
Related Manuals for Ness ELK-IP232

Summary of Contents for Ness ELK-IP232
- Page 1 ELK-IP232 Ethernet to Serial Bridge INSTALLATION AND CONFIGURATION MANUAL http://www.ness.com.au email: support@ness.com.au 1/07...
-
Page 2: Table Of Contents
Connecting to the IP232 over a Network ................9 Bench-testing the IP232 using a single PC ................10 Setting up the IP232 for use with Russound Audio Distribution Systems and the Ness-TS07 Touchscreen ................... 10 Updating the IP232 Firmware .................... 11 Troubleshooting Guide ...................... 12 Forcing the DHCP/IP Address Settings to Known Values ............. -
Page 3: Features And Specifications
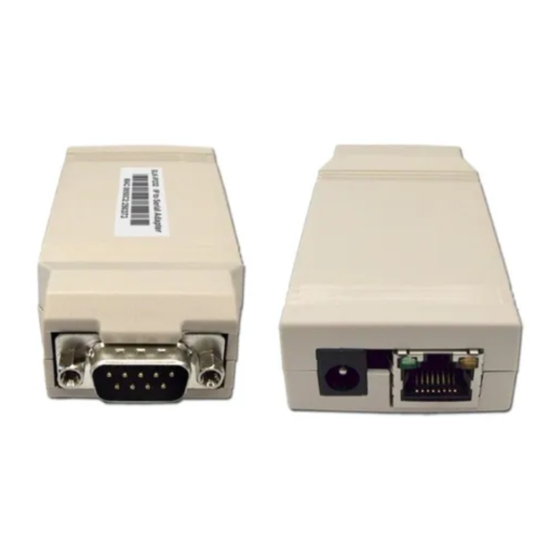
Data received on the serial side is transmitted to all connected network devices. It is powered by an Ness (100-310) 12 Volts DC, 1.5 Amp plug-in power supply/adapter (included). A software setup utility for configuring the serial and network setup options can be installed from the included CD ROM or may be downloaded from www.ness.com.au . -
Page 4: Basics Of Networking
Refer to the Notes on Router with Built-In Router Setup located on page 8. Dynamic DNS Support Technical support from Ness Security Products, is limited to the setup and connection of the IP232 inside the local IP232 network. -
Page 5: Installation And Hookup
Not all USB to RS232 serial adapters are created equally. Some work well, others do not. Even those that seem to work may not support hardware handshaking if it is needed. Ness has tested some adapters and found that some work well in some applications while others do not. For this reason, Ness can make no guarantee that the IP232 will work with your USB to RS232 serial adapter. -
Page 6: Configuration And Setup
The IP232 software configuration utility is supplied on the enclosed CD. You can either run it directly from the CD or copy it to any folder on your PC and run it from there. Current updates of the utility can be downloaded from Ness’s Website (www.nes.com.au) For the initial setup, the PC running the Configuration Utility and the IP232 must be on the same local network. - Page 7 Read Settings: Click to receive and display the settings currently stored in the IP232. Update Firmware: Used to update the IP232 when updates are released by Ness Security Products. Please refer to “Updating the IP232 Frimware” located on page 11.
-
Page 8: Notes On Flow Control (Hardware/Software Handshaking)
Consult the router’s documentation for complete instructions on this procedure. Because of the variety of routers available, Ness Security Products Technical Support will be unable to assist you with this. -
Page 9: Connecting To The Ip232 Over A Network
“Communications” -> “HyperTerminal”. If you see two “HyperTerminals,” select the one without the arrow beside it. 3. Enter a name such as “ Ness-IP232 Network Connection” and click “OK.” 4. In the “Connect Using” box, select “TCP/IP (Winsock).” Above that, in the “Host address” box, enter the IP address of the IP232 (as reported or configured by the Configuration Utility –... -
Page 10: Bench-Testing The Ip232 Using A Single Pc
Setting up the IP232 for use with Russound Audio Distribution Systems and the Ness-TS07 Touchscreen 1. Connect the IP232 serial port to the Russound serial port using the W040A serial cable (included). Connect the IP232 to the local network using an ethernet patch cable. Connect the power supply. For details, see “Installation and Hookup”... -
Page 11: Updating The Ip232 Firmware
Updating the ELK-IP232 Firmware 1. Obtain the latest ELK-IP232 firmware version by downloading it from the Ness Dealer website (http://www.ness.com.au and save it to any convenient location on your local disk drive. ! ! ! ! ! Some firmware updates may default certain settings in the IP232. It is good practice to use the Configuration Utility to connect to the IP232 and note its settings before updating its firmware. -
Page 12: Troubleshooting Guide
Verify whether a standard straight-through or null modem cable is required. To connect the IP232 to a PC, a null modem cable is required. To connect the IP232 to an Ness-M1, to most audio/video systems, and to most other similar devices, a standard straight-through cable is needed. -
Page 13: Forcing The Dhcp/Ip Address Settings To Known Values
World Wide Web pages are assigned a unique URL. Also known as an Internet address or web address. (Example: http://www.ness.com.au/) TCP/IP (Transmission Control Protocol/ Internet Protocol) - the basic communication protocol of the Internet. This is a standard for routing and data transfer around the world.
Need help?
Do you have a question about the ELK-IP232 and is the answer not in the manual?
Questions and answers