Table of Contents
Advertisement
Advertisement
Table of Contents
Troubleshooting

Summary of Contents for PSG PHENIX
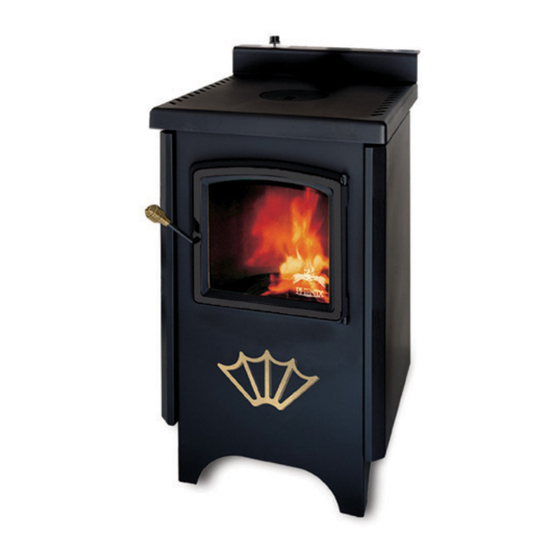
- Page 1 OWNER`S MANUAL OIL BURNING STOVE PHENIX Vérified and tested following CAN/CSA B140.3 et UL 896 standards by: Manufactured by: 1700 Léon-Harmel Québec, (Québec) G1N 4R9 www.psg-distribution.com tel : (418 ) 527-3060 Fax : (418 ) 527-4311 READ THESE INSTRUCTIONS AND SAVE FOR REFERENCE...
-
Page 2: Table Of Contents
CAUSES........................12 TROUBLESHOOTING GUIDE (CONT’D)..............13 CAUSES........................13 SPARE PARTS ......................14 PSG LIMITED LIFETIME WARRANTY...............15 REGISTER YOU WARRANTY ONLINE To receive full warranty coverage, you will need to show evidence of the date you purchased your stove. Keep your sales invoice. We also recommend that you register your warranty online www.psg-distribution.com... -
Page 3: Technical Data
TECHNICAL DATA PHENIX OIL BURNING STOVE COMBUSTIBLE : OIL N OIL N HEAT INPUT : BTU/h BTU/h Minimum: 20 450 16 600 Maximum: 10,9 37 250 33 150 FLOWRATE : cc/min litres/h cc/min litres/h Minimum: 0,60 0,45 maximun: 17,3 1,04... -
Page 4: Installation Instructions
INSTALLATION INSTRUCTIONS LOCATING THE STOVE • Install the stove as close to the chimney as possible. • Many configurations are possible, the most frequent are illustrated in figures 1, 2 and 3. • Respect clearances indicated on page 1. They have been tested according to approvals. •... -
Page 5: Chimney Informations
CHIMNEY INFORMATIONS • Before the hook up of the stove, check if the chimney is in good condition and that the quality of the flue pipe will allow a sufficient draught. For a good combustion, refer to the technical data of the stove to know the minimum draught required. -
Page 6: Connecting The Stove To The Chimney
CONNECTING THE STOVE TO THE CHIMNEY • The gases are vented from the back of the unit. The female part of the black pipe connector has to be installed toward the flue connector of the stove. Secure all connections with the (3) self taping screws, with 120 distance between each of them. -
Page 7: Leveling The Unit
LEVELING THE UNIT • Now that the stove is in place and properly hooked up to the chimney, you have to adjust the level on the burner. • Put the level in the middle of the burner parallel to the door. (Figure 9A). Screw or unscrew the adjustable legs to level the burner with a 7/16"... -
Page 8: Connecting Stove To Oil Tank
CONNECTING STOVE TO OIL TANK • Make sure that the tank outlet is 12" (305 mm) higher than the inlet of the carburetor. (Gravity fed) • Use only copper piping to connect tank to stove. • Make sure that there is a small slope on the connection from the tank toward the stove. •... -
Page 9: Adjusting The Draught
ADJUSTING THE DRAUGHT • Your stove operated with natural draught, created by the ascension of combustion gases in the chimney. This movement creates a siphon effect in the stove and forces ambient air to go in the burner by the holes in its surround. These orifices let air in for combustion. •... -
Page 10: Operation Instructions
OPERATION INSTRUCTIONS COMBUSTIBLE • Your stove has been designed to work with oil #1 or #2. DO NOT USE GASOLINE, CRANKCASE OIL OR ANY OIL CONTAINING GASOLINE. The manufacturer declines all responsibility regarding damage cause by using other combustibles. • Make sure to use oil without impurities which may plug filters and valve’s orifice. -
Page 11: Changing Intensity
LIGHTING (CONT’D) • Place the flow regulating handle on the "1" position, as soon as the oil enters the burner return to "0" position. • Open the door and pore into the burner 2 to 3 once (75 ml) of lighting gel or wood alcohol. -
Page 12: Turning The Stove Off
TURNING THE STOVE OFF • Set the flow regulating handle to position ‘’0’’. • If you plan to keep the stove off for a long while, it is recommended to disarm the valve’s lever and close the tap on the pipe between the stove and your oil tank. ALWAYS KEEP THE VALVE SHUT OFF WHEN THE BURNER IS NOT OPERATING MAINTENANCE ONCE A WEEK :... -
Page 13: Troubleshooting Guide
TROUBLESHOOTING GUIDE PROBLEMS CAUSES SOLUTION ON POSITION 6 (MAXIMUM) Position 6 was reached too 1. Set flow regulating handle quickly. to position 1; THE FLAME IS LONG AND SMOKY, THERE SUIT 2. wait combustion BUILD UPON THE GLASS. stabilize; 3. Progressively increase flow to desired position. -
Page 14: Troubleshooting Guide (Cont'd)
TROUBLESHOOTING GUIDE (CONT’D) PROBLEMS CAUSES SOLUTION THE FLAME PRODUCES Door gasket is not selling 1. Tighten door turning SMOKE, IN ANY POSITION. properly. counter-clockwise the door handle; 2. Check if gasket needs to be changed. The burner orifices are plugged 1. -
Page 15: Spare Parts
SPARE PARTS After years of use, if you need to replace some parts, please contact your SUPPLIER or one of our PSG approved DEALERS. • Give him product data as displayed in your warranty voucher or on your appliance’s name plate at the rear. -
Page 16: Psg Limited Lifetime Warranty
1 year ceramic glass (thermal breakage only*) *Pictures required Shall your unit or a components be defective, contact immediately your PSG dealer. Prior to your call make sure you have the following information necessary to your warranty claim treatment: •...
Need help?
Do you have a question about the PHENIX and is the answer not in the manual?
Questions and answers