Table of Contents
Advertisement
Quick Links
Advertisement
Table of Contents

Related Manuals for ViaSat Pace 460PVR

Summary of Contents for ViaSat Pace 460PVR
- Page 1 Användarmanual Pace 460PVR...
-
Page 2: Table Of Contents
Where to place your set-top box . . . . . . .8 Viasat Ticket . . . . . . . . . . . . . . . . . . 29 What else do I need? . - Page 3 Copyright notices . . . . . . . . . . . . . . . . . . . .65 End User Licence Terms . . . . . . . . . 66 Using your Viasat box...
-
Page 4: For Your Safety
For your safety Your set-top box has been manufactured to meet international safety standards, but you must take care if you want to obtain the best results and operate it safely. It is important that you read this booklet completely, especially the safety instructions below. -
Page 5: Welcome To Digital Satellite Tv
Welcome to digital satellite TV! Thank you for choosing the Pace PVR box for viewing your Viasat channel packages. Please follow the instructions in this User Guide carefully to enjoy all the advantages of digital satellite TV. We advise following the user instructions and recommendations supplied with your box, especially for first-time use. -
Page 6: Your Remote Control
Your remote control VIASAT Takes you from the EPG to the Displays the menu for Viasat’s range of last channel you were watching interactive services Takes you back to Normal mode after you have been using Puts your box into or out of standby... -
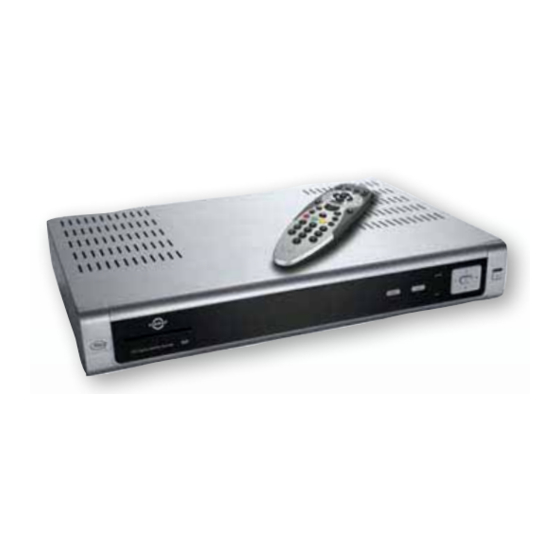
Page 7: Your Viasat Box
Lights up red when your set-top box is in standby EPG button Lights up green when your set-top box is active To display the Viasat EPG Lights up orange when your box is receiving a signal (electronic programme guide) from your remote control... -
Page 8: Rear Panel Connectors Overview
Your Viasat box Rear panel connectors overview ❖ Full details about connecting up and installing your set-top box begin on page 8. TELEPHONE LINE S-VIDEO OUT OPTICAL AUDIO To connect the telephone lead To connect to an S-Video lead (not supplied) to the S-Video... -
Page 9: Installation
To get access to the channels to which you have subscribed, you will need a smart card. If you are an existing Viasat customer... Please remove your smart card from your old box and insert it into your new box. -
Page 10: Inserting Your Smart Card
When you have completed the installation (see page 15), a Subscription Activation screen will be displayed. Please follow the instructions that are given on the screen to get access to your Viasat channel package. Satellite dish You will need a correctly-installed satellite dish, pointing at the correct satellite(s). - Page 11 Two LNBs - If you are using a DiSEqC™ unit* with two LNBs/satellite dishes, to ◆ ensure a simpler installation, and for the best Viasat channel line-up, you should connect up the LNBs to the DiSEqC™ ports as shown in the LNB positions table below.
-
Page 12: Connection Method 1: To Tv And Vcr (Without Scart)
Installation Connection method 1: To TV and VCR (without SCART) If wish to connect your box to a TV (with or without a SCART connector) and a VCR (without SCART connectors), connect up as shown in the diagrambelow. RF lead (not supplied) Lead from your TV antenna... -
Page 13: To Tv And Vcr
RF leads as shown, to continue to view or record terrestrial TV from your TV antenna. You must then connect the lead from your TV antenna to the antenna input connector (marked AERIAL IN) on your box. box. Using your Viasat box... -
Page 14: Connection Method 3: To Tv Only
Installation Connection method 3: To TV only If wish to connect your box to a TV only, connect up as described in 3A or 3B below. (The diagram below shows methods 3A and 3B combined.) Lead from your TV antenna ANTENNA Supplied RF lead Supplied SCART lead... -
Page 15: Optional Audio Connections
15. If your telephone wall socket is an RJ11 socket, you may need a splitter (not supplied) so that you can plug in both your box and your telephone. Using your Viasat box... -
Page 16: Connecting A 'Magic Eye
Installation 1. Insert one end of the supplied telephone lead into the telephone socket (marked TELEPHONE LINE) on the rear panel of your box, as shown in the diagram at the top of the page. 2. If you need to use an adapter, choose the correct adapter Adapter for Sweden for your location. -
Page 17: Switching On For The First Time
After completing this process, your box automatically switches to a channel. If you do not receive a signal If no signal is received, the following message displays. Check all connections. Check the LNB and Transponder settings (see pages 51 to 55) Using your Viasat box... -
Page 18: Rf Tuning
Installation If you do not see any picture If you have connected your box to your TV (and VCR) via RF leads only, you need to tune a ‘channel for satellite TV’ (see below). RF Tuning ❖ If you have connected up your equipment via RF leads, you may need to perform RF tuning before you can watch digital satellite TV. -
Page 19: Getting Started
Getting Started Using the Viasat Guide ❖ Your box has an on-screen digital guide to your digital satellite services. It is designed to help you get the most out of your box. You use it to: watch programmes and at the same time find out what is showing on other channels, ◆... -
Page 20: Changing The Volume On Your Tv Set
Getting Started Changing the volume on your TV set ❖ To change the volume on your TV set, press vol+ or vol- ◆ To turn your TV’s sound on or off, press mute. ◆ Using the channel banner ❖ You can display a banner to find out: what is showing on any channel, now and later on;... -
Page 21: Watching A Programme
While the channel banner is on screen, you can display extra information about the programme listed in the banner. While the channel banner is on screen (see page 18), to display extra programme information, press i. Using your Viasat box... -
Page 22: Symbols In The Channel Banner And Extra
Getting Started The extra information includes a programme summary and codes and symbols which provide you with additional information about the programme. These are explained below To remove the extra programme information, press i again. ◆ Symbols in the channel banner and extra ❖... -
Page 23: Using Live Pause
Live Pause recording, your box continues recording the programme until it finishes. However, you can press VIASAT at any point to stop Live Pause and resume normal TV viewing. When you stop Live Pause, the recording is deleted.If you change channel, or launch an interactive application, this will also stop and delete the Live Pause recording. -
Page 24: Using Instant Rewind
TV screen to show you what is happening (see ‘On-screen symbols’ on page 23). You can press VIASAT at any point to stop Instant Rewind and resume normal TV viewing. When you stop Instant Rewind, the recording is deleted. -
Page 25: On-Screen Symbols
Rewind (during playback from your Planner) The blue ring rotates anti-clockwise at double-speed, containing the selected rewind speed (x2, x6, x12 or x30). +35Min If the number is a minus number, rewind is taking place in Live Pause or Instant Rewind. Using your Viasat box... - Page 26 Getting Started Skip forward The blue ring does not move.The number shows the number of minutes since the start of the recording. +7Min Skip back The blue ring does not move. The number shows the number of minutes since the start of the recording. +28Min Note No playback symbols appear on-screen while the channel banner or extra programme information is...
-
Page 27: Epg
The EPG (Electronic Programme Guide) provides you with a listing of all programmes available on all channels for the next seven days. To see your EPG, press EPG on your Viasat remote control. ◆ TV listings are displayed as follows All Channel Listings - all programmes on all channels for today and the week ◆... - Page 28 If you know what type of channel you want to watch, you can search by channel genre, such as Sports. 1. To choose a programme by channel genre, press EPG on your Viasat remote control, highlight ‘Channels by Genre Listings’ then press OK. The Genre Listings screen displays.
- Page 29 If a programme you have selected for a reminder is on at the same time as another reminder you have previously selected, a message will appear asking you what you want to do - See “Reminder clashes” on page 34. Using your Viasat box...
-
Page 30: Ticket
Viasat Ticket Choosing a programme to record When you see a programme you want to record, highlight it then press R. ◆ If the programme is on now, your box starts recording instantly. If it is on at a later time, your box will record the programme when it starts. - Page 31 Ticket recording, you will have a period of time in which you can watch it as many times as you like, at no extra charge. When this time period is up, your box will automatically delete the recording. Using your Viasat box...
-
Page 32: Planner
Planner Deleting recordings of Ticket programmes You can delete a recording of a Ticket programme in the Planner as would a non-Ticket programme (see ‘Deleting a programme from your Planner’ on page 32). If you delete a Ticket programme before it has been viewed, you will not be charged for the programme. Notes As an alternative to using the Ticket listings, you can use the EPG (see page 25) or channel banner (see page 18) to choose a Ticket programme. - Page 33 Series Link Reminder symbol - shows that the programme is one of a series and you have selected it for Series Link, and you have also set for a reminder for it. Using your Viasat box...
-
Page 34: Your Box's Disk Space
Planner Using your Viasat remote control’s colour buttons Depending on the programme that is highlighted in your Planner, you may be able to use the colour buttons on your remote control to select one or more of the following. If a colour button is available, the option is shown at the bottom of the screen. -
Page 35: Planner
BACK.. Note In order for reminders to be displayed, your box must be switched on and you must be watching Viasat.You can change the settings for when the reminder displays (see page 45). Using your Viasat box... -
Page 36: Recording Programmes
Recording Programmes Reminder clashes If a programme you have selected for a reminder is on at the same time as another reminder you have previously set, a message will appear asking you what you want to do. To keep all the programmes in your Planner, press OK. ◆... -
Page 37: Using Your Box While You Are Recording
If you want to cancel the suggested recordings, so that you can record your new ◆ selection, press OK. If you would prefer to keep your previous selections, and cancel the new selection, ◆ press BACK. Using your Viasat box... -
Page 38: Disk Space Warning
Recording Programmes Note Sometimes a recording clash may occur when the programme is about to be recorded, for example if you are using Live Pause or Instant Rewind. If this happens, a message displays to inform you about the clash, and to ask you what you want to do. You can then either cancel or confirm the recording. -
Page 39: Manual Recording
If you selected Daily, Mon-Fri or Weekly in step 5, the Series Link symbol (see page 20) displays next to the Record symbol to show that the recording will take place more than once. You can press i to check details of when the recordings will take place. Using your Viasat box... -
Page 40: Watching Recordings
Watching Recordings Watching recordings ❖ You use your Planner (see page 30) to choose recorded programmes you want to watch. 1. Press PLANNER. 2. Use U and D to choose a recorded or recording programme. Note that these may be marked as Recorded, Part recorded, Recording or Viewed (see page 30). -
Page 41: During Playback
To pause playback at any moment, press pause. To start playback again, press pause ◆ again, or press play. To stop playback at any moment, and return to normal TV, press stop or VIASAT. ◆ To stop playback at any moment, and return to your Planner, press BACK. -
Page 42: Watching Recordings Of Restricted Programmes Or Locked Channels
You can use your Viasat remote control to play games provided by Viasat. 1. To play games, press iTV. The iTV screen displays. 2. Highlight ‘Games’, then press OK. 3. Follow the on-screen instructions. 4. When you have finished playing games, press Viasat to return to watching digital TV. -
Page 43: Using The Setup Menus
◆ change the language and subtitle settings; ◆ change the TV settings; ◆ look at on-screen help on using your Viasat digital guide; ◆ view information about your box. ◆ To display the System Setup menu: 1. Press iTV, then press D to highlight ‘System Setup’, and then press OK. -
Page 44: Locking Channels
Setup About your PIN code To use the Parental Control menu, you need to enter your PIN code. When you first use your box, your PIN code is 0000. In order to make your PIN code secret, you should change it to another number that you find easy to remember (see below). To display the Parental Control menu 1. -
Page 45: Setting Viewing Restrictions
To remove the restriction, press L or R to select the symbol. 2. Repeat step 2 to make all the changes you want. 3. To save your changes, highlight ‘Save New Settings’ then press OK, or to cancel, press BACK. Using your Viasat box... -
Page 46: Setting Purchase Restrictions
The standard setting is that any programme broadcast with an age rating of any sort will be restricted, but you can remove this restriction if you wish by following the steps above. Viewing restrictions work only if the broadcaster provides classification category information. Viasat is not responsible for channels providing incorrect age rating information. -
Page 47: Changing Your Planner Settings
1. Press D or U to highlight the item you want. 2. Use L or R to select the setting you want: 30, 60 or 90 seconds. 3. To save your changes, highlight ‘Save New Settings’ then press OK, or to cancel, press BACK. Using your Viasat box... -
Page 48: Changing Your Pvr Recording Settings
Setup Changing your PVR recording settings ❖ You use this screen to change various settings relating to how your box records programmes, to: change the way in which your box manages your recordings, when disk space is ◆ running low; change the length of time of the Instant Rewind recording;... -
Page 49: Using The System Settings
Use the System Settings menu to change the TV settings and view information about your box. 1. To use the System Settings screens, press iTV on your remote control. 2. Highlight ‘System Setup’, then press OK. 3. Highlight ‘System Settings’, then press OK. Using your Viasat box... -
Page 50: Changing The Picture Settings
Setup The System Settings screen displays on your TV. To display one of the Settings screens, highlight it and press OK. The details of each screen are described in the following sections. Changing the Picture settings You use the Picture Settings menu to change the following settings, to control how your box works with your other equipment: Picture Format;... -
Page 51: Changing The Sound Settings
You use the Sound Settings menu to change the following settings: Audio Output; ◆ Audio Format; ◆ Volume; ◆ Background Music. ◆ To change the Sound Settings: 1. Press U or D to highlight the setting you want to change (for more information on Using your Viasat box... -
Page 52: Subtitles Settings
Background Music On, Off Controls whether or not music will play while you look at your Viasat Digital Guide. Changing the Language & Subtitles settings You use the Language & Subtitles menu to change the following settings: Audio Language - your first choice of language for programmes which are broadcast ◆... -
Page 53: Viewing The Signal Test Screen
The items on the Installation Setup menu are explained in more detail in the following sections. To access the Installation Setup menu: 1. Press iTV on your remote control. 2. Highlight ‘System Setup’, then press OK. 3. Highlight ‘System Settings’, then press OK. 4. Highlight ‘Installation Setup’, then press OK. Using your Viasat box... -
Page 54: Changing The Lnb Setup
Setup The Installation Setup menu displays: Changing the LNB Setup Before making any changes to the LNB Setup, check which of the following two types of LNB you have. Universal see To change the LNB Setup (for Universal LNBs) ◆ SatCR see To change the LNB Setup (for SatCR LNBs) ◆... - Page 55 However you will not be able to watch one program while recording another. 6. To save your changes, highlight ‘Save New Settings’ then press OK, or to cancel, press BACK. For recommended SatCR LNBs, the default User Band (UB) frequency values are Using your Viasat box...
-
Page 56: Setting The Default Transponder
Setup already entered; under normal circumstances you do not need to change these. Refer to information supplied with your LNB. Check that the UB frequencies match those shown in the Set Frequency menu below. If they do not, you must edit the SatCR UB frequencies. To edit SatCR UB frequencies 1. -
Page 57: Changing The Modem Settings
The default values for the Default Transponder menu are shown on the image above. Changing the Modem Settings The Modem Settings control how your box connects to Viasat via the telephone line. These settings are made automatically when you select your country during the installation process;... -
Page 58: Setting Up Your Remote Control
7. As soon as the television switches off, press SETUP to store this code. The red LED under the TV button blinks twice. 8. Once it is set up, you can switch the remote control to operate your TV by first pressing the TV button. To switch back to operating your box, press the VIASAT button. -
Page 59: Extra Information
If this fails, you can use the TV code table available for download from the Viasat website. 1. Download the TV code table from the Viasat website (www.viasat.se), find the brand of your television in the TV code table and select the first 4 digit code in the list. -
Page 60: Recording A Digital Satellite Programme
Solving problems The factory default values are applied to your remote control. Recording a digital satellite programme ❖ If you have a VCR you can use it to record satellite programmes from your box. To record a satellite programme: 1. Make sure your box is switched on and tuned to the channel you wish to record. 2. -
Page 61: Error Messages
Your viewing card is Your box cannot Check it is the correct Viasat viewing card. Check it is in invalid or inserted in recognise your the right way up.Check that your card is not damaged. - Page 62 3300Norway8005 3020Denmark7012 1151Finland09 receiver. To use this smart card for this 4249 7700You will need your Viasat smart card ID and card in this receiver box. box ID. These are displayed on the System Details screen. please call the number To view the System Details screen, see ‘Viewing the box...
-
Page 63: General Problems
Your box doesn’t seem Your box is Press standby on the front panel, or S on your remote to be working, and the switched off. control. front-panel standby light is red. Using your Viasat box... - Page 64 Solving problems Problem Possible cause Suggested solution Your box doesn’t seem Your box is Check that all the connections are properly made.* to be working, and the not correctly Check that your TV is plugged into the mains and that it front-panel standby connected to your is switched on.
-
Page 65: Environmental Issues
Alternatively, you can take it to your local recycling centre. Your retailer or local municipal authority will advise you of the collection facilities available for waste electronic products in your area. Use of this service will be free to you. Using your Viasat box... -
Page 66: Specification
Specification Due to continued product improvement, this specification may change without notice. General Operating voltage: 230 V AC ± 15%; 50/60 Hz Power consumption: 30 W (max.) Weight: 1.35 kg Dimensions (W x H x D): 390 mm x 62 mm x 265 mm UHF modulator: CCIR PAL System B/G;... -
Page 67: End User Licence Terms
Product; rent, lease, gift, loan, sell, distribute or transfer possession of the Software in whole or in part. You will grant to Pace and/or Viasat, access to your Pace/Viasat digital decoder product, to enable Pace and/or Viasat to upgrade, service and otherwise adapt the Software in such decoder, by (for example) remote downloading of updated Software.
Need help?
Do you have a question about the Pace 460PVR and is the answer not in the manual?
Questions and answers