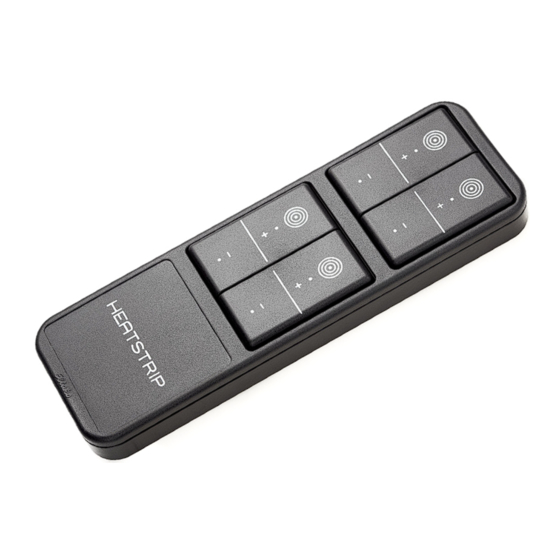
Summary of Contents for HEATSTRIP MHS-FBM
- Page 1 User manual for HEATSTRIP™ radio receiver Remote control systems This installation and user manual encompasses information about the following products: MHS-FBM MHS-FBHS MHS-FBWS MHS-ESM Exclusively engineered and made in Germany...
- Page 2 Table of contents 1.0 Use page 2 2.0 Safety Information page 2 3.0 Functionality description page 4 4.0 Assembly page 5 5.0 Programming page 7 6.0 Operation page 9 7.0 Connecting element MHS-ESM page 10 8.0 Technical Information back page Delivery: Radio receiver module 1 piece...
- Page 3 When pressing the button of the remote control, the system harnesses the physical pressure of your thumb onto the remote control and converts it into an electro-magnetic signal that is picked up by our MHS-FBM receiver.
- Page 4 2.0 Safety information When planning where to locate your device, please check accessibility to the different components as you may have to access them in the future. Electronic components may also fail and have to be replaced. Only to be installed by a professional. Please check the cable cross -section between the heater and the power supply is sufficient in terms of size and power.
- Page 5 The radio transmitter operates with a closed signal in the 866Mhz region. You can program a maximum of 28 radio transmitters (i.e. remote controls) per single MHS-FBM receiver. The maximum of 28 radio transmitters (i.e. remote controls) per single MHS-FBM receiver. The...
- Page 6 4.0 Assembly Caution: antenna is not removable. Programming button Legend: 1x MHS Heatstrip (5) 1x MHS-FBM (6) 2x Sockets (1) 2x Bolts (2) 1x Power connector (3) 2x Screws (4)
- Page 7 Fix the sockets (1) on the bolts (2). Screw the bolts into the Heatstrip heater (5). Plug the connector (3) to the heater and push the two elements together until you feel a click. Fix the MHS-FBM receiver or the connecting element MHS-ESM (6) until it clicks with the connector.
- Page 8 5.0 Programming Light Scheme LED Display blue green 0,5 h 12 h blinks...
- Page 9 Remote control programming Remote control programming - Press briefly the lateral button on the MHS-FBM receiver (less than 1 sec). - Press briefly the lateral button on the MHS-FBM receiver (less than 1 sec). Three green LEDs + one blue LED flash two times per second.
- Page 10 6.0 Operation Standby operation: heating off blue LED lit press the ON button heat output is set up on "power 3" (full power") press the ON button again Remote to “Power 0” (OFF) Heat output press the OFF button settings remote to “Power 2”...
- Page 11 7.0 Connecting element The connecting element serves as a stylish cable connection for your Heatstrip, hiding the power cable at the backside of the device - instead of it being visible at the front side. Install the connecting element after point 4.0 in this user manual.
- Page 12 -30ºC to +65ºC Shutdown as a built-in factory setting, the receiver automatically WEEE-Reg.-Nr. DE 45650441 shuts down after 12 hours of continuous use MHS GmbH Munich Home Systems Kramergasse 32 D- 82054 Sauerlach b. München Tel.: +49-(0)8104-64709-0 Fax: +49-(0)8104-64709-9 info@heatstrip.de www.heatstrip.de...

Need help?
Do you have a question about the MHS-FBM and is the answer not in the manual?
Questions and answers