Table of Contents
Advertisement
Advertisement
Table of Contents

Related Manuals for Nikon FM


Summary of Contents for Nikon FM
- Page 1 INSTRUCTION MANUAL...
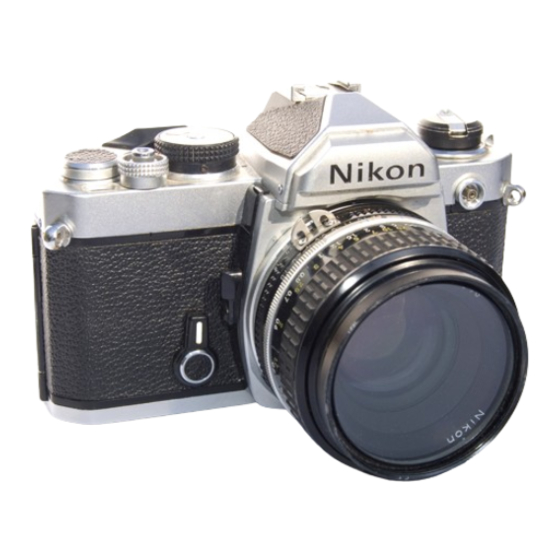
- Page 2 N O M E N C L A T U R E Lens aperture direct readout window Shutter Speeed/ASA selector ring Meter coupling lever Shutter release button Meter coupling lever release Shutter release fingerguard Neckstrap eyelet Sync terminal (cover provided) Lens mounting index...
- Page 3 Aperture/distance scale index Focusing distance scale Meter coupling shoe Focusing ring Depth-of-field indicators Aperture ring Aperture-direct-read out scale Meter couplling ridge Shutter speed selector Film rewind crank Frame counter Film rewind knob ASA film speed window Safety lock Meter ON index Film plane indicator...
-
Page 4: Table Of Contents
C O N T E N T S F o r e w o r d ........5 Focusing.............16 Preparation for use.........6 Infrared photography......18... -
Page 5: F O R E W O R D
F O R E W O R D The Nikon FM is a compact 35mm single-lens re- flex camera that offers a host of advanced features amateur photographers and professionals alike will appreciate.It is designed to accept virtually every accessory of the Nikon System-the most compre- hensive ever created for photography-so it can do virtually everything the top rated SLR’s can do . -
Page 6: Preparation For Use
PREPARATION FOR USE Installing the Batteries Checking Battery Power The Nikon FM’s built-in exposure meter is powered by two To check battery power, move the camera’s film advance le- button-cell type 1.5V silver-oxide batteries. These are ver from the flush to the stand off position by pulling it just mounted in the battery clip, which forms a single unit with far enough to uncover the red index on top of the camera. -
Page 7: Loading Film
Loading Film side (dull side) facing out. Make sure that the perforations along the edges of the film mesh with the sprockets. If neces- First, open the camera back by sliding its safety lock sary, release the shutter by cocking the shutter release button, to the rear and lifting the film rewind knob as far as it will and stroke the film advance lever slowly to make sure that the go. -
Page 8: Prior To Shooting
PREPARATION FOR USE - continued Prior to Shooting advance the film, confirm that the rewind crank turns in the direction opposite the arrow. This indicates that the film has been loaded properly and is being advanced. Fold out the film rewind crank, and turn it gently in the di- rection of the engraved arrow until you feel a slight resis- After advancing the film two frames, check that the frame tance;... -
Page 9: Memo Holder
Memo Holder Setting the Film Speed A special holder is provided on the camera back for conve- The camera’s exposure meter must be adjusted to the speed of nient storage of any relevant information. You can use it, for the film in use to ensure correct measurement. Accordingly, instance, to hold the end flap of a film carton to remind you the camera is provided with an ASA film speed scale. -
Page 10: Operation Of Camera Controls
“B” setting, the shutter remains open for as long as the shutter release button is kept depressed. The Nikon FM’s shutter speed selector is knurled for slip- Setting the Aperture free, easier manipulation; the face of the dial is engraved... -
Page 11: Film-Advance Lever
It also the film advance lever, the frame counter operates to show doubles as the Nikon FM’s meter on/off switch and shutter how many frames have been exposed. It is automatically re- button lock. -
Page 12: Self-Timer
A The built-in self-timer provides an approximately 8 to 14 unique feature of the FM’s self-timer lever is that its setting is second delay between the time the shutter release button is “cancellable.”... -
Page 13: Unloading Film
UNLOADING FILM As soon as the frame counter indicates that the last exposure as far as it will go; then, remove the film cartridge. Note that has been made, or when the film advance lever can no longer when the film advance lever is stroked for the next exposure be stroked, the roll of film has been fully exposed and can (with the next roll of film), the rewind button will be released now be removed. -
Page 14: Holding The Camera
HOLDING THE CAMERA Camera shake is one of the most common causes of blurred, unsharp pictures, especially at slow shutter speeds. To pre- vent this, study how to hold the camera correctly and prac- tice steady shutter squeezing. Wrap the fingers of the right hand around the camera body so that the index finger of your right hand rests comfortably on the shutter release button and the thumb fits between the camera body and the film advance lever. -
Page 15: Shutter Release Operation
Important:: If you mount the Nikon FM on a tripod with a large head, contact between the lens body and the head may make it impossible to turn the lens aperture ring. If this hap-... -
Page 16: Focusing
FOCUSING When the FM is used with a Nikkor lens fitted with an auto- and crisp. With the matte outfield, turn the ring until the im- matic diaphragm, focusing is done at full aperture. This makes age viewed in the field appears sharp. -
Page 18: Infrared Photography
The the image sharply through the viewfinder. Then, turn the fo- Nikon FM is thus provided with a film plane indicator ( - ); cusing ring counterclockwise until the point focused is aligned this is positioned exactly in the film plane, which is 46.5mm... -
Page 19: Depth Of Field
Depth-of-Field Preview Lever Most of the Nikkor lenses you will find yourself using with the Nikon FM are “automatic.” This means that the aperture diaphragm of the lens is kept open at its widest setting while you are viewing, focusing and metering. When you press the... -
Page 20: Depth-Of-Field Indicators
DEPTH OF FIELD - continued Depth-of-Field Indicators The Nikkor lens’ depth-of-field indicators come in the form of the three scales fitted on the lens barrel. The first is the lens aperture scale, with the f/numbers colorcoded. The sec- ond consists of two sets of colored lines, the colors corre- sponding to the colors of the f/numbers. - Page 21 Lens at f/8:Depth of Lens at f/16:Sharp fo- field extended in front cus is extended to en- of/behind the main sub- compass the entire fore- ject. ground and background...
-
Page 22: Exposure Measurement
EXPOSURE MEASUREMENT The Nikon FM’s built-in exposure meter utilizes Nikon’s Determining Degree of Exposure proven center-weighted through-the-lens metering system which is cross-coupled with both the shutter speed control of The viewfinder has three exposure indicators visible within the camera and the aperture control of the lens mounted on the viewfield: + for overexposure, o for correct exposure and the camera. -
Page 24: Exposure Control
EXPOSURE MEASUREMENT - continued Metering Range Exposure Control If the central exposure indicator LED (lo) fails to light up, The amount of light reaching the film plane is determined by even after all possible lens aperture and shutter speed combi- a combination of the shutter speed and the lens aperture. -
Page 25: High-Contrast Lighting
High-Contrast Lighting After completing this procedure, make your final picturt com- position and shoot without readjustingeithershutte’ speed or lens aperture. When shooting landscapes, fo’ example, it is When there is a substantial difference in brightness between often advisable to aim your camera slightly downwards while the main subject and the background, seemingly unimpor- metering to eliminate the effects of bright expanse (i.e., the tant bright spots or dark spots can adversely influence the... -
Page 26: Stop-Down Exposure Measurement
STOP-DOWN EXPOSURE MEASUREMENT The vast selection of lenses available for use with your Nikon FM includes some which are fitted neither with an automatic diaphragm nor a meter coupling ridge, both of which are es- sential to full-aperture exposure measurement. The FM works even with such lenses, through an alternative method called “stop-down”... -
Page 27: Exposure Compensation Adjustment
Also, you will find the calibrate their meters, using the correct rendition of skin tones special 18% reflective gray card available from Nikon and as the standard or most representative of the vast majority of major film companies especially useful for copying and gen- shooting subjects. -
Page 28: Multiple Exposures
MULTIPLE PURPOSE Intentional multiple exposure (two or more exposures on the same frame) for creative effects are easy with the FM. First, make the initial exposure. Then, slide the multi-exposure button as far as it will go, and hold it while you stroke the film-advance lever;... -
Page 29: Flash Synchronization
FLASH SYNCHRONIZATION Flash photography with the FM is easy. The camera is de- signed to synchronize with electronic flash at speeds up to 1/ 125 sec. You can use its hot-sync shoe to mount any ISO- type electronic flash unit or speedlight directly onto the cam- era. -
Page 30: Tips On Camera Care
TIPS ON CAMERA CARE Tough and durable though your Nikon FM is, it is a preci- camera body. sion optical instrument, and careless or rough handling can •If condensation should form on the lens surfaces (i.e., when cause irreparable damage. Observe the following tips, and... -
Page 31: Mounting And Removing Lenses
Note: The Nikon Fisheye 6mm f/5.6 and OP 10mm f/5.6 can- automatically indexed to the camera’s meter as soon as it is not be used with the Nikon FM, because the camera does not mounted. have a provision for locking the mirror in the “up” position. -
Page 32: Accessories
The Nikon FM’s own compact motor drive. Handsomely fin- ished in black and durably constructed, the MD-12 attaches to the FM in seconds, requiring absolutely no modification or special adjustment of the camera body. Continuous and single frame operation available, with a maximum shooting speed of 3.5 frames per second from 1/125 sec. - Page 33 Camera Cases Recommended for storing camera body and lenses. Differ- ent sizes available to accommodate most Nikkor lenses. Lens Hoods Recommended to prevent extraneous light from striking the lens and causing flare and ghost; also useful for protecting the lens. All kinds of models to match all kinds of Nikkor lenses.
-
Page 34: Features/Specifications
Additive type; automatically resets to “S.” two Fresnel focusing screen with central split-image rangefinder frames before “0,” when camera back is opened spot and microprism ring (similar to Nikon Type K screen) Flash synchronization: Built-in ISO-type hot-shoe contact with Exposure metering:...
Need help?
Do you have a question about the FM and is the answer not in the manual?
Questions and answers