Advertisement
Advertisement
Table of Contents

Related Manuals for PlayNetwork MC500


Summary of Contents for PlayNetwork MC500
- Page 1 QUICK START GUIDE ®...
- Page 2 Best of all, once you turn the MC500 on, it is basically a hands free player. You and your staff can forget about it and spend your time focusing on your customers.
-
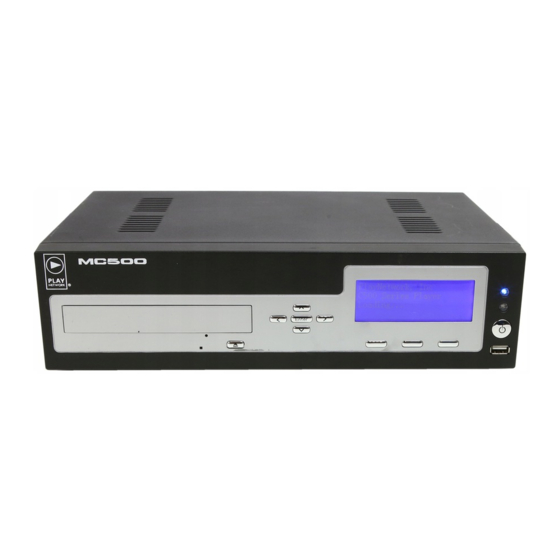
Page 3: Front View
STEP 1. GET FAMILIAR WITH THE PLAYER FEATURES Front View A. CD-ROM Drive B. LCD Display C. Power/Standby Button D. Hard Drive Activity Indicator E. Power On Indicator F. Shortcut Keys G. Navigation Buttons H. CD-ROM Eject Button Power/Standby Button Hard Drive Activity Indicator CD-ROM Drive LCD Display... -
Page 4: Connect To Your Soundsystem
SYSTEM Connect an RCA audio cable to the Zone 1 Output (L) on the back of the MC500. Connect the opposite end of the cable to your amplifier equipment. Repeat these steps for Zone 2 Output (M) if a second zone is required. -
Page 5: Connectivity
1. Locate the Network Connector (K) on the back of the player and securely plug in an active CAT5 cable (looks like telephone cord). 2. Attach the external power supply into the MC500 (see STEP 3, below), and power up the MC500 (see STEP 4, below). -
Page 6: Power Up
First, power up your amplifier and then power up your player by pushing the Power/Standby Button (C) on the front panel. It will take 2 minutes for the MC500 to boot up. Then, adjust the volume of your amplifier equipment to the desired listening level. You are in business, enjoy the music! NOTE: If you are not hearing any music, check to ensure that your amplifier is on and that you have correctly followed steps 1 –... -
Page 7: Step 5. Updating Your Music
Network Updated locations - If your business is scheduled to receive music updates via network connection, these will occur automatically. Please ensure that the MC500 is powered on at all times. At night or during business off-hours, put the MC500 into “Stand-by” mode (see Put the MC500 To Sleep At Night, above).
Need help?
Do you have a question about the MC500 and is the answer not in the manual?
Questions and answers