Table of Contents
Advertisement
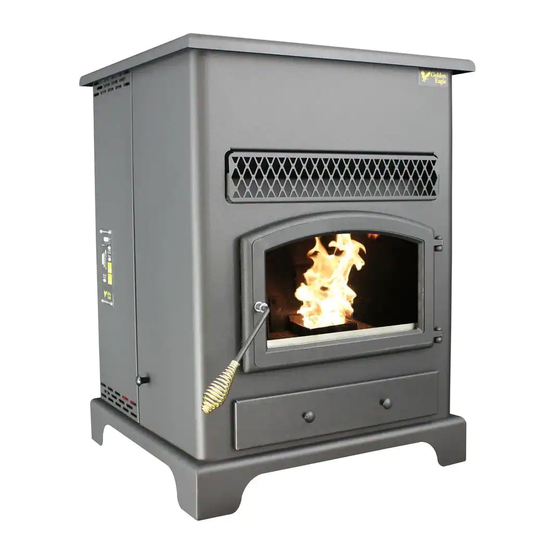
Model 5520
Certifi ed for installations in the
USA and Canada.
La version française est dis-
ponible pour téléchargement à partir
du site U.S. Stove: http://www.
USSTOVE.com/
Please read this entire manual before installation and use of this pellet fuel-burning room
heater. Failure to follow these instructions could result in property damage, bodily injury,
or even death.
Contact your local building or fi re offi cials about restrictions and installation inspection in
your area.
Save these instructions.
This unit is not intended to be used as a primary source of heat.
United States Stove Company • 227 Industrial Park Rd. P.O. Box 151 South Pittsburg, TN 37380 • www.USSTOVE.com
FOR TECHNICAL ASSISTANCE:
Golden
Owner's Manual
PHONE: (866) 606-8444
Eagle
FAX: (423) 837-2129
Part No.: 851907 E
Advertisement
Table of Contents
Troubleshooting

Related Manuals for Golden Eagle 5520

Summary of Contents for Golden Eagle 5520
- Page 1 Golden Eagle Model 5520 Certifi ed for installations in the USA and Canada. La version française est dis- ponible pour téléchargement à partir du site U.S. Stove: http://www. USSTOVE.com/ Owner’s Manual Please read this entire manual before installation and use of this pellet fuel-burning room ...
-
Page 2: Table Of Contents
Table of Contents TABLE OF CONTENTS ....................2 WARRANTY REGISTRATION ................3-4 SAFETY PRECAUTIONS ................... 5 SPECIFICATIONS ....................... 6 Heating Specifi cations ....................6 Dimensions ........................6 Electrical Specifi cations ....................6 Fuel Considerations ......................6 Safety and EPA Compliance ..................6 INSTALLATION ......................7 Installation Options .......................7 Floor Protection ......................7 Clearances ........................8 Venting Requirements ....................9... -
Page 3: Warranty Registration
WARRANTY INFORMATION CARD Name__________________________________________ Telephone #: (_____)_____________ City____________________________________________ State_______ Zip_________________ Email Address __________________________________________________________________ Model # of Unit________________________________ Serial #___________________________ Fuel Type: Wood Coal Pellet Gas Other _________________________ Place of Purchase (Retailer)______________________________________________________ City____________________________________________ State_______ Zip_________________ If internet purchase, please list website address___________________________________ Date of Purchase _______________________________________________________________ Alternative Heat Main Heat Source... - Page 4 Fold Here Fold Here Fold Here PLACE STAMP HERE United States Stove Company 227 Industrial Park Rd. P.O. Box 151 South Pittsburg, TN 37380...
-
Page 5: Safety Precautions
Safety Precautions circumstances and a safety concern may arise from IMPORTANT: Read this entire manual before installing sparks or fumes entering the room. and operating this product. Failure to do so may result in property damage, bodily injury, or even death. Proper Allow the stove to cool before performing any maintenance installation of this stove is crucial for safe and effi... -
Page 6: Specifications
Specifi cations Heating Specifi cations Fuel Burn Rate* (lowest setting) 1.0 lbs./hr. (0.5 kg/hr) Burn Time (lowest setting) 120 hrs. (approximate) Hopper Capacity 120 lbs. (55kg) * Pellet size may effect the actual rate of fuel feed and burn times. Fuel feed rates may vary by as much as 20%. Use PFI listed fuel for best results. Dimensions Height 34 in. -
Page 7: Installation
Installation INSTALLATION OPTIONS Read this entire manual before you install and use your pellet stove. Failure to follow instructions may result in property damage, bodily injury, or even death! (See specifi c installation details for clearances and other installation requirements) A Freestanding Unit—supported by pedestal/legs and placed on a non-combustible fl... -
Page 8: Clearances
Installation CLEARANCES Your pellet stove has been tested and listed for installation in residential, mobile home, and alcove applications in accordance with the clearances given in FIGURES 3-5 and TABLE 1. Any reduction in clearance to combustibles may only be done by means approved by a regulatory authority. NOTE: Distance “C”... -
Page 9: Venting Requirements
Installation VENTING REQUIREMENTS Install vent at clearances specifi ed by the vent manufacturer. Do not connect the pellet vent to a vent serving any other appliance or stove. Do not install a fl ue damper in the exhaust venting system of this unit. ... -
Page 10: Vent Termination Clearances
Installation VENT TERMINATION CLEARANCES: Minimum 4-feet (1.22m) clearance below or beside any door or window that opens. Minimum 1-foot (0.3m) clearance above any door or window that opens. Minimum 3-feet (0.91m) clearance from any adjacent building. Minimum 7-feet (2.13m) clearance from any grade when adjacent to public walkways. Minimum 2-feet (0.61m) clearance above any grass, plants, or other combustible materials. -
Page 11: Through The Wall Installation
Installation THROUGH THE WALL INSTALLATION (RECOMMENDED INSTALLATION) Canadian installations must conform to CAN/CSA-B365. To vent the unit through the wall, connect the pipe adapter to the exhaust motor adapter. If the exhaust adapter is at least 18 in.(457mm) above ground level, a straight section of pellet vent pipe can be used through the wall. -
Page 12: Outside Air Supply
Installation OUTSIDE AIR SUPPLY (optional, unless installing in a mobile home) or an airtight home Depending on your location and home construction, outside air may be necessary for optimal performance. Metal pipe (solid or fl exible) must be used for the outside air installation. PVC pipe is NOT approved and should NEVER be used. -
Page 13: Control Panel
Control Panel PANEL CONTROLS The blowers and automatic fuel supply are controlled from a panel on the left side of the appliance. The control panel functions are as follows: A. ON/OFF SWITCH • When pushed the stove will automatically ignite. No other fi restarter is necessary. The igniter will stay on for at least 10 and up to 15 minutes, depending on when Proof of Fire is reached. -
Page 14: Operation
Clean door glass, if necessary (a dry cloth or paper towel is usually suffi cient). Never use abrasive cleaners on the glass or door. Check fuel in the hopper, and refi ll if necessary. NOTE: The 5520 Hopper can hold up to 120 lbs. of pellets. BUILDING A FIRE Never use a grate or other means of supporting the fuel. -
Page 15: Damper Control
Operation d. Adjust feed rate to desired setting by pressing “Heat Level Advance” button. If fi re doesn’t start in 15 minutes, press “On/Off”, wait a few minutes, clear the burn pot, and start procedure again. DAMPER CONTROL The damper control rod on the stove’s lower left side adjusts the combustion air. This control is necessary due to the varied burn characteristics of individual installations, different pellet brands and pellet feed rates. -
Page 16: Thermostat Installation
Th ermostat Installation OPTIONAL THERMOSTAT A optional thermostat may help you maintain a constant house On/Off High/Low Manual temperature automatically. A millivolt thermostat is required. A fi xed wall mount or hand held model can be used. The control panel can be set up two ways to operate your stove in thermostat mode. -
Page 17: Maintenance
Maintenance Failure to clean and maintain this unit as indicated can result in poor performance and safety hazards. Unplug your stove’s electrical cord prior to removing the back panel or opening the exhaust system for any inspection, cleaning, or maintenance work. Never perform any inspections, cleaning, or maintenance on a hot stove. -
Page 18: Glass
Maintenance GLASS - Cleaning, Removal and Replacement of Broken Door Glass Cleaning - We recommend using a high quality glass cleaner. Should a build up of creosote or carbon accumulate, you may wish to use 000 steel wool and water to clean the glass. DO NOT use abrasive cleaners. DO NOT perform the cleaning while the glass is HOT. -
Page 19: Trouble Shooting
Trouble Shooting Guide When your stove acts out of the ordinary, the fi rst reaction is to call for help. This guide may save time and money by enabling you to solve simple problems yourself. Problems encountered are often the result of only fi ve factors: 1) poor fuel;... - Page 20 Trouble Shooting Guide STOVE SHUTS OFF AND THE #3 LIGHT FLASHES Possible Causes: Possible Remedies: (Unplug stove fi rst when possible) The hopper is out of pellets. Refi ll the hopper. The air damper is too far open for a low feed setting. If burning on the low setting, you may need to close the damper all the way (push the knob in so it touches the side of the stove).
- Page 21 Trouble Shooting Guide STOVE FEEDS PELLETS, BUT WILL NOT IGNITE Possible Causes: Possible Remedies: (Unplug stove fi rst when possible) Air damper open too far for ignition. Push the air damper in closer to the side of the stove for startup. In some situations it may be necessary to have the damper completely closed for ignition to take place.
- Page 22 Trouble Shooting Guide STOVE WILL NOT FEED PELLETS, BUT FUEL FEED LIGHT COMES ON AS DESIGNED Possible Causes: Possible Remedies: (Unplug stove fi rst when possible) Fuse on control board blew. Remove the control board. On the back there is one fuse. If it appears to be bad, replace it with a 5 Amp 125 Volt fuse.
-
Page 23: Trouble Shooting
Trouble Shooting Guide • GLASS “SOOT’S” UP AT A VERY FAST RATE • FLAME IS LAZY, DARK, AND HAS BLACK TIPS • AFTER STOVE HAS BEEN ON FOR A WHILE, THE BURNPOT OVERFILLS Possible Causes: Possible Remedies: (Unplug stove fi rst when possible) Stove or vent pipe is dirty, which restricts airfl... -
Page 24: Repair Parts Diagram/List
Parts Diagram... - Page 25 Parts List Part No. Description Qty. Part No. Description Qty. 891190 Bottom Bushing Plate 69846 Door Assembly 891180 Auger Cover 40571 Hinge Block 891161 Weld., Bot. Plate Retainer 83576 3/8-24 Jam Nut 83575 Hinge Pin 891195 Bracket, Drive Motor 69671 Ash Pan 891169 Hose, Heater...
- Page 26 Parts Diagram / List - Viewing Door Part No. Description Qty. 26347 Painted, Feed Door (40579) 69901MB Painted, Fascia-Deluxe Door 83566 #8-32 Kep Nut 88082 3/4 Round Rope Gasket-Blk 89284 Silicone Sealant (Black) (10.1 Oz) 891979 Door Glass 25904 Clip, Glass 25905 Air Wash Plate 83278...
-
Page 27: Wiring Diagram
Wiring Diagram... - Page 28 How to Order Repair Parts THIS MANUAL WILL HELP YOU OBTAIN EFFICIENT, DEPENDABLE SERVICE FROM YOUR PELLET STOVE, AND ENABLE YOU TO ORDER REPAIR PARTS COR- RECTLY. KEEP THIS MANUAL IN A SAFE PLACE FOR FUTURE REFERENCE. WHEN WRITING, ALWAYS GIVE THE FULL MODEL NUMBER WHICH IS ON THE NAMEPLATE ATTACHED TO THE HEATER.
Need help?
Do you have a question about the 5520 and is the answer not in the manual?
Questions and answers