
Related Manuals for Security Alarms AR6000c

Summary of Contents for Security Alarms AR6000c
-
Page 1: Installation Instructions
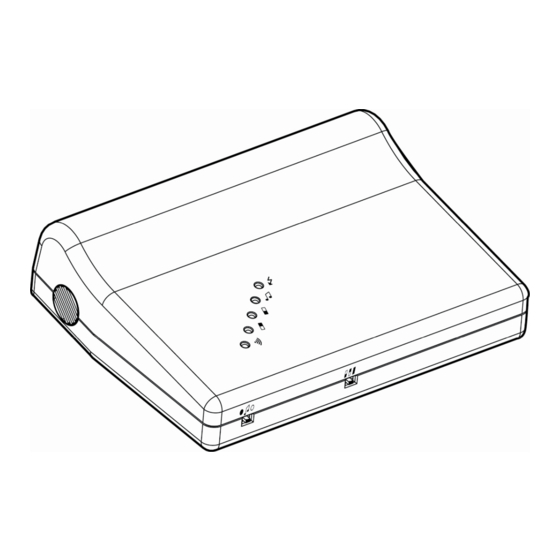
Security Alarms AR6000c radio controlled intruder alarm Advanced security system for your home and office Installation instructions... -
Page 3: Table Of Contents
Index Table of contents Index Safety instruction Introd uction Operat ing modes Installation sequence Alarm siren Calibra ting the infrasonic detector Installation Using the alarm Battery life Fault finding - when the alarm is not activated Fault finding - when the alarm is activated Set-up, accessory naming and faul t finding via remote diagnostics Interface port Specification... -
Page 4: Safety Instruction
Do not install the unit near a heat source. Never use abrasive products or a metallic sponge to clean the unit or accessories. Security Alarms declines all responsibility in case of damage caused by not respecting the installation instructions. | Safety instructions... -
Page 5: Introduction
Introduction Congratulations on your purchase of an AR 6000c intruder alarm. The AR6000c intruder alarm originally developed by the army to detect an intruder at the precise moment that he makes a forced entry or break-in. (fig. 1) The infrasonic system reacts to shock waves that are produced by a break-in. -
Page 6: Operating Modes
Operating modes Switches (fig. 3 & 4) 1. Infrasonic and Accessories detection; door window contacts &/or passive infra-red 2. Test mode 3. Accessories only with no infrasonic detection; door window contacts and/or passive infra-red detectors fig.3 4. Security Zone 1 - accessories only - the main area to be protected 5. - Page 7 Input and output ports (fig. 6) Power ( 15 Vac, 2 Amp) Digicom telephone modem wired output Bell box additional internal and external wired siren outputs PIR and smoke etc. wired accessories for main area to be protected Diagnostic port RS232 link for programming, inte rrogation and set-up Interface port (A B C D E F) system armed, remote armed, etc.
-
Page 8: Installation Sequence
Installation sequence 1. Remove the contents from the shipping box and check that all material is present 1 alarm AR 6000c 1 transformer with lead and jack plug 3 two-buttoned radio key-fobs 4 window stickers 1 User guide 2. Battery The alarm is fitted with a rechargeable Li-ion battery, inserting the fuse connects the battery to the alarm. - Page 9 4.2 Insert power jack plug. (fig. 9) The blue power light and a green zone light will be illuminated. fig.9 4.3 Key-fob code learning. Set switches to Test and zone 1. (fig. 10 & 11) The green test light will be illuminated. fig.10 fig.11 4.4 Remove the Program jumper.
- Page 10 4.8 For standard accessories. Set switch to zone 1 (fig. 15) The green zone 1 light will flash. Then activate the relevant accessory and 1 beep will confirm that the code is learned for activation in zone 1. Other accessory codes can also be learned and 1 beep will confirm that the new code has been learned.
- Page 11 4.12 Replace the Program jumper. (fig.19) Two short beeps will confirm that the memory is closed and the green Test light will be extinguished, but the green zone lights for either 1 or 2 will be illuminated. fig.19 4.13 To check the reception of all learnt codes. Set switch to Test.
-
Page 12: Alarm Siren
Alarm siren The duration of the alarm siren is set for 3 minutes to comply within European norms. Calibrating the infrasonic detector Make sure that all windows are closed and that all internal doors within the area to be protected are open. Set the switch to Test (fig. -
Page 13: Installation
Installation The alarm should be mounted centrally within the premises and as far away as possible from windows and doors. It should be secured to a wall close to a wall power socket. Using the alarm Press the green button on the radio key-fob (fig. -
Page 14: Battery Life
Battery life The operating life of the main Li-ion battery pack is about 5 years according to ambient temperatures. However, it is recommended that all lithium batteries are replaced every 2-3 years. It is important that the AR 6000c is plugged into the electricity mains supply at all times. | Battery life... -
Page 15: Fault Finding - When The Alarm Is Not Activated
Fault finding - when the alarm is not activated Observation: The blue power light is not illuminated Answer: The electrical power to the alarm has failed. Check that the transformer is plugged in. Check that the fuse is in place and not damaged. When in doubt call your installer. Observation: The blue power light flashes slowly Answer: The mains electrical supply has failed or the transformer is not connected. -
Page 16: Fault Finding - When The Alarm Is Activated
Fault finding - when the alarm is activated Observation: The alarm is not triggered by opening a door/window sharply Answer: The sensitivity is set too low and should be increased or recalibrated. When in doubt call your installer. Observation: The alarm goes off by itself Answer: The alarm cannot go off by itself. -
Page 17: Set-Up, Accessory Naming And Fault Finding Via Remote Diagnostics
Set-up, accessory naming and fault finding via remote diagnostics Set-up, accessory naming and fault finding can be made via the “ data out” terminal with a laptop computer. Remove the rear cover at the back of the alarm and plug the link cable into the “... - Page 18 Command line interface Open up the correct terminal progr am. Once you have the terminal window open enter “h elp” and you will see the menu displayed below: Enter: ? AR6000c Copyright © 1999-2013 Release_11_18 2013-02-06 Date/Time Now: 06-02-2013 12:45:21 Help...
- Page 19 Chime Assignment If this function is enabled for any accessory, radio or wired, then while the alarm is not armed any trigger from this device will sound a quiet beep or beeps to indicate it has been triggered. There are 3 chimes available, numbered 1 to 3 and 0 being chime OFF. Example: chime 2 1 Set accessory 2 to chime using chime #1.
- Page 20 Up to 100 accessories can be stored and are listed using the «acc» command. Example: Acc number Type Chime # Batlow Name Key-fob Peter Zone 1 Chime1 d/w_hall Zone 1 & 2 Batlow d/w_kitc Accessory Battery Low Indicator The alarm records reception of an accessory’s Battery Low Indicator (if available in the accessory) this can be viewed by using the «acc»...
- Page 21 The history lists the last 50 alarms events. The number also shows which accesssory caused the event, if applicable. 06-02-2013 13:05:37 ArmZone1&2 Key-fob Peter Ignore this option for code release 11 16 & 11 17 06-02-2013 13:06:03 WiredSmoke 06-02-2013 13:06:41 Disarm Key-fob Peter...
-
Page 22: Interface Port
Interface ports Functions as follows: System armed (NC). System armed (NO). System armed (Com). The three pins (D, E, F) ar e the relay outputs for the armed function. The relay cha nges over when the alar m is armed a nd will change back when disarmed. -
Page 23: Specification
Specification Type AR6000c radio controlled intruder alarm Power supply 220Vac 50Hz / 15Vdc 2A Power consumption 0.1 watts Radio frequencies 868MHz with radio anti-jamming protection Infrasonic sensor 0.4Hz.- 50Hz. Alarm codes capacity 100 codes Alarm activation 30 seconds after switching ON... -
Page 24: Wall Fixing Template
Wall fixing template... -
Page 25: Warranty
This warranty does not cover the Li-ion battery in the alarm, Lithium in the radio-key fobs and the alkaline or lithium batteries in various related accessories. This warranty is the only one given on your AR6000c alarm and it sets forth all our responsibilities regarding your product. - Page 28 AR600 Purchase date Purchased from © Security Alarms & Co. SA. Printed in Switzerland. 06.2013...
Need help?
Do you have a question about the AR6000c and is the answer not in the manual?
Questions and answers