Advertisement
Advertisement
Table of Contents

Summary of Contents for Direct Air PHRV
- Page 1 PHRV Heat Recovery Ventilator INSTALLATION, OPERATION AND MAINTENANCE MANUAL...
-
Page 2: Table Of Contents
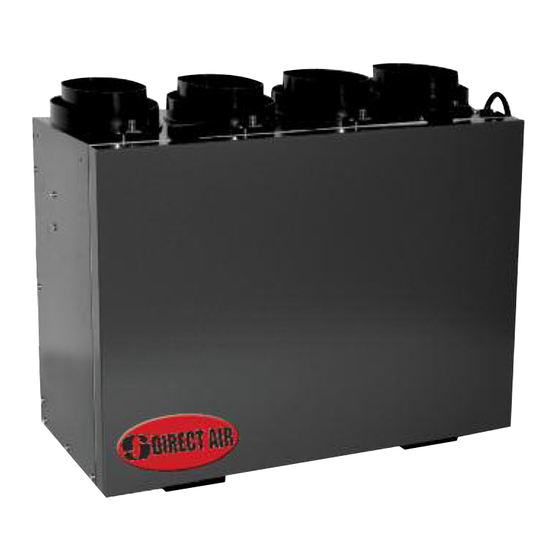
The Best TABLE OF CONTENTS Limited Warranty TECHNICAL DATA in the Business PHRVR96 ........... . .3 •... - Page 3 PHRV96 SPECIFICATIONS CASE 24 gauge galvanized steel. Baked powder coated paint, grey. Cabinet fully insulated with 1" (25 mm) aluminum foil- face high density polystyrene foam to prevent condensation and meet the requirements of the UL 94HF. MOTORS Two (2) German-manufactured, factory-balanced ebm™...
- Page 4 Dimensions & Airflow - All units feature three foot plug-in power cord with 3-prong plug. Stale Air Stale Air 22.50" To Outside From Inside (572mm) Fresh Air Fresh Air 10.20" 21.50" From Outside To Outside (259mm) (546mm) • Continuous ventilation mode of supply and exhaust airstreams •...
-
Page 5: Installation
INSTALLATION LOCATION The HRV must be located in a heated space where it will be possible to conveniently service the unit. Typically the HRV would be located in the mechanical room or an area close to the outside wall where the weatherhoods will be mounted. If a basement area is not convenient or does not exist, a utility room or laundry or closet may be used. - Page 6 INSTALLING DUCTS GOING TO / FROM OUTSIDE A well designed and installed ducting system will allow the HRV to operate at its maximum efficiency. Always try to keep PRACTICAL duct runs as short and straight as possible. See Installation Diagrams for installation examples. TIPS INSTALLING THE DUCTING •...
-
Page 7: Exhaust Air Ducting
INSTALLING DUCTS TO / FROM INSIDE To maximize airflow in the ductwork system, all ducts should be kept short and have as few bends or elbows as possible. Forty-five degree are preferred to 90º elbows. Use “Y” tees instead of 90º elbows whenever possible. All duct joints must be fastened with screws or duct sealant and wrapped with a quality tape to prevent leakage. -
Page 8: Installation Examples
INSTALLATION EXAMPLES Fully Dedicated System (suggested for new construction) Stale air drawn from key areas of home (bathroom, kitchen, laundry) Fresh air supplied to main living areas NOTE* PHRV96 should be mounted with its duct connec- tions on top or similar. Example diagram only-duct configuration may change depending on model... -
Page 9: Partially Dedicated System
INSTALLATION EXAMPLES (CONT'D) DIRECT CONNECTION of the SUPPLY AIR STREAM to the FURNACE COLD AIR RETURN (Stale air drawn from key areas of home) Partially Dedicated System Stale air drawn from key areas of home (bathroom) Fresh air supplied to main living areas via the forced air system. NOTES: 1.Furnace blower may be required to operate when HRV/ERV is on to provide good air distribution. -
Page 10: Air Flow Balancing
AIR FLOW BALANCING * Fantech’s superior design and use of EBM motors results in a steep fan curve that usually does not require balancing. Commissioning the system after installation is recommended which include confirming the proper operation of the system and how it interacts with other components within the home. -
Page 11: Heat Recovery Core
MAINTENANCE CAUTION MAKE SURE UNIT IS UNPLUGGED BEFORE ATTEMPTING ANY MAINTENANCE WORK The following components should also be inspected regularly and well maintained. PRACTICAL Filters need to be checked regularly TIPS • To prevent electrical shock, check FILTERS that the unit is unplugged before The filters (2) need to be checked and doing any repairs or maintenance. -
Page 12: Operation
MODES OF OPERATION The entire line of PHRV & PHRVR series Heat Recovery Ventilators comes equipped with Powrmatic's new electronic uni-control board which offers a wide variety of features making it the ultimate ventilation control system. Powrmatic engineers have used the latest technology to provide solid, trouble free operation under any conditions. -
Page 13: Optional Remote Controls
OPERATION (CONT'D) OPTIONAL REMOTE CONTROLS * All controls are low voltage. 18 to 24 PRACTICAL gauge wire is recommended. TIPS Dehumidistat I - The wall mount dehumidistat monitors the humidity level in 2 wire installation the area it is installed. When the humidity level rises above the desired set- point, the HRV will activate to high speed/override mode. -
Page 14: Troubleshooting
TROUBLESHOOTING Problem Causes Solutions Air is too dry Dehumidistat control is set too low Increase the desired level of humidity. Change ventilation mode from continuous mode to standby. HRV out of balance Balance HRV Reduce the desired level of humidity. Combine this step with use of con- Dehumidistat control is set too high Air is too humid tinuous exchange mode. -
Page 15: Electrical Connections
ELECTRICAL CONNECTIONS... - Page 16 ELECTRICAL CONNECTIONS (CONT'D) ELECTRICAL CONNEC- Standard Accessory Control Contact Standard Furnace Interlock Wiring TION TO A FURNACE THERMOSTAT TERMINALS PRACTICAL TIPS FOUR WIRE Caution: TWO WIRE heating only • Never connect a 120 volt AC circuit to the terminals of the Accessory Control Contacts.
Need help?
Do you have a question about the PHRV and is the answer not in the manual?
Questions and answers