Table of Contents
Advertisement
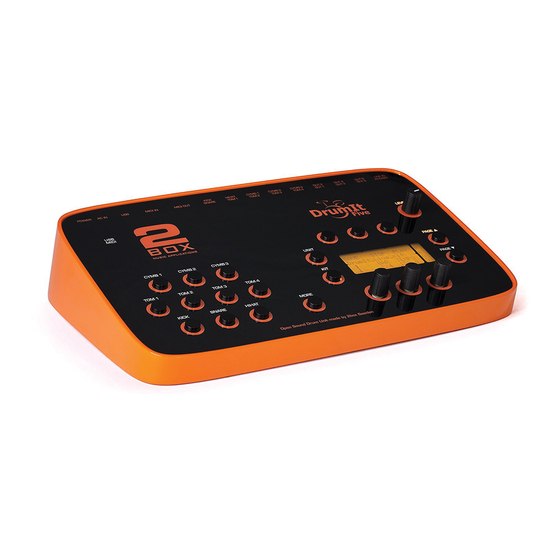
DrumIt Five
Operating System 1.2X*
* This manual refers to system 1.2X. Older systems differ in the menu structure and some of the features that are explained
here are not available.
Please update the system, so you can fully make use of this manual and your instrument. You can find the updates on our
homepage www.2box.se.
Advertisement
Table of Contents

Subscribe to Our Youtube Channel
Related Manuals for 2Box DrumIt Five


Summary of Contents for 2Box DrumIt Five
- Page 1 DrumIt Five Operating System 1.2X* * This manual refers to system 1.2X. Older systems differ in the menu structure and some of the features that are explained here are not available. Please update the system, so you can fully make use of this manual and your instrument. You can find the updates on our...
- Page 2 Good news for everyone who is in a hurry or just doesn’t like to study manuals: The concept of the DrumIt Five is designed so all functions can be learned by trial and error. Everything can be done by intuition. There are no complicated submenus or hidden key commands.
-
Page 3: Table Of Contents
Contents Intro ..............................4 Handling ............................6 Safety Information ........................... 7 Basic Know-How ..........................8 USB mode ..........................8 Menu structure ........................9 File-System .......................... 10 User-KIT-Bank and Single-KIT-file ..................12 Channel overview ........................ 14 Connections ........................... 16 Controls ............................20 Setting Up And Getting Started .................... -
Page 4: Intro
Depending on the pad, you can trigger different sounds via separate trigger zones. The tom- and snare pads of the DrumIt Five have a head and a rim sensor, the cymbal pads even have three zones – edge, bow and bell. In addition, the cymbal pads can be choked for stopping the sound –... - Page 5 In addition, you can create your own sounds in the specific DrumIt Five format. Create your own multi- layered sound files from WAV files, eg. from recordings of your acoustic set or sounds from sample libraries.
-
Page 6: Handling
Playing an electronic drum kit differs from the use of an acoustic drum set, and in some respects requires a different handling. With the DrumIt Five, the maximum volume of a drum sound – especially rim shots – is not necessarily achieved by powerful strokes, but by adjusting the module settings to your personal preferences. -
Page 7: Safety Information
18 V/500 mA and DC plug. Never use the AC adapter outdoors, avoid humid environments in general. The DrumIt Five module has a low power consumption, so it usually does not pose any danger. Nevertheless treat it always with common sense. -
Page 8: Basic Know-How
4.1 USB mode When you connect the DrumIt Five module via USB to your computer (PC or Mac) and run it in USB mode, it will be recognized and displayed as a "normal" memory drive. The module now behaves exactly like an external USB hard drive or a card reader. -
Page 9: Menu Structure
Basic Know-How 4.2 Menu structure The DrumIt Five module is characterized by a simple and intuitive menu structure. There are two general operating modes: UNIT: In the mode UNIT, you make general settings for your module. in the mode KIT you will find all pages that you need to edit a KIT. A “KIT” is a set, factory made KIT: or edited resp. -
Page 10: File-System
Basic Know-How 4.3 File-System The DrumIt Five module can be connected to a computer (PC or Mac) via USB and then acts like a conventional external mass storage device (see also page 19). In order to simplify the handling of the files, you'll find explanations of the file and folder system of the DrumIt Five in the following. - Page 11 - sound files in the 2BOX format (dsnd.) - Single-KIT-files Don’t forget to back up regularly! Connect your DrumIt Five module to a computer and save your files with a back-up program or by simply copying via drag and drop.
-
Page 12: User-Kit-Bank And Single-Kit-File
KIT bank (OPEN). Single-KIT-file In addition to the user KIT bank (see above), the DrumIt Five module can manage up to 999 (!) single user KITs. These user KIT files are single, editable program memory locations, each containing only one kit. - Page 13 There are several ways to create user KIT files. You can copy one of the existing user KIT files that are available as a free download on our website (www.2box.se) or you can use the export function of the editor software. This editor software is also available as a download on our homepage.
-
Page 14: Channel Overview
(see also page 20). Trigger-Channel The DrumIt Five module has 10 jacks for pads. But there are up to 15 independent trigger channels available, since five of the drum channels are designed as Dual-Channels (SNARE, TOM 1 to TOM 4). - Page 15 Basic Know-How CYMB 1: E4 = bell, F4 bow, F#4 = edge, (G4) = choke function The four MIDI notes are grouped together and can not (!) be changed individually. Only the first MIDI note can be edited (see page 52). The other MIDI notes are linked to the first note. The notes are always successive half-steps.
-
Page 16: Connections
Connections 5 Connections ... - Page 17 Connections PHONES: Headphone jack Plug your headphones into this 1/4" stereo phone jack (recommended impedance 32 Ω - 600 Ω). Adjust to the desired volume with the LEVEL control LEVEL control right above the display. Headphone jack as single output As a default setting, the stereo main mix signal is on this output.
- Page 18 It is possible to use an additional five trigger channels (PERC 1 to 5) to increase the number of pads connected to the DrumIt Five module from 10 to a total of 15 pads. In order to be able to use the additional trigger channels, connect two pads with a Y-splitter cable (1 x stereo jack to 2 x mono jack) to the SNARE or the TOM channel.
- Page 19 USB-Port This port lets you connect the module to a computer (PC or Mac). The USB port on the DrumIt Five is a 1.1 port (full speed - 12 Mbit/s) and compatible with USB 1.1 and USB 2.0. The DrumIt Five module is designed as a standard USB mass storage device and requires no driver installation.
-
Page 20: Controls
Controls 6 Controls Drum Channel Buttons To the left of the control panel you find 10 round buttons that are associated with the trigger inputs and named accordingly. The labeling of the channels follows the suggested factory configuration and reflects the commonly used e-drum setup. - Page 21 This button takes you to the "UNIT" mode and the corresponding pages. In the UNIT menu, you make settings of parameters that affect the entire DrumIt Five system and apply globally to all KITs (e.g. mixer, trigger, MIDI and general pad settings). The UNIT-mode is active when the label above the button lights ...
- Page 22 Display The display of the DrumIt Five-module can give a readout of up to 6 parameters. In general, these are three below the DATA buttons and three above the DATA controllers. The name of the parameter is always in the upper row (see example: TYPE, TAP1, TAP2, TAP3, FBK, VOL) and the value to be edited beneath (see Example: Echo, 1/2, 3/4, .89, IIIIIII, IIIIIIII).
-
Page 23: Setting Up And Getting Started
Pads and Triggers If you are using the DrumIt Five pads and have them wired as specified, you only need to calibrate the hihat (see chapter Fehler! Verweisquelle konnte nicht gefunden werden. Fehler! Verweisquelle konnte nicht gefunden werden.on page 25) and you can start immediately. If you use pads or triggers from other manufacturers with the DrumIt Five module, you may have to change trigger settings because the factory defaults were naturally optimized with DrumIt Five pads in mind. - Page 24 Setting Up And Getting Started Selecting a KIT After switching on the module, the DrumIt Five is in the KIT mode (KIT LED is lit). Use the left DATA knob to call up the various KITs of the user KIT bank.
-
Page 25: Calibrating The Hihat
Calibrating the Hihat 8 Calibrating the Hihat When you connect the Hihat for the first time you must perform a calibration. Usually a message appears asking you to calibrate the hihat. At this point, the hihat machine should of course already be installed or set up correctly. - Page 26 Calibrating the Hihat Now check the calibration. If the behavior of the hihat, concerning playability and reaction, does not meet your expectations, you can repeat the process and make a different setting by varying the height of the hihat pad. You can also make further settings for the hi-hat.
-
Page 27: Kit-Mode
If you have made changes on a KIT page and want to keep them, you have to save the modified KIT. Please note that the SAVE function of the DrumIt Five has to be switched on in order to be able to save a KIT. - Page 28 KIT-Mode Renaming a KIT If you want to rename a KIT, press the button above SAVE at the KIT main page. You can use uppercase and lowercase letters, numbers and various symbols. With the rotary control in the middle you can select the desired letter by turning or insert a space by pressing the knob. With the right rotary control you set the cursor position - indicated by the flashing underline in the display.
- Page 29 KIT-Mode With the button in the middle (above MOVE) you insert the KIT to the selected program number. The old KIT and the following KITs are shifted, the numbers change according to the new position. In this example, the old KIT becomes No. 81. Accordingly, all following KITs are shifted by one position (the numbers will change +1).
- Page 30 KIT-Mode If you press the MORE button once again, you get a REDO option. With this, you can restore your changes. UNDO/REDO The UNDO / REDO function is a great way to compare new settings with the original KIT. This feature allows you to switch back and forth between two KIT variants. This way, you can check simply and easily e.g.
-
Page 31: Kit - Prog
KIT-Mode 9.1 KIT – PROG Display view: KIT with Song Display view: KIT with metronome NUMBER The large numeral indicates the KIT number. Use the left rotary control to select a KIT (program location). SAVE See detailed descriptions on page 27. PLAY starts - if available –... - Page 32 (song, metronome, loops). Quick Search Function: Quickly Find and Select Single-KITs As described in chapter 4.4, page 12, the DrumIt Five distinguishes between a user-KIT- bank with 100 memory locations and single user KIT files (see page 12) with only one memory location.
-
Page 33: Kit - Drum
KIT-Mode 9.2 KIT – DRUM* FILE /FOLD Here you can assign a sound to a channel. The name of the sound is displayed in the second row. The first row contains information about the folder (category of sounds). Turn the left DATA controller to browse the sounds. -
Page 34: Kit - Env
KIT-Mode 9.3 KIT – ENV* SOUND Here you can specify which zone of the selected sound will be used. Depending on the type of sound, several zones can be controlled. For example, with cymbal sounds, three zones (+ Bell + Bow + Edge) are available, with snare sounds, only two zones (+ Fell + Rim). - Page 35 "fix" is available. Custom Sounds With the 2BOX sound editor you can create custom 2BOX sound files (.dsnd) from your own samples (see separate instructions for the Editor). For custom sounds with only a few layers (1-10 layers) the layer setting "FIX" should be selected for the parameter settings on this page, because otherwise the sound has an unnatural effect.
- Page 36 To do this, set the HOLD value to the desired time length and a short DECAY time value. Loops The DrumIt Five can play back loops in various playing modes. Loops can be assigned to any drum channel just like a regular 2BOX sound and thus started and stopped via the pads (see details on page 34).
-
Page 37: Kit - Vol
KIT-Mode 9.4 KIT – VOL* This feature allows you to specify whether the signal of the selected drum channel is sent through the EQ (see page 38) (EQ+) or not (EQ-). This feature is only available if the value for BUS on the EQ-page is set to "drum". The BUS signal itself is not affected by the EQ. -
Page 38: Kit - Eq
KIT-Mode 9.5 KIT – EQ Each KIT is equipped with a 3-band EQ with a semi-parametric mid band. CURVE Shows you a graphical view of the EQ settings made. Pressing the left DATA button (over CURVE) resets the equalizer. Pressing the button again restores the deleted setting. - Page 39 KIT-Mode Here you determine how much the mid band should be boosted or cut (MID mode). You have a control range from -12 to +12 dB. By pressing the controller you change to the MID. Now you can set the desired frequency (see also under FREQ). HIGH Like the low-band, the hi band also has a shelf-characteristic with a cutoff frequency at 12 kHz.
-
Page 40: Kit - Fx
KIT-Mode 9.6 KIT – FX Display view: TYPE Echo Display view: TYPE Flange You have one internal effects section per KIT. This can be used by every single drum channel (see also page 37). TYPE Select here the type of effect you want. Delay and flanger are available. Adjust the level of the output volume of the entire effects section with the rotary control. - Page 41 KIT-Mode Functions for TYPE “Flanger”: RATE RATE controls the modulation speed of the effect. There is a control range from 0.1 Hz to 10 Hz. DEPTH With DEPTH, you control the intensity of the effect. The higher the value, the more intense is the effect.
-
Page 42: Kit - Acmp
KIT-Mode 9.7 KIT – ACMP Display view: TYPE metronome Display view: TYPE song For live and studio applications, as well as for jamming and practicing, an internal player is provided. The settings you make here are stored in the respective KIT just like sound and equalizer settings. There are two different types of players: TYPE Choose between the song player... - Page 43 KIT-Mode TEMPO Here you can set the tempo. There is a tempo range from 30 to 280 bpm When you press the rotary control, an arrow appears pointing to the right → and you can set the tempo in steps of ten. Press the control once more ←, and you can change the tempo in whole bpm steps again.
- Page 44 KIT-Mode Split wave Split-Wave Mode In Practice You need the split-wave mode, e.g., if you want to play live with a backing track. To stay "on time", you maybe have produced a playback, with the music on the left and a matching click on the right.
-
Page 45: Unit Mode
Display view: vertical display Display view: horizontal display The DrumIt Five includes a mixer, that allows you to balance out the volume levels of the drum channels. There are nine FADER groups whose levels can be controlled individually. FX (F) sets the volume of the internal effects section, LINE (L controls the line-in channel's signal, and ACMP (A) controls, depending on the selection within the kit, either the volume of the metronome or of the song player. - Page 46 FADERs are currently active. Routing and Signal Flow The DrumIt Five offers a variety of routing options and allows you, through a combination of internal mixing and direct out channels, to master every imaginable application scenario. The way the routing in the DrumIt Five works is explained on page 64, based on practical...
-
Page 47: Unit - Trig
Cym14 14" cymbal pad (3 zones + choke) ○ CyCup cymbal pad with bell-trigger (BOW+CUP) ○ CyEdg cymbal pad with edge-trigger (BOW+EDGE) ● Hihat hihat pad (2BOX only) ○ ○ ○ ○ ○ ○ AcTr1 acoustic-trigger on small drums ○... - Page 48 UNIT Mode XTALK This feature can be used to prevent unwanted trigger impulses (cross talk) from other pads. If, e.g. a hard cymbal stroke triggers a tom sound, you can suppress the latter. Just select the channel of the unwanted sound (in our case: tom) and change the value of XTALK.
- Page 49 UNIT Mode You can switch between L ((low - minimum GAIN increase), M (medium increase) and H (high increase). THRES With the threshold value you determine how strong the lightest stroke has to be for triggering an impulse. Useful you when you need pad to be less sensitive for stray triggers.
- Page 50 UNIT Mode Max2: Regardless of the velocity, a fixed signal level of 0 dB is generated. Max1: Like Max 2, although with a fixed signal level of -6 dB. Pos2: The signal level increases more than the velocity. But at high velocities, the signal level increase is much smaller, i.e.
-
Page 51: Unit - Hped
UNIT Mode 10.3 UNIT – HPED On this page important adjustments for the hi-hat are made. CALIB On this menu page you can calibrate the hihat, i.e. adjust it to your playing. Because of the importance, we have dedicated an extra chapter to this subject. Please read the detailed explanations starting on page 25. -
Page 52: Unit - Intf
UNIT Mode 10.4 UNIT – INTF* On this page you make the global routing and MIDI settings for each trigger channel. Here you set to which BUS the respective signals should be sent and the settings for the MIDI control of each channel. Application examples expanding on this topic can be found from page 64 on. - Page 53 UNIT Mode NOTE Here you can specify with which MIDI note the respective channel will send and receive "NOTE ON" and "NOTE OFF" messages with. Channels with multiple zones use a consecutive sequence of MIDI notes (see also ZONES, as well as explanations about MIDI notes on page 14).
- Page 54 UNIT Mode Here you can send signals to BUS channels according to your needs. There are eight single BUS channels (1-8) and four BUS groups (1+2, 3+4, 5+6, 7+8). Think of a bus as an internal signal path. It leads the respective signal to a specific output (direct out).
-
Page 55: Unit - Out
Line In - Mono This setting is useful if you are using the DrumIt Five module as an in-ear monitor station and only a single monitor signal is provided by an external mixer (AUX). In this situation, you should select "mono"... - Page 56 UNIT Mode Fixed Volume - ! - Decoupling the output volume from the LEVEL control makes especially sense in live use because this ensures that the volume of the drum signal on the PA system is not changed when you change the volume of the headphones. SUB...
-
Page 57: Unit - Vu
UNIT Mode 10.6 UNIT – VU On this page, you can read the current signal level of the line input and the output channels from LED meters (DATA-buttons and DATA-controllers have no function). For an optimum signal quality, it is recommended to drive high levels but to avoid "clipping" (permanent illumination of the topmost LED segment). -
Page 58: Unit - Metr
UNIT Mode 10.7 UNIT – METR On this page you can change the sound settings of the metronome. Please note that these are global settings that affect all KITs. FILE Like on the DRUM Page in the KIT menu, you can select a sound by rotating the left DATA controller. -
Page 59: Unit - Midi
On this page, you can change the global MIDI settings. PRCHG You can choose between on and off. If you have selected "On", the DrumIt Five module can both send and receive MIDI program change messages. This is useful .. -
Page 60: Unit - Pref
UNIT Mode 10.9 UNIT – PREF SAVE This parameter determines whether changes in the modes KIT and UNIT can be saved or not. Select "On", to be able to save your results permanently after successful programming by pressing the left DATA button. The saving process is executed on the main page of the modes (KIT Page PROG or UNIT Page MIX). - Page 61 DrumIt.dkt files also corresponds to factory default sounds. If you have deleted sounds a “?” will appear under FILE for that channel in the Kit. Sounds can be downloaded for www.2box .se/downloads The factory default settings are saved in the file „DrumItInit.dkit“ (see explanations on page 11).
-
Page 62: Unit - Mem
Memory Capacity When you frequently copy additional sounds to your DrumIt Five-module, it may occur that there is not enough memory available. In this case, you should clear up your module to make room for new sounds. Make a back-up of the entire contents of your module and in the second step, delete those sounds from the module, you don’t like. -
Page 63: Unit - Info
UNIT Mode 10.11 UNIT – INFO This page gives you information about the software version of your module (DATA buttons and DATA controllers have no function). SERNR Serial number of your module BOOT software version of the boot program software version of the operating system... -
Page 64: Signal Flow And Routing Options
11 Signal Flow and Routing Options In this chapter we show you how the signal flow is set up within the module and give you suggestions for the use of the DrumIt Five in real life on the basis of a few examples. ... - Page 65 The examples on the following pages show what options you have with the routing capabilities of the DrumIt Five. Of course, these are just a few configurations and not an exhaustive list of all the options that are available for your personal use.
- Page 66 Signal Flow and Routing Options Situation 1 - Rehearsal Room: The same signal on PA and headphones You connect the Five-DrumIt module to a small PA in the rehearsal room and/or play with headphones. All signals from the mixer (MIX) (drum channels , effects , line-in signal , song player...
- Page 67 In this setup, you want to output the drum signals, the internal effects and songs as a stereo mix. At the same time you want to use the DrumIt Five as "in-ear monitor station" (stereo mix, metronome, external monitor signal).
- Page 68 Signal Flow and Routing Options Situation 3 - Studio: All Instruments Separately You connect the DrumIt-Five to an external mixer and want to provide the sound engineer with as many separate channels as possible. For this, you turn the headphone jack into the individual outputs 7+8 using a Y-split cable (1x stereo jack to 2x mono jack).
- Page 69 Signal Flow and Routing Options The output jacks OUT1·2 are assigned to the group BUS 1+2. The headphone jack is assigned to the group BUS 7+8. The setting for SUB does not matter in this setup, because the SUB signal is not sent to any output...
- Page 70 Signal Flow and Routing Options Situation 4 - Live 1: The Most Important Instruments Separately and Playback Songs for the PA In this particular situation, you want to use as many individual signals as possible and at the same time send a song as a playback to the PA.
- Page 71 Signal Flow and Routing Options Situation 5 - Live 2: Variation of Situation 4 In the previous example (situation 4) the toms were deliberately configured mono and the PERC group was left out. Of course you could additionally use the PERC group by sending the cymbals only to one output. KICK SNARE HIHAT...
- Page 72 Signal Flow and Routing Options Situation 6 - Live 3: Variation of Situation 5 There is another, somewhat more sophisticated way to use the PERC group, e.g., for loops without having to output the cymbals in mono. In this setup, the playback signal and the PERC group share the outputs OUT1·2. The volume of both signals can still be controlled separately in the internal mixer (page MIX).
-
Page 73: Technical Data
Technical Data 12 Technical Data Connectors: 10 x Trigger Input (6.3mm stereo jack) 1 x Line In, stereo (6.3 mm stereo jack) 6 x line out, mono (6,3 mm mono jack) 1 x headphone jack (6.3 mm stereo jack) 1 x USB 1.1 (Full Speed) 1 x MIDI IN 1 x MIDI OUT 1 x power supply (18 V AC, external power supply) -
Page 74: Update
Thanks to the Open Sound System of 2BOX the module can be updated easily and comfortably using drag and drop. This way you can keep your DrumIt Five always up to date and benefit from the operating system updates, new features and technical enhancements. - Page 75 Update Choosing Between Operating Systems During the boot process, you have the option to choose between the various operating systems that are available on your module. To do so, press the middle DATA button while powering up.. After you have selected the desired operating system with Prev/Next (left and middle DATA button), start the boot process by pressing the DATA button to the right (load).
-
Page 76: Faqs
FAQs 14 FAQs How can I adjust the volumes of the instruments to each other? For this purpose you have an internal mixer in the mode UNIT on the page MIX (see page 45). Refer also to the detailed explanations on this topic starting on page 64. How can I save my settings? Changes can be saved in both modes UNIT and KIT at the main page (KIT PROG respectively UNIT MIX) by pressing the left DATA button. - Page 77 How do I assign individual drum channels to direct outputs? The DrumIt Five provides many routing options. Read from page 64 on, what settings you need to make in order to assign individual channels directly to specific outputs.
- Page 78 Of course. The DrumIt Five works fine with the products of the major manufacturers, the most common triggers have been tested successfully with the DrumIt Five. In the UNIT mode on page TRIG you will find specific trigger TYPES (AcTr1, AcTr2 and AcTr3) and other parameters (GAIN, THRES), that allow you to set the module so it is perfectly suited to the use with acoustic triggers.
-
Page 79: Contact And Support
Contact and Support 15 Contact and Support You have questions about your DrumIt Five or a technical problem? Visit our website at: www.2box.se In our support area you'll find answers to your questions. 2BOX International 2BOX Music Applications AB... -
Page 80: Keyword Index
Keyword Index 16 Keyword Index DEPTH ........43 KtPrg ........... 63 Dismissing Changes (KIT) ..31 Display ........24 Done ........27, 63 ! ..........19, 58 Drum ........... 40 Drum Channel Buttons ..... 22 LAYER ......... 37 Drum-Channel ......16 LEFT .......... - Page 81 Neg2 ..........52 REP1 ........... 44 TUNE ........35, 60 NoChg ........28, 63 REP2 ........... 44 TYPE ........ 42, 44, 49 Norm ........... 52 Reset ........... 63 NOTE ........... 55 RIGHT ......... 42 UNDO ....... 31, 32, 48 UNIT Button ........ 23 operating system 13, 14, 65, 76, 77 Safety Information .......
Need help?
Do you have a question about the DrumIt Five and is the answer not in the manual?
Questions and answers