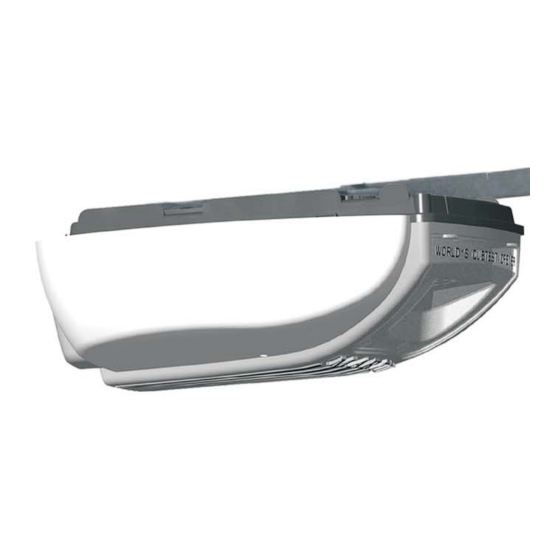
Martin Door DC2500e Instruction Manual

Martin Door DC2500e Instruction Manual

“low risk” finger shield garage doors

Advertisement

INSTRUCTION MANUAL
Featuring Martin "Low Risk" Finger Shield Garage Doors
See page 5 for IMPORTANT INSTALLATION, MAINTENANCE & SAFETY INSTRUCTIONS
*
WARNING! The back page helps you determine if your garage door is "HIGH RISK".
M
M
ARTI
ARTI
DOOR OPENERS
Martin Door Manufacturing® Salt Lake City, Utah 84127-0437 USA
N
N
TM
With Photo Eyes
DC2500e
DC3700e
DC3700e-H
ISO 9001
Quality
Standard
A8949
ISO 9001
R
MARTIN DOOR MFG.
www.martindoor.com Printed in the USA
Without Photo Eyes*
DC2500e-O
DC3700e-O
*
Must be Ordered as a
UL Listed Martin Garage
Door and Opener System.
U L
C
R
R
4/2007 AD-IM09-11
Copyright
©
2007
F.C.C.
US
Certified
Industry
Canada

Advertisement

Table of Contents
loading

Summary of Contents for Martin Door DC2500e

  • Page 1 WARNING! The back page helps you determine if your garage door is “HIGH RISK”. ISO 9001 ARTI ARTI Quality F.C.C. Standard Certified DOOR OPENERS A8949 ISO 9001 Industry Canada MARTIN DOOR MFG. 4/2007 AD-IM09-11 Martin Door Manufacturing® Salt Lake City, Utah 84127-0437 USA www.martindoor.com Printed in the USA Copyright © 2007...
  • Page 2 CARRIAGE “L” STRUT (IF PROVIDED) BOLT 3/8” X 1” SHORT NECK CARRIAGE BOLT AND 2- 3/8” LOCK NUTS 3/8” LOCK NUTS TOP ROLLER BRACKET TOP ROLLER BRACKET PHOTO TOP DOOR SECTION CURVED POWER ARM STILE COPYRIGHT © 2007 MARTIN DOOR...
  • Page 3 3/8”x1” SHORT NECK PUSH OPENER DOOR BRACKET CARRIAGE BOLT BUTTON CURVED POWER ARM “L” STRUT CURVED POWER PHOTO 3/8” LOCK NUTS PHOTO OPENER DOOR BRACKET DRILL 1/8” (3) HOLE AND FASTEN TO “L” STRUT AND DOOR SECTION COPYRIGHT © 2007 MARTIN DOOR...
  • Page 4 RELEASE 6 - CONCEALED PHOTO-EYE IN POWER HEAD BOX WIRE RIVETS (DC3700e ONLY) EXCEPT DC3700e-O / DC2500e-O 4 - 3/8 X 2“ PLASTIC ANCHORS 1 - WALL CONTROL (DC3700e) 9 - 3/8” X 1” CARRIAGE BOLTS OR PUSH BUTTON (DC2500e) 10 - 3/8”...
  • Page 5 If the Safety Reverse or any other part of the garage door and opener system do not work properly, or if you do not understand, call a trained Martin Door Dealer. Where possible , install the door opener 7’ (2130) or more above the floor.
  • Page 6 POWER ARM MARTIN OPENER DOOR BRACKET ANGLE ANGLE FASTENED TO CENTER STILE AND POWER ARM REVERSED “L” STRUT. ANGLE (FASTEN POWER ARM ANGLE TO STILE WITH 5 1/4” X 1” THREAD FORMING SCREWS AS SHOWN.) COPYRIGHT © 2007 MARTIN DOOR...
  • Page 7 Fasten the opener header bracket to the header with two 5/16" X 2" lag screws. The vertical 1/4” X 1” THREAD and horizontal marks are the “centered location marks. ” OPENER DOOR FORMING SCREWS BRACKET COPYRIGHT © 2007 MARTIN DOOR...
  • Page 8 TORSION SPRING POWER HEAD CURVED POWER ARM TORSION TUBE RAIL ASSEMBLY FIGURE 6 (Top View) OPENER HEADER BRACKET TOP DOOR SECTION “C” BRACKET END STOP CLEVIS PIN POWER HEAD TOP DOOR SECTION COTTER RING LADDER COPYRIGHT © 2007 MARTIN DOOR...
  • Page 9 IO N TO P DO OR SE CT “L ” ST RU T RAIL ASSEMBLY EXTRA RAIL SUPPORT BRACKET(S) POWER HEAD ON RAIL ASSEMBLY FURNISHED FOR DOORS OVER 8’3”(2500) HIGH. TEMPORARY TIE CURVED POWER ARM COPYRIGHT © 2007 MARTIN DOOR...
  • Page 10 See page 21 Screw WARNING: RISK OF ENTRAPMENT. Do not attempt to install Martin DC2500e-O, DC3700e-O (no Photo Eye photo-eye openers), on any door except the approved, U.L. Listed Martin garage door 3” to 5” and opener system. Attempting to do so will void the U.L. Listing and warranty of the (76 to 127) opener.
  • Page 11 NOTE: As an alternative, the wiring can be routed along the top of the rail assembly, or along the outside of the garage door track. Be sure the wiring is routed away from all moving parts of door and rail assembly. (For DC3700e with Martin Door applications, see concealed photo-eye wire attachment kit instructions). Open the control panel cover by gently pulling on the 2 tabs, allowing the cover to hang open.
  • Page 12 3/8” X 1” SHORT NECK CARRIAGE BOLT RED SQUARE DOT “L” STRUT EMERGENCY RELEASE CORD OPENER PULL DOWN DOOR BRACKET RED KNOB RED KNOB PULL DOWN TO ENGAGE(RED SQUARE DOT WILL DISAPPEAR) PULL DOWN TO DISENGAGE(RED SQUARE DOT WILL APPEAR) COPYRIGHT © 2007 MARTIN DOOR...
  • Page 13 It is easier to program if control panel cover is removed. ST RU T The LED’s show useful information regarding the opener’s normal use as well as Fault Finding. See Figure 24 and page 23 CIRCULAR LED DISPLAY CONTROL PANEL BUTTONS COPYRIGHT © 2007 MARTIN DOOR...
  • Page 14: Setting Adjustments

    “P” button twice to bypass the open limit setting. After close limit setting is completed, press “P” button twice to bypass transmitter code learning. LEDs #4 and #8 should illuminate. Complete “B” and “C” programs. End of programming. COPYRIGHT © 2007 MARTIN DOOR...
  • Page 15 Martin Door Dealer. contacts a 1 1/2" (38) high object (or a 2X4 board laid flat) on the floor, in line with the door opener.
  • Page 16 AD-01IM-03 TED) STEP 13 TEST DOWN CYCLE PHOTO EYES REVERSAL For Martin DC2500e, DC3700e, DC3700e-H Photo eyes must be clean and properly aligned. Rotate photo eyes vertically or horizontally for correct alignment. See Figure 33. green light on the transmitter photo eye and the red light on the 1 1/2”(38) HIGH OBJECT...
  • Page 17 (2) this device must accept any interference received, including interference that may cause undesired operation. Changes or modifications not expressly approved by the party responsible for compliance could void the user's authority to operate the equipment. COPYRIGHT © 2007 MARTIN DOOR...
  • Page 18 Lights turned on manually can only be turned off by manually pushing light switch button or by opening and closing the door. See Figure 43. COPYRIGHT © 2007 MARTIN DOOR...
  • Page 19 HEADER END Slide all rail assembly parts into rail assembly from header end according to original assembly. TENSION NUT CORRECT STATIONARY RAIL END-STOP Tension the belt following STEP 17. SPACE IS 1/16”(1.5) AND WASHER END-STOP COPYRIGHT © 2007 MARTIN DOOR...
  • Page 20 Motor Assembly complete with: Motor, Mounting Plate, RPM Sensor w/ Harness, RPM Wheel, Screws (4) RPM Sensor w/ Harness and Screw Housing w/ Screws & Labels Control Panel Cover w/ Label Varistor Motor Shaft Adapter (DC3700e only) Modular Receiver(315 MHz) COPYRIGHT © 2007 MARTIN DOOR...
  • Page 21 Knob, Tag and Emergency Release Cord Straight Power Arm Emergency Release Tag and Knob Gray Motor Shaft Adaptor Photo-eye centering techniques - For Martin DC2500e, DC3700e, DC3700e-H Openers YOU CAN KNOW YOU CAN KNOW WHERE THE SCREW SUN SHIELD WHERE THE HORIZONTAL...
  • Page 22: Troubleshooting

    Clear ice, snow, sand or dirt from garage floor area where garage door closes. Also, pull emergency apparent reason: release knob with door in closed position. Open door manually. If it is unbalanced or a broken spring, call a trained Martin Door Dealer. See STEP 11 and 12.
  • Page 23 USEFUL LED STATUS INFORMATION COPYRIGHT © 2007 MARTIN DOOR Illuminates if photo eyes Illuminates when Illuminates when Illuminates for 2 seconds Illuminates when opener is receiving Illuminates become disconnected, door is in fully door is in fully each time the belt tab signal from wall control button.
  • Page 24 Exposed one-piece door scissor arms with side mount stretch springs ..Body parts entrapped, broken or severed. If unable to correct “HIGH RISK” areas, replace with a new Martin Door. ONE PIECE SECTIONAL DOORS...

This manual is also suitable for:

Dc3700e-hDc2500e-oDc3700e-oDc3700e

Table of Contents