Table of Contents
Advertisement
Advertisement
Table of Contents

Related Manuals for Road Bear RV Class C 19-22'


Summary of Contents for Road Bear RV Class C 19-22'
- Page 1 Manual Welcome to Road Bear RV...
-
Page 2: Table Of Contents
Table of contents GENERAL INFORMATION _________________________________________ 4 1.1. LOCATION INFORMATION ________________________________________ 5 1.2. STATION MAPS _________________________________________________ 6 1.2.1. LOS ANGELES, AGOURA HILLS, CA (LAX) __________________________ 6 1.2.2. SAN FRANCISCO, HAYWARD, CA (SFO) ____________________________ 7 1.2.3. LAS VEGAS, LAS VEGAS, NV (LAS) ________________________________ 8 1.2.4. - Page 3 3.8.1. FRESH WATER_________________________________________________ 30 3.8.2. WASTE WATER ________________________________________________ 31 3.8.3. TOILET _______________________________________________________ 32 3.8.4. SHOWER _____________________________________________________ 32 3.9. SLIDE-OUT ROOM ______________________________________________ 33 3.10. AWNING ______________________________________________________ 34 TROUBLESHOOTING ___________________________________________ 36 4.1. ELECTRICAL SYSTEM __________________________________________ 36 4.2. GAUGES & INSTRUMENTS ______________________________________ 37 4.3.
-
Page 4: General Information
1. General information Introduction Thank you for choosing Road Bear RV - the company with the newest rental fleet in the United States. Are you ready to take off with your motor home to explore North America? If your personal walk-through was overwhelming or just too much information, please take a few minutes and read this manual carefully. -
Page 5: Location Information
1.1. Location information STATION ADDRESS LISTING 2007-2008 International customers should call the rental station immediately upon arrival but no later than between 8 am and 10 am of the departure day to schedule the pick up. Pick up shuttle transfer time is between 12 - 1 pm. Motor home pick up time is between 1 - 4.30 pm. -
Page 6: Station Maps
1.2. Station Maps 1.2.1. Los Angeles, Agoura Hills, CA (LAX) -
Page 7: San Francisco, Hayward, Ca (Sfo)
1.2.2. San Francisco, Hayward, CA (SFO) -
Page 8: Las Vegas, Las Vegas, Nv (Las)
1.2.3. Las Vegas, Las Vegas, NV (LAS) -
Page 9: Denver, Commerce City, Co (Den)
1.2.4. Denver, Commerce City, CO (DEN) -
Page 10: New York, Middletown, Nj (Nyc)
1.2.5. New York, Middletown, NJ (NYC) -
Page 11: Safety
1.3. Safety The following information is provided to make you are aware of the basic requirements to operate your motor home safely. Please read before you take off and enjoy your trip. - The motor home is substantially wider, longer, higher and heavier than a car. These differences do call for special driving procedures. -
Page 12: Accident
The accident report form in the rental vehicle must be completed by the renter and documented with pictures of the scene if possible. Road Bear RV must be contacted as soon as possible but max. within 24 hours (emergency # at 1-888-832-4080). -
Page 13: Measurement Conversions
How to drop-off the unit: - Gasoline tank full - L.P. Gas tank full - Waste water tanks empty - All kitchen equipment must be cleaned - Unit clean inside (including refrigerator, microwave, shower and toilet) Minimum charges: Late charges/surcharges US$ 30/hour or US$ 300/day plus daily rate Gasoline US$ 20 L.P. -
Page 14: Specifications
1.11. Specifications Class A Class C Class C Class C Model 30-32 ft 29-31 ft 25-27 ft 21-23 ft Seat belts Sleeps up to Engine Transmission automatic automatic automatic automatic AM / FM / CD Player Dash AC 3 burner stove Microwave Oven or Convection Oven Fridge / Freezer... -
Page 15: Campgrounds
- Private Campgrounds - or even in front of a Wal-Mart Store For safety reasons Road Bear RV does not recommend “roadside” camping! The National or State Parks and the Forest Campgrounds usually offer the most beautiful and spacious camp- sites. There is often a wooden table and a fire ring on each site. -
Page 16: Arriving At The Campsite
KOA Campgrounds Refer to the KOA campground directory in your motor home. Do not forget your 10% value card! Private Campgrounds Refer to the Woodall’s campground directory or RV magazines located in your vehicle 2.1. Arriving at the campsite 1. Park your motor home on a level spot if possible. Otherwise use the leveling blocks or levelers to level the vehicle. -
Page 17: The Cabin
3. The cabin 3.1. Ford cabin (chassis) 1 Light control / dimmer for instrument panel (cluster) Courtesy lamp → rotate knob fully counter-clockwise 2 Turn signal / Wiper/Washer Control 3 Gearshift (press brake to shift) Tow/Haul—default “off” = overdrive Tow/Haul on → use this position to descent moderate grades for safety and for towing. - Page 18 TOW/HAUL mode only to use when pulling a trailer! 1 All lights are “OFF” 2 Daytime running lamps. Automatic activation as soon gear shifter is moved out of park position. 3 Parking lights 4 Headlamps (low-beam). To activate high-beam by pulling the turn signal lever towards you.
-
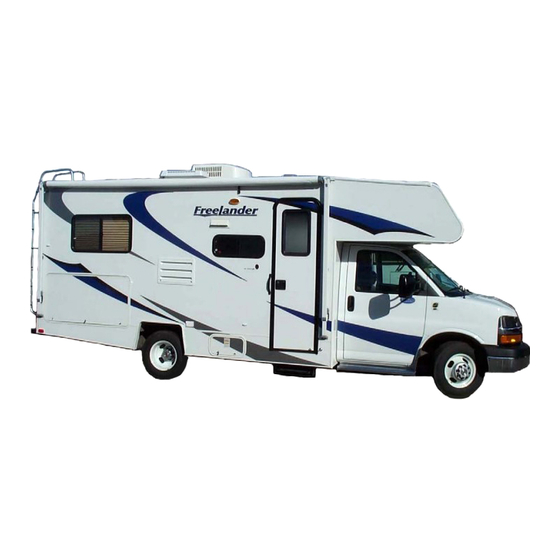
Page 19: The Motor Home Class C (P-Model Shown)
3.3. The Motor Home Class C (P-model shown) Ladder Air Conditioner TV Antenna Awning Storage 110V outlet LP Gas Entry step Spare tire in trunk Storage Water heater Storage Generator Fuel tank fill 110V cable Waste water outlet Furnace City water connection... -
Page 20: The Motor Home Class C (S-Model Shown)
3.4. The Motor Home Class C (S-model shown) Ladder Air Conditioner TV Antenna Awning Storage LP Gas Water heater Furnace Storage 110V outlet Entry step Slide out Awning Slide out Water fill Spare tire in trunk Storage Fuel tank fill Storage Waste water outlet Generator... -
Page 21: The Motor Home Class A (U-Model Shown)
3.5. The Motor Home Class A (U-model shown) Air Conditioner TV Antenna Awning Spare tire Water heater Storage 110V outlet Furnace Entry step LP Gas Slide out Slide out Awning Ladder Water fill Generator Fuel tank fill Waste water outlet Cable TV hookup 110V cable Storage... -
Page 22: Electrical System
3.6. Electrical System The motor home has 2 different electrical systems: 12 Volt DC (auxiliary batteries) and 110 Volt AC (on board generator or external power source). 12V system: Most electrical devices in the motor home run on 12 volt DC current: lights, fans, water pump, monitor panel, LP Gas detector, furnace, slide out (if equipped) and electric controls for the water heater, roof A/C and refrigerator. -
Page 23: Monitor Panel
reset the GFI by pushing the RESET button back in. It will only work if you have 110V supply otherwise it will not let you do it. How to reset a 110V circuit breaker: (sample with 20A A/C breaker) breaker is on “ON” breaker tripped flip breaker to “OFF”... -
Page 24: Generator
3.6.2. Generator All motor homes have an on board generator. It’s used to get 110V power if you do not have any other electricity source. It’s located in an outside compartment. The generator runs on gasoline of the main fuel tank. The fuel tank must be at least ¼... -
Page 25: Roof Air Conditioner
3.6.3. Roof Air Conditioner The roof air conditioner only works with 110V electricity hooked up or if the generator is running. Motor home: Ducted Roof A/C with thermostat on the wall. - Set the system switch (1) to COOL. - Set the fan switch (2) to AUTO (recommended) (fan operates cyclically) or ON (fan operates continuously). -
Page 26: Tv / Dvd Player
Hook up the external cable (Coax-cable) to TV cable hookup located on the outside of motor home. Note: cable is not provided by Road Bear RV. Make sure the antenna amplifier black button (1) is “OFF”. If left “ON” it will interfere with the cable TV signal. -
Page 27: Gas System
3.7. L.P. Gas System All motor homes are equipped with a propane gas system that provides LPG (Liquid Petroleum Gas / Propane) to the refrigerator/freezer, stove/oven, furnace and water heater. The propane tank is located outside the motor home in one of the compartments. The main valve located at the propane tank needs to be in the open position to operate the gas appliances. -
Page 28: Refrigerator - Norcold
In case the check light (3) is on, turn off the refrigerator (button 4), wait for 30 seconds and then turn it on again. Climate Control Switch, located on inside top (freezer section) must be on “OFF” position at all times. 3.7.4. -
Page 29: Furnace
3.7.6. Furnace All motor homes have a furnace or heater. You can operate and control the furnace with the thermostat. The furnace should not be used while driving. The blower fan of the furnace will drain the auxiliary batteries. The furnace runs on L.P. Gas and the fan of the furnace works off the house battery. -
Page 30: Plumbing System
3.8. Plumbing System 3.8.1. Fresh water During “dry camping” or on the road fresh water is available out of the onboard water tank. Water is transported to the faucets by means of the water pump. The “ON/OFF” switch is located at the monitor panel (some models have additional external switches in bathroom and/or outside. -
Page 31: Waste Water
3.8.2. Waste water The motor home has two separate waste water or holding tanks: - “grey water” – kitchen and bathroom sinks and shower - “black water” - toilet The holding tank drain valves are mostly on the left side of the vehicle. First you need to attach the sewer hose (located in one of the outside storage compartments) via the bayonet coupling to the outlet after removing the sewer outlet cap by a quarter turn. -
Page 32: Toilet
3.8.3. Toilet All motor homes are equipped with a flush toilet. Flushing the toilet requires water pressure from the internal water pump or city water connection. You need either the water pump to be turned on or city water hooked up. Flushing the toilet is done either by pulling the lever on the side of the stool or with the foot pedal. -
Page 33: Slide-Out Room
3.9. Slide-Out room The slide out (if equipped) is a great feature that allows you to greatly expand your living space while parked. Please follow these steps before operating the slide-out to assure proper function: 1. Make sure the motor home is level. Two levelers are stored in one of the outside compartments to simplify the task. -
Page 34: Awning
3.10. Awning unlock pull lever down loosen pull awning all the way out push spreader on both sides all the way out till they lock in tighten lock nut... - Page 35 Enjoy the shade! ATTENTION: - when it is windy retract or roll-up the awning - NEVER use awning during rain or gusty wind - NEVER leave awning unattended push spreaders all the way back to the motor home loosen lock nut pull grasp the pull strap, pull toward you, and flip the locking lever up to the ROLL UP / LOCK position lock...
-
Page 36: Troubleshooting
4. Troubleshooting 4.1. Electrical System ELECTRICAL 110V POWER Problem Cause Solution No electrical power to unit No power source Check breaker on campground or generator Circuit breaker may be off or Reset breaker(s) tripped Power cable unplugged Plug in cable into junction box for generator Bad power cord adapter Replace adapter... -
Page 37: Gauges & Instruments
MICROWAVE OVEN Microwave oven will not No power to microwave oven Check power supply and circuit operate breaker. Door open or closed incorrect Close door ELECTRICAL 12V POWER No power at all Check battery 12V power Turn battery disconnect on Reading low on the monitor Auxiliary battery is low recharge the auxiliary battery by... -
Page 38: Gas System
4.3. L.P. Gas System LP GAS / PROPANE GAS SYSTEM Problem Cause Solution Smell LP Gas in and/or Possible gas leak in system Extinguish any open flames, pilot around unit lights and all smoking material Do not touch electrical switches Shut off the gas supply at the tank valve Open doors and other ventilating... -
Page 39: Plumbing System
4.4. Plumbing System FRESH WATER SYSTEM Problem Cause Solution Fresh water tank will not fill Tank is already full Check the monitor panel no water Check water hookup or tank not filling water Make sure valves are in correct position Fresh water dripping under Tank full Set valves to correct city or water... -
Page 40: Disclaimer
Our employees are able to give you specific instructions. Please ask if you have any questions. This document is copyrighted by Road Bear RV and is not to be duplicated in any way without written consent by Road Bear RV.
Need help?
Do you have a question about the Class C 19-22' and is the answer not in the manual?
Questions and answers