Table of Contents
Advertisement
Quick Links
Advertisement
Table of Contents

Summary of Contents for Sherbourn CD-1
-
Page 3: Important Safety Precautions And Explanation Of Symbols
Connect the CD-1 only to power sources of the correct voltage (as shown in this manual and on the CD-1). Ensure that the Input Voltage selector switch on the rear of the CD-1 is set to the appropriate voltage. - Page 4 CD loading slot. Care should be taken so that small objects do not fall into the inside of the CD-1. You should seek service for your CD-1 by qualified service personnel if any of the following occur: 1. The power-supply cord or the plug has been damaged 2.
-
Page 5: Table Of Contents
Mechanical and Environmental ..............3 Inputs and Outputs ..................4 Installation Tips ...................5 Configuration ....................6 Performance Specifications ................7 Features .....................8 Operation ....................9 Periodic Maintenance ................11 Troubleshooting ..................12 Sherbourn Technologies, LLC Ten-Year Limited Warranty .......13 Important User Information ...............14 Notes ......................15 Page 1... -
Page 6: Introduction
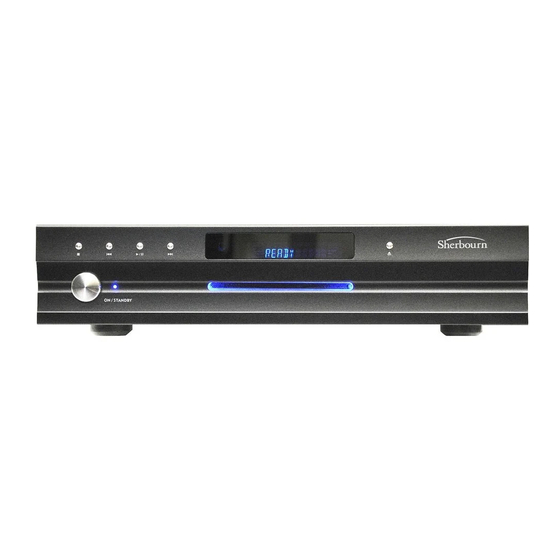
The CD-1 provides both balanced and unbalanced analog audio outputs, a full array of digital audio outputs, and a trigger input and output. The CD-1 includes a front panel VFD status display and an illuminated CD loading slot, and can be operated by either front panel pushbutton controls, or the included machined aluminum IR remote control. -
Page 7: Mechanical And Environmental
T1AL 250V for 115 VAC operation T500mAL 250V for 230 VAC operation Ventilation and cooling: While the CD-1 produces little heat, proper location and adequate ventilation should still be provided to prevent overheating due to heat generated by other components. Page 3... -
Page 8: Inputs And Outputs
Inputs and Outputs CD loading mechanism: Toshiba slot-load CD engine Analog outputs: Balanced audio (XLR), unbalanced audio (RCA) Output level (analog): 2 V RMS (7 V peak) Digital outputs: Optical (Toslink), XLR (AES/EBU), coaxial (RCA) Note: All audio outputs remain active at all times. Trigger and control: Trigger input (mono 1/8”), trigger output (mono 1/8”) Remote control:... -
Page 9: Installation Tips
The CD-1 is controlled primarily via IR remote control, and should be placed in a location where front panel visibility is good. If the CD-1 is installed in a location where front panel visibility is limited or blocked, a wired IR receiver and emitter should be used to relay the remote control signal reliably to the CD-1. -
Page 10: Configuration
Configuration Verify that the CD-1 is configured for the correct operating voltage for your area. (Voltage is set via the Input Voltage switch on the rear panel of the CD-1). Page 6... -
Page 11: Performance Specifications
Performance Specifications Types of media and data formats supported: • Standard (Red Book) prerecorded audio CDs • Standard audio CDs with HDCD™ encoded content • CD-R media with standard audio CD content • CD or CD-R media with MP3 content (single flat directory structure) CD loading mechanism: Toshiba slot-load CD engine Front panel controls and indicators:... -
Page 12: Features
Features The CD-1 combines the latest cutting edge technology with solid engineering and high quality components to deliver superior audio performance and features. Some of the more important features of the CD-1 include: • High reliability Toshiba slot load CD engine •... -
Page 13: Operation
Insert a Compact Disc gently into the slot loader. Allow the slot loader to take the disc from your hand; there will be a short delay. (If the CD-1 does not say READY at power up, a disc is already in the player. -
Page 14: Disc Handling
Press the Repeat button again and REPEAT ALL will appear on the display. This will cause the disc currently in the CD-1 to repeat. • Press the Repeat button a third time and REPEAT OFF will appear on the display and the CD-1 returns to normal playback functions. Changing what is shown on the display •... -
Page 15: Periodic Maintenance
If necessary, the CD-1 should be cleaned gently with a soft rag. • If something sticky gets on the front panel or case of the CD-1, it should be cleaned with a mild cleaning solution applied to a soft rag, followed by wiping with a clean rag dampened with plain water and drying with a soft dry rag or cloth. -
Page 16: Troubleshooting
(if a switched outlet was used, verify that it is On) • Verify that the Input Voltage switch on the rear panel of the CD-1 is set to the correct voltage Problem: The CD-1 does not load a disc when it is partially inserted •... -
Page 17: Sherbourn Technologies, Llc Ten-Year Limited Warranty
(including the PT-7030, PT-720C4, and PT-7020), preamplifiers (including the PRE-1), and the CD-1 CD Player (with the exception of the slot load CD engine) are covered by this warranty for five (5) years from the date of retail purchase by the original purchaser; and (2) electromechanical... -
Page 18: Important User Information
“RMA” written before the number. Parcels arriving without a RMA number on the outside of the box will be refused. Sherbourn Technologies, LLC Attn: Repair Department 135 Southeast Parkway Court... -
Page 19: Notes
Internal Laser Radiation Emission Parameters: Wavelength 790nm (+-15nm) CW power for classification <290uW Wavelength 650nm (+-10nm) CW power for classification <311uW No laser radiation above Class 1 levels accessible to user. Label Data: “Class 1 Laser Product” (explanatory label) location: Rear Panel Manufacturer’s ID &...
Need help?
Do you have a question about the CD-1 and is the answer not in the manual?
Questions and answers