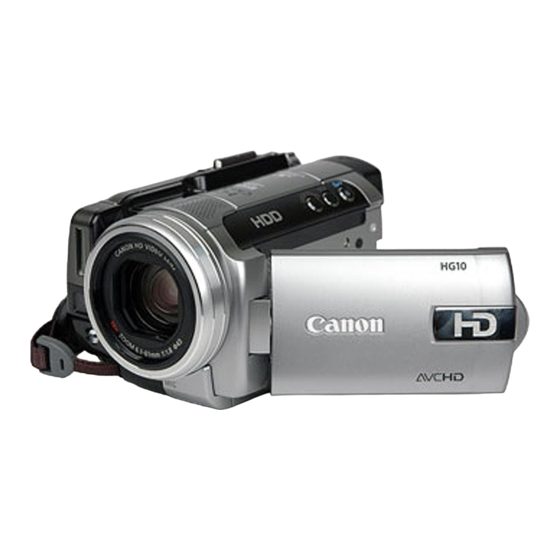
Canon HG-10 Quick Reference Manual
High definition hard disk camcorder
Hide thumbs
Also See for HG-10:
- Instruction manual (148 pages) ,
- Brochure (3 pages) ,
- Software manual (60 pages)
Table of Contents
Advertisement
Quick Links
Quick Reference Guide
High Definition Hard Disk Camcorder
Please remember to TRANSFER YOUR FOOTAGE OFF THE CAMERA before
returning it to the media lab.
The Canon HG-10 is a tapeless camcorder. All footage is recorded onto a hard drive that is built into
the camera. This has many advantages, two of which are no more money spent on tapes and a much
easier and faster capturing process for editing. However, you need to be extra careful with the
camera because there are no tapes - any carelessness or harm to the camera will not only damage
the camera (and cost you money) but also destroy all your footage. You will also need to be very
diligent with keeping back up copies of your footage files on your
external hard drives and/or DVDs.
Files are easier to be misplaced and corrupted than tapes are, so
please be smart about your recording and be organized with your files!
(Please see the Transferring Footage Instructions for more information.)
to the
Canon HG-10
(See Transferring Footage Instructions)
Quick Reference Guide to the Canon HG-10
UB Media Lab
1
Advertisement
Table of Contents

Related Manuals for Canon HG-10


Summary of Contents for Canon HG-10
-
Page 1: Quick Reference Guide
(See Transferring Footage Instructions) The Canon HG-10 is a tapeless camcorder. All footage is recorded onto a hard drive that is built into the camera. This has many advantages, two of which are no more money spent on tapes and a much easier and faster capturing process for editing. -
Page 2: Canon Hg-10 Item List
5. Remote Controller 6. XLR-mini Cable 7. USB2 Cable (Please make it sure to check out the following items with Canon HG-10.) 8. HD Camera Quick Reference Guide (Manual Included) 9. #6 Tripod Quick Reference Guide to the Canon HG-10... -
Page 3: Table Of Contents
USING HEADPHONES P. 17 USING A MICROPHONE P. 17 USING THE BATTERIES P. 18 CHARGING THE BATTERIES P. 18 IMPORTING FOOTAGE P. 19 LOG AND TRANSFER IN FINAL CUT P. 20 Quick Reference Guide to the Canon HG-10 UB Media Lab... -
Page 4: Tour Of The Camera
3. Open the memory card slot cover. 4. Insert the memory card with the label facing up, all the way into the slot until it clicks. 5. Close the cover. Quick Reference Guide to the Canon HG-10 UB Media Lab... -
Page 5: On The Top Of The Camera
Underneath the viewfinder there is a small slider that will adjust the focus of the viewfinder. (This does not effect the focus of the camera’s lens, only the viewfinder.) Quick Reference Guide to the Canon HG-10 UB Media Lab... -
Page 6: The Back Of The Camera
RECORD START/STOP button. Below the record button is the AC Adapter port. To operate the camera using AC power, plug one end into here and the other into a wall outlet. Quick Reference Guide to the Canon HG-10 UB Media Lab... -
Page 7: Power Switch
Use CAMERA mode to record new footage and PLAY mode to review your footage. To Turn The Camcorder Off Turn the power switch (mode dial) back to OFF and the camera will shut down. Quick Reference Guide to the Canon HG-10 UB Media Lab... -
Page 8: Navigation
When the camcorder is set on PLAY mode there are five submenus within the MENU. 1. HDD Operations 2. Display Setup 3. System Setup 4. Date/Time Setup (Ignore this menu) 5. Close Quick Reference Guide to the Canon HG-10 UB Media Lab... - Page 9 PHONES. 4. Date/Time Setup (Ignore this menu) 5. Close Press “SET” to exit the MENU. You can also press the “FUNC.” button to exit and return to the playback screen. Quick Reference Guide to the Canon HG-10 UB Media Lab...
-
Page 10: Play Mode
Yes. The it will erase the clip – MAKE SURE NOT TO MOVE THE CAMERA DURING THIS PROCESS! Select Date Ignore this option. MENU Press SET to open the menu. Quick Reference Guide to the Canon HG-10 UB Media Lab... -
Page 11: Camera Mode
The camera works same as a digital still camera. Quick Reference Guide to the Canon HG-10 UB Media Lab... -
Page 12: Menu & Controls In Camera Mode
P: Program AE – This sub-menu allows you to switch between video capturing modes. Each mode has different options. (See the We recommend manual for more details.) using “P” mode. Quick Reference Guide to the Canon HG-10 UB Media Lab... -
Page 13: White Balance
• You should notice that the colors in the LCD screen have adjusted themselves. • When you zoom out the colors should look correct. If not you’ll have to repeat the procedure. Quick Reference Guide to the Canon HG-10 UB Media Lab... -
Page 14: Image Effect & D. Effect
XP = 9hr 30min of Recording Time. (See the manual for more information.) STILL I. REC – Leave this feature OFF. MENU – This sub-menu option brings up the full MENU for CAMERA mode. Quick Reference Guide to the Canon HG-10 UB Media Lab... -
Page 15: Camera Setup
24p and if all your footage is in 24p. Please note that this 24p is not the same as professional quality 24p.) SELF TIMER – OFF WIND SCREEN – A Quick Reference Guide to the Canon HG-10 UB Media Lab... -
Page 16: Adjusting Focus & Exposure
• Pressing the down arrow again (when you’re done with focusing) will take you back to the first menu. • Press SET to exit this menu. Quick Reference Guide to the Canon HG-10 UB Media Lab... -
Page 17: Using Headphones
“MIC” to reveal the microphone jack. • This is where you can plug in an external microphone. • (The Canon HG-10 has no manual audio controls – so you can not adjust the audio levels, the camera automatically manages them.) -
Page 18: Using The Batteries
To charge the battery, insert a battery to the camera and plug the camera into the wall using the AC adapter. A light will blink whiles it’s charging and stop blinking when the charging process is complete. Quick Reference Guide to the Canon HG-10 UB Media Lab... -
Page 19: Importing Footage
These are the only steps that you have to do before returning the camera - you can “Log and Transfer” in FinalCut Pro from the DVD. Quick Reference Guide to the Canon HG-10 UB Media Lab... -
Page 20: Log And Transfer In Final Cut
MUST USE an Intel Mac to do the Log and Transfer in Final Cut Pro - all non-Intel red dot Macs have been labeled with a by the name tag. Quick Reference Guide to the Canon HG-10 UB Media Lab...
Need help?
Do you have a question about the HG-10 and is the answer not in the manual?
Questions and answers