Advertisement
Advertisement
Table of Contents

Summary of Contents for bto plus deck2c
- Page 1 Manual for Use and Installation (a warranty card enclosed)
- Page 2 User manual (a warranty card enclosed) Version. 3.50 The contents of this manual can be changed without prior notice due to any change in the product. Printed images may differ from the actual images. Copying or distribution of the contents of this material without our written permission is forbidden.
- Page 3 Before Installation Ç Ã · ¯ ½ º µ ¥Å © 2c» ç ¿ ë Contents 1. Before installation 1. About Plusdeck2c 2. Product Information and Requirements 2. Installing Plusdeck2c 3. Plusdeck2c components 3. Connecting Plusdeck2c 4. Plusdeck2c specification and electromagnetic wave regulation 4.
-
Page 4: Before Installation
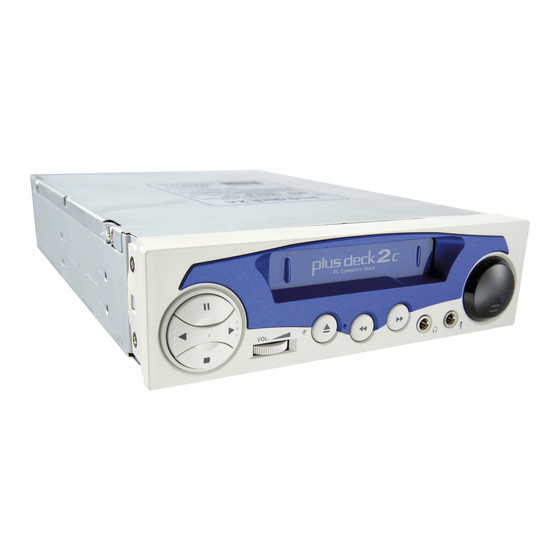
Part 1 Before Installation About Plusdeck2c Product Information Patent issue 0390012/International patent PCT/KR01/1567 It uses normal type cassette tapes. Registration of design 30-2001-0034551 It is a cassette deck for PC. Registration of program 2001-01-23-4046 It has software controlled full logic mechanism. It is assembled with a high quality Japanese deck and audio mechanism to deliver Best prize of the second Digital Innovation/Success Design of KIDP (Korea Institute CD quality sound. - Page 5 Part 1 Before Installation Plusdeck2c components Plusdeck2c Specification Size (W H D): 145 40 215mm Check all following components are in the box. If you find any component missing or Tape speed: 4.75Cm/sec damaged, contact the distributor or manufacturer. Wow & Flutter: 0.09%(WRMS) Plusdeck2c main body 20 pin cable Frequency response: 20 ~ 18,000Hz...
-
Page 6: Table Of Contents
Part 1 Before Installation Installing Plusdeck2c Suggestions when installing and using Plusdeck2c. Make sure that the power is off during the installation. A caution should be given with the sharp edges inside the PC 1 Make room for the installation Do not leave other materials or do not touch other parts inside the PC. -
Page 7: Make Room For The Installation
Part 2 Installing Plusdeck2c Make room for installation Inserting Plusdeck2c 1.Fully insert the Plusdeck2c into an empty 5.25”bay. Caution 2.Make sure that the back of the Plusdeck2c does not touch other PC components. Turn the power of PC off before installing. 3.For some PC models, you may need a side bracket to hold the Plusdeck2c. -
Page 8: Connecting Power Cable
Part 2 Installing Plusdeck2c Connecting Power Cable Fixing Connection Card and Plusdeck2c 1. The internal power cable is shown in the picture on the left. 1.Fix the connection card at an empty slot of PC with a screw. 2. A 4 pin power cable supplies 5V and 12V. 2. -
Page 9: Closing Pc Case
Part 2 Installing Plusdeck2c Connecting Plusdeck2c Closing PC case 1.A completed cable connection inside PC is shown in the figure on the left side. 2.Close the PC case to finish the installation. 1. About the connection card 2. Connect serial cable 3. -
Page 10: Connecting Plusdeck2C
Part 3 Connecting Plusdeck2c About Connection card Connecting Serial Cable www.plusdeck.com... - Page 11 Part 3 Connecting Plusdeck2c Connecting to Soundcard 2. Advanced connection 1. Standard Connection The advanced connection is useful when a headphone set is used. The Connect the blue jack of the connectin card to the blue jack of the sound card headphone sound volume can be adjusted by the volume control located in the with the blue stereo cable.
-
Page 12: Getting Started
Part 3 Connecting Plusdeck2c Getting Started 3. Connecting to Soundcard Connect the pink jack(D) of the connection card to the pink jack of the soundcard with the pink stereo cable. 1. Starting PC 2. Checking power supply Caution 3. Checking tape playback sound If the advanced connection is not done, no sound will be heard through the headphone jack. - Page 13 Part 4 Getting Started Starting the PC Getting started with the Plusdeck2c Start PC after you plug the power switch on. After the installation and cable connection is finished, this section lets you test the setup and helps familiarize yourself with the Plusdeck2c operation. Problem/Solution - PC won’t start Check if the power cable is connected properly or power switch is on.
- Page 14 Part 4 Getting Started Checking the power supply to the Plusdeck2c Problem/Solution The tape should be inserted as shown in the picture on the left. When the power is not supplied or the power cable is not properly When the power is normally supplied to the Plusdeck2c, the tape connected, the Plusdeck2c will not operate.
- Page 15 Part 4 Getting Started Checking the tape playback sound Problem / Solution 2 After the tape is inserted, play the tape by pushing the playback 1. Check if Line In in the Recording control window is selected. button shown in the picture on the left side. Windows98 : Start 1 Control Panel 1 Multimedia 1 Audio 1 Click Sound playback If you don’t hear the tape sound, check the following problem/solution.
- Page 16 Part 4 Getting Started Installing Software 2. Start Installing 1. Methods of installation 1) Install over the internet Click Next Go to http://www.plusdeck.com Search for the latest version at DOWNLOAD menu Download the software 2) Install from a CD If you agree to te terms of the licence, Insert the Plusdeck2c installation CD in the CD-ROM drive click Next to continue the installation.
- Page 17 Part 4 Getting Started Running the software The software can be started by either double clicking the shortcut icon in the desktop or clicking start 1 Plusdeck2c Click Next When the software has started, the interface as shown on the left appears. The software is closed by clicking X on the upper right corner.
-
Page 18: Using Plusdeck2C
Part 4 Getting Started Using Plusdeck2c Problem / Solution Software will not run 1. The problem with the serial cable The serial cable is not properly connected. (See page 17) The serial cable you are using is not provided by us. (The Plusdeck2c uses 1:1 1. - Page 19 Part 5 Using Plusdeck2c Inserting the tape Caution Do not use the Following Tapes 1. Insert the tape as shown in the picture on the left. 1. Wet tapes(can cause rust in the deck) 2. If you push the tape gently, it is inserted by itself. 2.
- Page 20 Part 5 Using Plusdeck2c Plusdeck2c main body I : Headphone jack - You can hear all sounds from PC or tape sound using a 1. Command Buttons headphone set. A : Playback A side J : Microphone jack - You can connect an external microphone to this port. It supports mono and stereo microphone.
- Page 21 Part 5 Using Plusdeck2c Plusdeck2c main body 1. Deck control buttons 2. LED indicator - Control buttons for playing the tape on the PC LED lights(1 red, 2 green) show the status of the Plusdeck2c operation. Condition Nothing No tapes Gray shows flickered Tapes are inside Play side A...
- Page 22 Part 5 Using Plusdeck2c 2. Converting and Recording 1. file setting Press Configure to open the file setting window. Digital files are generated using A, B, and C control buttons. ¨ ç ¨ è ¨ é ¨ ê ¨ ë A (Configure) : File setting can be changed.
- Page 23 Part 5 Using Plusdeck2c A-2(Type) specifies file format A-3(Auto Cut) One file option generates an entire tape in one file. Files option ¨ ç ¨ è ¨ é ¨ ê ¨ ë ¨ ç ¨ è ¨ é ¨ ê ¨...
- Page 24 Part 5 Using Plusdeck2c 2. Convert button in B convert the tape to digital files 3. Save button in C records PC output sound to digital files All output sounds from the PC, such as, internet radio, CD, DVD, can be This is the main funtion of the Plusdeck2c.
-
Page 25: Getting More Out Of Plusdeck2C
Part 5 Using Plusdeck2c Getting more out of Plusdeck2c 3. Menu list ®Á Shows the version of the current software. ®Ë ®È Directs you to the online manual. ®Í 1. Deck operation ®Î Directs you to the manufacturer’s web site. ®Ï... - Page 26 Part 6 Getting more out of Plusdeck2c Operating deck Note 1. Inset the tape as shown in the picture on the left and start the software. This section explains step by step 2. Try fast forward or fast rewind to check the tape condition. 1.
- Page 27 Part 6 Getting more out of Plusdeck2c Converting the tape to digital files Problem/Solution 1 1. Insert the tape to be converted. In case there is no sound in created files, the sound card setting needs to be 2. Start the Plusdeck2c software. changed as shown in the picture on the left.
- Page 28 Part 6 Getting more out of Plusdeck2c Saving PC output sound as digital file Problem/Solution 2 1. Start the software. If the above step does not fix the problem, Line In of the sound card functions as 2. File setting can be changed by clicking Configure button. The setting does not Line Out or it is out of order.
- Page 29 Part 6 Getting more out of Plusdeck2c Problem/Solution Problem/Solution In case there is no sound in created files, the sound card setting needs to be The name Stereo Mix may be called differently in some sound cards. The item changed as shown in the picture on the left. which corresponds to Stereo Mix must be selected.
- Page 30 Part 6 Getting more out of Plusdeck2c Optimizing Sound Quality 2. Controling tape playing sound 1. Understanding Sound Card Setting There are two sound control panels - one is master volume control panel which controls output sound and the other is recording control panel which controls input sound.
- Page 31 Part 6 Getting more out of Plusdeck2c 3. Controling volume level when converting the tape 4. Controlling volume level when saving PC output sound 1. Line In volume level in Recording control panel controls the input volume level 1. Stereo Mix volume level in recording control panel controls the input volume level. Note 2.
- Page 32 Part 6 Getting more out of Plusdeck2c Editing digital files 5. Getting rid of sound effect 1. It is very difficult to edit sounds in the tape but it is simple to edit converted files 1. Go to Start 1 Control Panel 1 Sounds and Audio devices. using a sound editing software.
- Page 33 Part 6 Getting more out of Plusdeck2c Warranty Card This product is manufactured under thorough quality control and test. If you have any question or suggestion, send an email to us at During the warranty period, you can get the product serviced by the distributor or manufacturer. (info@plusdeck.com).
- Page 34 5. We are not responsible for any damage done on the tape or computer caused by user mishandling or error. Product Serial number plusdeck 2c Purchased date Warranty period Within 1 year from Purchased place purchased Customers’ address Name Phone number Trouble particulars BTO Co., Ltd. www.plusdeck.com...
Need help?
Do you have a question about the plus deck2c and is the answer not in the manual?
Questions and answers