Table of Contents
Advertisement
Quick Links
Advertisement
Table of Contents

Summary of Contents for iNeo I-NA312N1-S
- Page 1 Model:I-NA312N1-S Network Attached Storage User Manual www.ineotechusa.com...
-
Page 2: Table Of Contents
Content Getting Started Product Specification……….. Networking Concept………. Package Contents …………………………...……. System Requirements ………………………….. Updating Your Operating System ……………… Handling Precautions…………………… Setting Up I-NA305N1 Front View …………… The information on LCD…………….. Hard Disk Drive Installation………… Connecting the NAS Connecting the Cables ………………. NAS Mode Enclosure Mode Powering Up the NAS ……..………... - Page 3 uShare Web Album IP Camera Web Server PHP BB Gallery...
- Page 4 Appendixes A: Mount NFS share in Linux B: USB Devices C: Remote Login FTP D: Printer Server E: Modify Password by User F: Map NAS G: Promise...
-
Page 5: Getting Started
3. All brands and products names referred to are trademarks of their respective holders. LIMITED WARRANTY In no event shall the liability of ineo Tech Computers, Inc. ineo exceed the price paid for the product form direct, indirect, special, incidental, or consequential software, or its documentation. ineo makes no warranty or... -
Page 6: Product Specification
Product Specification Chipset Solution Protocol Support Storlink 3516 ARM9 300MHz Networking: TCP/IP File Sharing: SAMBA, FTP Management: HTTP LAN Interface Data Transfer Rates: 10/100/1000 Mbps Connector Type: RJ-45 x 1port User Management User account management (no limit) ... -
Page 7: System Requirements
Networking Concept I-NA305N1 LAN to SATA HDD w/o WiFi RJ-45 Cable User Manual Power Adapter System Requirements... -
Page 8: Updating Your Operating System
Hardware ® Pentium II, 200 MHz equivalent or newer for IBM compatible PC ® PowerPC G4, 350 MHz or newer for PowerPC-based Apple Computer Core or newer for Intel-based Apple Computer Software Windows 98SE / 2000/ 2003 / XP / Vista / 7 ®... -
Page 9: Setting Up
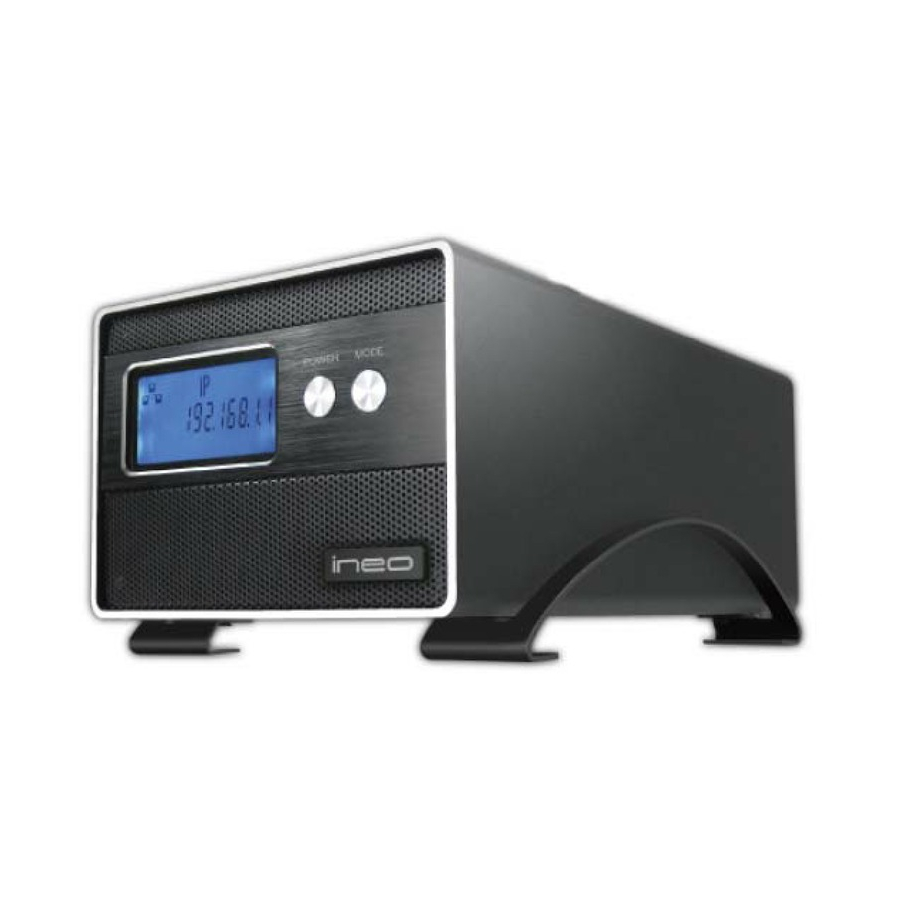
2. Setting Up You will need one or two 3.5 inch SATA Hard Disk Drives. Carefully follow the procedures to install the Hard Disk Drives into the NAS System. ineo |I-NA312N1-S Front View The Information on LCD Hard Disk Drive Installation... - Page 10 2. Please pull out the disk mounting tray from housing 3. Please connect SATA1 cable to the larger size hard disk drive (Install two SATA hard disk drives into the SATA Connectors on the disk mounting trays. If the hard disk driver does not have the same size, please place the lager hard disk drive to SATA1 cable.
- Page 11 4. Please place the hard disk drive into disk mounting tray and tighten up four screws from two sides Please connect SATA2 cable to the connector of the hard disk drive Please place the hard disk drive into disk mounting tray and tighten up...
- Page 12 four screw from two sides Please insert the disk mounting tray into the housing 8. Tighten up four screws at the bottom of the NAS 9. NAS installation complete...
-
Page 13: Connecting The Nas
3. Connecting the NAS Connecting the Cables 1. Connect the Power Adapter to DC IN. 2. Connect one end of the RJ-45 cable to the Ethernet port at the rear of the NAS. 3. Connect the other end of the RJ-45 cable to an available Ethernet port on your computer or router. -
Page 14: Overview
Overview All administrative tasks are performed through this web utility. The web utility can be accessed by any PC on the network by entering http://192.168.1.1 or http://stornas/ (stornas is the default hostname) in the PC’s web browser Address window. If your NAS is behind a router, you can get the IP address from the LCD panel onI-NA312N1-S. -
Page 15: Quick Setup
Quick Setup 1. Wizard: a. Setup Language: Select the appropriate language for users on your network. If multiple languages are used, select the most common. b. Password... - Page 16 c. Hostname Setting: In this field, you can enter a new Hostname for the NAS Link. Punctuation and some special characters can not be used in the name.
- Page 17 d. Internet Protocol Setting...
- Page 18 e. Time Settings f. Wizard Setting Confirmation.
- Page 19 2. Add User a. Step 1/3: Attention: To be able to set a quote the EXT2 or EXT3 file system has to be chosen for the data partition, because only the EXT2 or EXT3 file system supports that feature. If the data partition is formatted with FAT32, this option cannot be selected.
- Page 20 b. Step 2/3:...
- Page 21 c. Step 3/3: 3. Add Group: a. Step 1/3...
- Page 22 b. Step 2/3 c. Step 3/3...
- Page 23 4. Add Share: a. Step 1/3 b. Step 2/3...
- Page 24 c. Step 3/3...
-
Page 25: Users And Groups
Control Panel Users and Groups: In order to be able to control the Network access on the NAS, theI-NA312N1-S is able to setup access restrictions for user and group definitions. A user is a personal identifier authenticated by a password or a user can be part of one or more groups. So access rights can be defined for users or groups. - Page 26 b. Step 2/2: After having clicked on the “Save” button, the user account and the personal folder is created. Also the Samba network share (expression of the personal folder to the network) has been created and can be accessed using the username and password which has been defined.
- Page 27 Group you want the users to be deleted from in the “Exiting Groups” list and the “Group Members” form opens. Select the users you want to remove from the group and click on the “Remove>>” button. a. Step 1: b. Step2:...
- Page 28 1. File Server: A file server offers disk space to a network. The term server used to name a service offered to the network.I-NA312N1-S uses three different services to provide hard disk space to the network: Samba (Windows), FTP and NFS. The basic settings regarding these three services are done in the “File Server”...
- Page 29 Attention: Changing the FTP servers port from 21 (default) to another value will cause, that standard FTP client will not be able to access theI-NA312N1-S FTP server, except the changed port number is configured in the FTP client appropriately. NFS Server Setting Here the NFS Server can be enabled or disabled.
- Page 30 2. Share Management: In this section of the web management surface is defined how the hard disk drive storage is offered to the network. Here you can create folders, so called shares, and define the access rights for the different users or groups towards it.
- Page 31 a user or a group of users: “Read Only” and “Writable”. User/Group right Description Read Only The user is only allowed to read or copy a file or directory on the share. Writable The user is allowed to read, write or delete a file or directory on the share and also to create new files or directories.
- Page 32 a. Windows, FTP Access button...
- Page 33 b. NFS Access button...
- Page 34 3. Printer Server...
- Page 35 System: This section describes how to set up a basic system setting like those for network and time. TheI-NA312N1-S is by default configured to get its IP Address from a DHCP server. In the point “Network configured on fix IP-Address” is also described how theI-NA312N1-S network and time settings are changed with the web surface.
- Page 36 2. Wireless Settings: To enable wireless, check the option of “Wireless Enabled” and change the “SSID” & “Wireless Mode”, and then click on “Save” button.
- Page 37 3. Time Settings...
- Page 38 4. Turn Off Server: In some cases it might be necessary to restart or even turn off theI-NA312N1-S. This could be done via the web interface.
- Page 39 5. Information: To display some basic system information.
- Page 40 6. Disk Usages: To get a quick overview of the used and free space. a. Summary: For a brief overview on the usage of the complete disk, select “Summary” as described below. b. User: For a detailed listing per user, please select “User” as described below.
- Page 41 7. Error Notification: To check the “Disk Usage”, when the usage of disk approach 90%, the system will notify administrator. To check the “Windows File Sharing Server”, the system will notify administrator when there is any problem. To check the “FTP Server”, the system will notify administrator when the FTP Server goes wrong.
- Page 42 8. Wireless USB dongle A. Login NAS > Control Panel > Maintenance > Software Update > Browse… B. Please select “UsbWifi-1.0.2_090716.bz2” and click on “Open” button...
- Page 43 C. Please press “Upload” button. The system is going to reboot after upload process is finished. D. Go to the "Control Panel” > “System” > “USB Wireless Settings" page Insert USB Wireless dongle. Please wait 30 seconds later then see the setting web page.
- Page 44 Refresh: This button will search on the network's new wireless AP base station. Set Wireless IP Address: After saving settings, you will enter new login page.Please remove RJ-45 cable to start use wireless network. Now, please press remove button before remove USB dongle from NAS. Wireless USB Dongle Compatibility List Brand Model Name...
-
Page 45: Network Service
Network Service 1. DHCP Server: To enable DHCP Server, please check “Enable Server” option. To setup DHCP IP Address Start or End, please input the IP Address into the field. To setup the maximum lease time from one hour to one week, please choose from drop down list. - Page 46 3. TorrentFlux(BT Download Function) Attention: To be able use this function, please upload the file of TorrentFlux.bz2 from CD to Software Update. The step for upload TorrentFlux.bz2 as following: 1. Click on Maintenance > Software Update > Browser Button 2. Choose the file of TorrentFlux.bz2 from CD 3.
- Page 48 4. uShare 1. Login NAS from web page. 2. Please install uShare page from Control Panel>Maintenance>Software Update...
- Page 49 uShare Package is uploading…. Once the package has been installed, the NAS will reboot. 3. Please login to NAS after reboot. You can check weather uShare is installed successfully or not by click on “Installed Software” button from “Control Panel>Maintenance>Software Update. The information table shows uNAS (uShare) is installed.
- Page 50 4. Now, you can copy your multimedia files into uShare folder on \\NAS-IP\public\media\ Please copy music files to music folder, photo files to photo folder, and video files to video folder. 5. Now, you can start browser your multimedia files from XBOX360. Note: The UI might be different please reference to your XOBX360 user manual for more information.
- Page 51 Select UPnP_NAS3000 from source list. Press Video folder. Select one of video from list and play the video.
- Page 52 B. Music: Please select UPnP NAS 3000 from source list. Please select one of method from list to browser.
- Page 53 Press play to start play music. C. Photo: Please select UPnP NAS3000 from source list.
- Page 54 Please select photo folder from list. Now, you can select photo to browse or run slideshow.
- Page 55 5. Web Album 5.1 Web Album Software Installation 5.1.1. Please click on Control Panel > Maintenance > Software Update 5.1.2. Please click on “Browse” button and choose “Web_Album” from CD then click on Open button.
- Page 56 5.1.3. Please press Upload button 5.1.4. The package is uploading...
- Page 57 5.1.5. After system reboot, you can click on Installed Software button to check the application is installed correctly. 5.2 Start Web Album 5.2.1 Please click on Control Panel > Network Service > Web Album. If default album port is using by your system, please change an available port web album.
- Page 58 5.2.2 Please enter user name and password created by “User Management” under “Users and Groups”. 5.2.3 Add Album(s) or Photo(s) Please click on “Add” button from link. In this section, you can create album or upload photo(s) and set album permission.
- Page 59 5.2.3.1 Create Album Before upload photos you must create at least one album. Please click on “Create Album” tab. a. Album Name: Please input characters or numbers into this column. b. Album Description: This column is only accepted characters and numbers. c.
- Page 60 (2) You can give a description of “Photo Title” and “Photo Description”. Please press “Browse” button. (3) Please press “Select Photo” to select photo or press “Back” to go back to previous page.
- Page 61 (4) Please choose photo from your computer. You can select one photo or click on “Ctrl+A” to select all photos and then please press open button. The photos only support jpg, gif and png. (5) Please click on “Upload” button to start upload photos or click on “remove”...
- Page 62 (6) When all of photos upload to web album, the screen will display “Upload Finish…!!”. Note: *. Upload Limitation: Max. 10MB *. All of the upload pictures will be compressed twice. For the first time compression, the resolution of the picture is 520X480 and the resolution of the second time compression is 120X100.
- Page 63 5.2.4 Public You can search photo or album in this section. Please input part of file name into search column and choose “Album or Photo” from drop down list then press “Search” button to start search. The result will display on right hand side column. 5.2.5 Personal In this section, you can delete album, modify album description, modify photo, modify info, set photo as album...
- Page 64 5.2.5.2 a. Modify Info: You can type a short note for the photo in “Description” column and choose “Modify Info” from drop down list then press “Submit” button.
- Page 65 b. Set as Cover: After you choose the photo from list, you can click on “Set as Cover” from drop down list and press “Submit” button. c. Change Album: You can move the photo to another album. First, select a photo and click on “Change Album” from drop down list and click on album from list.
- Page 66 d. Delete Photo: Please select one photo and click on “Delete Photo” from drop down list and press “Submit” button. 5.2.6 Guest Login Guest user is only authorities to browser “Public Album” without any setup privileges. Guest user can view all albums, photos and search album or photo.
- Page 67 6. IP Camera 1.1 Surveillance Software Installation 1.1.1. Please click on Control Panel > Maintenance > Software Update...
- Page 68 1.1.2. Please click on “Browse” button and choose “Survillance-1.6” from CD then click on Open button. 1.1.3. Please press Upload button 1.1.4. The package is uploading...
- Page 69 1.1.5. After system reboot, you can click on Installed Software button to check the application is installed correctly. 1. 2. IP Camera’s Control Panel 1.2.1 Please follow the user manual of IP Camera to install IP Camera. After the IP Camera has been setup correctly, please click on the link under “Control Panel >...
- Page 70 1.2.2 If you are first time connect to IP Camera, you have to setup the required columns. a. Name: Give a nick name for IP Camera. b. User Name: The default name is admin. If you would like to use other name, please press “Control”...
- Page 71 d. IP: Once the IP Camera connects correctly, the user just click on drop down list, the system will automatically detect IP address. e. Profile Use: After you setup schedule, you can choose one of the schedules from drop down list. f.
- Page 72 1.3.3 Please enter profile name and click on “Save” button. 1.3.4 Please select one of the schedule names from list and the setup menu will show up. 1.3.5 Please input “Start Time” and “End Time” and choose one of weekdays then press “Add”...
-
Page 73: File Manager
c. Time List: Display the period of time that you have assigned within the selected weekday(s). Click “Copy this to all weekdays” to assign the same period of time to every weekday(s). Press “Delete this from all weekdays” to remove the selected period from every weekday(s). - Page 74 c. Manage: If any recorded files in here, you can click on Play, Download or Del. If Windows Media Player can not display “.avi” file, please install codec first. The example codec for “.avi” file is http://www.divx.com/, besides you also can install other codec support “.avi” file.
- Page 75 d. Default Capacity: The screen will display the maximum capacity. Users can input how many spaces for recording. e. Reach Default Capacity: Please choose “Stop” or “Recycle” for system. 1.5 Manual Recording You can press “Video” button to manual start recording. If you want to stop recording, just press “Press to stop…”...
- Page 76 1.5.2 When you press “Press to Stop…”, the IP Camera will stop record and note column will display file name. 1.6 Control When you press “Control” button, the pup up page will ask you to input user name and password. The default user name and password is admin/admin.
- Page 77 For more information about “Control”, please reference to the user manual of IP Camera. 7. Web Server A. Web Server Installation Login NAS > Control Panel > Maintenance > Software Update > Browse…...
- Page 78 Please select “Webserver-1.1-090710.bz2” and click on “Open” button Please press “Upload” button. The system is going to reboot after upload process is finished.
- Page 79 Control Panel > Network Service > Web Server B. Apache Configuration 1. Apache support multi virtual machines. This page shows currently setup virtual machine. Each virtual machine can be treated as an independent web host. 。ServerName: It is the domain name of currently web host. If a client wants to connect to a web host through domain name, the domain name must register from service provider.
- Page 80 。 Listen port: Please fill out the port number and press “Save” button. The system is going to notice if the port number has been used. 。 DocumentRoot: The drop down list is going to list all shared folders and the second drop down list is root directory.
- Page 81 Update: 。 Choose any ServerName from table and press Update button.
- Page 82 。ServerName and ServerAlias can be modified. 。 Listen port can NOT modify because the port number is listening. 。 DocumentRoot also can be modified. 3. Delete: 。Delete Virtual Machine: The delete function is only removing setup values but not delete directories and files.
- Page 83 2. Add: 。Administrator Name: The user name of administrator. 。Host Allowed: The host name allows connect to MySQL. 。Password: The password of login database. 。Save: When press save button, the system is going to verify user name is used or not. 。ClearForm: Remove all data in the columns.
- Page 84 Default User Name: root / Password: 123456 Create new database Create the new database name display on left hand column...
- Page 85 E. Sample To verify the apache server is working normal. E-1、 Login: admin/admin E-2、Message Page...
- Page 86 F. Read Help 8. PHP BB Installation Step: 1、 Create a new virtual machine in Web Server as following:...
- Page 87 Note: The folder name is going to create after user gives the name in DocumentRoot. 2、 Please select the writeable check box. 3、When apache server is created, please go to “Mysql Configuration” page to create a user as following:...
- Page 88 4、 Press “phpMyAdmin” link to create a database named as phpbb. 4-1 Please login in to phpMyAdmin...
- Page 89 4-2 Please create a database 5、Compress “phpbb3.0.4_zh_phpbbchina.zip” and copy the files under “phpbb3.0.4_zh_phpbbchina” to \\public\phpbb\. 6、 Please enter IP address such as192.168.1.30:8090. 7、 PHP BB setup page as following:...
- Page 90 8、Please click on INSTALL tab and press “Proceed to next step” button. 9、Please press “Start Install” button at the end of the page.
- Page 91 10、Please fill out database configuration and press “Proceed to next step” button. The “database server port” column accepts empty value. 11、The connection test is successful. Please press “Proceed to next step” button.
- Page 92 12、Please fill out administrator configuration and press “Proceed to next step” button. 13、Administrator setting pass test. Please press “Proceed to next step” button. 14、Please press “Download” button and upload the file following the instruction and press “Done” button. 15、Please press “Proceed to next step”. 16、Please browse to the bottom and press “Proceed to next step”.
- Page 93 17、Please press “Proceed to next step”. 18、PHP BB is successfully installed. 19、Please rename “install” folder under \\NAS-IP\public\phpbb\ in order to login phpBB. Any folder name is acceptable.
- Page 94 20、Please input IP address to the link of browser. 9. Gallery A. Gallery Installation 1. Please press “Add” button from “Control Panel>Network Service>Web Server>Add...
- Page 95 2. Fill out empty columns for virtual host 3. Please press Add button from “ControlPanel>WebServer>MysqlConfiguration Tab” and create a new user.
- Page 96 4. Please create a new database named “gallery” by press phpMyAdmin . 5. Please use the user name and password which created from “Mysql Configuration” to login phpMyAdmin. 6. Please create new database called gallery and press “Create” button. 7. Please compress gallery-2.3-full.zip and copy all of data to \\NAS-IP\Public\Gallery.
- Page 97 8. Please input http://NAS_IP:PortNumber (ex:192.168.1.165:8091) to address link on browser and press “Begin Installation” button. 9. Please create a new text file called login.txt in the gallery directory on your web server and it must contain the randomly generated characters as following.
- Page 98 11. Please press “Continue to step 3” button. 12. Please press “Continue to step 4” button.
- Page 99 13. Please press save button. 14. Please press “Continue to step 5”. 15. Please fill out empty columns and press save button.
- Page 100 16. Please press “Continue to step 6” button. 17. Please enter the user name and password for admin and press create button. 18. Please press “Continue to step 7” button. 19. Please press “Continue to step 8” button.
- Page 101 20. Please press “Continue to step 9” button. 21. Please press “Activate Selected Modules” button. 22. Please press “Continue to step 10” button.
- Page 102 23. Please press “Continue to step 11” button. 24. Please press “Continue to step11” button. 25. Please press “Go to my Gallery” button.
- Page 103 - Maintenance: The Maintenance submenu bundles tools for the hard disk setup, RAID setting, firmware upgrade, save or restore the configuration and a factory reset. 1. Disk Utility: When adding a new hard disk drive, please format the hard disk drive fist, and users can choose encrypt or not.
- Page 104 * When setup two hard disk drives toI-NA312N1-S, users can create their RAID system (please refer to the screen shown below).
- Page 105 RAID 0 Under this mode, the capacity of the hard disk drive is sum of two hard disk drives. For example, one of the hard disk drive is 250GB and the other one is 80GB, after create a single large virtual partition, the capacity under RAID 0 mode is around 302GB.
- Page 106 Linear RAID-Linear is a simple concatenation of partitions to create a larger virtual partition. It is handy if you have a number small drives, and wish to create a single, large partition. This concatenation offers no redundancy, and in fact decreases the overall reliability: if any one disk fails, the combined partition will fail.
- Page 107 3. Firmware Upgrade:I-NA312N1-S is constructed to allow a complete upgrade for the firmware. The upgrade starts by selecting the upgrade file, which has to be located on the local hard disk. By clicking on the “Browse…” button a dialog pops up where you are able to select the file. When having selected please click on the “Start Upgrade”...
- Page 108 4. Save Configuration: TheI-NA312N1-S offers an opportunity to save all settings been made to disk and restore them if necessary.
- Page 109 5. Restore Configuration: To restore all configurations, please click on the “Browse…” button. A dialogue is opened where you can select the configuration file. Click on the “Restore” button to start the restore process.
- Page 110 6. Factory Reset: A factory reset may destroy all data on the disk. Please backup all important data before you proceed resetting.
- Page 111 7. Software Update: It is for you to upload a new package for the NAS. For example, you can upload TorrentFlux.bz2 from CD to Software Update. The step for upload TorrentFlux.bz2 as following: Click on Maintenance > Software Update > Browser Button ii.
- Page 112 - Log File 1. Samba Log...
- Page 113 2. FTP Log...
- Page 114 3. DHCP Server Log 4. System Log...
- Page 115 5. Administration Log...
- Page 116 5. Appendixes A: Mount NFS share in Linux In the Unix world the NFS protocol is common to share disk space via network. This protocol could be used to mount natively network storage to all kinds of Unix operating systems such as Linux, Solaris, etc. The NFS protocol is fast but does not provide a user or group based access control server sided.
- Page 117 Hub, USB Printer, USB Stick or USB External Hard Disk drive. Supported File Systems As on the internal hard disk drives,I-NA312N1-S supports EXT2, EXT3, FAT32 and NTFS on external mass storage devices.I-NA312N1-S supports only one partition per mass storage device. If the mass storage device has more than one partition, only the first partition will be recognized.
- Page 118 interface of theI-NA312N1-S, it will automatically be recognized and a share containing the first partition of the external USB mass storage device will be created and presented to the network without any password restriction. The name of the share is “USB<number>, where <number> is a number counted up from 1 in the chronological order of attachment.
- Page 119 To activate or deactivate the printer server please select Control Panel > File and Print > Printer Server. I-NA305N1 is able to share an attached printer to all computers in the local network. If the printer is connected and the Printer Server has been enabled, it is possible to print from any computer connected in the local network on the printer attached to theI-NA312N1-S.
- Page 120 5. Choose the driver for your printer if the printer is not in the list, please contact your printer supplier 6. Go to Printers and Faxes and you can see the Printer Server has been added into the list...
- Page 121 E: Modify Password by User A user can login to web utility to change the password created by administrator. The step to change the password as following: 1. Type IP address forI-NA312N1-S into address link on browser, such as http://192.168.1.15 2.
- Page 122 3. Click on Personal Information > Account 4. Enter New Password into “Change Password” fields 5. Click on Save button 6. Click on Refresh button...
- Page 123 F: Map NAS 1. To Map Network Drive, click on Start Run Enter the IP of the NAS such as \\192.168.1.15 and click on OK button. 2. Right click on the folder you want to map and click on Map Network Drive from right click menu.
- Page 124 3. Choose a driver from drop down list and click on “Finish” button. 4. Now, you can access NAS directly from My Computer.
-
Page 125: Regulatory Compliance
G: Promise Regulatory Compliance Copyright Notice All title, copyright and other intellectual property rights in and to any ineo Tech Products, the “Products” or “Product” (including but not limited to product design and appearance, firmware, and any relevant media, images,... -
Page 126: Warranty Information
Tech personnel. Obtaining Service ineo Tech values your business and always attempts to provide you the very best of service. If the Product requires maintenance, either contact the detailer from whom you originally purchased the Product or visit our product support Web site at http://www.neo2tech.com for information on how to obtain a... - Page 127 Product placed in its possession. One Year Limited Warranty ineo Tech warrants that the Product, in the course of its normal use, will be free from defects in material and workmanship for a period of one (1) year and will conform to ineo Tech specification therefore.
- Page 128 Downloads - Download installation software and drivers. Contact- Contact a support representative by email or phone. When contacting ineo Tech for support, have your ineo Tech product serial number, model number, system hardware, and system software version...
- Page 129 Thank you for choosing ineo Tech products!
Need help?
Do you have a question about the I-NA312N1-S and is the answer not in the manual?
Questions and answers