Chapters
Table of Contents
Troubleshooting

Summary of Contents for QuantumFX PDT-91
-
Page 1: Instruction Manual
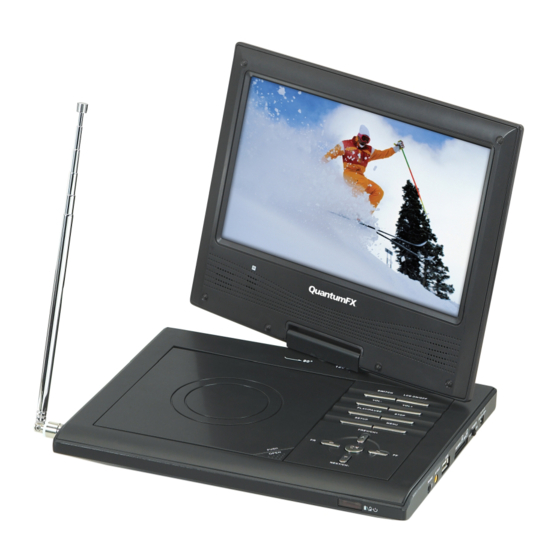
9" FULL COLOR TFT LCD SCREEN MULTI MEDIA PLAYER Model No.: PDT-91 Instruction Manual BEFORE USING THIS PRODUCT, READ, UNDERSTAND, AND FOLLOW THESE INSTRUCTIONS. Save this booklet for future reference. -
Page 2: Safety Information
Safety information CAUTION: DVD/VIDEO CD/CD PLAYER IS A CLASS 1 LASER PRODUCT. HOWEVER THIS DVD/VIDEO CD/CD PLAYER USES A VISIBLE LASER BEAM WHICH COULD CAUSE HAZARDOUS RADIATION EXPOSURE IF DIRECTED. BE SURE TO OPERATE THE DVD/VIDEO CD/CD PLAYER CORRECTLY AS INSTRUCTED. WHEN THIS DVD/VIDEO CD/CD PLAYER IS PLUGGED TO THE WALL OUTLET, DO NOT PLACE YOUR EYES CLOSE TO THE OPENING OF THE DISC TRAY AND OTHER OPENINGS TO LOOK INTO THE INSIDE OF THIS PLAYER. - Page 3 Read all instructions before using l Do not use this product near water. l Do not ceiling- or wall-mount the product. l Install the product in accordance with the operating instructions. l Do not set the product near heat sources, such as radiators, heat registers, stoves, or other apparatus (including amplifiers) that produce heat.
-
Page 4: Disc Handling And Maintenance
DISC handling and maintenance Handling precautions Hold the disc by the edges so the surface will not be soiled with fingerprints. Fingerprints, dirt and scratches can cause skipping and distortion. Do not write on the label side with a ball-point pen or other writing utensils. Do not use record cleaning sprays, benzine, thinner, static electricity prevention liquids. -
Page 5: Table Of Contents
Table of contents Getting Started: Safety information..……………………… ……………………………………………..…..1-2 Disc handling and maintenance……………………… ………………………..……………3 Accessories...…………………………………… ………………………....…...…..……3 Features...…………………………………………………………....………………..…5 Control reference guide....………………………………………...……………..… 6-7 Basic connection……… ……………………………………………………………....…8-9 Remote control preparation ……… ………………………………………… ……………..10 DVD Operations: Basic play………………………………………………....……………………………11 Stopping play………………………………… ……………………………………………………12 Skipping ahead or back……… ………………………………………… ………………..…12 Fast forward or backward………………... -
Page 6: Features
Features 9" TFT DISPLAY This player has a built-in 9" TFT display window to provide clear vision and low radiation. WITH RECHARGABLE LITHIUM BATTERY USB/CARD READER FUNCTION This player can play USB/SD/MMC/MS card containing files in VCD/SVCD/DVD/MUSIC/ MOVIE/WMA/JPEG /CD format. (Note: The USB port of the unit cannot connect to removable HDD.) MULTI TV SYSTEM SUPPORT The player can play discs with signal system of PAL and NTSC. -
Page 7: Control Reference Guide
Control reference guide Main unit 1 TFT display window - Displays all to left, and if you keep pressing it for more information about DVD work scene. than 2 seconds, the player will play the 2 Remote control sensor disc backward at speed:x2,x4,x8,x16,x32. 3 Built-in speakers 15 RIGHT/FF button - Press RIGHT 4 OPEN button- Press this button to open... -
Page 8: Remote Control
Control reference guide Remote control 1 MUTE – To mute the sound. 2 INVERSION BUTTON - To invert the picture which played. 3 NUMBERIC buttons - To input the numeric information, such as track number, channel number and so on. 4 FF button- To play the disc forward at speeds: x2,x4,x8,x16,x32. -
Page 9: Basic Connection
Basic connection Ensure all the cables are disconnected from the main unit before connecting to AC power source by AC power adaptor. Read through the instructions before connecting other equipment. Connecting to AC power source To power outlet Main unit NOTE: Before connecting to AC power, push the POWER ON/OFF switch to OFF. - Page 10 Connecting to TV set To video input connector (yellow) To audio input connectors (red, white) Video/audio cable To AV OUT jack Connecting to external signal sources Recorder/DVD To video input connector (yellow) To audio input connectors (red, white) Video/audio cable Connecting to audio equipment Audio equipment To audio input connector (red, white)
-
Page 11: Remote Control Preparation
Remote control preparation Battery installation Insert the batteries while observing the correct (+) and (-) polarities as illustrated at right(Fig 1). Service life of battery The battery normally last for about one year although this depends on how often, and for what operations, the remote control is used. -
Page 12: Dvd Operations
DVD operations Before enjoying DVD/Video CD/CD The On-Screen menu language of your player has been factory pre-set to Spanish. If you want to change the menu language to other language, please refer to "Initial settings / General setup / OSD lang". In the explanation below it is assumed that English has been selected as menu language. -
Page 13: Stopping Play
Stopping play Press the STOP button to stop playing a disc. NOTE: When player is stopped, the player records the point where STOP was pressed (RESUME function). Press PLAY again, playback will resume from this point. When the tray is opened or STOP is pressed twice, the RESUME function will be cleared. -
Page 14: Slow-Motion Play [Dvd/Vcd]
Slow-motion play (DVD/VCD) Press the SLOW button during playback. 1) Plays the disc at a 1/2 of normal speed at first. Each time the button is pressed, the play speed becomes 1/4,1/8,1/16. 2) Press PLAY button, the unit will return to normal play. Music playback 1. -
Page 15: Movie Playback
Movie playback 1. Insert the disc containing the files in MOVIE format to be played and after a few seconds, the screen of the monitor will show all the folders on the disc: 2. Select the folder you want to play by the navigation buttons and press the ENTER button to confirm. -
Page 16: Card Playback
Card playback 1. Insert the CARD(SD/MMC/MS) containing the files in VCD/SVCD/DVD/MUSIC/WMA/MOVIE/ JPEG CD format to be played. 2. Press USB/CARD/DVD button to switch the unit in CARD reader mode. 3. After several seconds, all the folders in the CARD will display on monitor screen: 4.Select a folder you want to play by using the navigation buttons and press the ENTER button to confirm. -
Page 17: Usb Playback
USB playback 1. Insert USB containing the files in VCD/SVCD/ DVD/MUSIC/WMA/MOVIE/JPEG format to be played. 2. Press USB/CARD/DVD button to switch the unit in USB reader mode. Then the screen will display as following: 3. After several seconds, all the folders in the USB will display on monitor screen : 4. -
Page 18: Jpeg Cd
Rotating pictures JPEG CD Press RIGHT navigation button to rotate For JPEG picture CD, select the folder you the picture clockwise. want to play by the navigation buttons and Press LEFT navigation button to rotate the press ENTER button to confirm. picture counter-clockwise. -
Page 19: Enjoying Video Cd With Playback Control
JPEG CD Press PROGRAM button to select one of the effects when changing from one picture to another: Slide show effects 1 WIPE TOP 2 WIPE BOTTOM 3 WIPE LEFT 4 WIPE RIGHT 5 DIAGONAL WIPE LEFT TOP 6 DIAGONAL WIPE RIGHT TOP 7 DIAGONAL WIPE LEFT BOTTOM 8 DIAGONAL WIPE RIGHT BOTTOM 9 EXTEND FROM CENTER H... -
Page 20: On Screen Display Information
On screen display information Press DISP button to display playing information. DVD disc VCD disc CD disc Program play The player plays the files in the desired order. 1. Press PROGRAM button and the screen will display the program menu. 2. -
Page 21: Repeat Play
Repeat play Press REPEAT button during play, it will repeat play one chapter or one title (for DVD disc), or repeat play track (for VCD/CD). DVD DISC REPEAT CHAPTER REPEAT TITLE REPEAT ALL VCD/CD DISC (In the PBC OFF mode) REPEAT TRACK REPEAT DISC A-B repeat play... -
Page 22: Changing Subtitle Language(Dvd Only)
Changing subtitle language (DVD only) It is possible to change the subtitle language to a different language from the one selected at the initial settings.( This operation works only with discs on which multiple subtitle languages are recorded) 1. Press SUBTITLE button during play, the screen will display the current language. -
Page 23: Viewing From Different Angle(Dvd Only)
Viewing from different angle (DVD only) Some DVDs may contain scenes which have been shot simultaneously from a number of different angles. For these discs, the same scene can be viewed from each of these different angles using the ANGLE button.Press ANGLE during play, number of angle being played will be displayed in the screen, press the button to change to different angles. -
Page 24: General Setup
1. GENERAL SETUP 1.1 TV TYPE - Color system of the TV selecting. 1.2 TV DISPLAY - It is for selecting TV output mode. Options: Normal /PS: Pan & scan mode Normal/ LB: Letter box mode Wide : 16:9 wide screen mode 1.3 ANGLE MARK - It is used to select whether or not the multi- angle icon is display on screen when a Multi-angle disc is playing. - Page 25 3. PASSWORD SETUP 3.1 PASSWORD - It is used to change the password, and the procedure of changing password is described as followings: Enter old password in the OLD PASSWORD row Enter new password in the NEW PASSWORD row Enter the new password again in the CONFIRM PWD row Press OK button on the screen to return to the Password Setup Page, then the password has been changed.
-
Page 26: Tv Operations
TV operations Turn on the unit 1. Press POWER switch at the right side of the unit to turn on the unit. 2. Press SWITCH button to set the unit in TV mode. Antenna operation External antenna Install external antenna into antenna jack for best reception. Basic operations - Press SETUP button on remote control to enter TV PAGE menu. - Page 27 SELECT WANTED PROGRAM 1. Press CH + button to enter next channel. 2. Press CH - button to enter previous channel. 3. Press numeric buttons on the remote control directly to select wanted program. Example : Track 9, press "9", three seconds later it will turn to track 9 automatically, or press ENTER button to confirm directly.
-
Page 28: Main Menu
MAIN MENU Common procedure for initial settings 1. Press MENU button. 2. Use the UP or DOWN button to select preferred page, then press RIGHT button to enter. Each page for setting the value will display. Then move the up or down button to select item and use left or right button to set. - Page 29 2.2 SKIP -Press up or down button to select skip item, then press left or right button to select on or off. ON: If SKIP is ON, channel number what you select will be skipped when selecting channel using the CH- or CH+ button. OFF: If SKIP OFF, all the channel numbers (the channels are stored in the unit) can be accessed using CH- or CH+ button.
- Page 30 Edge color - To change the edge color of the screen to gray, red, green, blue, yellow, navy, dark gray or black. Edge type - To change the edge type between raised, depressed, outline, L. Shadow, R. Shadow or None. BK color - Select the BK color between red, green, blue, yellow, navy, dark gray, black, gray.
- Page 31 Note: Blocking a rating affects all the higher ratings, so that blocking R in the example above automatically blocks NC-17 and X, whatever previous state of these ratings was. If a password is defined while a TV program warning is received for the current channel, sound is muted and the following menu is displayed on the center of screen;...
-
Page 32: System Setup
6. SYSTEM SETUP 6.1 FACTORY RESET -It is used to reset to factory settings. -Press up/down button to select this item, then press right button to enter. 6.2 TIME SETUP 6.2.1 Clock -The Clock displays the current time from programs.(this option is not user adjustable) 6.2.2 Time Zone -To set the time zone: Eastern, Samoa, Hawaii, Alaska, Pacific, Mountain, Central, Atlantic and Newfoundland. -
Page 33: Definition Of Terms
Definition of terms This refers to a high-density optical disc on which high-quality pictures and sound have been obtained by means of digital signals. DVD has a structure consisting of two 0.6 mm thin discs which are adhered to each other. Since the thinner the disc, the higher the density at which the information can be recorded, a DVD disc has a greater capacity than a single 1.2 mm thick disc. -
Page 34: Specifications
Specifications Power requirements: AC 100 -240V~ 50/60Hz DC12V 800mA adapter ≤9.6W Power consumption: Resolution: 640(RGB)X 234 Dots distance: 0.30975(W) X 0.4775(H) mm Visible range: 198.240 (W) X 111.735 (H) mm PLAYER: DVD / MOVIE/ JPEG / MUSIC / CD-DA Discs played: (1) DVD-VIDEO disc 12 cm single-sided,single-layer 12 cm single-sided,dual-layer... -
Page 35: Troubleshooting
Troubleshooting Before requesting service for this player, check the chart below for a possible cause of the problem you are experiencing. Some simple checks or an adjustment on your part may eliminate the problem and restore proper operation. Symptom(Common) Remedy No power Insert the AC adaptor securely into the power outlet. -
Page 36: Region Code Setting
Troubleshooting (Continued) Alternative audio soundtrack (or An alternative language is not selected with subtitle) languages fail to be discs which do not contain more than one selected. language. In the case of some discs, the alternative language can not be selected by operating the LANGUAGE or SUBTITLE button. - Page 37 Reproductor multimedia con pantalla TFT LCD COLOR COMPLETO 9’’ No. Modelo: PDT-91 Instructivo...
- Page 38 Información para su seguridad PRECAUCIÓN: Este reproductor DVD/VIDEO CD/CD es un producto laser clase 1. De cualquier modo, este reproductor DVD/VIDEO CD/CD utiliza un rayo visible de laser el cual puede causar exposición peligrosa a radiación, asegúrese de operar este reproductor DVD/VIDEO CD/CD correctamente como se muestra.
- Page 39 Lea todas las instrucciones antes de utilizar - No utilice este producto cerca de agua. - No instale este producto en el techo o en paredes. - Instale este producto de acuerdo a las instrucciones de operación. - No coloque este producto cerca a fuentes de calor como radiadores, calentadores, estufas o cualquier aparato (incluyendo amplificadores) que produzcan calor.
- Page 40 MANTENIMIENTO Y MANEJO DE DISCOS Precauciones de Manejo - Sostenga los discos por los bordes para que la superficie no se ensucie con huellas. Las huellas, rayones, o suciedad pueden ocasionar distorsión. - No escriba en ningún lado del disco con plumas u otros utensilios. - No utilice limpiadores en espray, tiner, diluyentes o líquidos estáticos de prevención de electricidad.
- Page 41 TABLA DE CONTENIDOS Iniciando: Información de seguridad......................1-2 Manejo y mantenimiento de Discos....................3 Accesorios..........................3 Características..........................5 Guía de Referencia de control remoto..................6-7 Conexiones básicas.........................8-9 Preparación del control Remoto....................10 Operaciones de DVD Reproducción básica........................11 Detener reproducción.......................12 Saltar hacia adelante o hacia atrás...................12 Adelantar o regresar.........................12 Pausar y reproducir........................12 Reproducción en cámara lenta (DVD/VCD)................13 Reproducción de música......................13...
-
Page 42: Características
Características Pantalla TFT 9’’ Este reproductor tiene una pantalla TFT 9’’ integrada para proveer una visión mas clara y baja radiación Con batería de litio recargable. Función de lectura de USB/Tarjetas Este equipo puede reproducir archivos contenidos en USB / tarjetas SD/MMC/MS que sean de formato VCD/SVCD/DVD/MUSIC/MOVIE/WMA/JPEG/CD. -
Page 43: Unidad Principal
Guía de Referencia Unidad Principal 1 Pantalla TFT: Muestra la información sobre equipo reproducirá el disco hacia atrás a las las escenas del DVD. siguientes velocidades: x2, x4, x8, x16, x32. 2 Sensor de control remoto 15 Derecha/Adelantar: Presione para ir a la 3 Bocinas integradas derecha, y si lo mantiene presionado por mas 4 Botón de Abrir: presione este botón para... -
Page 44: Control Remoto
Control Remoto 1 Silenciador: para desactivar el sonido. 2 Inversión: para invertir la imagen que se está reproduciendo. 3 Botones numéricos: para entrar información numérica, como número de canción, número de canal, etc. 4 Adelantar: para reproducir el disco hacia adelante a las siguientes velocidades: x2, x4, x8, x16, x32. -
Page 45: Conexiones Básicas
Conexiones Básicas - Asegúrese de que los cables estén desconectados de la unidad antes de conectarlos a la fuente e electricidad (AC) con el adaptador de energía AC. - Lea las instrucciones antes de conectar otro equipo. Conexión a la fuente de poder (AC) A la electricidad Unidad Principal Uso de batería recargable... - Page 46 Conexión a una television Conector de entrada de video (amarillo) Conector de entrada de audio (rojo, blanco) Cable Audio/Video Salida A / V Conexión a una fuente de señal externa Reproductor/DVD Conector de entrada de video (amarillo) Cable Audio/Video Conector de entrada de audio (rojo, blanco) Conexión a un equipo de audio Equipo de Audio Conector de entrada de audio (rojo, blanco)
-
Page 47: Preparación Del Control Remoto
Preparación de Control Remoto Instalación de batería Inserte las baterías asegurándose de las polaridades (+) y (-) en la ilustración (Fig. 1) Vida de las baterías - Las baterías duran normalmente un año, aunque depende de la frecuencia con que se use, y el uso que se le dé. -
Page 48: Operaciones De Dvd
Operaciones del DVD Antes de disfrutar DVD/Video CD/CD El menú de idioma en pantalla del reproductor, esta preestablecido a “Español”. Si quiere cambiar el idioma del menú a otro idioma, por favor refiérase a “Configuración inicial/ Ajustes Generales / Idioma OSD”. En la siguiente explicación se ha elegido “Español”. Reproducción básica 1. -
Page 49: Detener Reproducción
Detener la Reproducción Presione el botón de Detener para detener la reproducción de un disco. NOTA: Cuando la reproducción se detiene, el reproductor recordará el lugar donde se detuvo. Presione Reproducir otra vez, la reproducción iniciará desde dicho punto. Cuando la bandeja de discos se abre, o presiona el botón Detener dos veces, el reproductor no recordará... -
Page 50: Reproducción En Cámara Lenta (Dvd/Vcd)
Reproducción en cámara lenta (DVD/VCD) Presione el botón Despacio (Slow) durante la reproducción. 1) Reproducirá el disco a ½ de la velocidad normal, cada vez que lo presione la velocidad cambiará a ¼, 1/8, 1/16. 2) Presione el botón de Reproducir, la unidad volverá... - Page 51 Reproducción de una Película 1. Inserte un disco que contenga archivos de Formato de película (MOVIE), unos segundos después la pantalla mostrará las carpetas en el disco: 2. Seleccione la carpeta que quiere reproducir con los botones de navegación y presione el botón de confirmación (Enter) para confirmar.
-
Page 52: Reproducción De Tarjetas
Reproducción de Tarjetas 1. Inserte la tarjeta (SD/MMC/MS) que contenga archivos de formato VCD/SVCD/DVD/MUSIC/WMA/MOVIE/JPEG CD 2. Presione el botón USB/Tarjeta/DVD para ir al modo de lectura de Tarjetas 3. Después de algunos segundos, se mostrarán las carpetas en la pantalla: 4. -
Page 53: Reproducción De Usb
Reproducción de USB 1. Inserte una USB que contenga archivos de formato VCD /SVCD/ DVD/ MUSIC/ WMA/ MOVIE/ JPEG. 2. Presione el botón USB/Tarjetas/DVD para cambiar al modo de lectura USB. 3. Después de unos segundos, la pantalla mostrará las carpetas que estén en la USB. 4. -
Page 54: Cd Jpeg
Rotar Imágenes CD JPEG - Presione el botón de navegación derecho Para CD de imagen JPEG, seleccione la para rotar la imagen en el sentido de las carpeta que desea reproducir con los manecillas del reloj. Presione el botón de botones de navegación y presione el botón navegación izquierdo para rotar la imagen en de confirmación (ENTER) para confirmar. -
Page 55: Ver Cd De Video Con El Control De Reproducción
JPEG CD Presione el botón PROGRAMAR para seleccionar uno de los efectos al cambiar de una imagen a otra: Efectos de diapositivas: 1 Borrarse por arriba 2 Borrarse por abajo 3 Borrarse por la izquierda 4 Borrarse por la derecha 5 Borrarse diagonalmente por la parte superior izquierda 6 Borrarse diagonalmente por la parte superior derecha 7 Borrarse diagonalmente por la parte inferior izquierda... -
Page 56: Información En La Pantalla
Información en la pantalla Presione el botón de Visualización (DISP) para mostrar la información e la reproducción. Disco DVD Disco VCD Disco CD Programar Reproducción El equipo reproduce archivos en el orden deseado. 1. Presione el botón Programar y la pantalla mostrará el menú de programación. 2. -
Page 57: Repetir Reproducción
Repetir Reproducción Durante la reproducción presione el botón “Repetir”, repetirá la reproducción de un título o capítulo (disco DVD) o canción (VCD/CD) Disco DVD Disco VCD/CD (En el modo PBC Apagado) Repetir Reproducción A-B Repetir secciones entre dos puntos específicos (Repetición A-B) Presione el botón A-B durante la reproducción para señalar el punto de inicio (A). -
Page 58: Cambiar El Idioma Del Subtitulo (Únicamente En Dvd)
Cambiar el idioma del subtitulo (únicamente en DVD) Es posible cambiar el idioma de los subtítulos. (Esta operación funciona únicamente con discos que tienen diferentes idiomas de subtítulos). 1. Presione el botón Subtítulos durante la reproducción, la pantalla mostrará el idioma actual de los subtítulos. -
Page 59: Configuración Inicial
Vista de diferentes ángulos (únicamente en DVD) Algunos DVD contienen escenas que se han grabado simultáneamente desde distintos ángulos. Para estos discos, la misma escena podrá verse desde dichos distintos ángulos utilizando el botón “Ángulo” durante la reproducción, el número de ángulo que se esté... -
Page 60: Configuración De Audio
1. Configuración General 1.1 Tipo de Televisión - Seleccionar el sistema de Color de la televisión 1.2 Visualización de la televisión - Seleccionar el modo de salida de la televisión Opciones: Normal/PS: modo de escaneo Normal/LB: modo de buzón Ancho: modo de imagen ancha 16:9 1.3 Marca de Ángulo - Para activar o desactivar el icono que se muestra en la pantalla cuando hay un disco con ángulos múltiples. - Page 61 3. Configuración de Contraseña 3.1 Contraseña – se utiliza para cambiar la contraseña, y el proceso para cambiarla se describe a continuación: Ingrese la contraseña vieja en la línea de “Contraseña Vieja” Ingrese la nueva contraseña en la línea de “Nueva Contraseña” Presione el botón de Confirmar (Enter) para volver a la página de configuración de la contraseña, y la contraseña habrá...
-
Page 62: Operaciones De Televisión Encender La Unidad
Operaciones en la Televisión Encender la Unidad 1. Presione el Interruptor de encendido/apagado al lado derecho para encender la unidad. 2. Presione el botón Cambiar (Switch) para ir al modo de televisión. Operación de la Antena Antena Externa Instale una antena externa en la entrada para antena para una mejor recepción. - Page 63 Seleccionar un programa 1. Presione el botón “AUTO” en el control remoto para iniciar la búsqueda automática de canales. 2. Presione CH+ para ir al siguiente cana.l 3. Presione CH- para ir al canal anterior. 4. [Presione los botones numéricos en el control remoto para seleccionar directamente el canal deseado.
-
Page 64: Menú Principal
Menú Principal Procedimientos para la configuración inicial. 1. Presione el botón “MENÚ” 2. Utilice los botones arriba y abajo para seleccionar la página que deseé, luego presione el botón derecho para entrar. Cada página mostrará el valor de cada elemento. Luego utilice los botones arriba y abajo para seleccionar elementos y utilice los botones izquierdo y derecho para ajustar. - Page 65 2.2 Saltar - Presione arriba o abajo para seleccionar “Saltar”, luego presione izqueirda o derecha oara activarlo o desactivarlo. Activado: el número del canal que selecciono se saltará cuando cambie de canal utilizando CH- o CH+. Desactivado: todos los números de canales (canales guardados en la unidad) podrá accesar utilizando los botones CH+ o CH-.
- Page 66 Tamaño de Subtítulos- Presione izquierda/derecha para cambiar entre: pequeño, grande y estándar. Fuente de Subtítulos- para elegir el tamaño de los subtítulos de 0 a 7. Opacidad de Subtítulos – para cambiar la opacidad de los subtítulos, consiste en modo solido, modo intermitente, modo tornasol, modo transparente.
- Page 67 Configuración de la Tabla de Valoración/Clasificación Regional (RRT) - Presione RESET para restablecer la información en la tabla de valoración/clasificación regional. Clasificación de Películas - Después de entrar a “Control de Programas” presione los botones arriba/abajo para entrar al submenú “Clasificación de Películas” y seleccione la clasificación que quiera presionando los botones arriba/abajo.
- Page 68 6. Configuración del Sistema 6.1 Restablecer de Fábrica - Se utiliza para restablecer todos los ajustes y configuraciones de fábrica. -Presione arriba/abajo para seleccionar este elemento, luego presione el botón derecho para confirmar. 6.2 Configuración de Hora 6.2.1 Reloj - El reloj muestra la hora actual según los programas. (Está opción no se puede ajustar por el usuario).
-
Page 69: Definición De Términos
Definición de Términos: Se refiere a discos ópticos con alta densidad los cuales contienen imágenes y sonidos de alta calidad obtenida por señales digitales. Un DVD tiene una estructura que consiste de 2 discos muy delgados 0.6mm que están adheridos uno al otro. Entre mas delgado este el disco, mas alta será... -
Page 70: Especificaciones
Especificaciones Requisitos de energía: AC 100 -240V~ 50/60Hz DC12V 800m Adaptador Consumo de Energía: ≤9.6W Resolución: 640(RGB) X 234 Distancia de puntos: 0.30975 (W) X 0.4775 (H) mm Rango visible: 198.240 (W) X 111.735 (H) mm Reproductor: DVD / MOVIE/ JPEG / MUSIC / CD-DA Discos reproducibles: (1) discos DVD-VIDEO 12 cm de una cara, de una sola capa 12 cm de una cara, de doble capa... -
Page 71: Resolución De Problemas
Resolución de Problemas Antes de solicitar servicio para este reproductor, verifique la siguiente tabla para revisar las posibles causas del problema que esta experimentando. Algunos ajustes simples de su parte podrían eliminar el problema y restaurar el funcionamiento del reproductor. Síntoma Remedio No hay energía... -
Page 72: Configuración De Códigos De Región
Los subtítulos se borran del monitor de televisión. Siga los pasos para la visualización de subtítulos. No se puede seleccionar el idioma - No se podrán seleccionar idiomas si el disco únicamente contiene un idioma de audio y/o subtítulos - En el caso de algunos discos, los idiomas no se pueden seleccionar utilizando los botones “Idioma”...
Need help?
Do you have a question about the PDT-91 and is the answer not in the manual?
Questions and answers