Table of Contents
Advertisement
Quick Links
Advertisement
Table of Contents

Related Manuals for RJM Amp Gizmo

Summary of Contents for RJM Amp Gizmo
- Page 1 Amp Gizmo User’s Manual RJM Music Technology, Inc.
- Page 3 Amp Gizmo User’s Manual Version 2.0 January 13, 2008 RJM Music Technology, Inc. 2525 Pioneer Ave #2 Vista, CA 92081 E-mail: support@rjmmusic.com Web: www.rjmmusic.com...
- Page 4 Copyright © 2008 RJM Music Technology, Inc. All Rights Reserved. , MasterMind, RG-16 and the RJM logo are trademarks of IZMO RJM Music Technology, Inc.
-
Page 5: Table Of Contents
Table of Contents INTRODUCTION FRONT PANEL BACK PANEL MIDI USAGE Continuous Controllers Bank Selection Backing Up Your Settings: Sysex Dump CONTROLLING MULTIPLE DEVICES SETUP MODE To Select MIDI Channel and MIDI Options MIDI Channels Continuous Controller Ranges GCX Compatibility Mode Saving MIDI Channel and Options Invert Mode Momentary Mode... -
Page 7: Introduction
Introduction Thank you for purchasing an A . This product is designed to IZMO connect your amplifier, effects devices or other electronic equipment to can control any other MIDI-enabled equipment. The A IZMO device that uses short-to-ground switching. This means that virtually any function that is controlled by a footswitch can be MIDI controlled using the A . -
Page 8: Front Panel
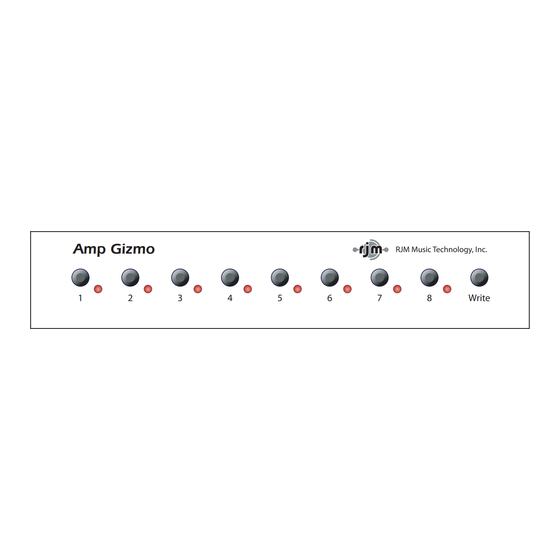
Front Panel Amp Gizmo RJM Music Technology, Inc. Write Buttons 1 through 8 - These buttons turn function switches 1 through 8 on and off. The LED to the right of each button is lit when the corresponding function switch is on. -
Page 9: Back Panel
Back Panel Model AG-2 RJM Music Technology, Inc. www.rjmmusic.com Power MIDI Thru / 9-18V MIDI In To Amplifier Switch 1/2 Switch 3/4 Switch 5/6 Switch 7/8 AC / DC To Amplifier – Connect the custom amplifier interface cable here. Use the cable end that has a yellow label reading “RG-16 / A... - Page 10 MIDI In – Jack for incoming MIDI commands. Connect your MIDI foot controller here. The A will phantom power a compatible IZMO MIDI controller if you use a 7-pin MIDI cable. The AC adapter provided with the A can phantom power most MIDI IZMO controllers provided that they can run on a 9V AC supply.
-
Page 11: Midi Usage
MIDI Usage The A can receive MIDI messages from any MIDI controller. IZMO You can store different switch settings for MIDI program numbers 1 through 128 in MIDI banks 0 and 1. When a Program Change message is received on the correct channel, the A will automatically IZMO recall the saved settings for the given program number. -
Page 12: Continuous Controllers
Switch 8 on *Setup Mode can be used to change which Continuous Controller messages the Amp Gizmo responds to. Please refer to the Setup Mode section for more details. Please note that settings such as Momentary Mode and Group Mode are... -
Page 13: Bank Selection
Bank Selection The Amp Gizmo can store programs in MIDI banks 0 and 1, for a total of 256 programs. Continuous Controller #0 (Bank MSB) is used to select the current MIDI bank. Bank numbers above bank 1 are ignored. -
Page 14: Controlling Multiple Devices
Controlling Multiple Devices Each of the switching jacks on the A is electrically isolated IZMO from the others. Because of this, it’s possible to safely control multiple devices. For example, you could control an amplifier that has three channels and two switchable functions, plus an effects device that has two switchable functions –... -
Page 15: Setup Mode
Setup Mode To configure the A , you must first enter Setup Mode. IZMO Holding down selected buttons while powering the unit on will bring up selected setup modes, as detailed in this section. To Select MIDI Channel and MIDI Options MIDI Channels The A is set by default to send and receive on MIDI Channel... -
Page 16: Continuous Controller Ranges
You can also set a few other MIDI-related options using the other Switch buttons: Continuous Controller Ranges The Switch 5 and 6 buttons control the Continuous Controller range for all switches: CC Range Switch 5 Switch 6 Number 80…87 88…95 (default) 64…71 56…63 GCX Compatibility Mode... -
Page 17: Momentary Mode
Hold down the Switch 2 button while powering up the A IZMO Keep holding the button until the LEDs flash. You are now in Invert Mode. While in Invert Mode, use the front panel buttons to light the LED of any function that is inverted. -
Page 18: Quick Setup Buttons
To enter Group mode, hold down the Switch 4 button while powering up the A . Keep holding the button until the LEDs flash. IZMO Use the front panel buttons to light the LED of any function that should be in the group. Make sure that no other LEDs are lit. Once you’ve selected the functions that need to be grouped, press the Write button. - Page 19 Hold Switch 6: First two switches grouped and momentary. Hold Switch 7: First three switches grouped and momentary. (Bogner Ecstasy, EVH 5150III, Traynor YCS100) Hold Switch 8: First four switches grouped and momentary. (Marshall Mode 4) Once the button has been pressed and the LEDs have flashed, the A will go directly to normal operating mode IZMO...
-
Page 20: Troubleshooting
Check the instruction sheet that came with your amplifier interface cable, or check the Setup Mode section for more information on how to configure. You can also check contact us at RJM Music for assistance. We’d be happy to help you out. -
Page 21: Warranty
Merchandise Authorization (RMA) number and shipping and packaging instructions. RJM Music Technology will repair or replace the product free of charge, provided it is returned freight prepaid to RJM Music Technology with a valid receipt and RMA number. Return shipping will be paid by RJM Music Technology within the U.S.
Need help?
Do you have a question about the Amp Gizmo and is the answer not in the manual?
Questions and answers