Table of Contents
Advertisement
Quick Links
Video door entry systems with 2-wire cabling
Assistenza tecnica Italia
Commerciale Italia
Comelit Group S.p.A. - Via Don Arrigoni 5 - 24020 Rovetta S. Lorenzo BG Italy - tel. (+39) 0346 750 011 - fax (+39) 0346 71436
www.comelit.eu
www.simplehome.eu
EN
TECHNICAL
MANUAL
MT SBC 01
0346/750090
Technical service abroad (+39) 0346750092
0346/750091
Export department
info@comelit.it
commerciale.italia@comelit.it
(+39) 0346750093
export.department@comelit.it
Advertisement
Chapters
Table of Contents

Subscribe to Our Youtube Channel
Summary of Contents for SBC MT SBC 01
- Page 1 TECHNICAL MANUAL MT SBC 01 Video door entry systems with 2-wire cabling 0346/750090 Technical service abroad (+39) 0346750092 Assistenza tecnica Italia Commerciale Italia 0346/750091 Export department (+39) 0346750093 Comelit Group S.p.A. - Via Don Arrigoni 5 - 24020 Rovetta S. Lorenzo BG Italy - tel. (+39) 0346 750 011 - fax (+39) 0346 71436 www.comelit.eu...
- Page 2 • All the products comply with the requirements of the 2006/95/CE directives (which replace the 73/23/CEE directives and the successive amendments). This is proved by the CE mark on the products. • Do not run the riser wires in proximity of the power supply cables (230/400V). MT SBC 01...
-
Page 3: Table Of Contents
MT SBC 01 Video door entry systems with 2-wire cabling CONTENTS EXTERNAL UNITS • - Okay surface-mounted interphone for mixed systems - Installation instructions for Powercom audio-video Art. 2428W/A Page 50 external unit Page 2 - Okay surface-mounted interphone with privacy/doctor - Installation instructions for information modules Art. -
Page 4: External Units
GROUP S.P.A. EXTERNAL UNITS Installation instructions for Powercom audio-video external unit MT SBC 01... - Page 5 MT SBC 01 Alternative microphone position 360˚ open close MT SBC 01...
-
Page 6: Installation Instructions For Information Modules Art. 3326, Art. 3344 And Art. 3346
Installation instructions for information modules Art. 3326, Art. 3344 and Art. 3346 Powercom name-tag holders For optimum execution of the name-tag holders, you are advised to proceed as follows: Use a transparent adhesive labelling strip (e.g. Dymo) as shown in the figure. A l d MT SBC 01... -
Page 7: Digital Call Module Art. 3340
MT SBC 01 Digital call module Art. 3340 2) INSTALLATION OF THE MODULE To prevent any interference caused by electrostatic discharges, it is advisable to screen the casing as shown in diagram CA/EN/108 on page 119. Arrange the modules only as indicated in the following drawing. - Page 8 ▲▼ keys. Art. 1230 Enter the user name. CODE: _ _ 1 EXAMPLE: 1 Press ENTER on Art.1230 to STORING save the user name and code. IN PROGRESS You can now proceed to enter other users. MT SBC 01...
- Page 9 MT SBC 01 8C) ENTERING BY MEANS OF SOFTWARE ART. 1249/A OPERATION DISPLAY DESCRIPTION INITIAL CONDITION Select the ENTER PART The user name to be Module powered up ENTER USER The directory must be empty. NAME DIRECTORY/ OF THE NAME modified is requested.
- Page 10 1) Select the user Smith by means of the ▲▼ ➔ keys and press ➔ to send the call to the user identified with code 1. 2) From the keypad, enter the Indirect Code 100 ➔, and press ➔ to send the call to the user identified with code 1. MT SBC 01...
- Page 11 MT SBC 01 10B) DISPLAYING THE PARAMETERS OF PORTER MODULE ART. 1602 – 4660C 11C) RESETTING THE SUPERCODE (door lock release time, audio timing and reset wait time) OPERATION DISPLAY DESCRIPTION OPERATION DISPLAY DESCRIPTION Configuration mode has NAME DIRECTORY Configuration mode has...
- Page 12 * * * * * * Press PASSWORDS If a code is in the memory, CONFIRMED the relay in module Art. 1602 / 4660C is activated. PASSWORDS If a code is not WRONG in the memory. MT SBC 01...
-
Page 13: Digital Directory Module Art. 3342
MT SBC 01 Digital directory module Art. 3342 4B) CHANGING THE PREVIOUSLY SET LANGUAGE OPERATION DISPLAY DESCRIPTION INTRODUCTION Configuration mode has NAME DIRECTORY The Comelit digital call module Art. 3342 can be used in Simplebus type systems. It is been accessed (see ACCESS CONTROL equipped with a name directory for storing a list of user names. - Page 14 STORING IN PROGRESS Art. 1230 to store the user ELIMINATION Press to eliminate all name and code. IN PROGRESS the users in the directory. You can now proceed Press to cancel the to enter other users. operation MT SBC 01...
- Page 15 MT SBC 01 7G) DISPLAYING THE NUMBER OF NAMES STORED IN THE DIRECTORY, 8C) SETTING THE ID CODE ( Default = 0 ) THE SOFTWARE VERSION INSTALLED AND THE ID CODE The ID code is only used in special applications...
-
Page 16: Installation Instructions For Vandalcom Audio-Video External Unit
GROUP S.P.A. Installation instructions for Vandalcom audio-video external unit MT SBC 01... - Page 17 MT SBC 01 yellow green MT SBC 01...
- Page 18 GROUP S.P.A. SOLUTION “A” SOLUTION “B” MT SBC 01...
-
Page 19: Digital Call Module Art. 3070/A
MT SBC 01 Digital call module Art. 3070/A 3) USING THE DIGITAL CALL MODULE 3A) CALLING A USER: INTRODUCTION INITIAL CONDITION The Comelit digital call module Art. 3070/A can be used in Simplebus type systems and enables you to call interphone users by keying in the code that identifies them. The main... - Page 20 The module is in been accessed programming mode. SETTINGS been accessed programming mode. SETTINGS (see point 4A). The menus are scrolled The menus are scrolled (see point 4A). through automatically through automatically every 2 seconds. every 2 seconds. MT SBC 01...
- Page 21 MT SBC 01 To change the value of the parameter, if the value is not set to DEFAULT: OPERATION DISPLAY DESCRIPTION INITIAL CONDITION ADDRESS RS485 ( 1 -255 ) * Select the N.B: The values in VALUE: _ _ _...
- Page 22 (see point 4B-4). supercode value VALUE: 222222 up of 6 digits. EXAMPLE: 222222. INITIAL CONDITION Press PARAMETER The new supercode value is Module powered up ENTER USER to confirm the CHANGED 222222. and in standby. CODE entry. MT SBC 01...
- Page 23 MT SBC 01 7) PARAMETERS TABLE OPERATION DISPLAY DESCRIPTION The table below shows the configuration parameters for module Art. 3070/A: Connect the cable supplied ENTER USER with software Art. 1249/A to CODE terminals TX / RX / - ( or D /...
-
Page 24: Digital Directory Module Art. 3072/A
Call effected or OPERATING conversation in progress. EFFECTED COMMUNICATING OPERATION DISPLAY DESCRIPTION Module Art. 3072/A goes Press SELECT NAME ↓ ↑ back into standby and the WITH call sent to the riser is cancelled. SEARCH NAME WITH MT SBC 01... - Page 25 MT SBC 01 OPERATION DISPLAY DESCRIPTION 4) SETTINGS When you have made the 4A) SYSTEM PARAMETERS 4A-1) CHANGING THE CONVERSATION TIME, DOOR LOCK RELEASE TIME AND change, remove the RESET WAIT TIME FOR THE PORTER MODULE connections between PR This operation enables you to change the audio timing, door lock release relay closure and –...
- Page 26 SETTINGS ↓ powered with terminal PR proceed to enter other ENTER NAME to select the menu connected to the - terminal. users. ▲▼ to scroll through the menu SELECT NAME to go back to the menu WITH below. MT SBC 01...
- Page 27 MT SBC 01 5B) DELETING A NAME USING ART.1230 5E) READING (UPLOAD) OF THE STORED LIST Using software Art. 1249/A, it is possible, from module 3072/A, to read the list with the OPERATION DISPLAY DESCRIPTION User Name and Code fields. It is necessary to perform the following operations:...
-
Page 28: Installation Instructions For Roma Audio-Video External Unit
GROUP S.P.A. Installation instructions for Roma audio-video external unit yellow green green yellow MT SBC 01... - Page 29 MT SBC 01 Operation to be carried out only if pushbutton modules Art. 3063/A or 3063B are not present. To use more than 2 pushbuttons, only mount modules 3063B or 3063/A. MT SBC 01...
-
Page 30: Installation Instructions For N-Av/4 Audio External Unit
GROUP S.P.A. Installation instructions for N-AV/4 audio external unit yellow green MT SBC 01... - Page 31 MT SBC 01 Operation to be carried out only if pushbutton modules Art. 3063/A or 3063B are not present. To use more than 2 pushbuttons, only mount modules 3063B or 3063/A. MT SBC 01...
- Page 32 GROUP S.P.A. Installation instructions for Powerpost audio-video external unit with vertical opening MT SBC 01...
- Page 33 MT SBC 01 Installation instructions for Powerpost audio-video external unit with side opening MT SBC 01...
-
Page 34: Internal Units
(reference on terminal board C1 P1 contact C.NO. max 24V 100mA, see SB2/AAF on page 125). 5. Standard pushbutton 2 (factory-set for Switch-on function). 6. Optional pushbuttons 3 and 4 (factory-set for activating a generic actuator). Available using Art. 5733. MT SBC 01... -
Page 35: Installation Instructions For Bravo Internal Unit
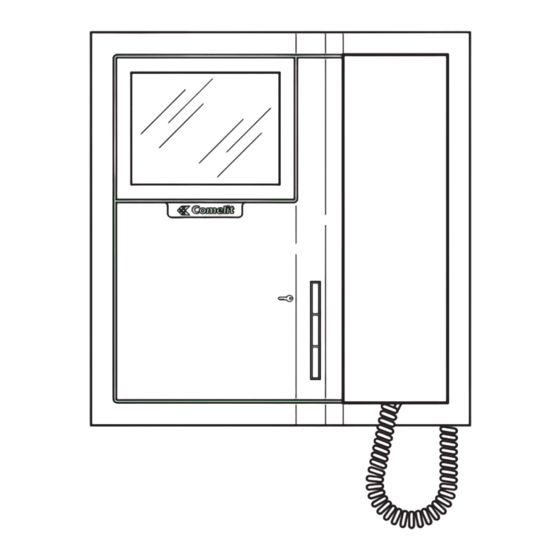
MT SBC 01 Installation instructions for Bravo internal unit Installation of bracket Art. 5714C on civil series box Wall-mounting of bracket Art. 5714C with 4 503 (Art. 4517). expansion bolts. Overall dimensions of the monitor. Procedure for mounting the Monitor. -
Page 36: Installation Instructions For Optional Cards Art. 5733, Art. 5734 (For Bravo Monitor Only)
GROUP S.P.A. Mounting the monitor on desktop base Art. 5712. Installation instructions for optional card Art. 5733, Art. 5734 (for Bravo monitor only) MT SBC 01... - Page 37 MT SBC 01 5734 5734 ! 1. Remove the bracket and optional card from their package. 2. Secure the optional card on the plastic support of the bracket with the special screws. 1. Terminal block: P3: Monitor Pushbutton 3 contact. * C3: Monitor pushbutton 3 common contact*.
-
Page 38: Fitting Screens On Bravo Monitors
GROUP S.P.A. Fitting screens on Bravo monitors MT SBC 01... -
Page 39: Description Of Genius Monitor Art. 5802 And User Information
MT SBC 01 Description of Genius monitor Art. 5802 and user information The Genius monitor Art. 5802 (colour monitor) can be used as an alternative to the Bravo monitor on bracket Art. 5714C and with desktop base Art. 5712. For installation and wiring, refer to the above products. -
Page 40: Installation Instructions For Genius Internal Unit
Wall-mounting of bracket Art. 5714C with 503 (Art. 4517). 4 expansion bolts. Overall dimensions of the monitor. Procedure for mounting the Monitor. 10,3 cm 10,1 cm 14,4 cm 8,1 cm 1,4 cm 1,4 cm Procedure for removing the Monitor. MT SBC 01... - Page 41 MT SBC 01 Mounting the monitor on desktop base Art. 5712. MT SBC 01...
-
Page 42: Technical Specifications Of Mounting Bracket Art. 5714C For Bravo And Genius Monitors
10. CV5 Video closing jumper. It is possible to personalise the pushbutton functions by programming bracket Art. 5714C with hand-held programming module Art. 1251/A; for details on programmable functions and on how to program the monitor pushbuttons, see page 65. MT SBC 01... -
Page 43: Description Of Diva Monitor Art. 4780, Hands-Free Interphone Art. 4781 And User Information
MT SBC 01 Description of Diva monitor Art. 4780, hands-free interphone Art. 4781 and user information The Diva series hands-free video interphone Art. 4780 and hands- 8. Pushbutton available as standard (factory setting for Privacy free audio interphone Art. 4781 are compatible with the monitors function) (Privacy service means exclusion of the call from the from the following series: Bravo, Genius. -
Page 44: Installation Instructions For Diva Audio-Video Internal Unit Art. 4780
The civil 503 series box (Art. 4517) must be horizontally wall-mounted. 11,5 17,5 74,5 Ø Wall-mounting of monitor Art. 4780. Procedure for mounting the Monitor. Procedure for removing the Monitor. Mounting the Monitor on desktop base Art. 4782. MT SBC 01... -
Page 45: Installation Instructions For Diva Audio Internal Unit Art. 4781
MT SBC 01 Installation instructions for Diva audio internal unit Art. 4781 Overall dimensions of the monitor. Installation of Art. 4781 on flush-mount box. The civil 503 series box (Art. 4517) must be horizontally wall-mounted. 17,5 11,5 63 mm Wall-mounting of monitor Art. 4781. -
Page 46: Technical Specifications Of Mounting Bracket Art. 4784 For Diva Monitor
(factory-set to ideal position). * The pushbutton functions can be personalised by programming bracket Art. 4784 with the handheld programmer Art. 1251/A; for details on programmable functions and on how to program the monitor pushbuttons, see page 65. MT SBC 01... -
Page 47: Installation Instructions For Style Interphone Art. 2638, 2628, 2610 And 2618
MT SBC 01 Installation instructions for Style interphone Art. 2638, 2628, 2610 and 2618 95mm 47,5mm 75,5mm 215mm Ø 5mm max Ø 5mm max Interchangeable cover available for Art. 2628, 2610 and 2618 MT SBC 01... -
Page 48: Description Of Style Interphone Art. 2638 And User Information
Generic Actuator (position A) function of pushbutton P1 (see figure below). 7. CV1 CV2 jumper to be removed in order to have potential- free C.NO. contact on pushbutton P1. 8. DIP switch U2 for setting user code (see page 79). 9. Microphone volume control trimmer. MT SBC 01... -
Page 49: Description Of Style Interphone Art. 2628 And User Information
MT SBC 01 Description of Style interphone Art. 2628 and user information “Elegance” interphone equipped as standard with Landing Call (see functions (to be applied under the interchangeable cover) Fig. 7 variant A on page 123) and Call Repetition (see variant SB2/AAK on page 45. -
Page 50: Description Of Style Interphone Art. 2610 And User Information
79. Factory-set for Switchboard Call 16. Microphone volume control trimmer. function). CAUTION ! TO USE INTERPHONE ART. 2610 IN SB2 OR SBC SYSTEMS (i.e. SYSTEMS WHICH USE ART. 4896, 4888 or 4888C) JUMPER JP1 MUST BE MOVED TO POSITION S2 MT SBC 01... -
Page 51: Description Of Style Interphone Art. 2618 And User Information
MT SBC 01 Description of Style interphone Art. 2618 and user information The “Elegance” interphone is equipped with a door lock release pushbutton, indicator LED and eight pushbuttons whose functions can be set according to the system in which the unit is fitted. Interphone Art. -
Page 52: Okay Surface-Mounted Interphone For Mixed Systems Art. 2428W/A
(remove CP8 and CC8) 5. Microphone volume control trimmer. 20. DIP switch U2 for setting user code (see page 79). 6. Ringtone volume control trimmer. 21. Microphone volume control trimmer. 22. Connector for Hand-held Programmer Art. 1251/A. MT SBC 01... -
Page 53: Function Art. 2410W/2B
MT SBC 01 Okay wall-mounted interphone with privacy / doctor Table 1 function Art. 2410W/2B DIP 4 DIP 3 DIP 2 DIP 1 Pushbutton 2 Pushbutton 3 Call Privacy Call Doctor Generic Privacy Generic Doctor Generic Generic Call Generic Okay wall-mounted interphone for intercommu- nicating service Art. -
Page 54: Accessories
The closure time of the relay can be programmed by means of the DIP switch (see Fig. 3 table A on page 53). For correct fitting of Art. 1256 within the system see diagrams: SB2/MBC-SB2/NC- SB/GC. MT SBC 01... - Page 55 MT SBC 01 D) Bottom of Stairs Door Opening function Table A: (without external unit). programming relay closure time for functions B, C and E To activate this function, set jumper JP1 as shown in figure 4. switches The relay is activated when the door lock...
-
Page 56: Simplebus Remote Camera Switcher Art. 1259C
On Art. 5714C, the Generic Actuator control is factory set for use on (factory-set to optimum setting: do not adjust) pushbuttons 3, 4 and 5 of video interphones equipped with 5. Programming microswitches S1 Art. 5733 (optional pushbuttons module) or by setting one of the MT SBC 01... - Page 57 MT SBC 01 available pushbuttons using hand-held programming module 1259C. At this point, each time a control pushbutton is pressed (see Art. 1251/A. previous modes) or each time the manual contact is closed, a DIP-SWITCH In this mode, with the video interphone...
-
Page 58: Porter Switchboard Art. 1998A
Entering names in the personal directory. 11 MENU Access to menus. 12 ON/OFF Hold down for 2 secs. Setting DAY/NIGHT mode. Call. Door lock release. Transfer of a call from external unit or intercom. Putting a call on hold/resuming a call. MT SBC 01... - Page 59 MT SBC 01 Description of terminal block Figure 2 Legend: 24 VA 24V AC power supply IN IN N.O. contact for special functions. 0 VA 0V AC power supply TX RX RS232 serial. Connect to a PC to download a personal LP LP Incoming data line from external unit.
- Page 60 The set time is A NIGHT 21:40 to confirm MON 00/00/00 kept by means of a buffer Press OK WED 12/03/07 entry. battery even in to go to the event of power failure. the next speed number. MT SBC 01...
- Page 61 MT SBC 01 • PERSONAL DIRECTORY • AUTO MODE The system has a personal directory which can hold up to 400 names with a The system can be set to switch automatically from DAY mode to NIGHT mode at maximum of 16 alphanumeric characters each. A code corresponding to the established times which can be programmed by the user.
- Page 62 AUTO mode The switchboard hangs up. will all have (——) 21:40 The conversation the same time bands set the communication ends WED 12/03/07 ends. in the section “Setting due to time-out (MAX 3 min). times in auto mode” MT SBC 01...
- Page 63 MT SBC 01 • CALL TO AN INTERNAL EXTENSION NIGHT MODE OPERATION DISPLAY DESCRIPTION OPERATION DISPLAY DESCRIPTION Starting condition: (——) 21:40 stand-by. WED 12/03/07 Starting condition: A NIGHT 21:40 the system is set WED 12/03/07 EXAMPLE: You want to call extension 2.
- Page 64 ON HOLD waiting to speak to internal extension 3. Press IN COMMUNICATION WITH USER 002 The internal extension hangs up. (——) 21:40 The conversation The communication ends WED 12/03/07 is ended. due to time-out (MAX 3 min). MT SBC 01...
- Page 65 MT SBC 01 • MANAGEMENT OF UNANSWERED CALLS • VIDEO CALL MODE You can initiate a video call to an external unit. If video call mode is set, the monitor called by the switchboard switches on, thus OPERATION DISPLAY DESCRIPTION allowing, for example, viewing of the remote cameras associated with Art.
- Page 66 You can now scroll To confirm press DELETING CODE:YYY the user name list IN PROGRESS with the keys. Press OK Followed by: NAME NOT STORED The name does not exist. A (——) 21:40 IN DIRECTORY WED 12/03/2007 MT SBC 01...
-
Page 67: Hand-Held Programmer Art. 1251/A
MT SBC 01 HAND-HELD PROGRAMMER Art. 1251/A After displaying the software version of the programmer Introduction After displaying the software version of the programmer (figure 2), press the key corresponding to the function (figure 2), press the key corresponding to the function Hand-held programmer Art. - Page 68 • Messages appearing on the display are shown in: “bold black italic in inverted commas” • Particularly important information is shown in: bold. • Battery low indicator. Fig. 4 4. Mains power connector (figure 5). Fig. 5 MT SBC 01...
- Page 69 MT SBC 01 5. ON-OFF switch (figure 6). Changing the batteries 6. Connector CN1 for connecting the serial programming cable The batteries are housed in the battery compartment in the back of (figure 6). the hand-held programmer. To change the batteries, proceed as follows: 1.
- Page 70 4. Screw the cover back onto the base. Proceed as follows: 1. Make sure the bracket (or interphone) is not connected to the system. 2. Switch on hand-held programmer Art. 1251/A with the programming cable connected to the programmer. Fig. 9 Fig. 10 MT SBC 01...
- Page 71 MT SBC 01 Fig. 11 Fig. 13 3. Connect the other end of the programming cable to the programming cable connected to the programmer. polarised connector on the bracket as shown in figures 10, 11, 3. Connect the other end of the programming cable to the 12 and 13.
- Page 72 2 signalling LEDs in the positions of Pushbuttons 5 and 6. Ringtone selector / Privacy service Fig. 16 Door lock release Call Automatic switch-on/ Video request Door lock release Switchboard Generic actuator Privacy Doctor Function Not programmed Fig. 17 Fig. 15 MT SBC 01...
- Page 73 MT SBC 01 Functions that can be associated with a pushbutton Standard function: Door lock release This function enables you to programme the selected pushbutton to perform the door lock release function on the external unit. The function does not require the programming of any Parameter.
- Page 74 The function is available only for intercom systems that use Select Standard. Func. and press Reset pushbutton internal extensions Art. 4897, 5714CI, 4784I, 2618 and 2418W. Standard Func. Camera cycle Use the Function: keys to scroll the Coded Coded Actuator Actuator function. parameter MT SBC 01...
- Page 75 MT SBC 01 Art. 2618 (see fig. 16 on page 70): OPERATION DISPLAY Function k Door lock release Use the keys to Coded Actuator 1 Actuator reach the Parameter field and enter code for the Art. 1256 2 Switchboard parameter that you want to activate (N.B.
- Page 76 1. Connect the hand-held programmer to the device to be programmed, see page 68. 2. Use the keys to select the Read Pushbuttons menu, then press 3. The display will show a list of the device’s pushbuttons and the functions assigned to them. MT SBC 01...
- Page 77 MT SBC 01 List of menu functions Simplebus2 cabling system • Prog. Intercom Standby mode • Read Intercom • Canc. Intercom • Prog. pushbuttons 5714C • Key pushbutton • Prog. Pushbuttons: - Standard Func. • Key pushbutton: - Intercom Group - Standard Func.
-
Page 78: Configuration Of The Devices
(see figure). • The user code must be set according to the corresponding example shown in the programming table on page 79. • Coding can take place at any time, even without a power supply. MT SBC 01... -
Page 79: Programming Switching Device Art. 1224A
MT SBC 01 Programming switching device Art. 1224A • Each switching module is equipped 1216 1216 with a pair of DIP switches with 8 selectors (see figure). The two DIP switches define the MIN and MAX 5802 5802 1214/2C range of codes that can be recognised 1214/2C by the switching device. -
Page 80: Push-Button Programming With Audio-Video Unit Art. 4660C And Modules Art. 3323/3, 3323/4 And 3323/6
3. Set the DIP switch located on the rear of the module Art. 4660C with the same code assigned to the interphone or monitor according to the corresponding example shown in the programming table on page 79. MT SBC 01... -
Page 81: Dip Switch Programming Table
MT SBC 01 DIP switch programming table User DIP switch ON User name User DIP switch ON User name User DIP switch ON User name User DIP switch ON User name code code code code 1,3,4,5,6 1,4,5,6,7 1,3,5,6,8 2,3,4,5,6 2,4,5,6,7... -
Page 82: Special Programming Operations On Art. 4660C, 1602, 1602Vc
Door lock release control normally open (NO) (factory setting) 2,4,5,6,7,8 Door lock release control normally closed (NC) 1,2,4,5,6,7,8 Door lock release active even with no call (factory setting) 3,4,5,6,7,8 Door lock release only enabled for the user called 1,3,4,5,6,7,8 Reset of all factory settings 2,3,4,5,6,7,8 MT SBC 01... -
Page 83: General Installation
MT SBC 01 GENERAL INSTALLATION AND OPERATION INSTRUCTIONS MIXER-POWER SUPPLY ART. 4888C Carry out the cabling and system connection prior to the connection 6. JP4 Position 2 for normal use. of the power supply operations after disconnecting the mains Set to position 1 to cancel auto-configuration of the article. If supply. -
Page 84: Installation Regulations For Video Door Entry Systems
Double-wire cable sect. 0.5 mm Ø 0.8 mm AWG 20) Double-wire cable sect. 1 mm (1.2 mm AWG 17) Braided and screened cable (cross-sect. 1 mm (Ø 1.2 mm AWG 17) Double-wire cable sect. 1.5 mm (Ø 1.4 mm AWG 15) MT SBC 01... -
Page 85: Maximum Reachable Distances For Additional Monitor And External Unit Power Supply Conductors
MT SBC 01 Maximum reachable distances for additional monitor and external unit power supply conductors Cross-section of the conductor Max. distance between transformer Max distance between power supply unit Art. 1395 and external unit Art. 1212/B and internal unit 10 m 0.28 mm... - Page 86 * In case of multipair cable, it is advisable to use only one of the pairs for the system. If necessary to reduce voltage drop, due to long distances, it is possible to use a pair as a single core. ** In case of multicore cable, use only two of the available wires and never use wires in parallel. MT SBC 01...
- Page 87 MT SBC 01 Figures showing distances 1214/2C 5702 5802 4780 1214/2C 5702 5802 4780 4888C 4888C 4833C 1395 1216 1214/2C 5702 5802 5702 4888C 4834/9 MT SBC 01...
-
Page 88: Operating Notes
• Monitors and interphones with same user code all ring at the same time (regardless of whether they are main or secondary) in response to calls from the external unit, switchboard or landing. MT SBC 01... -
Page 89: Switching On/Voltage Check With System In Standby
MT SBC 01 Switching on/voltage check with system in standby Local floor call Request to exit button 10 - 15 Vac during activation Planux Monitor ref.6101 and Maestro Monitor ref.5900 are compatible with Simplebus Color system. Please refer to specific technical leaflets... -
Page 90: Connection Diagrams
Installation of Art. 1256 for D (secondary door lock release) in Simplebus Color mixed audio/video systems. Page 112 SB2/NC • Secondary door lock release with Art. 1256 branched before Art. 4888C. Page 114 SB/GC • Art. 1256 branched on the external unit. Page 114 MT SBC 01... -
Page 91: Connection Variants
MT SBC 01 CONNECTION VARIANTS • SB2/A3BC • VARIANT A Connection in series of monitors with the same user code Addition of landing call pushbutton. Page 123 powered separately. Page 115 • SB2/AAG • SB2/A2BC Use of LED for various functions on Bravo monitor Connection in series of monitors with the same user code Art. -
Page 92: Sb2V/01Pxm
System with 1 Powercom Series video entrance. Local door lock release pushbutton Planux Monitor ref.6101 and Maestro Monitor ref. 5900 are compatible with Simplebus Color system. Please refer to specific technical leaflets FT/SBC/11, FT/PLALUX/01 and FT/SBC/13 for further information. MT SBC 01... -
Page 93: Sb2V/03Gc
System with 2 Powercom Series video entrances. Local door lock release pushbutton Planux Monitor ref.6101 and Maestro Monitor ref. 5900 are compatible with Simplebus Color system. Please refer to specific technical leaflets FT/SBC/11, FT/PLALUX/01 and FT/SBC/13 for further information. MT SBC 01... -
Page 94: Sb2V/012Gc
GROUP S.P.A. SB2V/012GC System with 1 Powercom Series video entrance and MAX 9 Mixer-power supplies Art. 4888C. Cut only the resistor of the output used. Local door lock release pushbutton MT SBC 01... - Page 95 MT SBC 01 Planux Monitor ref.6101 and Maestro Monitor ref. 5900 are compatible with Simplebus Color system. Please refer to specific technical leaflets FT/SBC/11, FT/PLALUX/01 and FT/SBC/13 for further information. MT SBC 01...
-
Page 96: Sb2V/En/115Gc
GROUP S.P.A. SB2V/EN/115GC System with 1 main video entrance and MAX 9 Powercom series secondary audio units. Cut only the resistor of the output used. Local door lock release pushbutton MT SBC 01... - Page 97 MT SBC 01 Planux Monitor ref.6101 and Maestro Monitor ref. 5900 are compatible with Simplebus Color system. Please refer to specific technical leaflets FT/SBC/11, FT/PLALUX/01 and FT/SBC/13 for further information. MT SBC 01...
-
Page 98: Sb2V/En/112Gc
GROUP S.P.A. SB2V/EN/112GC System with 1 main video entrance and MAX 9 Powercom series secondary video units. Cut only the resistor of the output used. Local door lock release pushbutton MT SBC 01... - Page 99 MT SBC 01 Planux Monitor ref.6101 and Maestro Monitor ref. 5900 are compatible with Simplebus Color system. Please refer to specific technical leaflets FT/SBC/11, FT/PLALUX/01 and FT/SBC/13 for further information. MT SBC 01...
-
Page 100: Sb2V/En/103Gc
Video door entry system with one main entrance and porter switchboard Art. 1998A. Local door lock release pushbutton Planux Monitor ref.6101 and Maestro Monitor ref. 5900 are compatible with Simplebus Color system. Please refer to specific technical leaflets FT/SBC/11, FT/PLALUX/01 and FT/SBC/13 for further information. MT SBC 01... -
Page 101: Sb2V/En/159Gc
System with 2 video entrances and porter switchboard Art. 1998A. Planux Monitor ref.6101 and Maestro Monitor ref. 5900 are compatible with Simplebus Color system. Please refer to specific technical leaflets Local door lock release pushbutton FT/SBC/11, FT/PLALUX/01 and FT/SBC/13 for further information. MT SBC 01... -
Page 102: Sb2V/En/220Gc
GROUP S.P.A. SB2V/EN/220GC Video door entry system with one main entrance, MAX 9 secondary video units and porter switchboard Art. 1998A. Cut only the resistor of the output used. Local door lock release pushbutton MT SBC 01... - Page 103 MT SBC 01 Planux Monitor ref.6101 and Maestro Monitor ref. 5900 are compatible with Simplebus Color system. Please refer to specific technical leaflets FT/SBC/11, FT/PLALUX/01 and FT/SBC/13 for further information. MT SBC 01...
-
Page 104: Sb2/En/001
Variant using bracket Art. 4784 in audio only systems. Local door lock release pushbutton Planux Monitor ref.6101 and Maestro Monitor ref. 5900 are compatible with Simplebus Color system. Please refer to specific technical leaflets FT/SBC/11, FT/PLALUX/01 and FT/SBC/13 for further information. MT SBC 01... -
Page 105: Sb2/Bgc
Connection of MAX 4 riser branches for each mixer/power supply Art. 4888C. Planux Monitor ref.6101 and Maestro Monitor ref. 5900 are compatible with Simplebus Color system. Please refer to specific technical leaflets FT/SBC/11, FT/PLALUX/01 and FT/SBC/13 for further information. MT SBC 01... -
Page 106: Sb2/Ggc
Art. 4888C according to the cables, please refer to the table on page 84 column A. Planux Monitor ref.6101 and Maestro Monitor ref. 5900 are compatible with Simplebus Color system. Please refer to specific technical leaflets FT/SBC/11, FT/PLALUX/01 and FT/SBC/13 for further information. MT SBC 01... -
Page 107: Sb2/Aar
RISER LINE FROM EXTERNAL UNIT Planux Monitor ref.6101 and Maestro Monitor ref. 5900 are compatible with Simplebus Color system. Please refer to specific technical leaflets FT/SBC/11, FT/PLALUX/01 and FT/SBC/13 for further information. SB2/CC Connection in series of Art. 4834/9. Planux Monitor ref.6101 and Maestro Monitor ref. 5900 Only cut the resistance of the output used are compatible with Simplebus Color system. -
Page 108: Sb2V/01Gtcc
System with 1 main audio entrance with remote camera. Local door lock release pushbutton To be powered separately Planux Monitor ref.6101 and Maestro Monitor ref. 5900 are compatible with Simplebus Color system. Please refer to specific technical leaflets FT/SBC/11, FT/PLALUX/01 and FT/SBC/13 for further information. MT SBC 01... -
Page 109: Sb2V/017Gc
For setting and operation of Art. 1259C see page 54. Local door lock release pushbutton Planux Monitor ref.6101 and Maestro Monitor ref. 5900 are compatible with Simplebus Color system. Please refer to specific technical leaflets FT/SBC/11, FT/PLALUX/01 and FT/SBC/13 for further information. MT SBC 01... -
Page 110: Sb2V/018Gc
For setting and operation of Art. 1259C see page 54. Local door lock release pushbutton Planux Monitor ref.6101 and Maestro Monitor ref. 5900 are compatible with Simplebus Color system. Please refer to specific technical leaflets FT/SBC/11, FT/PLALUX/01 and FT/SBC/13 for further information. MT SBC 01... -
Page 111: Sb2/Mbc
To set functions A,C,D,E of Art. 1256, see page 52. Planux Monitor ref.6101 and Maestro Monitor ref. 5900 are compatible with Simplebus Color system. Please refer to specific technical leaflets FT/SBC/11, FT/PLALUX/01 and FT/SBC/13 for further information. MT SBC 01... -
Page 112: Sb2V/019Gc
GROUP S.P.A. SB2V/019GC Simplebus Color system with remote camera switcher Art.1259C in actuator with code mode. To be powered separately For setting and operation of Art. 1259C see page 54. MT SBC 01... - Page 113 MT SBC 01 Planux Monitor ref.6101 and Maestro Monitor ref. 5900 are compatible with Simplebus Color system. Please refer to specific technical leaflets FT/SBC/11, Local door lock release pushbutton FT/PLALUX/01 and FT/SBC/13 for further information. MT SBC 01...
-
Page 114: Sb2V/En/155Gc
GROUP S.P.A. SB2V/EN/155GC Installation of Art.1256 for function D (secondary door lock release) in Simplebus Color mixed audio/video systems. To set functions A,C,D,E of Art. 1256, see page 52. Local door lock release pushbutton MT SBC 01... - Page 115 MT SBC 01 Planux Monitor ref.6101 and Maestro Monitor ref. 5900 are compatible with Simplebus Color system. Please refer to specific technical leaflets FT/SBC/11, FT/PLALUX/01 and FT/SBC/13 for further information. MT SBC 01...
-
Page 116: Sb2/Nc
To set functions A,C,D,E of Art. 1256, see page 52. Planux Monitor ref.6101 and Maestro Monitor ref. 5900 are compatible with Simplebus Color system. Please refer to specific technical leaflets FT/SBC/11, FT/PLALUX/01 and FT/SBC/13 for further information. SB/GC Art.1256 branched on the external unit. -
Page 117: Sb2/A3Bc
MONITOR Planux Monitor ref.6101 and Maestro Monitor ref. 5900 are compatible with Simplebus Color system. Please refer to specific technical leaflets FT/SBC/11, FT/PLALUX/01 and FT/SBC/13 for further information. SB2/A2BC Connection in series of monitors with the same user code powered from the riser. -
Page 118: Sb2/A1Bc
MAIN MONITOR Planux Monitor ref.6101 and Maestro Monitor ref. 5900 are compatible with Simplebus Color system. Please refer to specific technical leaflets FT/SBC/11, FT/PLALUX/01 and FT/SBC/13 for further information. SB2/A5BC Connection of audio interphone users in mixed systems. Branch connection of interphones from the riser. -
Page 119: Sb2/A4Bc
MAIN MONITOR Planux Monitor ref.6101 and Maestro Monitor ref. 5900 are compatible with Simplebus Color system. Please refer to specific technical leaflets FT/SBC/11, FT/PLALUX/01 and FT/SBC/13 for further information. SB2/AAW Branch connection of additional interphones from the monitor. Planux Monitor ref.6101 and Maestro Monitor ref. 5900 are compatible with Simplebus Color system. -
Page 120: Sb/Uc
Planux Monitor ref.6101 and Maestro Monitor ref. 5900 are compatible with Simplebus Color system. Please refer to specific technical leaflets FT/SBC/11, FT/PLALUX/01 and FT/SBC/13 for further information. SB/KC Connection with modules 3262/0 (combined with module 1602) or 3268/0 (combined with module 4660C). -
Page 121: Diagram For Connection Of Art. 1319 To Modules Art. 3340 And Art. 3342
Simplebus Color system. - It is possible to use a maximum of 5 terminals Art. 3340-3342. Please refer to specific technical leaflets FT/SBC/11, - Maximum distance between Art. 1319 and the furthest terminal Art. 3340-3342: 100 m. -
Page 122: Sb2/Aas
Simplebus Color system. For the use and programming of modules 3063B and 3064B, see page 78. Please refer to specific technical leaflets FT/SBC/11, FT/PLALUX/01 and FT/SBC/13 for further information. To use more than 2 pushbuttons, only mount modules 3063B or 3063/A. -
Page 123: Sb2/Aav
Planux Monitor ref.6101 and Maestro Monitor ref. 5900 are compatible with Simplebus Color system. For the use and programming of modules 3063B and 3064B, see page 78. Please refer to specific technical leaflets FT/SBC/11, FT/PLALUX/01 and FT/SBC/13 for further information. SB2/AAFC Simplebus Color audio-video system with Vandalcom keypad and module Art. -
Page 124: Sb/Pc
Timed local door lock release connection variant. Planux Monitor ref.6101 and Maestro Monitor ref. 5900 are compatible with Simplebus Color system. Please refer to specific technical leaflets FT/SBC/11, FT/PLALUX/01 and FT/SBC/13 for further information. SB2/AAK Connection of call repetition devices on bracket Art. 4784, 5714C and interphone Art. 2628, 2638. -
Page 125: Gen/Aab
Use of Art. 1232 on bracket 5714C for filtering interference on terminals S+ and S-. Planux Monitor ref.6101 and Maestro Monitor ref. 5900 are compatible with Simplebus Color system. Please refer to specific technical leaflets FT/SBC/11, FT/PLALUX/01 and FT/SBC/13 for further information. VARIANT A Addition of landing call pushbutton. -
Page 126: Sb2/Aag
Planux Monitor ref.6101 and Maestro Monitor ref. 5900 are compatible with Simplebus Color system. The signalling LED flashes in the presence of voltage on terminals + LED - LED. Please refer to specific technical leaflets FT/SBC/11, FT/PLALUX/01 and FT/SBC/13 for further information. VARIANT C Video request on monitors Art. -
Page 127: Sb2/Aaf
Remove CV3, CV4. Planux Monitor ref.6101 and Maestro Monitor ref. 5900 are compatible with Simplebus Color system. Please refer to specific technical leaflets FT/SBC/11, FT/PLALUX/01 and FT/SBC/13 for further information. SB2/AAH Use of LEDs for various functions on Diva monitor Art. 4780 and hands-free interphone Art. 4781. -
Page 128: Sb2/Aai
Planux Monitor ref.6101 and Maestro Monitor ref. 5900 are compatible with Simplebus Color system. Please refer to specific technical leaflets FT/SBC/11, FT/PLALUX/01 and FT/SBC/13 for further information. Use of LEDs for various functions: Jumpers CV4 and CV5 in position B. -
Page 129: Sb/Aaa
Use of LEDs for various functions: Jumpers CV4 and CV5 in position B. Planux Monitor ref.6101 and Maestro Monitor ref. 5900 are compatible with Simplebus Color system. Please refer to specific technical leaflets FT/SBC/11, FT/PLALUX/01 and FT/SBC/13 for further information. SB2/AAC Use for various purposes of pushbutton P1 on interphone Art. -
Page 130: Sb/X1
2628 Planux Monitor ref.6101 and Maestro Monitor ref. 5900 are compatible with Simplebus Color system. Please refer to specific technical leaflets FT/SBC/11, FT/PLALUX/01 and FT/SBC/13 for further information. SB/X Use for various purposes of pushbutton P3 on interphone Art. 2610. -
Page 131: Variant F
MT SBC 01 VARIANT F Changing ringtones on Art. 5702 and 2618. 1 Keep the pushbutton pressed until a confirmation tone sounds (this 3 Press and release the Pushbutton to scroll the different tones available. operation is only possible in with the system in standby and the handset on Keep the pushbutton pressed to hear the same tone repeatedly the hook;... - Page 132 8 0 2 3 9 0 3 1 8 6 7 8 9 0346/750090 (+39) 0346750092 Assistenza tecnica Italia Technical service abroad Commerciale Italia 0346/750091 Export department (+39) 0346750093 [ B ] Comelit Group Belgium [ D ] Comelit Group Germany GmbH [ E ] Comelit Espana S.L.
Need help?
Do you have a question about the MT SBC 01 and is the answer not in the manual?
Questions and answers