Table of Contents
Advertisement
Advertisement
Table of Contents

Subscribe to Our Youtube Channel
Related Manuals for Universal Laser Systems VersaLaser VL-200


Summary of Contents for Universal Laser Systems VersaLaser VL-200
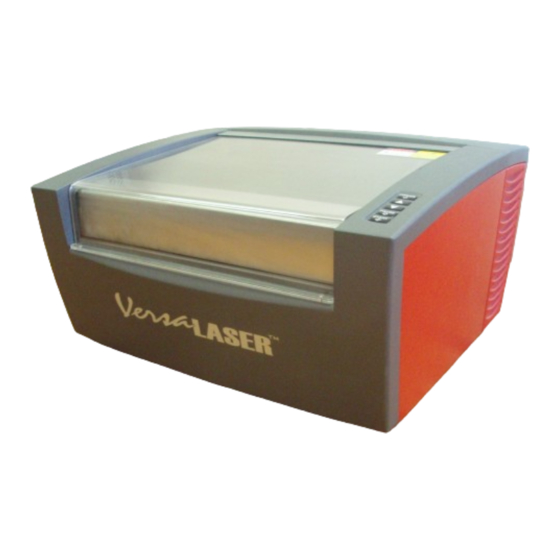
- Page 1 Models VL-200 & VL-300 Safety, Installation, Operation, and Basic Maintenance Manual Universal Laser Systems, Inc. 16008 North 81st Street Scottsdale, AZ 85260 USA Customer Support Department Phone: 480-609-0297 Fax: 480-609-1203 Web Based Email Support: www.VersaLASER.com August 2005...
- Page 2 Notice This publication and its contents are proprietary to Universal Laser Systems, Inc. (ULS), and are intended solely for the contractual use of ULS, Inc. customers. While reasonable efforts have been made to assure the accuracy of this manual, ULS shall not be liable for errors contained herein or for incidental or consequential damage in connection with the furnishing, performance, or use of this material.
- Page 3 Introduction All of us at Universal Laser Systems, Inc. (ULS) would like to thank you for your purchase. Since 1988, the staff at ULS has been dedicated to total customer satisfaction. When you buy Universal you get more than a money making product, you get a team of talented, experienced, and enthusiastic people who are focused on your satisfaction.
- Page 4 Specifications System Operating Environment Requirements (user provided) Model VL-200 VL-300 Operating Environment Well-ventilated office (recommended) or clean, light-duty manufacturing area Operating Temperature 50ºF (10ºC) to 95ºF (35º C) capable 73ºF (22ºC) to 77ºF (25º C) for best performance Storage Temperature 50ºF (10ºC) to 95ºF (35º...
-
Page 5: Table Of Contents
Table of Contents Section 1 - Safety Description of Appropriate Use ..................1-1 General Safety .........................1-1 Laser Safety ........................1-2 Safety Labels ........................1-2 EU Compliance (CE)......................1-4 FCC Compliance......................1-5 Recycling..........................1-5 Section 2 – Step-By-Step Installation Establishing a Proper Operating Environment..............2-1 Providing a Suitable Electrical Power Source..............2-1 Extracting Fumes and Particulates ..................2-1 Computer and Operating System ..................2-2 Recommended Software Programs ................2-3... -
Page 7: Section 1 - Safety
CFR 1040.10 and 1040.11. CDRH is the Center for the Devices of Radiological Health division of the Food and Drug Administration (FDA) in the USA. It also complies with CE (European Community) safety regulations. No guarantees of suitability or safety are provided for any use other than those specified by Universal Laser Systems, Inc. -
Page 8: Laser Safety
The following warning labels are placed on the laser system for your safety. DO NOT remove them for any reason. If the labels become damaged or are removed for any reason, DO NOT OPERATE the laser system and immediately contact Universal Laser Systems, Inc. for free replacements. Labels are NOT to scale. - Page 9 OXIDIZING GASES TO THIS SYSTEM CREATES A SERIOUS SAFETY AND/OR FIRE HAZARD. DO NOT CONNECT ANY GAS SOURCES EXCEEDING 75 PSI (5 ATM) PRESSURE. UNIVERSAL LASER SYSTEMS ASSUMES NO RESPONSIBILITY ARISING FROM THE IMPROPER USE OF THIS SYSTEM. 221-0037-0 Section 1-3...
-
Page 10: Eu Compliance (Ce)
EU Compliance (CE) L A S E R S Y S T E M S I N C. Product Identification: VersaLASER VL-200 and VL-300 Manufacturer: Universal Laser Systems, Inc. 16008 N. 81 Scottsdale, AZ 85260 Phone: (480) 483-1214 Fax: (480) 483-5620... -
Page 11: Fcc Compliance
Recycling By placing the above symbol on our products and accessories Universal Laser Systems is indicating that we are committed to helping reduce the amount of waste electronics ending up in municipal landfills. Therefore Universal Laser Systems urges consumers to recycle this product and its accessories. -
Page 12: Section 2 - Step-By-Step Installation
Section 2 Step-By-Step Installation In this section we will step you through site preparation, computer and software setup, and unpacking and assembling the VersaLASER. Please follow the instructions in the order shown. Establishing a Proper Operating Environment • The device MUST be installed in an office-type or light duty manufacturing environment. Airborne pollutants can damage the device. - Page 13 INSTALLATION • For personal safety and noise control reasons, we recommend that the blower be mounted OUTSIDE the building. • Rigid tubing should be used for 90% of the distance traveled between the blower and the laser system. The tubing should be smooth walled and have as few 90 degree bends as possible. •...
-
Page 14: Computer And Operating System
INSTALLATION Computer and Operating System Your computer is critical component in the operation of the VersaLASER. In fact, you cannot power on the VersaLASER if your computer is not connected, powered on, running Windows, and running the VersaLASER Control Panel software (VCP). Only ONE VersaLASER per computer is allowed. -
Page 15: Recommended Software Programs
INSTALLATION To properly configure Power Management in your Windows XP computer, right-click on your desktop, then click Properties. Click the Power Schemes Tab, choose “Never” from the “System Standby” and the “System Hibernates” dropdown list, and then click “Apply”. If you have further questions on how to configure or upgrade Windows XP, please contact Microsoft Corporation. -
Page 16: The Versalaser Software Installation Cd-Rom
INSTALLATION 3. The motion system arm cover is hinged and is held down by magnets. Grasp the bottom of the cover and rotate it up to expose the motion system carriage. 4. Remove any remaining packing material that may be preventing the motion system carriage from sliding left and right. -
Page 17: Configuring Your Graphics Software
• Set the default page orientation to Landscape and page size to a width of 16 inches (406.4mm) (model VL-200) or 24 inches (609.6mm) (model VL-300) and height of 12 inches (304.8mm). • Set the default line thickness to Hairline or the smallest available by the software (for vector output). -
Page 18: Section 3 -Operation
Section 3 Operation How it Works The VersaLASER uses the intense energy of the laser beam to vaporize material (wood, plastic, etc.), placed on the VersaLASER work surface, by using the technique of etching, cutting, or scribing the material. Etching is the technique where the laser beam traverses left and right, etching horizontal lines of material as it steps down the material vertically, similar to a laser or inkjet printer. -
Page 19: The Versalaser On-Screen Control Panel (Vcp)
SYSTEM OPERATION The VersaLASER On-Screen Control Panel (VCP) The purpose of the VersaLASER On-Screen Control Panel (VCP for short) is to be able to remotely control your VersaLASER by being able to view and print your stored print jobs. You will not be able to operate the VersaLASER without the VCP running in the taskbar. -
Page 20: Running Your First Job, Step-By-Step
SYSTEM OPERATION • GO HOME will move the Focus Carriage to the upper right edge of the work area. • RESET X-Y button will electronically and mechanically re-home the Focus Carriage if you accidentally bump it out of position. • RESET Z will electronically and mechanically re-home the Z-axis table. -
Page 21: Step 4 - Loading And Positioning Your Material
SYSTEM OPERATION Step 4 – Loading and Positioning Your Material Open the user door and position the wood (1) into the upper left corner of the table, up against the rulers. If necessary, use the UP or DOWN arrow buttons on the keypad or in the VCP to raise or lower the Z-axis to make loading easier. -
Page 22: Section 4 - Basic System Maintenance
Section 4 Basic System Maintenance Keeping the VersaLASER clean will ensure the highest quality performance and prolong the lifetime of the mechanical components. The frequency of cleaning will depend entirely on the type of material being processed, the performance of your exhaust system, the operating environment, and the amount of laser system usage. -
Page 23: Optics
BASIC SYSTEM MAINTENANCE Optics A visual inspection of the optics should be performed at least once a day. If the optic appears cloudy or has material deposits formed on the surface, it should be cleaned. If, after inspection, the optic appears visually uncontaminated, DO NOT clean the optic. -
Page 24: Mirror
BASIC SYSTEM MAINTENANCE #2 Mirror • Locate the #2 Mirror Holder (red). Grasp its protruding handle with your thumb and forefinger and slide it out. It is held in place by magnets so you may feel a slight resistance when you begin to slide it out. -
Page 25: Beam Window
BASIC SYSTEM MAINTENANCE Beam Window • The Beam Window is where the laser beam enters into the processing area. It is located in the upper left hand corner, towards the rear of the machine. • It is only necessary to clean the front side of the Beam Window. -
Page 26: The Main Enclosure
BASIC SYSTEM MAINTENANCE The Main Enclosure • Clean the acrylic user door with a non-abrasive cotton cloth or facial tissue and the soap solution. The top window is made out of acrylic. DO NOT use paper towels because they will scratch the acrylic. -
Page 27: Cooling Fan Filters
BASIC SYSTEM MAINTENANCE Cooling Fan Filters 1. Side cooling fan filter (inside cover) 4. Lift the cover straight up and off 2. Rear cooling fan filter (inside cover) 3. Rear cover mounting screws The side (#1) and rear (#2) cooling fan filters are located inside the Rear Cover. To access them, remove the two mounting screws (#3) underneath the rear of the system. -
Page 28: Section 5 - Accessories
Section 5 Accessories As an addition to the regular VersaLASER, we offer a wide variety of optional accessories. Before attempting to use any of the accessories in this section, make sure that you are comfortable operating the VersaLASER, the VCP, and your graphics software. Cylindrical Object Rotary Accessory (CORA) This accessory allows the VersaLASER to be quickly reconfigured to etch, scribe, or cut (material dependent), cylindrical objects such as glassware,... - Page 29 ACCESSORIES Insert the CORA into the slot (OK to do with the power on because it is hot swappable) and move On the underside of the CORA notice the self- it around until the connector engages, the pins aligning electrical connector (1) and two alignment protrude through the alignment holes, and the holes (2).
- Page 30 ACCESSORIES Lift the lever (1) on the adjustable end of the fixture (2) and slide it to the left, out of the way. Place the open end of the glass into the cone, and slide the adjustable end of the fixture to the right (3) up against the base of the glass so the glass rests firmly centered inside of the inverted cone.
- Page 31 ACCESSORIES Printing WARNING: The following steps are critical. Make sure that you enter the correct information otherwise the VersaLASER might not only adjust the Z-axis and scale the graphic incorrectly, which can ruin your material, but it can also damage itself if the moving parts of the X-axis crash into the CORA.
- Page 32 ACCESSORIES Inside the VersaLASER you will find the large By using the thumbscrews as handles (3), insert recessed slot with a self-aligning electrical the VCA into the slot (it is OK to do with the power connector to the right side (1) and the two on because it is hot swappable) and move it alignment pins (2).
-
Page 33: Integrated Cart
ACCESSORIES Integrated Cart Features: • Size: 25”W x 22” D x 30”H / Weight: 95 lbs • Maximum stability at low cost / Powder-coated, durable construction • Four “foot” ports to secure the VersaLASER to the cart to prevent slipping (1) •... - Page 34 ACCESSORIES Figure 1 (Front View) Figure 2 (Rear View) 1. Four “foot” ports to secure the 1. Exhaust intake port VersaLASER to the cart and prevent 2. Cable retainer clips slipping (1) 3. USB port 2. Pre-filter and HEPA filter drawer 4.
- Page 35 ACCESSORIES Installation • Push down on the tabs of the locking casters so that the cart does not roll. • Obtain the assistance of another person. One person should grasp the front of the machine and place his hands where the arrows indicate. The other person should stand in the back of the machine and place his hands where the arrows indicate.
-
Page 36: Computer Controlled Compressed Air Unit
ACCESSORIES Computer Controlled Compressed Air Unit This integrated accessory provides dry, oil-free compressed air to protect the VersaLASER’s optics and assist with cutting and etching of materials that tend to flame up or produce heavy quantities of smoke or debris. It MUST be used in conjunction with either the Air Assist Cone or AABS accessories. -
Page 37: Air Assist Cone
ACCESSORIES Periodic Maintenance Below the device you will find a tray. With your hands, slide the tray forwards. Inside the tray you At least once per month, check the condition of will find sponges that are designed to absorb the the two filters on the back of the device. - Page 38 ACCESSORIES Installation Lower the table down far enough so that you can Using a 3/16 socket tool or 5mm wrench, attach the attach the cone. Power off the VersaLASER. By needle valve to the port where you removed the hand, move the X-axis arm and Focus Carriage to plug.
-
Page 39: Back Sweep
ACCESSORIES Removal Loosen the thumbscrew and pull the Cone downwards. Leave the thumbscrew attached to the Focus Carriage by re-tightening it so that it doesn’t get lost. Either detach the accessory by unscrewing the needle valve and reinstalling the plug (the same way you installed it), or by the preferred method of un- attaching the hose from the needle valve by either using a wrench to loosen the nut at the end of the hose or by simply using the cone as your wrench and turning it counter clockwise. - Page 40 ACCESSORIES Power on the VersaLASER. Load some scrap material of the same type you intend to process and set focus using the Focus Tool. Adjust the angle of the nozzle by loosening the thumbscrew (1), rotating the bracket, and re-tightening the thumbscrew.
Need help?
Do you have a question about the VersaLaser VL-200 and is the answer not in the manual?
Questions and answers