HP OmniBook 4100 Service Manual
Notebook pc
Hide thumbs
Also See for OmniBook 4100:
- Reference manual (150 pages) ,
- Service manual (111 pages) ,
- User manual (50 pages)

Related Manuals for HP OmniBook 4100


Summary of Contents for HP OmniBook 4100
-
Page 1: Service Manual
® HP OmniBook 4100 Service Manual For other Service and User Manuals, go to www.ManualDepot.com... - Page 2 Intel Inside logo are U.S. registered trademarks and MMX is a U.S. trademark of Intel Corporation. TrackPoint is a U.S. registered trademark of International Business Machines. All certifications may not be completed at product introduction. Check with your HP reseller for certification status.
-
Page 3: Table Of Contents
Removing the LCD Module (HP Authorized Service Providers Only) ........2-11 Removing the Top Case (HP Authorized Service Providers Only) ..........2-14 Removing the Motherboard or Bottom Case (HP Authorized Service Providers Only).....2-16 Removing the BIOS IC (HP Authorized Service Providers Only) ..........2-19 Removing Other Components (HP Authorized Service Providers Only) ........2-21... - Page 4 Figure 4-2. Display Components ......................4-5 Figure 4-3. Motherboard Components....................4-6 Tables Table 1-1. OmniBook 4100 Models ....................1-1 Table 1-2. Product Comparisons......................1-3 Table 1-3. Activating Power Modes ....................1-4 Table 1-4. Main Status Lights (LED Strip Cable) ................1-5 Table 1-5.
-
Page 5: Replaceable Parts
Table 3-5. POST Messages........................3-18 Table 3-6. BIOS Setup Menus and Parameters..................3-23 Table 4-1. OmniBook Replaceable Parts .....................4-3 Table 4-2. Assembly-Component Breakdown ..................4-7 Table 4-3. Accessory Replaceable Parts ....................4-7 Table 4-4. Part Number Reference.......................4-8 Table 5-1. OmniBook 4100 LCD Guidelines (TFT)................5-3 HP OmniBook 4100... - Page 6 Introduction This service manual provides reference information for the HP OmniBook 4100. It is intended to be used by HP-authorized service personnel in the installation, servicing, and repair of these products. The manual is designed as a self-paced guide. It is intended to train you to install, configure, and repair OmniBook computers.
-
Page 7: Product Information
Product Information The HP OmniBook 4100 provides desktop performance and expandability as well as convenient portability. It uses high-performance component technologies that make it capable of replacing a desktop computer or serving as a portable multimedia presentation tool. Table 1-1. OmniBook 4100 Models... -
Page 8: Features And Operation
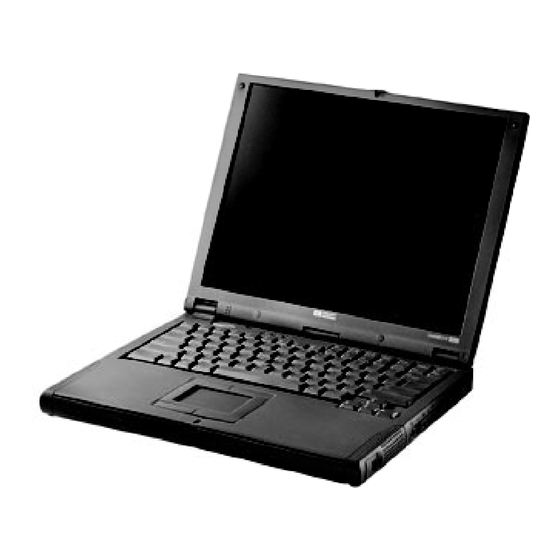
AC adapter socket Module latch Mute button Speaker Figure 1-1. OmniBook - Front View Battery PS/2 port USB port Plug-in module bay System-off button Speaker Module latch Figure 1-2. OmniBook - Side View Product Information HP OmniBook 4100... -
Page 9: Figure 1-3. Omnibook - Rear View
On, Standby, On, Standby, Suspend, Hibernate, Suspend, Hibernate, Suspend, Hibernate, Suspend, Hibernate, Off. Off. Off. Off. Features at the time of product introduction. Not updated for later versions. Intel Mobile Pentium or Mobile Pentium II processor. HP OmniBook 4100 Product Information... -
Page 10: Turning The Omnibook On And Off
(battery continues charging if ac adapter is button until the display shuts connected). Computer reboots at turn-on and down. restores network connections. Does not suspend if Video Display Device set to Both in BIOS Setup. Product Information HP OmniBook 4100... -
Page 11: Checking The Status Of The Omnibook
In addition, the battery module has five lights that indicate its charge level. To view the lights, you have to remove the battery and press the pad on the back next to the connector. The number of lights that turn on indicates the charge. HP OmniBook 4100 Product Information... -
Page 12: Using Fn Hot Keys
• You select the CD-ROM drive as the boot device. You can do this during reboot by pressing ESC to cancel the OmniBook screen, then ESC to display the boot-device menu for a one- time selection. Product Information HP OmniBook 4100... -
Page 13: System Resources
A0000 - BFFFF Video C0000 - CBFFF Video BIOS CC000 - DBFFF* Free** DC000*- FFFFF System BIOS * Approximate boundary. ** Valid uses for memory addresses CC000-DBFFF: Upper memory blocks (UMBs). PC card memory windows. HP OmniBook 4100 Product Information... -
Page 14: Table 1-9. System Input/Output Addresses (100-3Ff)
PCMCIA controller 3F0-3F5 Floppy controller Internal hard disk (primary IDE controller) Floppy controller 3F8-3FF COM1 (serial port) Table 1-10. DMA Channels Sound record Sound playback Floppy drive LPT1 (ECP parallel port) Cascade Free Free Free Product Information HP OmniBook 4100... -
Page 15: Specifications
Specifications The following tables list descriptions for the OmniBook and its accessories. Table 1-11. OmniBook 4100 Specifications Physical Attributes Size: 330.5mm×256.9mm×35-36.5mm (13.0"×10.1"×1.3-1.4"). Weight: 2.92 kg (6.45 lb). 233/266-MHz Intel Pentium II processor with MMX technology. Processor and –or– Bus Architecture 266-MHz Intel Pentium processor with MMX technology. - Page 16 Microsoft Windows 95 or Windows NT 4.0. Windows 95-compatible Plug-and-Play. Windows NT 4.0 APM and PC Card Plug-and-Play. Advanced Power Management (APM 1.2). DMI 2.0 with HP TopTools 2.6. McAfee Virus Scan 3.1.5. Online documentation. OmniBook Recovery CD-ROM included. Centralized worldwide BIOS and driver update service.
-
Page 17: Table 1-12. Omnibook 4100 Accessories
Table 1-12. OmniBook 4100 Accessories OmniBook 4100-Only Accessories F1474A 24X CD-ROM drive module. F1472A Floppy drive module. F1473A Floppy drive cable for external use. F1466A Lithium-ion battery (primary and secondary). F1467A 4.0-GB internal hard disk drive. F1475A 6.4-GB internal hard disk drive. -
Page 18: Internal Design
Hard Disk Speaker Speaker Drive All external connections (except IR and audio) are made to the Plug-In motherboard. Main Module Battery or Battery Figure 1-4. Replaceable Module Diagram 1-12 Product Information HP OmniBook 4100... -
Page 19: Table 1-13. Functional Structure
IR PCA Infrared transmitter/receiver. Motherboard Keyboard controller, PS/2 processor, PS/2 connector. PS/2 port Motherboard Bus controller (South Bridge), USB connector. Docking port Motherboard Docking logic, docking connector. Motherboard PCMCIA controller. PCMCIA PCMCIA socket PCMCIA connectors. HP OmniBook 4100 Product Information 1-13... -
Page 21: Removal And Replacement
Hinge cover (table on page 2-21). VGA PCA (table on page 2-23). Inverter PCA (table on page 2-21). Caution Always provide proper grounding when performing repairs. Without proper grounding, an electrostatic discharge may damage the OmniBook and its components. HP OmniBook 4100 Removal and Replacement... -
Page 22: Table 2-2. Required Equipment
Torque (kgf•cm) Torque (in•lbf) 1.0 – 1.5 0.9 – 1.3 M2.5 (5 mm) 3.0 – 3.5 2.6 – 3.0 M2.5 (16–19 mm) 2.5 – 3.0 2.2 – 2.6 3.0 – 3.5 2.6 – 3.0 Removal and Replacement HP OmniBook 4100... -
Page 23: Removing The Battery Or Plug-In Module (User-Replaceable)
• Important: You must slide the latch forward before you can insert a module. • You can install a battery in either bay. But any other type of module must be installed in only the left bay. HP OmniBook 4100 Removal and Replacement... -
Page 24: Removing A Ram Board (User-Replaceable)
Figure 2-2. Removing a RAM Board Reassembly Notes • Insert the RAM board into the connector at about a 30° angle until it is fully inserted. Then press down at both sides until both latches snap closed. Removal and Replacement HP OmniBook 4100... -
Page 25: Removing The Hard Disk Drive (User-Replaceable)
• Use a flat-blade screwdriver to pry open the snaps at the ends of the case, then open the connector-side of the case. • Pry out the corner next to the connector, then lift out the connector and hard drive together. • Unplug the internal connector and cable from the hard drive. HP OmniBook 4100 Removal and Replacement... -
Page 26: Figure 2-4. Installing A Hard Drive In The Cover
¨ On any computer that has a CD-ROM drive, run from the makesupp \Omnibook\Drivers\Hputils directory on the OmniBook 4100 Recovery CD. ¨ On any computer with World Wide Web access, download the Support Utility software package from the OmniBook website (see page vi). Follow the instructions provided. -
Page 27: Replacing Small Parts (User-Replaceable)
VGA Connector Cover lower tabs release. To install, insert the top tabs into the strip cover, then push up on the cover and down on the bottom case until you can insert the lower tabs. HP OmniBook 4100 Removal and Replacement... -
Page 28: Removing The Keyboard (Hp Authorized Service Providers Only)
Removing the Keyboard (HP Authorized Service Providers Only) Required Equipment • Small Phillips screwdriver. • Probe or tweezers. Removal Procedure 1. Unplug the ac adapter, if present, and remove the battery. 2. On the bottom of the unit, remove the seven “K” screws from the bottom case. - Page 29 Hint On the bottom case, the holes for the keyboard screws are marked by “K”. The hole recesses have flat bottoms for the 16-mm T-head screws (not tapered as for longer flathead screws). HP OmniBook 4100 Removal and Replacement...
-
Page 30: Removing The Display Assembly (Hp Authorized Service Providers Only)
Removing the Display Assembly (HP Authorized Service Providers Only) Required Equipment • Small Phillips screwdriver. Removal Procedure 1. Unplug the ac adapter, if present, and remove the battery. 2. On the back of the unit, lift up on the VGA connector cover above the VGA port and unsnap it from the case. -
Page 31: Removing The Lcd Module (Hp Authorized Service Providers Only)
16-mm T-head screws and tapered bottoms for the longer 19-mm flathead screws. Removing the LCD Module (HP Authorized Service Providers Only) Note The exact details for removing the LCD module depend on the type of module. Some details may differ from those described below. - Page 32 13. Separate the LCD module and the shield: • You may have to remove one or more pieces of tape. • If the flex cable is still attached to the LCD module, unplug the cable. 2-12 Removal and Replacement HP OmniBook 4100...
-
Page 33: Figure 2-7. Removing The Display
• Make sure the LED strip cable is routed through the bottom-right corner of the LCD bracket. • Install the inverter PCA under the main LCD flex cable. HP OmniBook 4100 Removal and Replacement 2-13... -
Page 34: Removing The Top Case (Hp Authorized Service Providers Only)
At the lower-right corner of the LCD module, be careful the wires are not pinched where they pass next to the LCD bracket. Otherwise, they could be damaged. Removing the Top Case (HP Authorized Service Providers Only) Required Equipment • Small Phillips screwdriver. -
Page 35: Figure 2-8. Removing The Top Case
On the bottom case, the holes for the top case screws are unmarked. The hole recesses have flat bottoms for the 16-mm T-head screws and tapered bottoms for the longer 19-mm flathead screws. HP OmniBook 4100 Removal and Replacement 2-15... -
Page 36: Removing The Motherboard Or Bottom Case (Hp Authorized Service Providers Only)
Removing the Motherboard or Bottom Case (HP Authorized Service Providers Only) Required Equipment • Small Phillips screwdriver. • 5-mm hex driver (or 3/16 inch). Removal Procedure 1. Unplug the ac adapter, if present, and remove the battery. 2. Remove these additional assemblies: •... -
Page 37: Figure 2-9. Removing The Motherboard
IR PCA Motherboard Screw, M2.5×5mm Heat exchange cover Air vent cover Screw, M2.5×5mm Screw, M2.5×16mm Left frame Right frame RAM/BIOS cover Screw, M2.5×5mm Screw, M2×3.5mm Audio jack cover Figure 2-9. Removing the Motherboard HP OmniBook 4100 Removal and Replacement 2-17... - Page 38 OmniBook. After installing the IC, you must reprogram it. Hewlett- Packard prefers that you program the IC with the latest BIOS—follow the directions carefully. You can download it from the OmniBook website (see page vi). 2-18 Removal and Replacement HP OmniBook 4100...
-
Page 39: Figure 2-10. Installing Docking Doors And Module Latch
¨ If you are prompted for the serial number, type the serial number shown on the bottom of the case. ¨ If a serial number has already been stored, you must call an HP support center to change it. Installing a New Serial Number Label If you do not have a master file that creates serial number labels, get a copy from the Reseller website (see page vi). -
Page 40: Removing The Bios Ic (Hp Authorized Service Providers Only)
3. While holding the paper label in place, attach a serial label overlay into the outer recess. It covers and protects the serial label. Removing the BIOS IC (HP Authorized Service Providers Only) Note A replacement BIOS IC contains only enough basic programming to boot the OmniBook. After installing the IC, you must reprogram it. -
Page 41: Removing Other Components (Hp Authorized Service Providers Only)
• Press down firmly on the IC with your thumb to ensure a proper connection. • Reprogram the IC by programming the BIOS—see the note above. Removing Other Components (HP Authorized Service Providers Only) Required Equipment • Small Phillips screwdriver. - Page 42 LCD bracket. Reassembly Notes: Make sure the LED cable is routed through the bottom-right corner of the LCD bracket. Display (page 2-10). Unsnap the strip cover from the hinge covers. Strip Cover (Top Case) 2-22 Removal and Replacement HP OmniBook 4100...
-
Page 43: Table 2-9. Removing Top Case Components
Keyboard (page 2-8). remove the frame. Display (page 2-10). 3. Unplug the DC-DC PCA. Top case (page 2-14). 4. Unplug the audio jack PCA. BIOS IC See page 2-19. See page 2-16. Bottom Case HP OmniBook 4100 Removal and Replacement 2-23... - Page 44 Display (page 2-10). 2. Unplug the fan cable from the motherboard and lift out the fan. Reassembly Notes: Route the fan wires at the bottom of the opening next to the motherboard. 2-24 Removal and Replacement HP OmniBook 4100...
- Page 45 Top case (page 2-14). Reassembly Notes: See the picture on page 2-19. See page 2-16. Motherboard Keyboard (page 2-8). Remove the four screws from the PCMCIA socket and PCMCIA Socket unplug it from the motherboard. HP OmniBook 4100 Removal and Replacement 2-25...
- Page 46 2. Use a probe to unplug the LVDS PCA from the VGA PCA. 3. On the back of the unit, remove the two standoffs from the VGA connector. 4. Unplug the VGA PCA from the motherboard. 2-26 Removal and Replacement HP OmniBook 4100...
-
Page 47: Troubleshooting And Diagnostics
• Diagnostic tools ¨ OmniBook hardware diagnostic program (page 3-12). ¨ Power-on self-test (page 3-17). ¨ Sycard PCCtest 450 PC Card (page 3-20). ¨ Desktop Management Interface (page 3-21). ¨ BIOS Setup utility (page 3-23). HP OmniBook 4100 Troubleshooting and Diagnostics... -
Page 48: Troubleshooting
Troubleshooting The suggestions in this section can help isolate and repair the cause of a problem. To ensure quality repair, HP recommends that you follow the basic troubleshooting steps shown in the illustration below. Check the customer's description of the problem and any supporting information. -
Page 49: Verifying The Repair
Run the basic test of the OmniBook diagnostic program (page 3-12). –and– • Function Tests. Run tests that check the repaired function, such as in the OmniBook diagnostic program (page 3-12). –and– • Failed Tests. Run any other tests that failed during troubleshooting. HP OmniBook 4100 Troubleshooting and Diagnostics... -
Page 50: Suggestions For Troubleshooting
* The diagnostic test is more thorough if you use a loopback connector. † Use an appropriate external device to exercise the port. See the help text for the tests in the menu. Troubleshooting and Diagnostics HP OmniBook 4100... -
Page 51: Table 3-2. Troubleshooting Suggestions
“Invalid drive. check for corrupt files on Hard drive. system disk” or hard drive, reload hard drive, Remove and reinsert hard “Auto IDE error” replace hard drive. drive. Check boot order in BIOS Setup. HP OmniBook 4100 Troubleshooting and Diagnostics... - Page 52 Press Fn+F5 several times. the VGA PCA instead, then LCD cable or Try external monitor. motherboard. connections. Inverter PCA. LVDS PCA. White display Adjust display brightness. LCD module. Inverter PCA. LVDS PCA. Troubleshooting and Diagnostics HP OmniBook 4100...
- Page 53 Floppy module or contacts. contacts. Try using alternate Floppy cable. connection (with or without Motherboard. floppy cable). Check settings in BIOS Setup. Keyboard Some or all keys do Keyboard. not work properly Motherboard. BIOS IC. HP OmniBook 4100 Troubleshooting and Diagnostics...
- Page 54 Check operation using play Setup. headphones or external Motherboard. speakers (audio jack PCA). Increase sound volume (Fn+UP and software controls). Check whether mute is active (mute button and software controls). Check for sound resource conflicts. Troubleshooting and Diagnostics HP OmniBook 4100...
- Page 55 Control Panel System (Windows NT). Reboot the computer. Try the card in the other slot or in another computer. Check the OmniBook website for installation instructions (page vi). Download current drivers from the card manufacturer’s website. HP OmniBook 4100 Troubleshooting and Diagnostics...
- Page 56 You can run BIOS Setup and change the hard disk time- out to match the Suspend time-out. Certain background operations (such as HP COE virus scans) can affect performance while they’re running. Some file browsers may be unresponsive while they’re...
- Page 57 Call Center: Repair Center: Repair Center: Suggestions Likely Causes Comments General plug-in Check module contacts. Plug-in module or Plug-in modules are not module problems contacts. repairable—they must be Push system-off button. exchanged. Motherboard. HP OmniBook 4100 Troubleshooting and Diagnostics 3-11...
-
Page 58: Diagnostic Tools
–or– If TopTools is installed, use the DiagTools page to create the disk. • On any computer with a CD-ROM drive, run diaginst from the \Omnibook\Dmi\Hpdiags directory on the OmniBook 4100 Recovery CD. 3-12 Troubleshooting and Diagnostics HP OmniBook 4100... - Page 59 On any computer, open the HPSUPPT.TXT log file on the diagnostic Optional: Check the log. disk using Notepad or other text editor. It contains a hardware summary and a list of all test results and errors. HP OmniBook 4100 Troubleshooting and Diagnostics 3-13...
-
Page 60: Figure 3-3. Serial And Parallel Loopback Connectors
Replace the BIOS IC. Replace the 0086h motherboard. 0180h For 01FFFFFFh and below, replace the motherboard. For 02000000h and above, 0087h Replace the motherboard. replace the RAM board (each 01000000h 0088h Replace the BIOS IC. represents 16MB). 3-14 Troubleshooting and Diagnostics HP OmniBook 4100... - Page 61 Make sure the loopback connector is installed Replace the hard disk. Replace the and constructed properly. Replace the motherboard. motherboard. Floppy Disk Tests 0608h - Replace the motherboard. 0611h 0301h Replace the floppy drive. Replace the motherboard. HP OmniBook 4100 Troubleshooting and Diagnostics 3-15...
- Page 62 Restart the reflector unit. Replace the IR PCA, 0A06h Insert an audio CD in the drive. replace the motherboard. USB Tests 1301h Reprogram the BIOS IC. Replace the BIOS IC. Replace the motherboard. 3-16 Troubleshooting and Diagnostics HP OmniBook 4100...
-
Page 63: Power-On Self-Test
The following table lists POST messages and explanations for reported problems. If the system fails after you make changes in BIOS Setup, reset the computer, enter BIOS Setup, and install the defaults or correct the error. HP OmniBook 4100 Troubleshooting and Diagnostics 3-17... -
Page 64: Table 3-5. Post Messages
ServerBIOS2 test error: Cannot write to EISA CMOS. 02F5: DMA Test Failed ServerBIOS2 test error: Cannot write to extended DMA (Direct Memory Access) registers. 02F6: Software NMI Failed ServerBIOS2 test error: Cannot generate software NMI (Non-Maskable Interrupt). 3-18 Troubleshooting and Diagnostics HP OmniBook 4100... - Page 65 Displays the address nnnn of the upper limit of Upper Memory Blocks, indicating released segments of the BIOS which can be reclaimed by a virtual memory manager. Video BIOS shadowed Video BIOS copied to shadow RAM. HP OmniBook 4100 Troubleshooting and Diagnostics 3-19...
-
Page 66: Sycard Pcctest 450 Cardbus Card (Optional)
Requires the PC Card configuration header. Run the test for the Texas Instruments PCI1250A socket controller (command line switch -b65). • CardBus (32-bit) test, TESTCB. Requires the CardBus configuration header. Run the test for the Texas Instrument PCI1250A socket controller (command line switches -b65 and -jsd000). 3-20 Troubleshooting and Diagnostics HP OmniBook 4100... -
Page 67: Desktop Management Interface (Dmi)
1. Start Windows, if it is not already running. 2. Click Start, Programs, HP DMI, Setup. To install the DMI from floppy disks or from the OmniBook 4100 Recovery CD: 1. For floppy disks, copy the DMI software from the \omnibook\drivers\os_version\dmi directory of either the hard disk or Recovery CD to two or more floppy disks (for example, copy the contents of the \disk1 subdirectory to disk #1). -
Page 68: Figure 3-4. Dmi Components
• Windows-compatible DMTF Service Layer software, which controls access to the DMI. • A client agent. The HP Remote DMI Agent is a DMI application and also a network server-side stream-based application. The Remote Agent is listening for Remote Application connection requests. -
Page 69: Bios Setup Utility
FDD Controller Enables the floppy drive. Enabled Serial Port Sets how the serial port is configured by the BIOS (specified Enabled or automatic). Base I/O address Sets the I/O address and interrupt. 3F8h, IRQ4 HP OmniBook 4100 Troubleshooting and Diagnostics 3-23... - Page 70 (Skips Suspend mode if that time-out is disabled.) Hard Disk Time-out Sets the period of hard disk inactivity after which the hard disk 2 minutes stops spinning. 3-24 Troubleshooting and Diagnostics HP OmniBook 4100...
- Page 71 Load Previous Values Discards Setup changes since last save, stays in Setup. Does not affect Security and date/time changes. Save Changes Saves Setup changes, and stays in Setup. Security settings are saved when changed. HP OmniBook 4100 Troubleshooting and Diagnostics 3-25...
-
Page 73: Replaceable Parts
This chapter contains an exploded view of the OmniBook and the following lists of parts: • OmniBook replaceable parts (page 4-2). • Assembly-component breakout (page 4-7) • Accessory replacement parts (page 4-7). • Part number reference (page 4-8). HP OmniBook 4100 Replaceable Parts... -
Page 74: Figure 4-1. Exploded View
Display components (see page 4-5) Motherboard components (see page 4-6) Figure 4-1. Exploded View Replaceable Parts HP OmniBook 4100... -
Page 75: Table 4-1. Omnibook Replaceable Parts
Hinges, display (left and right) F1460-60973 IC, BIOS, Pentium II (MD) F1460-12007 IC, BIOS, Pentium (T) F1460-12016 Keyboard, Danish F1460-60932 Keyboard, French F1460-60923 Keyboard, French-Canadian F1460-60927 Keyboard, German F1460-60924 Keyboard, International English F1460-60922 Keyboard, Italian F1460-60926 Keyboard, Norwegian F1460-60930 HP OmniBook 4100 Replaceable Parts... - Page 76 Screw, M2.5×5mm F1460-60984 Screw, M2.5×16mm F1460-60986 Screw, M2.5×19mm F1460-60985 Screw, M3×3mm F1460-60983 Screw, M3×4mm F1460-60990 Socket, PCMCIA F1460-60919 Speaker F1460-60960 Standoff, VGA Thermal pads, Pentium (T) Thermal pads, Pentium II (MD) See Table 4-2 for components. Replaceable Parts HP OmniBook 4100...
-
Page 77: Figure 4-2. Display Components
Note: 14-inch display shown. For a 13-inch display, the LCD flex cable and other details differ. Figure 4-2. Display Components HP OmniBook 4100 Replaceable Parts... -
Page 78: Figure 4-3. Motherboard Components
Figure 4-3. Motherboard Components Replaceable Parts HP OmniBook 4100... -
Page 79: Table 4-2. Assembly-Component Breakdown
Cable, external FDD F1473-80001 Drive, CD-ROM module F1474-80001 Drive, floppy disk module (no cable) F1472-80001 Drive, LS-120 module F1470-80001 Module, filler F1460-80015 Monitor stand (short) F1453-60901 RAM board, 32MB 1818-7413 F1456-69001 RAM board, 64MB 1818-7414 F1457-69001 HP OmniBook 4100 Replaceable Parts... -
Page 80: Table 4-4. Part Number Reference
PCA, audio jack F1460-60914 PCA, LVDS (Samsung 13") F1460-60916 PCA, LVDS (LG 14") F1460-60917 PCA, inverter (Samsung 13") F1460-60918 PCA, inverter (LG 14") F1460-60919 Socket, PCMCIA F1460-60921 Keyboard, US English F1460-60922 Keyboard, International English F1460-60923 Keyboard, French Replaceable Parts HP OmniBook 4100... - Page 81 Hinges, display (left and right) F1460-60974 Kit, LCD (shield, brackets) (Samsung 13") F1460-60975 Cable, LCD flex (Samsung 13") F1460-60980 Kit, LCD (shield, brackets) (LG 14") F1460-60981 Cable, LCD flex (LG 14") F1460-60982 Case, HDD kit HP OmniBook 4100 Replaceable Parts...
- Page 82 Recovery CD, Italian (OB4100, WNT) F1462-60921 Recovery CD, Swedish (OB4100, WNT) F1466-80001 Battery, lithium-ion F1469-80001 Adapter, PS/2 "Y" F1470-80001 Drive, LS-120 module F1472-80001 Drive, floppy disk module (no cable) F1473-80001 Cable, external FDD F1474-80001 Drive, CD-ROM module 4-10 Replaceable Parts HP OmniBook 4100...
-
Page 83: Reference Information
The statement can be a fax copy of the document. The fact that the unit is in the hands of an HP representative on behalf of the customer is not evidence of ownership. -
Page 84: Hewlett-Packard Display Quality Statement
These cosmetic imperfections may be visible to the customer under varying display conditions and can appear as bright, dim, or dark spots. This issue is common across all vendors supplying TFT displays in their products and is not specific to the HP OmniBook display. -
Page 85: Table 5-1. Omnibook 4100 Lcd Guidelines (Tft)
Table 5-1. OmniBook 4100 LCD Guidelines (TFT) Type of Imperfection Imperfections Not Allowed LG 14" TFT, XGA • Electrical Imperfections: 7 or more single bright dots. • Bright dots 7 or more single dark dots. Dark dots • 3 or more double bright dots. - Page 88 1. Product Information 2. Removal and Replacement 3. Troubleshooting and Diagnostics 4. Replaceable Parts 5. Reference Information Part Number Printed in U.S.A. 4/98 F1460-90020...
Need help?
Do you have a question about the OmniBook 4100 and is the answer not in the manual?
Questions and answers