Chapters
Table of Contents

Related Manuals for JVC GR-AX310


Summary of Contents for JVC GR-AX310
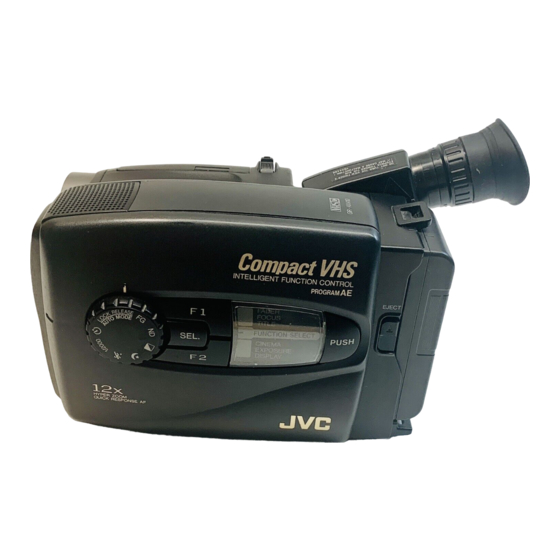
- Page 1 COMPACT VHS CAMCORDER CAMESCOPE COMPACT VHS GR-AX210 GR-AX310 GR-AX410 (The camcorder illustrations appearing in these instructions are of the GR-AX310.) INSTRUCTIONS MANUEL D'INSTRUCTIONS YU30052-515-1...
-
Page 2: Safety Precautions
Dear Customer, Thank you for purchasing the JVC Compact VHS camcorder. Before use, please read the safety information and precautions contained in the following pages to ensure safe use of your new camcorder. Using This Instruction Manual • All major sections and subsections are listed in the Table Of Contents ( pg. -
Page 3: Important Product Safety Instructions
IMPORTANT PRODUCT SAFETY INSTRUCTIONS Electrical energy can perform many useful functions. But improper use can result in potential electrical shock or fire hazards. This product has been engineered and manufactured to assure your personal safety. In order not to defeat the built-in safeguards, observe the following basic rules for its installation, use and servicing. - Page 4 1. Accessories To avoid personal injury: • Do not place this product on an unstable cart, stand, tripod, bracket or table. It may fall, causing serious injury to a child or adult, and serious damage to the product. • Use only with a cart, stand, tripod, bracket, or table recommended by the manufacturer or sold with the product.
-
Page 5: Quick Operation Guide
Push in. BATT. RELEASE Using the battery pack Hook-on the battery pack’s top end to the camcorder. (Charging procedure, Push in the battery pack until it locks into place. To remove the battery pack Slide BATT. RELEASE and pull out the battery pack. -
Page 6: Random Assemble Editing
• AC Power Adapter/ •Battery Pack Charger AA-V11U BN-V11U MAJOR FEATURES Intelligent Function Control P. 18 – 25) Variable-Speed Hyper Zoom [GR-AX210/AX410:12x, GR-AX310:14x] ( Zoom-in Zoom-out Random Assemble Editing P. 32 – 35) [GR-AX310 only] •Cassette Adapter (VHS PlayPak) C-P7U Cassettes marked can be used with this camcorder. -
Page 7: Table Of Contents
Using The Cassette Adapter... 28 Basic Connections ... 29 Basic Playback ... 30 Features ... 31 EDITING Tape Dubbing ... 32 Random Assemble Editing (R.A.Edit) [GR-AX310 only] ... 32 Insert Editing ... 36 Audio Dubbing ... 37 USER MAINTENANCE TROUBLESHOOTING INDEX Controls ... -
Page 8: Getting Started
2 hrs. 40 min. USING THE BATTERY PACK ATTACH BATTERY PACK Hook its top end to the camcorder and push the battery pack in until it locks in place. DETACH BATTERY PACK Slide BATT. RELEASE and pull out the battery pack. -
Page 9: Using A Car Battery
The CHG. indicator may not light properly with a brand new battery pack, or with one that’s been stored for an extended period. In this case, remove and reattach the battery pack and recharge it. The CHG. indicator should light during recharging. If not, contact your nearest JVC dealer. To AC outlet... -
Page 10: Clock (Lithium) Battery Removal/Insertion
–/+ POWER Date Month/Day/Year DATE ... Date setting is performed DATE JAN 1.00 TIME AM12:00 Time 12-hour indication with AM or PM TIME ... Time setting is performed GETTING STARTED (cont.) Clock (Lithium) Battery Removal/Insertion This battery is necessary to operate the clock and to perform date/time settings. -
Page 11: Viewfinder Adjustment
SP-EP recording mode and T20•30•40 tape length select button Set POWER to “CAMERA”. Tape length and recording mode indicator T20 SP T20 EP T30 SP T40 EP T30 SP T40 SP T30 EP Turn to take up slack. Erase Protection Gear Viewfinder Adjustment POSITION VIEWFINDER... -
Page 12: Grip Adjustment
Recording Start/Stop button GETTING STARTED (cont.) Grip Adjustment EXPAND LOOP Separate the Velcro strip. INSERT HAND Pass your right hand through the loop and grasp the grip. ADJUST STRAP LENGTH Adjust so your thumb and fingers can easily operate the Recording Start/Stop button and Power Zoom switch. -
Page 13: Rm-V20U Remote Control Unit
ZOOM (T/W) Slow-speed zoom ( FF/RETAKE Retake (Forward) ( PLAY REW/RETAKE Retake (Rewind) ( START/STOP Functions same as the Recording/Stop button of a camcorder. & VISS Index Code Marking ( To REMOTE & Functions With the camcorder’s power switch set to “PLAY”. -
Page 14: Recording
If you’re recording on a cassette from the middle, use the RETAKE function ( last recording so you don’t erase any of it. The LENS COVER warning blinks for about 5 seconds when the camcorder is turned on, whether the cover is open or closed. Basic Recording pg. 11) -
Page 15: Basic Features
This is normal. FEATURE: Retake PURPOSE: To re-record certain segments. OPERATION: 1) Make sure camcorder is in Record–Standby mode. 2) Press either RETAKE button to reach start point for new recording. 3) Press Recording Start/Stop to start recording. Noise may appear during Retake. -
Page 16: Advanced Features
Captures faster action than Sports mode. SELF TIMER 15sec. Self-Timer Lets you delay recording start after Recording Start/ Stop is pressed. If camcorder is secured, operator can enter scene before recording starts. 1) Set PROGRAM AE dial to “ ”. “ in viewfinder. -
Page 17: White Balance Adjustment
To switch to automatic white balance adjustment, press MWB until the indication disappears, or turn the PROGRAM AE dial to LOCK. Re-adjust the White Balance mode when the lighting has changed, when the camcorder has been turned on and off again, or when the PROGRAM AE dial’s position has been changed. -
Page 18: Start Recording
Group 1 FADER CINEMA FADER SEL. Group 2 FOCUS EXP. Viewfinder SEL. Group 3 TITLE DISP. SEL. F1 button Function SEL. button PROGRAM AE select dial FADE IN FADE OUT RECORDING INTELLIGENT FUNCTION CONTROL This feature makes it easier for you to make selections CINEMA during the following modes: Fader, Cinema, Manual Focus Adjust, Exposure Control, Display, and Instant... - Page 19 Cinema Cinema mode This feature allows you to record black bars at the top and bottom of the screen to produce a cinema-like “wide-screen” effect. SELECT MODE Press Function SEL. until “CINEMA” appears to the right of F2. ENGAGE CINEMA MODE Press F2.
- Page 20 This feature locks the focus in place, which is especially helpful in the following situations: •When things pass between your subject and the camcorder. Engage the focus lock function to lock your subject in before recording. •When you want your subject to be focused, and to appear in a corner of the screen.
- Page 21 F1 button F2 button Function SEL. FOCUS button Power zoom switch Viewfinder Manual Focus NOTE: You should already have made the necessary viewfinder adjustments ( pg. 11). If you haven’t, do so before continuing. SELECT MODE Press Function SEL. until “FOCUS” appears to the EXP.
- Page 22 F1 button F2 button Function SEL. FOCUS button Power zoom switch Viewfinder To brighten the image To darken the image Exposure indicator bar RECORDING Exposure Control This feature automatically adjusts the iris for the best available picture quality, but you can override and make the adjustment manually.
- Page 23 It is not recorded during any other recordings made on that day. ON-SCREEN DISPLAY CONNECT CAMCORDER TO MONITOR Connect the camcorder to a monitor as instructed in “BASIC CONNECTIONS” ( DISPLAY VIEWFINDER INDICATIONS Press F2 until the indications appear on the connected monitor.
-
Page 24: Character Generator
–/+ CHARACTER SET MODE screen CHARACTER SET MODE A B C D E F G H I J K L M N O P Q R S T U V W X Y Z Ä Ö Ü À È Ì Ò Ù Ñ Æ Ø Å & : . -
Page 25: Instant Titles
IN PARIS, FRANCE Title: OUR VACATION Instant Titles The camcorder has eight preset titles in memory. You can superimpose one of them above a previously stored title as shown in the illustration to the left. The preset titles appear in this order: HAPPY BIRTHDAY,... - Page 26 You can set the delay between pressing Recording Start/ Stop and the actual start of recording. If you secure the camcorder, you (or whomever is operating the camcorder) can enter the scene before recording starts. NOTE: You need the optional RM-V20U remote control unit to perform this procedure.
- Page 27 Press REC TIME until “ ” disappears from the viewfinder. NOTES: For best results, make sure the camcorder is secured when shooting. If the PROGRAM AE dial is set to Self-Timer mode, Animation is cancelled and Self-Timer mode is engaged with 15S selected.
-
Page 28: Playback
Using The Cassette Adapter Cassette Adapter (VHS PlayPak) Use this to play back a VHS-C video cassette recorded with this camcorder. It is fully compatible with any VHS video cassette recorder. The C-P7U adapter is battery powered and automatically performs tape loading and unloading. -
Page 29: Basic Connections
AUDIO and VIDEO connectors on the camcorder and those on the VCR. SUPPLY POWER Turn on the camcorder, the VCR and the TV. SELECT MODE Set the VCR to its AUX input mode, and set the TV to its VIDEO mode or channel 3. -
Page 30: Basic Playback
Tape counter M 0:00:00 PLAYBACK Basic Playback NOTE: Make sure you connect your camcorder as directed in “BASIC CONNECTIONS” ( pg. 29 ). LOAD A CASSETTE Slide EJECT to open the cassette holder, then insert the cassette with the label facing out. Press PUSH to ensure the holder is closed and locked. -
Page 31: Features
PLAYBACK Features TRACKING PLAY/PAUSE COUNTER R/M STOP PLAY PAUSE RM-V20U (optional) FEATURE: Manual Tracking PURPOSE: To eliminate noise bars that appear on the screen. OPERATION: 1) Press either TRACKING button as many times as necessary for best picture. To reset TRACKING to the original NOTES: preset, press both TRACKING buttons simultaneously. -
Page 32: Editing
Tape Dubbing CONNECT EQUIPMENT Following the illustration at left, connect the camcorder and the VCR. GR-AX310 only: If you have a Remote PAUSE terminal, use the editing cable to connect it to the camcorder and the VCR. (See “NOTES” below for details.) PREPARE FOR DUBBING Set the camcorder’s power switch to PLAY, turn on... -
Page 33: Make Connections
REC STBY (you don’t need to press VCR CTL for this one). You’re now ready to try Random Assemble Editing. IMPORTANT Although the MBR is compatible with JVC VCRs and those of many other makers, it may not work with yours or may offer limited functions. NOTES: If the VCR’s power doesn’t come on in step 1, try... - Page 34 NOTES: There must be at least one second between an in-point and its corresponding out-point. The camcorder prerolls during R.A. Edit, so there must be at least 15 seconds of recording material prior to any in-point. 0:01:05...
- Page 35 VCR in the specified order. END AUTOMATIC EDITING When all selected scenes have been copied, the camcorder and VCR enter the still or pause mode. Press STOP on both units. NOTES: If you performed step 1C on page 33, keep the remote control pointed at the VCR during editing.
-
Page 36: Insert Editing
AUDIO DUB and PAUSE simultaneously after Step 5. When INSERT and PAUSE are pressed simultaneously again, the unit re-enters the Video-signal-only Recording mode. If the camcorder’s mike is too close to the TV, or if the TV’s volume is too high, whistling or howling may occur. -
Page 37: Audio Dubbing
Audio Dubbing may not work correctly if the tape contains blank segments, or if the recording speed was changed during the original recording. If the camcorder’s mike is too close to the TV, or if the TV’s volume is too high, whistling or howling may occur. -
Page 38: User Maintenance
PUSH. Press BATT. RELEASE to remove the battery pack. Slide the LENS COVER open/close switch to close the lens cover. Cleaning The Camcorder CLEAN EXTERIOR Wipe gently with a soft cloth. CLEAN LENS Blow it with a blower brush, then wipe gently with lens cleaning paper. -
Page 39: Troubleshooting
An error number (E01, etc.) appears in the viewfinder. The camcorder is a microcomputer-controlled device. External noise and interference (from a TV, a radio, etc.) might prevent it from functioning properly. In such cases, first disconnect its power supply unit (battery pack, AC Power Adapter/Battery Charger, etc.) and clock battery;... -
Page 40: Connectors
Button ... Tape Length [T20•T30•T40] Select Button ... COUNTER R [Reset]/M [Memory] Button ... EDIT Button (GR-AX310 only) ... DATE/TIME +/– Buttons ... CHAR. [Character] SET +/– Buttons ... TRACKING +/– Buttons ... DATE/TIME SET Button ... CHAR. SET Button ... -
Page 41: Viewfinder
INDEX Viewfinder Viewfinder Indications PROGRAM AE Indicator ... Displayed at for approx. 3 seconds when the PROGRAM AE select dial is switched from one position to another. Then only the indicator remains at Focus Indicator ... White Balance Mode Indicator ... Zoom Level Indicator ... -
Page 42: Terms
AC Power Adapter ... pg. 9 Animation Recording ... pg. 27 Audio Dubbing ... pg. 37 Auto Date Record ... pg. 23 Auto Focus ... pg. 20 Auto Mode Lock Mode ... pg. 16 Auto Mode Release Mode ... pg. 16 Battery Pack ... -
Page 43: Cautions
In case of connecting the unit's power cord to an AC wall outlet other than American National Standard C73 series type use an AC plug adapter, called a "Siemens Plug", as shown. For this AC plug adapter, consult your nearest JVC dealer. Plug adapter General Battery Precautions •... -
Page 44: Main Unit
•Moisture on the head drum can cause severe damage to the video tape, and can lead to internal damage to the camcorder itself. Serious malfunctioning If malfunctioning occurs, stop using the unit immediately and consult your local JVC dealer. -
Page 45: Optional Accessories
•Battery Charger BH-VC10U •Car Battery Cord AP-V7U •RF Unit RF-V5U •Wireless Remote Control Unit RM-V700U For R.A. Edit (GR-AX310) using a non-JVC VCR pg. 33) * The RM-V700U cannot be used to operate the camcorder. •Wired Remote Control Unit RM-V20U •Compact VHS-C Cassettes TC-40/30/20... -
Page 46: Precautions De Securite
Cher client, Nous vous remercions pour l’achat du camescope Compact VHS JVC. Avant utilisation, veuillez lire les informations pour votre sécurité et les précautions de sécurité indiquées dans les pages suivantes pour assurer une utilisation sûre de votre nouveau camescope. -
Page 47: Consignes De Securite Importantes
CONSIGNES DE SECURITE IMPORTANTES L’énergie électrique peut effectuer de nombreuses fonctions utiles. Mais un usage incorrect peut causer une éventuelle électrocution ou des risques d’incendie. Cet appareil a été conçu et fabriqué pour garantir votre propre sécurité. Pour ne pas anéantir les sécurités incorporées, observez les règles de base suivantes pour son installation, utilisation et entretien. - Page 48 UTILISATION 1. Accessoires Pour éviter des blessures: • Ne pas placer ce produit sur un chariot, un support, un trépied ou une table instables. Il pourrait tomber, causant des blessures sérieuses à un enfant ou à un adulte, en endommageant sérieusement l’appareil. •...
- Page 49 GUIDE DE FONCTIONNEMENT BREF ALIMENTATION Crocher Pousser BATT. RELEASE Utilisation de la batterie Crocher l’extrémité supérieure de la batterie au camescope. (Procédure de recharge, P. 8) Pousser sur la batterie jusqu’à ce qu’elle s'enclenche en place. Pour retirer la batterie Faire coulisser BATT.
-
Page 50: Accessoires Fournis
AA-V11U PRINCIPALES CARACTERISTIQUES Commande de fonction intelligente ( Hyper Zoom à vitesse variable ( [GR-AX210/AX410:12x, GR-AX310:14x] ( Zoom avant Montage par mémorisation de séquences ( [GR-AX310 seulement] •Adaptateur de cassette (VHS Playpak) C-P7U BN-V11U Les cassettes portant la marque avec ce camescope. - Page 51 Raccordements de base ... 29 Lecture de base ... 30 Fonctions... 31 MONTAGE Copie de bande... 32 Montage par mémorisation de séquences [GR-AX310 seulement] ... 32 Montage par insertion ... 36 Doublage audio ... 37 ENTRETIEN CLIENT EN CAS DE DIFFICULTE INDEX Commandes ...
-
Page 52: Mise En Route
Indicateur CHG. (recharge) Repères Indicateur POWER Indicateur Commutateur Indicateur REFRESH REFRESH Crocher Pousser BATT. RELEASE Alimentation Les 3 possibilités d’alimentation de ce camescope vous laissent le choix de la source d’alimentation la plus appropriée à vos besoins. REMARQUES: Aucune fonction n’est disponible sans alimentation. N’utiliser qu’une source d’alimentation spécifiée. - Page 53 L’indicateur CHG. peut ne pas s’allumer correctement avec une batterie toute neuve, ou avec une batterie qui a été entreposée pendant longtemps. Dans ce cas, retirer et refixer la batterie et la recharger. L’indicateur devrait s’allumer pendant la recharge. Si ce n’est pas le cas, consulter votre revendeur JVC le plus proche. Vers une...
-
Page 54: Retrait Et Mise En Place De La Pile (Au Lithium) De L'horloge
–/+ POWER Date Mois/jour/année DATE ... Le réglage de la date est effectué. DATE JAN 1.00 TIME AM12:00 Heure Indications sur 12 heures avec AM ou PM TIME ... Le réglage de l’heure est effectué. MISE EN ROUTE (suite) Retrait et mise en place de la pile (au lithium) de l’horloge Cette pile est nécessaire pour le fonctionnement de l’horloge et pour effectuer les réglages de date/heure. -
Page 55: Ajustement De La Netteté Du Viseur
Sélecteur de mode d'enregistrement (SP-EP) et de longueur de bande (T20•30•40) Placer l’interrupteur d’alimentation sur “CAMERA”. Indicateur de durée de bande et de mode d'enregistrement T20 SP T20 EP T30 SP T40 EP T30 SP T40 SP T30 EP Tourner pour retendre la bande. -
Page 56: Ajustement De La Courroie
Touche de marche/arrêt d’enregistrement MISE EN ROUTE (suite) Ajustement de la courroie ELARGIR LA BOUCLE Séparer la bande velcro. INTRODUIRE LA MAIN Passer la main droite dans la boucle et tenir la poignée. AJUSTER LA LONGUEUR DE LA COURROIE Ajuster pour que votre pouce et vos doigts puissent facilement commander la touche de marche/arrêt d’enregistrement et le commutateur de zoom. -
Page 57: La Télécommande Rm-V20U
La télécommande RM-V20U La RM-V20U (en option) permet aux fonctions magnétoscope d’être commandées à distance. En utilisant la RM-V20U, raccorder son câble à la prise REMOTE du camescope. * Avant l’utilisation, veuillez lire le manuel d’instructions pour la RM-V20U. Touches Avec l’interrupteur d’alimentation du camescope placé... -
Page 58: Enregistrement Enregistrement De Base
Commutateur LENS COVER POWER Touche de marche/arrêt d'enregistrement L’indicateur d’alimentation Indicateur de durée de bande restante 120MIN 119MIN 1MIN (clignotant) 2MIN (clignotant) 0MIN (clignotant) * MIN...(En cours de calcul) Lampe de signalisation ENREGISTREMENT Enregistrement de base REMARQUE: Vous devez déja avoir effectué les procédures indiquées ci-dessous. -
Page 59: Fonctions De Base
ENREGISTREMENT Fonctions de base Barre d’indication de zoom Zoom avant Zoom arrière RETAKE Commutateur de zoom électrique START/STOP VISS RM-V20U (en option) Caractéristique: Zoom Objectif: Faire varier la longueur focale de l’objectif et produire ainsi un effet zoom. Opération: Zoom avant 1) Pousser le commutateur de zoom électrique vers le bas “T”. -
Page 60: Fonctions Avancées
Programme AE avec effets spéciaux Tout ce que vous avez à faire pour avoir accès à un des effets de prise de vues est de tourner la molette de sélection PROGRAM AE jusqu’à ce que l’indication désirée apparaisse dans le viseur. Le mode est activé environ 1 seconde plus tard. -
Page 61: Ajustement De La Balance Des Blancs
Indicateur de mode de balance des blancs Pas d'indication (Auto) REMARQUES: Pour passer en ajustement automatique de la balance des blancs, appuyer sur MWB jusqu’à ce que l’indication disparaisse, ou tourner la molette PROGRAM AE sur LOCK. Régler à nouveau le mode de balance des blancs quand l’éclairage a changé, lorsque l’alimentation du camescope a été... - Page 62 Groupe 1 FADER CINEMA FADER SEL. Groupe 2 FOCUS EXP. Viseur SEL. Groupe 3 TITLE DISP. SEL. Touche F1 Touche SEL. fonction Molette de sélection PROGRAM AE Fondu à l’ouverture Fondu à la fermeture REMARQUES: Maintenir pressée la touche de marche/arrêt d’enregistrement vous permet d’enregistrer un écran vierge noir. L’écran devient légèrement rougeâtre quand le fondu est utilisé...
- Page 63 Cinéma Mode cinémascope Cette caractéristique vous permet d’enregistrer des barres noires en haut et en bas de l’écran pour produire un effet “écran large” comme au cinéma. SELECTIONNER LE MODE Appuyer sur SEL. jusqu’à ce que “CINEMA” apparaisse à la droite de F2. PASSER EN MODE CINEMASCOPE Appuyer sur F2.
-
Page 64: Mise Au Point
Zone de détection de la mise au point Touche SEL. ENREGISTREMENT Fonctions avancées Mise au point Mise au point automatique Le système de mise au point automatique toute distance du camescope permet de filmer en continu de gros plan à l’infini. Toutefois, la mise au point correcte peut ne pas être obtenue dans les situations citées ci-dessous (dans ces cas, utiliser la mise au point manuelle): •Si deux sujets à... - Page 65 Touche F1 Touche F2 Touche SEL. FOCUS Commutateur de zoom Viseur Mise au point manuelle REMARQUE: Vous devez déjà avoir fait les réglages nécessaires du viseur ( P. 11). Si ce n’est pas le cas, le faire avant de continuer. SELECTIONNER LE MODE Appuyer sur SEL.
- Page 66 Touche F1 Touche F2 Touche SEL. FOCUS Commutateur de zoom Viseur Pour rendre l’image plus lumineuse Pour rendre l’image plus sombre Barre d’indication de luminosité ENREGISTREMENT Commande d’exposition Cette caractéristique règle automatiquement l’iris pour la meilleure qualité d’image possible, mais vous pouvez modifier et faire le réglage manuellement.
-
Page 67: Affichage Sur Ecran
Touche F1 Touche F2 Touche SEL. TITLE Mode d'enregistrement Affichage automatique de la date de la date Générateur de Affichage de caractères la date/heure Mode sans date Affichage sur écran Affichage Mode d'enregistrement de la date automatique de la date DEC 25.96 AUTO DATE Mode... - Page 68 –/+ Ecran en mode de réglage des caractères (CHARACTER SET MODE) CHARACTER SET MODE A B C D E F G H I J K L M N O P Q R S T U V W X Y Z Ä Ö Ü À...
- Page 69 Exemple de générateur de caractères et de titre Viseur OUR VACATION IN PARIS, FRANCE Indication de titre Générateur de caractères: IN PARIS, FRANCE Titre préprogrammé: OUR VACATION Titres immédiats Le camescope a huit titres préréglés en mémoire. Vous pouvez surimprimer l’un d’eux au dessus du titre précédemment mis en mémoire comme montré...
- Page 70 Lampe de signalisation PROGRAM AE START/STOP (Touche de marche/ arrêt d’enregistrement) INTERVAL REC TIME RM-V20U (en option) ENREGISTREMENT Fonctions avancées Retardateur Vous pouvez régler un retard entre le moment où vous appuyez sur la touche de marche/arrêt d’enregistrement et le début réel de l’enregistrement. Si vous fixez le camescope, vous (ou la personne qui fait fonctionner le camescope) pouvez entrer dans la scène avant que l’enregistrement commence.
- Page 71 Animation Donnez à des scènes ou des objets immobiles une illusion de mouvement. Cette fonction vous permet de filmer une série d’images légèrement différentes du même objet pendant une courte durée. REMARQUE: Vous avez besoin de la télécommande RM-V20U pour effectuer la procédure suivante.
-
Page 72: Lecture
Magnétoscope Porte du compartiment Verrou coulissant Cassette vidéo compacte Bobines Trou de protection contre l’enregistrement LECTURE Utilisation de l’adaptateur de cassette Adaptateur de cassette (VHS Playpak) Utiliser cet adaptateur pour lire une cassette vidéo VHS-C enregistrée avec ce camescope. Elle est entièrement compatible avec tout magnétoscope VHS. -
Page 73: Raccordements De Base
LECTURE Raccordements de base Vers connecteurs AUDIO et Câbles audio et VIDEO vidéo (en option) Vers connecteurs d’entrée AUDIO et VIDEO Magnétoscope Antenne Vers connecteurs AUDIO, VIDEO et DC OUT Convertisseur HF RF-V5U (en option) REMARQUES: Il est recommandé d’utiliser l’adaptateur secteur/chargeur de batterie comme source d’alimentation plutôt que la batterie. -
Page 74: Lecture De Base
PLAY/PAUSE STOP POWER Compteur de bande M 0:00:00 LECTURE Lecture de base REMARQUE: Bien raccorder votre camescope comme indiqué dans “RACCORDEMENTS DE BASE” ( P. 29). MISE EN PLACE D’UNE CASSETTE Faire coulisser EJECT pour ouvrir le porte cassette, puis introduire la cassette avec son étiquette tournée vers l’extérieur. -
Page 75: Fonctions
LECTURE Fonctions TRACKING PLAY/PAUSE COUNTER R/M STOP PLAY PAUSE RM-V20U (en option) Caractéristique: Alignement manuel Objectif: Pour éliminer des barres de bruit qui apparaissent sur l’écran. Opération: 1) Appuyer sur une touche TRACKING autant de fois que nécessaire pour une meilleure image. Remarques: Pour repasser en alignement original préréglé, appuyer simultanément sur... -
Page 76: Montage
Cependant, certains magnétoscopes ne sont pas compatibles avec le système de commande de montage. Montage par mémorisation de séquences (GR-AX310 seulement) Créez des vidéos montées facilement en utilisant votre camescope comme lecteur source. Vous pouvez sélectionner jusqu’à... - Page 77 UN MAGNETOSCOPE JVC DISPOSANT D’UNE BORNE DE TELECOMMANDE Raccorder le câble de montage à la borne de télécommande PAUSE. UN MAGNETOSCOPE JVC NE DISPOSANT PAS DE BORNE DE TELECOMMANDE Raccorder le câble de montage au connecteur R.A.EDIT. UN MAGNETOSCOPE NON-JVC Raccorder le câble de montage au connecteur d’entrée de pause de la télécommande RM-V700U.
- Page 78 REW/FF CANCEL IN/OUT R.A. EDIT PLAY/PAUSE STOP Vers EDIT Vers connecteurs de sortie AUDIO et VIDEO Câble de montage (câble à mini-fiche (ø 3,5 mm, en Câble audio et option)) vidéo (en option) PAUSE Vers connecteurs (pause de d’entrée AUDIO et télécommande) VIDEO Entrée de pause...
- Page 79 BANDE ORIGINALE (Camescope) IN OUT BANDE MONTEE (Magnétoscope) EDIT STOP MONTAGE AUTOMATIQUE VERS UN MAGNETOSCOPE PASSER LE MAGNETOSCOPE EN MODE DE PAUSE D’ENREGISTREMENT Pointer la télécommande vers la fenêtre de réception infrarouge du magnétoscope et appuyer sur VCR REC STBY, ou engager manuellement le mode de pause d’enregistrement du magnétoscope.
-
Page 80: Montage Par Insertion
COUNTER R/M POWER Compteur de bande M-0:12:34 Indicateur de montage par insertion Viseur PLAY PAUSE AUDIO DUB INSERT RM-V20U (en option) MONTAGE (suite) Montage par insertion Vous pouvez enregistrer une nouvelle séquence sur une bande préenregistrée, remplaçant ainsi une partie de l’enregistrement original, avec un minimum de distorsion d’image aux points d’entrée et de sortie. -
Page 81: Doublage Audio
Indicateur de doublage audio Viseur Microphone PLAY PAUSE AUDIO DUB RM-V20U (en option) Doublage audio Vous pouvez enregistrer une nouvelle piste son sur une bande préenregistrée (audio normal uniquement) ** Effectuer les étapes 1, 2 et 3 de la procédure d’insertion vidéo ( P. -
Page 82: Entretien Client
Commutateur d’ouverture/ fermeture LENS COVER Placer sur “POWER OFF“. BATT. RELEASE EJECT APPUYER Introduire. Repères ENTRETIEN CLIENT Après utilisation Placer l’interrupteur d’alimentation sur POWER OFF pour couper l’alimentation. Faire coulisser EJECT pour ouvrir le porte-cassette, puis retirer la cassette. Fermer et verrouiller le porte-cassette en appuyant sur PUSH. -
Page 83: En Cas De Difficulte
Le modulateur RF n’a pas été réglé sur le bon canal. L’alignement manuel n’a pas été effectué ( Les têtes vidéo sont sales ou usées. Consulter votre revendeur JVC le plus proche pour un nettoyage ou un remplacement des têtes. C’est normal. -
Page 84: Autres Parties
Sélecteur de durée de réglage de la bande (T20•T30•T40) ... Touche de remise à zéro et mémoire de compteur (COUNTER R/M) ... Touche de montage (EDIT) (GR-AX310 seulement) ... Touches DATE/TIME +/– ... Touches de sélection de caractères CHAR. SET +/– ... Touches d’alignement TRACKING +/–... -
Page 85: Indications Dans Le Viseur
INDEX Viseur Indications dans le viseur Indicateur PROGRAM AE ... Affiché en pendant 3 secondes environ quand la molette de sélection PROGRAM AE est commutée d’une position à l’autre. Puis seul l’indicateur reste en Mise au point ... Indicateur de balance des blancs ... Indicateur de Zoom ... - Page 86 Accessoires fournis ... p. 6 Adaptateur de cassette ... p. 28 Adaptateur secteur/chargeur de batterie ... p. 9 Affichage sur écran ... p. 23 Ajustement de dioptrie ... p. 11 Ajustement de la balance des blancs ... p. 17 Ajustement de la courroie ... p. 12 Ajustement de la netteté...
-
Page 87: Precautions A Observer
C73, utiliser un adaptateur de prise CA nommé "Siemens Plug", comme indiqué ci-dessous. Pour cet adaptateur de fiche CA, consulter votre revendeur JVC le plus proche. Adaptateur de fiche Précautions générales sur les piles • Si la RM-V20U (télécommande) ou le C-P6U/ C-P7U (adaptateur de cassette) ne fonctionne pas en étant correctement utilisé, les piles sont usées. - Page 88 Si, toutefois, les têtes deviennent sales et produisent un flou ou une interruption de l’image de lecture, consulter votre revendeur JVC le plus proche. Condensation d’humidité . . . •Vous avez sans doute observé qu’en versant un liquide froid dans un verre, des gouttes d’eau vont...
-
Page 89: Caracteristiques Techniques
BH-V3U •Chargeur de batterie BH-VC10U •Cordon pour batterie automobile AP-V7E •Convertisseur HF RF-V5U •Télécommande sans fil RM-V700U Pour R.A.EDIT (GR-AX310) en utilisant un magnétoscope non-JVC. ( P. 33) * La RM-V700U ne peut pas être utilisée pour commander le camescope. - Page 90 MEMO...
- Page 91 MEMO...
- Page 92 VICTOR COMPANY OF JAPAN, LIMITED Printed in Japan U ( C ) COPYRIGHT© 1996 VICTOR COMPANY OF JAPAN, LTD. 0296MKV...
Need help?
Do you have a question about the GR-AX310 and is the answer not in the manual?
Questions and answers