Table of Contents
Advertisement
Quick Links
Advertisement
Table of Contents

Summary of Contents for Letus 35 Elite
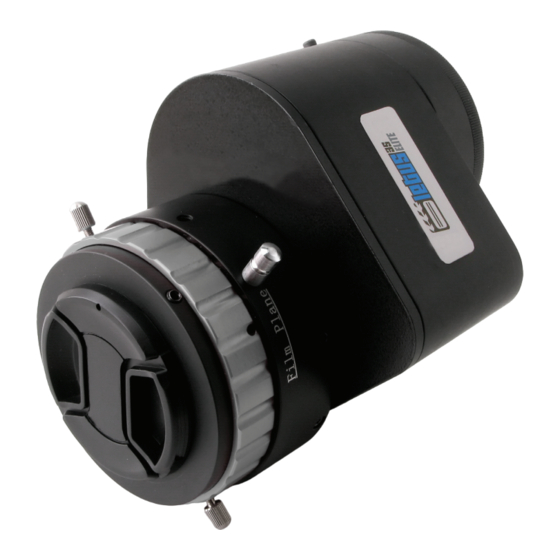
- Page 2 A Word of Welcome Thank you and congratulations on your purchase of the Letus35 Elite! This manual covers the basic installation and operation of your 35mm adapter along with additional information on Troubleshooting and Technical Support. Getting to Know the Letus35 Elite Below is an image of the different components of the Letus35 Elite for refer- ence throughout this user guide.
-
Page 3: Table Of Contents
TABLE OF CONTENTS Understanding The Letus35 Elite ....2 Package Contents ........2 Optional Accessories . -
Page 4: Understanding The Letus35 Elite
Understanding The Letus35 Elite This section provides information about the Letus35 Elite, package contents, optional accessories and its main features. Package Contents: » Letus35 Elite 35mm DOF Adapter » Lens caps for the Elite (one for each side of the adapter) »... -
Page 5: Installation And Setup
» IOC Prism System to correct the image so it is right side up » Lens style backfocus adjustment on the fly » Virtually Quiet: The Vibrating Ground Glass emits nearly no operational noise. » Highest Optical Grade Achromatic lens custom-made for the Letus35 Elite 35mm DOF Adapter. -
Page 6: Focusing The Camera Lens To The Ground Glass
Fit the adapter into the ring and look at the LCD screen. Align the adapter until you have all edges of the Ground Glass (GG) parallel with the edges of the LCD screen (you may want to zoom in until the edges of the GG are close to the edges of the LCD screen for better alignment). -
Page 7: Attaching The Lens Mount And Lens
Attaching The Lens Mount And Lens : Using the Allen Wrench Tool included with your package, loosen the three (3) screws located at the very front of your Letus35 Elite 35mm DOF Adapter. Insert the lens mount into the front tube of the unit. -
Page 8: Measuring Focus
your package, loosen the three (3) screws located at the very front of your Letus35 Elite 35mm DOF Adapter. Remove the current lens mount. Insert the optional lens mount into the front tube of the unit. Make sure to seat the mount flush against the tube. -
Page 9: Cleaning The System
Cleaning The System: We try our best to ship each unit free of dust in the Optical Path. However, the Magic of Dust Particles is always surprising. In which case you may need to clean the optical path, refer to the steps listed below: NOTE: If the dust moves when the unit is operating it will more than likely be located on the Ground Glass (GG) and you will only need to perform steps 1 –... - Page 10 Take the battery compartment off and gently pull it out. Remember, the wires are still attached to the battery compartment. Lift the prism up by using the index finger and the thumb. Clean the prism with lens cleaning solu- tion and put it back. Put the rubber wedge back.
-
Page 11: Trouble Shooting And Technical Support
(RMA number), which must accompany all returns. The returned accessory or component shall remain the property of the buyer who shall ship it freight prepaid to the designated Letus Corpo- ration location with the RMA number clearly displayed on the packaging exterior and all paper- work. - Page 12 All returns must be shipped freight prepaid with the RMA number displayed on the outside of the shipping box along with the number of boxes being shipped back (i.e. 1 of 3, 2 of 3, etc.). Letus Cor- poration WILL NOT ISSUE CALL TAGS FOR ANY REASON WHATSOEVER. For your own protection, we suggest shipping all returns fully insured and via traceable carrier.
-
Page 13: Notes
Notes Letus35 Elite User Guide... - Page 14 Letus35 Elite User Guide...
- Page 15 Focusing Aid...
- Page 16 Copyright © 2008 Letus Corporation Letus35 Elite User Guide version 1.0.0...

Need help?
Do you have a question about the 35 Elite and is the answer not in the manual?
Questions and answers