Table of Contents
Advertisement
D
U
D
U
I
n
I
n
3
9
0
3
9
0
8
1
3
-
8
7
8
1
3
-
8
7
S
M
S
M
A
L
V
i
d
e
A
L
V
i
d
e
s
t
a
l
l
a
t
i
o
n
s
t
a
l
l
a
t
i
o
n
K
E
Y
T
K
E
Y
T
7
W
.
M
a
r
t
i
n
L
u
7
W
.
M
a
r
t
i
n
L
u
7
-
4
5
0
0
w
w
w
7
-
4
5
0
0
w
w
w
A
R
T
A
R
T
o
D
r
i
v
e
o
D
r
i
v
e
a
n
d
O
p
e
r
a
a
n
d
O
p
e
r
a
R
O
L
L
E
R
O
L
L
t
h
e
r
K
i
n
g
B
l
.
t
h
e
r
K
i
n
g
B
l
.
.
k
e
y
t
r
o
l
l
e
r
.
c
o
m
.
k
e
y
t
r
o
l
l
e
r
.
c
o
m
E
R
E
R
R
e
c
o
r
R
e
c
o
r
t
o
r
s
M
a
n
u
t
o
r
s
M
a
n
u
R
,
E
R
,
L
L
C
.
L
L
C
.
T
a
m
p
a
,
F
l
a
.
3
T
a
m
p
a
,
F
l
a
.
3
i
n
f
o
@
k
e
y
t
r
o
i
n
f
o
@
k
e
y
t
r
o
d
e
r
d
e
r
a
l
a
l
3
6
1
4
3
6
1
4
l
l
e
r
.
c
o
m
l
l
e
r
.
c
o
m
Advertisement
Table of Contents

Summary of Contents for Keytroller Smarter
- Page 1 ...
-
Page 2: Table Of Contents
Contents Main Features..................3 Technical Specifications ..................3 Safety Instructions....................4 Components ......................4 Descriptions ......................5 Front face of Body ....................5 Rear face of Body ..................... 5 IR (Infra-red) light module ..................6 SD Memory Card specifications ................ -
Page 3: S M A R T Er
R Main Features Unlike other in‐car recording systems, your Drive Recorder is used to record both video and audio data in a continuous loop fashion. If the vehicle is involved in an accident such as a collision, impact, and sudden acceleration‐related incident, this data is marked and stored. One may thereafter analyze the data to find its root cause by playing back the scenes of interest and where acceleration, vehicle speed, direction, and location are available for review. Added to the recording are vehicle speed and direction and GPS location. Interior video helps a company enforce existing cell phone restrictions and policies. Exterior video provides protection where the driver is not at fault. Continuous recording The video and audio data from the front and interior views is continuously recorded while power on. When the capacity of the SD card has been reached, the oldest files are overwritten by the latest ones in a “round‐robin”, first in, first out fashion. Pre and post event recording When impact or unusual acceleration or deceleration is detected by the built‐in 3 axis G‐Sensor and has exceeded the preset limit or the external emergency record button is pushed‐‐‐‐the recorded video data is locked‐in and is erased only by an authorized party and by using a PC or laptop, accessing that camera’s SD card. Event data records 1 minute before and 1 minute after it is triggered. (Note: The User may set the pre‐event time to either 1 minute, 2 minutes or 3 minutes of pre‐event recording). The next time the SD card is read by the unit, the unit’s set up parameters will be uploaded into the recorder. Night view recording with Infra‐Red Light The included IR (Infra‐Red) Light module with adjustment used this invisible light source to assist in recording nighttime views from the interior camera facing the driver and passenger. Playback of video/audio data The recorded data can be played back using the provided playback software which resides on the SD card. By removing the SD card and accessing the Player folder and double clicking on the “Player.exe” line starts the playback software. Data analysis The recorded data can be easily analyzed for speed, vehicle location and direction of travel including impact by using the Player that is found on conveniently on the supplied SD card . Technical Specifications ... -
Page 4: Safety Instructions
Safety Instructions To ensure proper operation please read the manual before installation and use. Failure to follow this safety notice may cause a malfunction and may void the warranty. Do not clean the product with water or volatile Do not apply excessive shock or never insert foreign materials into the product. solvents. This may cause product damage, a fire or a short circuit. This may damage the product, cause a fire or electric shock. Video quality is affected by lighting conditions. GPS Do not arbitrarily change the product location. is affected by signal receipt. Nighttime or use in This may cause a GPS communication error. tunnels affects system operation. Do not disassemble, repair or modify the product. Any excessive window tinting may cause an unclear or distorted image on This voids the warranty and where we take no playback. responsibility for product damage or problems First record and then play back the video to see if the recorded video is caused by the user. acceptable. Do not cover the camera lens with any materials or Once installed, do not manipulate the product while you’re driving a car. objects. This may cause a traffic accident. This may affect recording quality. Ensure that the capacity of the SD card is not Use only the provided cables and specified power input. exceeded. A cable not supplied by the manufacturer may cause product damage, a fire or a A full SD card will not allow one to record manual short circuit. alarms or G‐sensor based triggers. Do not obstruct the view of the product through Only use factory approved parts. Use the approved power cable. the front windshield. Contact your authorized Reseller for assistance. The GPS receiver may not work properly. Components... -
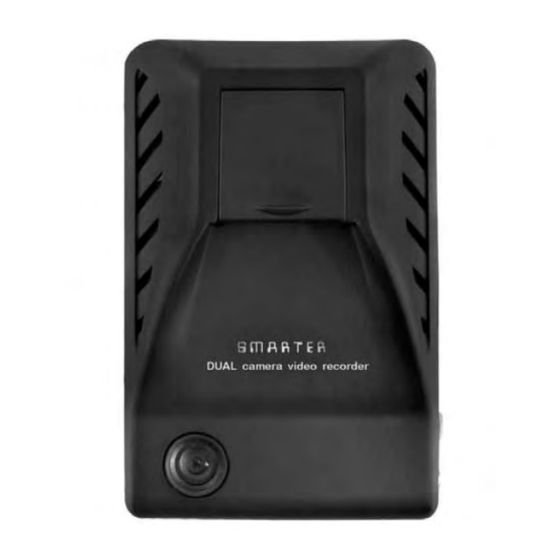
Page 5: Descriptions
Descriptions Front Face (Toward Street) Shown without mounting bracket installed Number Name Description 1 Forward Facing Camera Used to record scenes through the windshield. 2 SD card Slot Used to insert the SD card into unit. 3 Emergency Record Protection Used to cancel protection of all the emergency recording data. Cancel Button 4 Emergency Record Button Used to perform an emergency recording. 5 Volume Control Used to adjust the audio volume when recording 6 Mounting Connection Used to mate with the mount. Rear Face (Toward Driver) Shown without IR installed Number ... -
Page 6: Ir (Infra-Red) Light Module
IR (Infra-red) light module Number Name Description 1 CDS Used to illuminate interior while nighttime recording. 2 Power Connection Used to connect the power cord to the IR light module. SD Memory Card specifications *Denotes an average time. (Motion affects recording duration. Times reflected see recordings made during the daytime in typical city downtown areas.) Size of SD Max Storage Time Event Recording Time Number of Event Generated Recordings Memory Card according to the Preset Recording Time 1Min 2Mins 3Mins 2GB (included) 90 64 25 80 70 4GB 180 120 50 40 30 8GB 370 280 ... -
Page 7: Caution-Before Installing
CAUTION!! Before Installing Installation: • Be sure to stop the engine before installing the product. • Remove all power to any areas where wires will be connected. • Install in a location where the GPS signal will be received • Before permanently mounting the unit, ensure that the camera views meet your requirements. -
Page 8: Connecting The Power Cord
Connecting the power cord 1. Connect the “Y” power 2. Connect the other side of cable to the power “Y” power cable to the connection port on the power connection port of the right side of the unit attached IR light module of the unit 4. Insert the power cord into the 3. Arrange the power cord Cigarette Lighter Plug. neatly after inserting it in the chink of the door near Note: Cigarette lighter plug can the driver or passenger only be hard wired to 12‐24 vehicle seat. power when using the JACK‐EXT option. Using the AWP‐22OO option also allowsdirect hard wiring to vehicle power The recorder will only record when there is power to the cigarette lighter. Note: To “hard wire” the device to vehicle power, you will need our optional AWP‐2200 module or JACK‐EXT accessory. Go to end of this manual to review their installation requirements and capabilities. NOTE: Do try to circumvent the “cigarette ligher plug”... -
Page 9: Functions Of Each Component
Functions of each component Forward facing and rear facing/interior view camera The camera must be aligned horizontal and vertical. When the lens of the camera is obstructed or is dirty, clear images may not be captured. Periodic cleaning is required. To clean the lens, use a soft camera lens cloth to prevent damage. Emergency record button (Video image removal protection) In order to record diver detected scenes of interest, press the emergency record (E) button to record. This data records 1 minute before and 1 minute after. (User may set pre‐event time 1 minute, 2 minutes or 3 minutes). Stored event recording data in SD card will not be erased unless user cancels (A remote button is also provided for this function for covert recording) The recording time is determined in prerecording time. . SD card slot Before inserting / removing the SD card, Power must be OFF. The LED Display must be off. (BLANK!) Manual Cancellation of the Emergency Manual Record if enabled in software Press the “M” button for about 3 seconds until you hear a chime from the speaker. This is used in the rare case if the SD card is full and was not replaced. This function is typically not enabled so to secure all recordings. If enabled in system setup, all the previous events and the overwritten record protection is disabled when this button was activated, allowing the system to overwrite alarm data. (rarely used) Volume control ... -
Page 10: Pc Minimum Systems Requirements
Memory 512 MB of RAM or higher Operating system Microsoft Windows XP Home Edition or higher Graphics DirectX 8.1b or higher Hard disk drive space 200 MB or higher *Note: When using MS Windows Vista and SMARTER T-Eye Player software for the first time, you may have to run the Player in Administrator Mode. To Review Video: Remove Power from the unit. Remove the SD card from the unit and Insert the SD card into a PC or SD card reader and connect it to a computer. Explore the SD card. Locate the ‘Player.exe” file that is found in the ‘PLAYER’ folder. Double click on ‘Player.exe’. The following window will appear: No. Name Description ... -
Page 11: System Configuration
System configuration Before using the system, remove the SD card from the recorder and insert the SD card into the SD slot of a PC or in the SD card reader of a computer. MS Windows will automatically see the device. Locate the Folder called “Player”. Double Click on “Player.exe”. When the player’s main screen appears, click on the System Setup configuration icon () located at the lower right corner. The following window will then appear. No. Name Description 1 Video Quality Sets the video recording quality. (Default: Standard) 2 G‐Sensor Sensitivity Sets the sensitivity of G‐Sensor. (Default: Low) By un‐checking the box the G‐sensors will NOT work. This would be necessary on an application like a motor boat 3 Audio Recording Enables or Disables the audio record function. 4 Pre‐Event Recording Time Sets the time to record the previous scenes before the event. (Ex. in case of 3 minutes, T‐eye records scenes for previous 3 minutes and next 1 ... -
Page 12: Playback Interface Controls
Playback Interface Controls Button Function Button Function Move to the previous frame Open a file Reverse Playback Convert the file into an AVI format Pause the Playback Link recorded data with map Stop Playback Configuration Set Up Menu Playback Exit, close the program Hide/close the window Move to the next frame Playback 1. With the Playback interface Open: After clicking the folder icon on the lower right corner of the viewer, click Change Directory to select the location for the recorded data. Typically the first time you do this all the files are located on the SD card. If saved elsewhere, use this utility to explore your computer to locate the file for playback. 2. When the file list appears, double‐click the desired file to play back. FILE NAME: File name of the recorded video images. RECORD TIME: Date and time when the images have been recorded. ... -
Page 13: Converting The Authenticated Files Into Avi File Format
G‐Sensor (shock sensor) automatic recording: Annotated with G‐SENSOR. This data is recorded when any impact, sudden acceleration, or accident is detected. Converting the Authenticated files into AVI file format One may convert a portion of the recorded data into an AVI file format when one wants to share the recorded data with someone else or email a file. 1. Click the AVI conversion button ( ) at the start of video clip position where you want to convert the images into the AVI file format. The video playback stops and the AVI conversion window appear. 2. Set the following options from the window and click Start. A. AVI storage directory B. Selection of previous/next videos and whether or not to include audio data C. AVI recording time 3. The conversion progress appears as follows: NOTE: The AVI files cannot be created on a portable disk such as SD card or USB memory stick but only on a hard disk first due to speed required for the conversion... -
Page 14: Interfacing With A Gis/City Map
Interfacing with a GIS/City map Drive Recorder simultaneously records the GPS data while driving so you can check the driver’s route start—stop times, direction and speed on the map. Click the GIS/MAP icon ( ) on the lower right corner. The map window appears for the user to see the vehicle location and travel onto a city map. • To use this function, the system must access the Internet!! When you click on the MAP icon at bottom right of screen, the vehicle position exactly synchronized with the video is shown. You can choose, Google Map, Satellite (Earth view) or Hybrid (Earth with road names) -
Page 15: Additional Functions Of Player: Pop-Up Display Window
Additional Functions of Player: Pop‐up Display window When you double‐click the display window, the recorded images are played back at the original size. Double clicking the screen returns the view to normal, original size. You may use your PC's mouse to move the screens and adjust them within your desktop window... -
Page 16: Analyzing G-Sensor Data
Analyzing G‐SENSOR data The G‐sensor (Gravity Sensor) furnishes data for X, Y and Z axis and stores it along with the other recorded data on the SD card. When using the playback software, this information is represented in a graphic format. The resulting graph may be used to analysis the driving condition and driver’s safe or abusive habits. Depending on the type of the vehicle, the amplitude of the curve of shown may vary. * X axis: left + right of the vehicle * Y axis: front + rear of the vehicle * Z axis: top + bottom of the vehicle ... -
Page 17: System Diagnostics Via The Led Display
System Diagnostics via the LED Display Event Sound Display No sound. [ dr ][Init] Initialization after power applied [ Err][ Sd ] When SD card is not Chime is heard (“Ding dong”) from the speaker. (Turn off the inserted power, re‐insert the SD card, supply power again.) [Err0] While GPS is updating GPS data is now being received and is being downloaded ‐ ‐ ‐ Event recording One chime ‐ ‐ ‐ Number of events ... -
Page 18: Firmware And Playback Sw Update
THE FILES PREVIOUSLY STORED ON THE PC. IDEALLY THIS SHOULD BE DONE ONCE A MONTH. USE THE PANASONICSD CARD FORMATTER FOUND ON THE E INSTRUCTION CD. IT MAY ALSO BE DOWNLOADED FROM: http://panasonic.jp/support/global/cs/sd/download/sd_formatter.html Software Update 1. After downloading the Playback SW file, copy it to the player directory on the SD card. 2. After installing the SD card on the body and connecting the power, update automatically starts. Caution Do not remove the cigarette lighter plug or interrupt power to the unit or stop the engine during update. Note For further information, access the website (http://www.keytroller.com) or contact your retailer. ... -
Page 19: Installation Of Optional "Hard Wired" Awp-2200 Delay Timer Device
APW-2200 – “Hardwire” Installation of Optional Delay Timer Module NOTE: Do try to circumvent the “cigarette lighter plug”. This has a circuit that protects the camera and provides power to the IR illuminator. If the “cigarette lighter plug” is circumvented and wired direct to 12— 24V vehicle power---it will “fry”... - Page 20 Power Unit for Car Parking APW-2200 User’s Guide *APW-2200 is an accessory product that can record at 1~3 frames while car parking. Monitoring 1. Replacing the fuse of cigar jack Cables GND (Black)(-) Connect to Ground. IGN (White)—Start (ignition) APW2200 start signal. Power VCC (Red)(+) Power (+12V to +24V) 2.
- Page 21 5. Setting APW2200 switches Switch No Function Initial Value Remarks Continuous recording (Full Frame) *With ADR3000, maximum SD Setting time + 1 hour card’s recordable times are as Setting time + 2 hours follows: (In case of ADR2000, recordable time is doubled) Setting time + 4 hours - 2GB: 12 hours Setting time + 8 hours...
-
Page 22: Product Installation
Product Installation • The installation ways vary depending on the car type so see this page for simple installation. • Installation must be done with the car key Off. If required, consult with an expert. 1. Check the location of the fuse box. - Caution: For time setting, a time-worn battery may be discharged. - Page 23 5. After keeping the cable neat, the next step is electrical installation. • Connect the red line (1) to the fuse of the emergency light (any place is OK if power is supplied) and connect the black line (2) to Ground. •...
Need help?
Do you have a question about the Smarter and is the answer not in the manual?
Questions and answers