Advertisement
Table of Contents
- 1 Table of Contents
- 2 Safety Instructions
- 3 Air Supply: Fittings, Hoses, Filters, Air Consumption, Regulators, Operation Pressure, Setting Correct Pressure
- 4 Production Specifications
- 5 Depth Adjustment
- 6 Loading the Tool
- 7 Tool Operation
- 8 Maintaining the Pneumatic Tool
- 9 Trouble Shooting
- 10 Year Limited Warranty
- Download this manual
Advertisement
Table of Contents

Summary of Contents for Master-force ANGLED FINISH NAILER
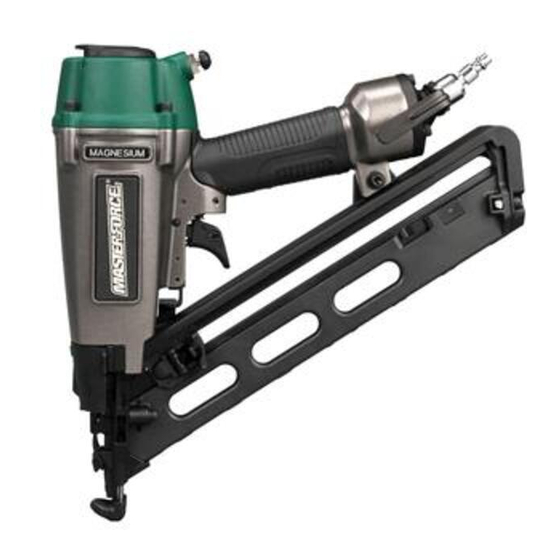
- Page 1 ANGLED FINISH NAILER 208-5009 OPERATOR'S MANUAL CAUTION: TO REDUCE THE RISK OF INJURY, USER MUST READ AND UNDERSTAND OPERATOR'S MANUAL. SAVE THESE INSTRUCTIONS FOR FUTURE REFERENCE.
-
Page 2: Table Of Contents
TABLE OF CONTENTS Safety Instructions ............Page 2 Air Supply: Fittings, Hoses, Filters, Air Consumption, Regulators, Operation Pressure, Setting Correct Pressure ....Page 5 Production specifications ..........Page 6 Depth Adjustment ............Page 7 Loading the Tool ............. Page 8 Tool Operation .............. -
Page 3: Safety Instructions
SAFETY INSTRUCTIONS The purpose of safety symbols is to attract our attention to possible dangers. The safety symbols, and the explanations with them, deserve your careful attention and understanding. The symbol warnings do not by themselves eliminate any danger. The instructions and warnings they give are no substitutes for proper accidents prevention measures. - Page 4 SAFETY INSTRUCTIONS 1. EYE PROTECTION which conforms to and balance at all times. Proper footing and balance enables better control of the tool in ANSI specifications and provides protection unexpected situations. against flying particles both from the FRONT Do not use on a ladder or unstable and SIDE should ALWAYS be worn by the support.
- Page 5 SAFETY INSTRUCTIONS improperly feeding fasteners could result in serious personal injury. 17. Never use this tool in a manner that could Always handle the tool with care: 1.) cause a fastener to be directed toward the Never engage in horseplay; 2.) Never pull user or others in the work area.
-
Page 6: Air Supply: Fittings, Hoses, Filters, Air Consumption, Regulators, Operation Pressure, Setting Correct Pressure
Do not use oxygen, combustible gases, or bottled gases as a A pressure regulator with an operating power source for this tool as tool may pressure of 0 - 125 p.s.i. (0 - 8.79 kg/cm 2 ) is explode, possibly causing injury. Keep the required to control the operating pressure for tool pointed away from yourself and others safe operation of this tool. -
Page 7: Production Specifications
PRODUCT SPECIFICATIONS DRIVING POWER ........... 510 in.lbs FASTENER TYPE . -
Page 8: Depth Adjustment
DEPTH ADJUSTMENT Always disconnect air supply: 1. Before making adjustments; 2. When servicing the tool; 3. When clearing a jam; 4. When tool is not in use; 5. When moving to a different work area, as accidental actuation may occur, possibly causing injury. The depth adjustment feature provides close control of the fastener drive depth;... -
Page 9: Loading The Tool
LOADING • Never place a hand or any other part of the body in nail discharge area of tool while the air supply is connected. • Never point the tool at anyone else. • Never engage in horseplay. • Never pull the trigger unless nose is directed at the work. •... -
Page 10: Tool Operation
TOOL OPERATION EYE PROTECTION which conforms to ANSI specifications and provides protection against flying particles both from the FRONT and SIDE should ALWAYS be worn by the operator and others in the work area when connecting to air supply, loading, operating or servicing this tool. - Page 11 TOOL OPERATION CHECK Keep the tool away from yourself and others when connecting air source. Remove all fasteners from tool before performing tool operation check.To reduce the risk of injury to yourself and others, check the tool before beginning work each day or if the tool is dropped, receive a sharp blow, been run over, etc.
-
Page 12: Maintaining The Pneumatic Tool
Do not store tools in a cold weather environment to prevent frost or ice formation on the tools operating valves and mechanisms that could cause too failure. could cause... -
Page 13: Trouble Shooting
TROUBLE SHOOTING PROBLEM CAUSE CORRECTION Frame/nose leaks air Loose nose screws ....Tighten and recheck O-ring or Gasket is cut or cracked . . .Replace O-ring or gasket Bumper cracked/worn . - Page 14 NOTES Page 13...
-
Page 15: Year Limited Warranty
ANGLED FINISH NAILER WARRANTY 90-DAY MONEY BACK GUARANTEE This MASTERFORCE® brand power tool carries our 90-DAY Money Back Guarantee. If you are not completely satisfied with your MASTERFORCE® brand power tool for any reason within ninety (90) days from the date of purchase, return the tool with your original receipt to any MENARDS®... - Page 16 Menards, Inc., Eau Claire, WI 54703 Rev. A...
Need help?
Do you have a question about the ANGLED FINISH NAILER and is the answer not in the manual?
Questions and answers