Samsung Galaxy Mega User Manual
Hide thumbs
Also See for Galaxy Mega:
- User manual (285 pages) ,
- Quick reference manual (21 pages) ,
- How to use the 2 sim cards (8 pages)

Related Manuals for Samsung Galaxy Mega


Summary of Contents for Samsung Galaxy Mega
-
Page 1: Table Of Contents
TABLE OF CONTENTS YOUR PHONE Front View Features Side by Side View Cool Apps SIM Card Memory Card Battery Power Initial Device Configuration Google Play Making a Call Text Messaging Home Screen Ringtone Volume Voicemail Contacts Email Bluetooth Camera & Camcorder Near Field Communication Your Navigator Deluxe NOTES... -
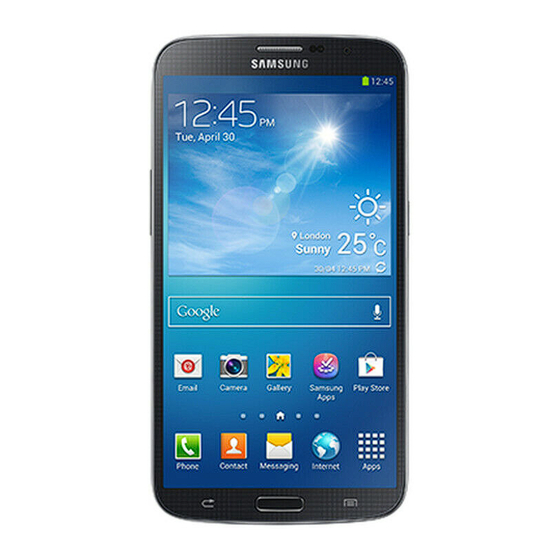
Page 2: Your Phone
YOUR PHONE FRONT VIEW FEATURES 1. MENU KEY 2. HOME/RECENT APPS KEY 3. RETURN KEY 4. FRONT FACING CAMERA 5. EARPIECE 6. HEADSET JACK 7. FLASH 8. CAMERA... -
Page 3: Side By Side View
SIDE BY SIDE VIEW 1. VOLUME KEY 2. MEMORY CARD SLOT* 3. POWER KEY *The Memory Card Slot is located under the battery cover. -
Page 4: Cool Apps
COOL APPS Samsung Smart Switch Samsung Smart Switch is an easy-to-use tool for transferring content from other smartphones to Samsung mobile devices. For more information, see www.samsungsmartswitch.com Samsung Link Share your on-device media content with other external devices, such as an HDTV, using DLNA ®... -
Page 5: Sim Card
SIM CARD This device uses a micro SIM. The micro SIM (Subscriber Identity Module) card identifies your phone to the wireless network. You cannot make or receive calls or browse the Internet without a properly installed micro SIM card. Insert the SIM card 1. - Page 6 2. Place your fingernail in the opening and firmly “pop” the cover off the device. 3. Carefully slide the micro SIM card into the SIM card until it clicks into place.
- Page 7 NOTE: This device requires a SIM card. Please insert the SIM card included in the package prior to turning on the device. This SIM card will only work with this device. Once the SIM card has been inserted, do not remove! If your SIM card is ever separated from the device or damaged, your device will not function.
- Page 8 REPLACEMENT OF THE SIM CARD AS PROVIDED HEREIN IS YOUR EXCLUSIVE REMEDY UNDER THIS LIMITED WARRANTY, AND IS IN LIEU OF ALL OTHER WARRANTIES, EXPRESS OR IMPLIED INCLUDING, WITHOUT LIMITATION, ANY WARRANTIES OF TITLE, FITNESS FOR A PARTICULAR PURPOSE, MERCHANTABILITY, NON-INFRINGEMENT OR ARISING FROM COURSE OF DEALING OR USAGE OF TRADE.
-
Page 9: Memory Card
MEMORY CARD Your phone does not come with a microSD memory card. However, you can purchase one separately and use it to store your multimedia files. WARNING: Applications, personal settings and other stored data may be lost or may not function properly if the memory card is removed. -
Page 10: Battery
BATTERY Your phone is shipped with the battery partially charged. Please charge it fully before using it for the first time. Install the Battery 1. Slide the battery into the compartment (1) so that the tabs on the end align with the slots at the bottom of the phone, making sure the connectors align. -
Page 11: Charge The Battery
Charge the battery 1. Connect the USB cable to the charging head. 2. Insert the USB cable into the device’s Charger/ Accessory jack. 3. If using a wall charger, plug the charging head into a standard AC power outlet. If using a computer, remove the charging head and plug the USB cable into computer’s USB port. -
Page 12: Power
POWER Turn the phone on X Press and hold (Power/Lock) until the phone switches on. It searches for your network and after finding it, you can make or receive calls. Turn the phone off 1. Press and hold (Power/Lock) until the Device options screen appears. -
Page 13: Initial Device Configuration
Next. 3. If prompted, assign the Date and time settings and tap Next. 4. At the Samsung account screen, select Create new account, Sign in or tap Skip. 5. At the Got Google? screen, select Yes to log into to Google account or No to continue. -
Page 14: Google Play
GOOGLE PLAY 1. From the Home screen, tap Play Store 2. Use your existing Google™ account or create one following the steps on the screen. Navigate Google Play From Play Store, you will have multiple ways to search for apps, games and more. –... -
Page 15: Making A Call
MAKING A CALL X From the Home screen, tap (Phone). Access Dial number contacts list* Access Call frequent history contacts Touch and hold to activate vibrate mode Tap for Delete voicemail Dial number NOTE: *From the contact list, make a call by sliding your finger across the contact name from left to right. -
Page 16: Text Messaging
TEXT MESSAGING X From the Home screen, tap (Messaging) (Compose). Return to messages contacts Enter phone number or contact name Send message Enter text message attachment... -
Page 17: Home Screen
HOME SCREEN Swipe your fingers left or right to view the entire Home screen. You can customize the screen with widgets and shortcuts to your favorite applications. Status bar The Status bar appears at the top of your Home screen. Icons indicating your phone’s status and new notification alerts appear on the Status bar. -
Page 18: Notification Screen
Notification Screen The Notification area indicates new message events. You can expand this area to reveal the Notifications screen that provides more detailed information about the current on-screen notification icons. Access Quick additional settings options Access settings Screen brightness Notifications Drag bar down to show panel... -
Page 19: Multi Window
Multi window This feature allows you to run multiple applications on the current screen at the same time. X From Notifications panel, slide quick settings menu from right to left and tap to enable. Multi window NOTE: Only applications found within the Multi window panel can be active atop another current application on the screen. -
Page 20: Applications Screen
Applications screen To access the Applications screens, from any Home screen, tap the Apps icon Swipe left or right through the screens. As you download new applications, they will appear on the Applications screens in alphabetical order. As you transition from screen to screen, a dot (located at the bottom) displays which panel you are currently on. - Page 21 5. While still holding the on-screen icon, position it on the current screen. Once complete, release the screen to lock the shortcut into its new position. Move and delete items Touch and hold the item you want to move or delete and drag it to another location or to the Trash Can icon at the top of the screen.
- Page 22 Change Home screen wallpaper 1. Navigate to any screen. – OR– Press (Home) to go to the Home screen. 2. Touch and hold an empty area of the screen. 3. From the Home screen window tap Set wallpaper. 4. From the Set wallpaper window tap Home screen, Lock screen or Home and lock screens.
-
Page 23: Ringtone
RINGTONE Set call and notification ringtone 1. From the Home screen, press (Menu) Settings My device Sound. 2. Tap either Ringtones or Default notification sound. 3. Tap the desired sound. 4. Tap OK. Set other sounds 1. From the Home screen, press (Menu) Settings My device... -
Page 24: Volume
VOLUME Set call volume While on a call, press the Volume key up or down. Set other volume 1. From the Home screen, press (Menu) Settings My device Sound. 2. Tap Volume. 3. Touch and drag the Music, video, games and other media , or Ringtone, Notifications, and System sliders to the desired levels. -
Page 25: Voicemail
VOICEMAIL Use voicemail To call and set up voicemail: 1. From the Home screen, tap (Phone). 2. Touch and hold until the device dials voicemail. 3. Follow the instructions to set up your voicemail account. -
Page 26: Contacts
CONTACTS Add new contact 1. From the Home screen, tap (Phone). 2. Enter the contact’s phone number. 3. Tap Add to contacts. 4. Tap Create contact. 5. Tap a contact destination. 6. Enter the contact’s information. 7. Tap Save. Call contact from the contacts list 1. -
Page 27: Email
EMAIL Set up Gmail 1. From the Home screen, tap (Apps) (Gmail). 2. Tap Existing or New. 3. Follow the on-screen instructions. Set up Internet email 1. From the Home screen, tap (Apps) (Email). NOTE: If you have already set up an email account, tap the name of the (Menu) g Settings g Accounts g open account, tap Add account. -
Page 28: Complete Setup
Set up Corporate Exchange email 1. From the Home screen, tap (Apps) (Email). NOTE: If you have already set up an email account, tap the name of the (Menu) g Settings g Accounts g open account, tap Add account. 2. Enter your email address and password information and tap Next. -
Page 29: Bluetooth
BLUETOOTH Your phone comes with Bluetooth connectivity, a wireless technology that enables a connection between your phone and a Bluetooth headset or other Bluetooth device (sold separately). Prepare Bluetooth headset Make sure that your headset is fully charged and in pairing mode. -
Page 30: Camera & Camcorder
CAMERA & CAMCORDER Use your phone’s built-in Camera to take pictures and record video. X From the Home screen, tap (Apps) (Camera) to launch the camera. Switch to Picture/ front/back Open video Use video camera settings controls camera View picture/video Apply Change gallery... -
Page 31: Near Field Communication
NEAR FIELD COMMUNICATION Near Field Communication (NFC) is a short-range wireless communication technology that allows you to make simple transactions, exchange digital content (also known as NFC tags), share large multimedia files (via S Beam), and connect electronic devices with just a touch. Your phone contains the NFC technology that allows you to use services and features that require NFC capability. - Page 32 Turn on S Beam This feature allows you to beam large files directly to another compatible device that is in direct contact. These files can be larger, such as videos, HD pictures, and other large files. You can beam images and videos from your gallery, music files from your music player, and more.
- Page 33 Turn on Voice Control Voice Control allows you to use voice commands to control phone functions like answering a call by saying ‘Answer’, taking a photo buy saying ‘Cheese’ or snoozing your Alarm by saying ‘Snooze’ and much more. 1. From the Home screen, press (Menu) Settings My device...
-
Page 34: Your Navigator Deluxe
YOUR NAVIGATOR DELUXE With Your Navigator Deluxe, get all of the features of an advanced car navigation system on your mobile phone with voice turn-by-turn navigation enabled by GPS. Search for any destination including gas stations, ATMs, restaurants, and more. Get detailed maps of any location. - Page 35 Use Your Navigator Deluxe X From the Home screen, tap (Apps) (Your Navigator Deluxe). From the Your Navigator Deluxe home screen you can select. – “Drive To” for turn by turn direction to an address, airport, contacts addresses and more. –...
-
Page 36: Notes
NOTES...
Need help?
Do you have a question about the Galaxy Mega and is the answer not in the manual?
Questions and answers