Table of Contents
Advertisement
Advertisement
Table of Contents

Summary of Contents for Robomaid RM-770
- Page 1 RM-770 ROBOT VACUUM CLEANER...
- Page 2 Failure to observe any of the above safety precautions will void warranty. Do not look directly into the built-in UV lamp. PLEASE NOTE that although the Robomaid RM-770 Robot Vacuum Cleaner is designed for automated use and convenience, it does require regular cleaning and maintenance. Damage due to lack of cleaning or maintenance will not be covered under warranty.
-
Page 3: Components
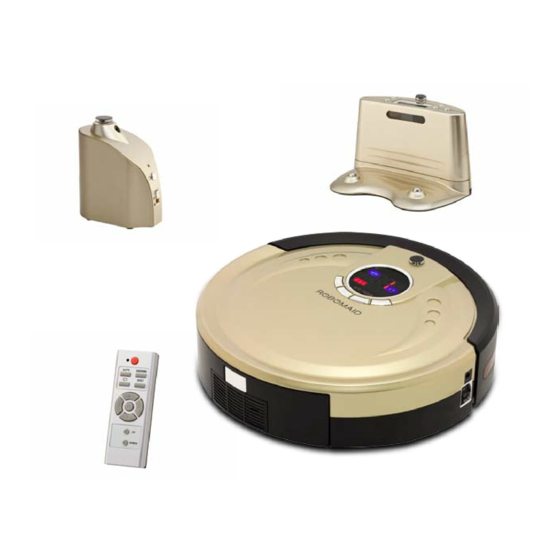
Components RM-770 Robot Vacuum Cleaner Virtual Wall Power Adaptor Docking Station Remote Control Furniture Protection 2 x Side Brushes Cleaning Brush User Manual Mopping Attachment Spare Filters Adhesives (2 x cloth and holder) Names of Parts Top View: Front Bumper... -
Page 4: Names Of Parts
- Tidy up any electric wires along the wall to avoid obstructing the operation of the Robomaid. - Avoid placing the docking station near year TV or other wireless-based device. - Never place the docking station near the top of a stair case or ledge, as the Robomaid RM-770 will reverse away from the docking station. -
Page 5: Standby Mode
- In Standby Mode, the current mode will be displayed (the default is “AUTO 1” ). - If the Robomaid is left in Standby Mode for more than 3-5 minutes, it will start chirping every 30 seconds until the Robomaid is activated, switched OFF, or recharging. -
Page 6: Charging Mode
10 equals the actual number of charging in minutes. - When the Robomaid is not being used, it is best to keep it in Charging Mode, either on the Docking Station or connected to the Power Adaptor. - Page 7 - If the Robomaid detects a place with a lot of dirt or debris, the DIRTY icon on the display will light up and the Robomaid RM-770 will increase the cleaning intensity in that area.
-
Page 8: How To Use The Remote Control
Press this button again to enter Standby Mode. AUTO Button: Press this button and the Robomaid RM-770 will work in an automatic cleaning mode until the battery power is used and then will automatically search for the Docking Station for recharging. -
Page 9: Setting The Time
”, Timer Button “ ” Adjust Button “ ”. Please note the buttons will only work if the Robomaid is NOT charging on the Docking Station. Full Go Mode - Press the Full Go button “ ” to enable the Full Go Mode - when the battery has been fully recharged, cleaning will automatically begin. -
Page 10: How To Use The Virtual Wall
How to Use The Virtual Wall The Virtual Wall sends a special infrared signal to prevent the Robomaid RM-770 from entering unnecessary or unwanted areas or to reduce the cleaning area. Before using the Virtual Wall, install the batteries as shown in Figure 3, open the bottom cover of the Virtual Wall, install 2 x D batteries. -
Page 11: Using The Mopping Attachment
Pushing down on the front of the Robomaid while pressing the button also helps. -
Page 12: Installation Of Filters
Cleaning Sensors - The sensors should be cleaned by cotton swab or soft cloth. - There are wall-following sensors installed in the front of bumper of the Robomaid RM-770, and ground detection sensors installed under the RM-770 (see the gure below) To ensure a more e ective cleaning of the Robomaid RM-770, please clean the sensors regularly. -
Page 13: Main Brush
Please clean the main brush after the rst 3 times to judge how often the brush should be cleaned. Any damage caused by lack of cleaning and maintenance may not be covered under warranty. Storing the Robomaid RM-770 The Robomaid RM-770 should be stored in ventilated and dry places. Avoid damp areas and direct sunlight. -
Page 14: Troubleshooting
Trouble shooting If you experience some issues while using your Robomaid RM-770, please use the following guide and please feel free to contact our Customer Care team. The Robomaid Stops while Working - Check if the selected cleaning time is over. -
Page 15: Technical Speci Cations
- Check the error code and refer to the table on the previous page. - The Robomaid is about 11cm high, but can get stuck on furniture that has a gap of between 10-11cm. If this is the case, try sectioning the area o with a Virtual Wall or if possible, increase the height of the furniture by 1cm. - Page 16 Robomaid Australia Pty Ltd PO Box 7293 Alexandria, New South Wales, Australia 2015 Customer Service Line (free call) 1800 794 191 Customer Service Email: customercare@robomaid.com.au Website: www.robomaid.com.au Due to continual product improvement in design or otherwise, the product you purchase may di er slightly from the illustrations in this book.
Need help?
Do you have a question about the RM-770 and is the answer not in the manual?
Questions and answers