Table of Contents
Advertisement
Quick Links
Advertisement
Table of Contents

Summary of Contents for Painless Performance 60217
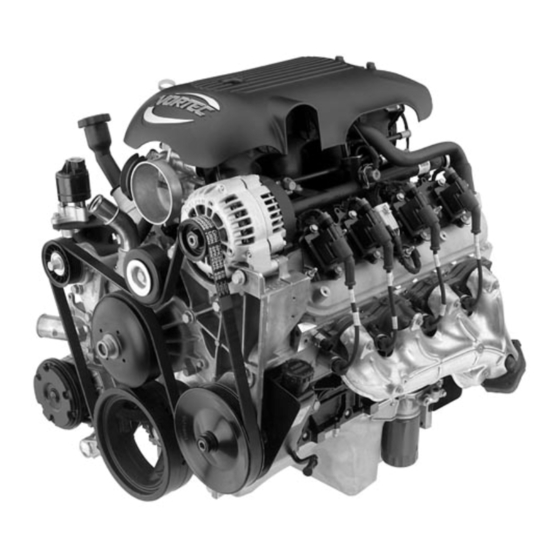
- Page 1 P/N 60217 & 60218 1999 - 2002 GM VORTEC FUEL INJECTION 4.8L, 5.3L & 6.0L WIRE HARNESS INSTALLATION INSTRUCTIONS Manual P/N 90530 Third Edition July 2014 Copyright © November 2004 PAINLESS PERFORMANCE PRODUCTS 2501 Ludelle Street Fort Worth, Texas 76105 (800) 423-9696...
-
Page 2: Table Of Contents
ROUGH INSTALLATION......................4 HARNESS ATTACHMENT......................4 TERMINAL INSTALLATION INSTRUCTIONS................4 GM 99-02 VORTEC SYSTEM WIRE HARNESS INSTALLATION..............5 CONTENTS OF THE 60217 & 60218 WIRE HARNESS KIT............5 DASH SECTION INSTALLATION....................5 ENGINE SECTION INSTALLATION..................... 9 TAIL SECTION INSTALLATION....................14 TROUBLE-SHOOTING INSTRUCTIONS...................... -
Page 3: Introduction
INTRODUCTION You have purchased what we at Painless Performance Products believe to be the most up-to-date and easiest-to-install automotive fuel injection harness on the market. It is designed for easy installation, even if you have no electrical experience. This harness is designed to be a complete wiring system for the fuel injection system on General Motors 1999 - 2002 4.8L, 5.3L, &... -
Page 4: About These Instructions
ABOUT THESE INSTRUCTIONS These instructions provide information for the installation of the 60217 & 60218 Vortec Fuel Injection Harness Kit. The contents of these instructions are divided into major Sections, as follows: INTRODUCTION ABOUT THESE INSTRUCTIONS TOOLS NEEDED PRE-INSTALLATION AND HARNESS ROUTING GUIDELINES... -
Page 5: Oxygen Sensors
4.1.1 If you are using a manual transmission, tape off and store the purple and pink (brake switch) wires, the park neutral position plugs/ wires and the 13-position (transmission) round connector in the tail section. 4.1.2 If you ARE going to use a 4L60E, 4L65E, 4L80E, or 4L85E transmission, you must use the vehicle speed sensor (VSS), transmission connector, park neutral position connectors and correct brake switch. -
Page 6: Grounding The Vehicle
4.8L, 5.3L & 6.0L Vortec Fuel Injection Harness (99 - 02) Part # 60217 & 60218 MAP Sensor…………………..…Delco# 213-796 Main Computer…………………Service#12200411 Idle Air Control Motor…………..GM# 17113598 Fuel Pump Relay………………..Painless #80130 Knock Sensor…………………..Delco# 213-362 Brake Switch……………………Painless# 80176 EGR Valve……………………….GM# 17113575 MAF/ IAT Sensor……………….Delco# 213-364 Coils………………………….…..GM# 10457730... -
Page 7: Rough Installation
5.1.1 Connect a ground strap or cable (minimum of a 4 Ga. wire) from the negative battery terminal to the chassis (frame). 5.1.2 Connect a ground strap (minimum of a 4 Ga. wire) from the engine to the chassis (frame). Do not rely upon the motor mounts to make this connection. 5.1.3 Connect a ground strap from the engine to the body. -
Page 8: Terminal Installation Instructions
GM 99 – 02 4.8L, 5.3L & 6.0L VORTEC SYSTEM WIRE HARNESS INSTALLATION INSTRUCTIONS CONTENTS OF THE 60217 & 60218 WIRE HARNESS KIT Take inventory to see that you have everything you are supposed to have in this kit, if anything is missing, contact the dealer where you obtained the kit or contact Painless Performance at (800) 423-9696 or (817) 244-6898. -
Page 9: Dash Section Installation
DASH SECTION INSTALLATION Note: If you have not already done so, read sections 4.0 and 5.0 of these instructions and think through the installation of the harness before securing or cutting any wires. The wires in this group consist of the diagnostic link connector (DLC) (SEE FIGURE 6.1), the check engine light (pre-mounted into a mounting bracket), fuel pump relay, emissions devises (optional) and 6 other wires. -
Page 10: Vss Output
5. CANISTER PURGE (not equipped on all models) - The Evaporative Emissions (EVAP) control system is the charcoal canister storage method. This method transfers fuel vapor from the fuel tank to an activated carbon charcoal storage canister, to hold the vapors when the vehicle is not operating. When the engine is operating, the fuel vapor is purged from the carbon element by intake air flow and consumed in the normal combustion process. -
Page 11: Figure 6.2 Brake Switch Connection
FIGURE 6.1 DLC Connector & Check Engine Light FIGURE 6.2 Brake Switch Connections FIGURE 6.3 Brake Switch Relay... -
Page 12: Figure 6.4 Air Pump Relay
WIRE COLOR # OF WIRES LABELED CONNECT TO: IN CONNECTOR Brown, Red, Orange, Pink Air Relay Relay Pink, Green/White Canister Purge Canister Purge Solenoid Pink, White Canister Vent Canister Vent Solenoid Black, Red Air Sol Air Bleed Solenoid Black, Red Air Pump Air Pump Gray, Green/White, Black, Orange... - Page 13 FIGURE 6.8 Air Solenoid FIGURE 6.9 Fuel Pump Relay Connector ENGINE GROUP INSTALLATIONS The engine group is designed to be separated into left (driver) and right (passenger) sections. Each side is tie-wrapped separately, BUT NOT LABELED. The left side of the has the connectors for the idle air control, throttle position sensor, mass air flow sensor, and engine coolant sensor, all of which ARE labeled.
- Page 14 DRVR. & PASS COIL (mandatory) - The ignition system on this engine is a multiple coil configuration called coil per plug. The ignition coil mounting bracket is attached to the rocker cover. The secondary ignition wires are short compared to a distributor ignition system wire. See Figure 6.21 & 6.22 ECT (mandatory) - The (PCM) supplies a 5.0 volt signal to the Engine Coolant Temperature (ECT) sensor through a resistor in the PCM and measures the voltage.
-
Page 15: Table 6.2 Engine Section Connections
MAP (mandatory) – The Manifold Absolute Pressure (MAP) sensor responds to changes in the intake manifold pressure as a result of engine load and speed. The map sensor converts this to a voltage output. See Figure 6.13 STARTER B+ (mandatory) - These circuits are used to maintain memory in the PCM and provide power to all heavy amp circuits. -
Page 16: Figure 6.10 Egr Valve
FIGURE 6.10 EGR Valve FIGURE 6.11 Knock Sensor Connector FIGURE 6.12 Oxygen Sensor FIGURE 6.13 MAP Sensor FIGURE 6.14 CMP Sensor FIGURE 6.15 CKP Sensor... -
Page 17: Figure 6.18 Tps Sensor
FIGURE 6.16 Injectors 1, 3, 5, 7 FIGURE 6.17 Injectors 2, 4, 6, 8 FIGURE 6.18 TPS Sensor FIGURE 6.19 IAC Sensor FIGURE 6.20 MAF-IAT Sensor FIGURE 6.21 Driver Side Coil Connector... -
Page 18: Figure 6.22 Passenger Side Coil Connector
FIGURE 6.22 Passenger Side Coil Connector FIGURE 6.23 ECT Sensor Locate the tail section that you earlier separated from the engine group. Begin routing it towards the rear of the vehicle. Be sure to avoid all sharp edges, moving or hot parts, or anything else that may damage the harness. -
Page 19: Park Neutral Position Sensor
PNP (optional) – The Transmission Range Switch (PRND) switch is mounted to the side of the transaxle and is part of the Park Neutral Position (PNP) switch. The PRND switch is used by the PCM to indicate the actual gear selected. The PRND is made up of 4 individual switches. -
Page 20: Transmission Connector
FIGURE 6.26 Transmission Connection FIGURE 6.27 Park Neutral Position Sensor Converting the 4L60E Transmission Connector to a 4L80E Connector *Note: Harness numbers 60217and 60218 have been wired for both the 4L60E and the 4L80E. All harnesses have the transmission connector pre terminated to allow use of the 4L60E transmission. In applications where a 4L80E is to be used, follow this procedure to change your transmission connector to ensure all functions of the transmission work properly. -
Page 21: Trouble-Shooting Instructions
TROUBLE- SHOOTING INSTRUCTIONS FIGURE 7.1 Fuse Identification THE "CHECK ENGINE" LIGHT Normally, the "check engine" light should come on when the ignition is turned on, and then go out a few moments after the engine starts running. If it reappears, or stays on while the engine is running, the computer has detected a problem and a trouble code has been set. -
Page 22: Idle Learn Procedure
The PCM is designed to withstand normal current draws associated with vehicle operations. Avoid overloading any circuit. When testing for opens or shorts, do not ground any of the PCM circuits unless instructed. When testing for opens or shorts, do not apply voltage to any of the PCM circuits unless instructed. - Page 23 Or, better yet, send us a fax at (817) 244- 4024. We sincerely appreciate your business. Painless Performance Products would like to thank the following the manufactures/ suppliers for their contributions to this project:...
- Page 24 All other products manufactured and/or sold by Painless Performance are warranted to the original purchaser to be free from defects in material and workmanship under normal use. Painless Performance will repair or replace defective products without charge during the first 12 months from the purchase date. No products will be considered for warranty without a copy of the purchase receipt showing the sellers name, address and date of purchase.
Need help?
Do you have a question about the 60217 and is the answer not in the manual?
Questions and answers