Table of Contents
Advertisement
Advertisement
Table of Contents

Subscribe to Our Youtube Channel
Summary of Contents for Waters Fitness Tsunami Elite
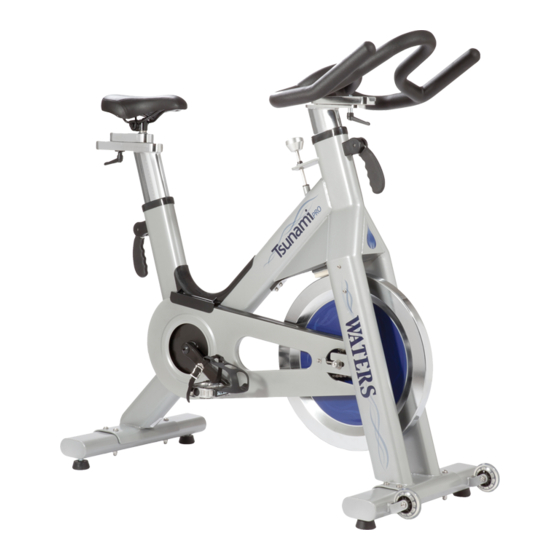
- Page 1 ELITE/PRO/SPORT I N D O O R C Y C L E O W N E R ’ S M A N U A L section...
- Page 3 Thank you for choosing WATERS FITNESS to assist you in meeting your fitness goals. The information in this manual will help you with the assembly, operation and maintenance of your WATERS FITNESS Indoor Cycle. Please review this Owner’s Manual carefully before you use your Indoor Cycle.
-
Page 4: Warranty
Warranty WATERS FITNESS warrants to the original owner that our products will be free of all defects in materials and workmanship. Frame – 10 years Parts – 3 years Wear Items, such as pedals, seat, and brake pad – 1 year Labor –... -
Page 5: Table Of Contents
Table of Contents Warranty ............4 Safety Instructions ..........6 Assembly............7-9 Installing the Front Foot ....... 7 Installing the Rear Foot ........ 7 Installing the Handlebar Assembly ....8 Installing the Seat Assembly ......8 Installing the Pedals ........9 Installing the Water bottle Cage ...... -
Page 6: Safety Instructions
Safety Instructions Important: Read all safety instructions before using the Indoor Cycle. 1. Keep children off the Indoor Cycle at all times. 2. Keep children and pets away from the Indoor Cycle while in use. 3. The maximum weight on the Indoor Cycle is 350 lbs. 4. -
Page 7: Assembly
Assembly 1) Install the Front Foot Using the 5mm Allen key and a 13mm open end wrench, attach the front foot using the bolts, washers and nuts provided. The wheels on the foot should be facing forward. 2) Install the Rear Foot Using the 5mm Allen key and a 13mm open end wrench, attach the rear foot using the bolts, washers and nuts provided. -
Page 8: Installing The Handlebar Assembly
3) Installing the Handlebar Assembly Tsunami Elite/Pro: Make sure the Quick Release handle is in the up position (loose) prior to installing the handlebar assembly. Slide the handlebar post into the front frame opening; the handlebar should be facing forward. Make... -
Page 9: Installing The Pedals
5) Installing The Pedals Important: Each pedal is marked with either an “R” (right) or an “L” (left) on the pedal shaft. Installing the pedal on the wrong side of the bike may damage the pedals and/or the crank arms. An easy way to know if you are attaching the pedals properly is to always thread the pedals towards... -
Page 10: Operational Instructions
Operational Instructions 1) Seat Adjustments The easiest way to start this adjustment is to stand next to the bike and raise the seat to hip height. Mount the bike and check to see if you have a slight bend in your knee when the pedal is in the 6 o’clock position. -
Page 11: Pedal Strap Adjustments
To quickly stop the flywheel, press down directly on the resistance knob. Magnetic Resistance Control on the Tsunami Elite – see supplemental manual provided with this model. operational instructions... -
Page 12: Dismounting The Indoor Cycle
5) Dismounting the Cycle This product has a weighted flywheel with a fixed gear, meaning the pedals will continue to turn as long as the flywheel is still moving. To stop the flywheel, push down on the resistance knob. Once the pedals have stopped moving, it is safe to dismount the cycle. -
Page 13: Warranty Registration
Please complete and return this Warranty Registration Card within 30 days of receipt. Last Name First Name Address City State Country Postal Code Phone Number Email Address Date Purchased Serial Number Purchased From City State Signature of Purchaser Detach and mail to WATERS FITNESS. warranty registration... - Page 16 Waters Fitness, LLC 740 Pierce St., Waterloo WI 53594 888.850.9973 f: 262.923. 1000 www.watersfitness.com...
Need help?
Do you have a question about the Tsunami Elite and is the answer not in the manual?
Questions and answers