
Related Manuals for Magnum fitness MF100

Summary of Contents for Magnum fitness MF100
- Page 1 Treadmill Manual 2010/10/20 2010/10/20 Ver1.0 1.0 2010/10/20 2010/10/20...
-
Page 2: Table Of Contents
Contents Contents Contents Contents Page Page Page Page Thank Thank Thank Thank you 1 1 1 1 General General Safety Safety Instructions Instructions General General Safety Safety Instructions Instructions 2 2 2 2 Special Safety Precautions Special Special Special Safety Safety Safety Precautions Precautions... -
Page 3: Thank You
Thank Thank Thank Thank you Thanks for purchasing this product. The product will help you exercise your muscles in the correct way and to improve your fitness – and all this in a familiar environment. Implied Implied Warranty Warranty Implied Implied Warranty Warranty The importer of this machine assures that this device was manufactured from high... - Page 4 General General safety safety instructions instructions General General safety safety instructions instructions A great deal of emphasis was placed on safety in the design and manufacture of this fitness device. Still, it is very important that you strictly adhere to the following safety instructions.
- Page 5 cial cial Safety Safety Precautions Precautions Special cial Safety Safety Precautions Precautions Power source source: : : : • • • • Power Power Power source source • Choose a place in reach of a socket when placing the treadmill. •...
- Page 6 Assembly Assembly Assembly Assembly • Before starting with the assembly of this fitness device, carefully read through the set up steps as of page 9 We also recommend that you view the assembly drawing prior to assembly (page 7). • Remove all packaging material and place the individual parts on a free surface.
-
Page 7: Hardware Kit
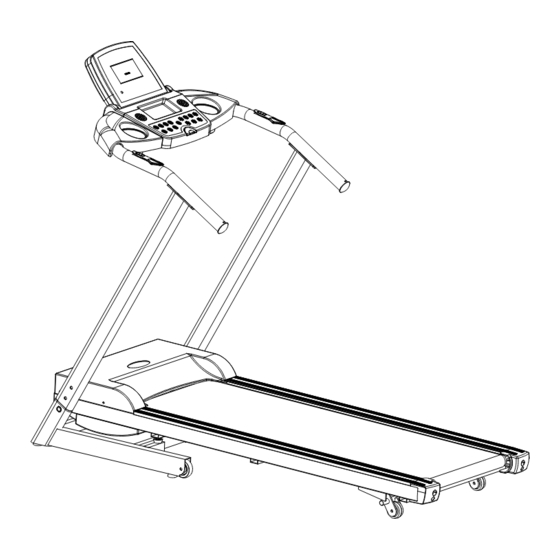
Unpacking Unpacking Unpacking & & & & Asse Asse Asse mbly mbly Unpacking Assembly mbly WARNING!: WARNING!: WARNING!: WARNING!: Use extreme caution when assembling this treadmill. Failure to do so could result in injury. NOTE: NOTE: NOTE: NOTE: Each step number in the assembly instructions tells you what you will be doing. - Page 8 Assembly Assembly Diagram Diagram Assembly Assembly Diagram Diagram Most of the displayed parts in this diagram are shipped pre-assembled. For spare parts, please do always specify parts numbers used on this diagram or in the following parts list. 6 6 6 6...
- Page 9 Parts Parts List List Parts Parts List List ITEM DESCRIPION ITEM DESCRIPION Up motor cover Left end cover Hex head bolt M8*45 Wheel Fixing bracket motor Manual alignment jig Motor Down motor cover Running deck Nut M8 Washer Φ8 Running belt Hex head bolt M8*25 Moving wheel Side rein...
-
Page 10: Assembly Assembly Diagram Diagram Diagram
Assembly Assembly Diagram Diagram Assembly Assembly Diagram Diagram (2) console Console mast Main body Rear roller Motor cover Moving wheel 8 8 8 8... -
Page 11: Assembly Assembly Instructions Instructions
Assembly Assembly Instructions Instructions Assembly Assembly Instructions Instructions Step 1:Attach the console masts to the base frame. Console mast A;)put the console wire through the console mast . B:)then attach left/right console mast into main frame with six M8X15mm bolt using washer wrench. -
Page 12: Instruction Instruction Use Use
Instruction Instruction Instruction u u u u se se se se Instruction TURNING TURNING TREADMILL TREADMILL TREADMILL: : : : TURNING TURNING ON ON THE THE TREADMILL Make sure that the treadmill is correctly connected to power source. Open on/off switch, turn it ON and it will be light. -
Page 13: Training Training M M M M Onitor Onitor
Training Training M M M M onitor onitor Training Training onitor onitor Front Front View View Front Front View View Techni Specifications Techni Techni Technical cal Specifications Specifications Specifications Time 00:00-99:59 Min Speed 0.8-14km/h Distance 0.00-99.9 km Calories 0-999 KCAL Pulse 70-200 / Min Program... - Page 14 Computer Computer Computer F F F F un unc c c c tion tion tion tions s s s Computer SELECT SELECT SELECT SELECT Use the SELECT key to select training speed and training time. Press the START/STOP-KEY to begin training.
- Page 15 Computer Computer Display Display Computer Computer Display Display CALORIES: CALORIES: CALORIES: CALORIES: Shows estimated use of calories at the time of display. DISTANCE DISTANCE DISTANCE DISTANCE Shows the completed or remaining distance in kilometres. TIME TIME TIME TIME Shows minutes and seconds of the elapsed or remaining time.
- Page 16 Computer Computer Computer Computer Operations Operations Operations Operations Speed...
-
Page 17: Maintenance
Maintenance Maintenance Maintenance Maintenance TREADMILL TREADMILL TREADMILL TREADMILL MAINTENANCE MAINTENANCE MAINTENANCE MAINTENANCE Proper maintenance is very important to ensure a faultless and operational condition of the treadmill. Improper maintenance can cause damage to the treadmill or shorten the life of the product. All parts of the treadmill must be checked and tightened regularly. - Page 18 � If the belt is still not centre, repeat the above step until the running belt is on centre. 2. After the belt is centre, increase the speed to 16kph and verify that it is running smoothly. Repeat the above steps if it is necessary. If the above procedure is unsuccessful in resolving the off-centre, you may need to increase the belt tension.
-
Page 19: Important Important Notes Notes
• After After After After each each each each training training training training: Wipe the console and other surfaces with a clean soft and damp cloth to remove sweat residues. Caution Caution Caution Caution: Do not use any abrasives or solvents. To avoid damage to the computer, keep any liquids away. -
Page 20: Trouble Trouble Shooting Shooting
Trouble Trouble Shooting Shooting Trouble Trouble Shooting Shooting TROUBLE TROUBLE TROUBLE TROUBLE SHOOTING SHOOTING SHOOTING SHOOTING GUIDE GUIDE GUIDE GUIDE: : : : SYMPTOM CAUSE SOLUTION Show E0 Not equip Safety key Please equip the Safety key 1.Please check Speed feedback equipment and 10-pin cable or contact special service 2.caused by overload of the user weight,3 Show E1... -
Page 21: Tips
General General fitness fitness tips tips General General fitness fitness tips tips Start your exercise programme slowly, i.e. one exercise unit every 2 days. Increase your exercise session week by week. Begin with short periods per exercise and then increase these continually. Start slowly with the exercise sessions and don’t set yourself impossible targets. -
Page 22: Warm Warm Up Up Up / / / / Stretching Stretching Stretching Exercises Exercises
Warm-up Warm-up Warm-up / / / / stretching stretching stretching exercises exercises Warm-up stretching exercises exercises A successful exercise session begins with warming up exercises and ends with exercises for cooling down and relaxing. These warming up exercises prepare your body for the subsequent demands made upon it. - Page 23 EXERCISES EXERCISES UPPER UPPER THIGH THIGH EXERCISES EXERCISES FOR FOR THE THE UPPER UPPER THIGH THIGH Support yourself by placing your hand on the wall, then reach down behind you and lift up your right or left foot as close to your buttocks as possible. Feel a comfortable tension in your front upper thigh.
- Page 24 EXERCISES EXERCISES KNEES KNEES EXERCISES EXERCISES FOR FOR THE THE KNEES KNEES Sit on the floor and stretch out your right leg. Bend your left leg and place your foot on your right upper thigh. Now try to reach your right foot with your right arm. Maintain this position for 30-40 seconds if possible.
Need help?
Do you have a question about the MF100 and is the answer not in the manual?
Questions and answers