
Related Manuals for Grand Banks GB-36-127

Summary of Contents for Grand Banks GB-36-127
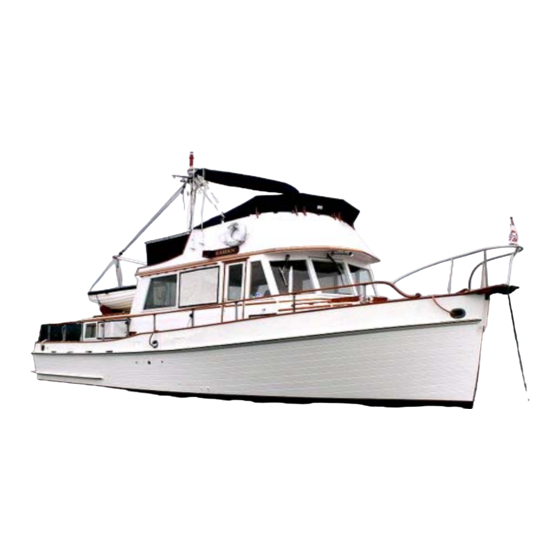
- Page 1 OPERATIONS MANUAL Welcome aboard Kaizen 改善 GB-36-127 Owners: Michael Barrett and Holly Marold 425-750-1583 Specifications:...
- Page 2 Hull ID WIDLC36-353 1973 VHF Call Number WdA9944 36’ 4” Beam 12’ 2” Draft 3’ 11” Mast Height 18’4 From Waterline Displacement 28,000 LBS Fuel Capacity 400 Gallons in two tanks Navigation Range (Approx) 1000 Miles Water Capacity 240 Gallons in two tanks Engine and Transmission Oil Chevron Delo 400 30W Amp hours/House Batteries- Full Charge...
-
Page 3: Table Of Contents
GRAND BANKS 36 SPECIFICATIONS WELCOME ABOARD! SAFETY GUIDELINES BEFORE EMBARKING: CRUISING CHEKLISTS • General Preparation Checklist • Navigation Preparation Checklist • Engine Preparation Checklist STARTING ENGINES GETTING UNDERWAY APPROACH AND DOCKING AT THE DOCK ENGINE SHUT DOWN FUELING ELECTRICAL SYSTEM SHORE POWER (110 VOLT) ELECTRICAL EFFICIENCIES: Helpful Hints ELECTRICAL SYSTEM (D.C. -
Page 4: Welcome Aboard
PROPANE STOVE/OVEN CRABBING and FISHING CRAB COOKING CABIN HEAT STEREO SPEAKERS TV/DVD PLAYER BARBECUE CANVAS and BIMINI ANCHOR and WINDLASS ANCHORAGE LOWERING the ANCHOR RAISING the ANCHOR MOORING CANS DINGYS 36-37 THROUGH-HULL LOCATIONS WHERE IS IT? HOW DO I? NAUTICAL LIBRARY Welcome aboard! -
Page 5: Safety Guidelines
Japanese for "change for the better" or "improvement"; the English translation is "continuous improvement". We hope you will enjoy the many extra amenities that have been added to make Kaizen a comfortable cruiser. • Upgraded decor, including oriental rugs, upholstery, miniblinds, and refrigeration. She has a refurbished bridge including seats and canvas. -
Page 6: Before Embarking
Kaizen is equipped with safety as a priority. Buy a safe and enjoyable charter can only happen when the yacht and the skipper both function properly. The following information is intended to assist you in the proper operation of the boats systems and to note some of the most important safety precautions. -
Page 7: General Preparation Checklist
Bilge Main bilge access. In Grand Banks trawlers, bilge water tends forward, so water level in the bilge is checked here. Anchor Ready for use. Electric Windlass is controlled by remote switching device. Fresh Water Tanks Full. Capacity gauge is located in the aft head Dockside Power Circuit breaker off. -
Page 8: Navigation Preparation Checklist
• DO NOT OVERFILL • DO NOT OPERATE BELOW “ADD” MARK Transmission Fluid Level Dipsticks on inboard side of each transmission, Remover, Wipe Dry and re-install dipstick • DO NOT OVERFILL • DO NOT OPERATE BELOW “ADD” MARK • Should be checked immediately after operation. Check at beginning of charter, once mid-way, and at completion of charter. -
Page 9: Engine Preparation Checklist
Currents and Tides Reviewed Cruise Plan and Charts At helm Binoculars At helm VHF Radios Power turned on with toggle switch on instrument panel on; set to Channel 16 Chartplotters Power to all turned units on with toggle switch on the instrument panel Turn on Bridge Chartplotter first. -
Page 10: Getting Underway
2. DC Panel: Run exhaust fan for at least 60 seconds. REMEMBER TO TURN OFF. 3. Lower helm: Ensure both engine cut-off plungers are in the down position. Ensure that the engine transmission controls (black knob handles) are in neutral position (straight up and down). -
Page 11: Approach And Docking
or the bezel ring attachment on the fittings. Store the power cords on the bridge. Refer to the A.C. section below. 2. While still at dock and idling (approximately 700 RPM), shift gears to test response while tied to dock. Shift gears ONLY with throttle in idle. Pause in neutral when shifting to forward or reverse. -
Page 12: At The Dock
4. Brief crew/line handlers on intentions, critical lines to be applied first. 5. “Kaizen” has a modest amount of momentum. Use neutral a lot, go easy, reverse, and stop the boat if the dock is on the fenders. Continuing will only roll the fenders out of the way and hull scratches will result. -
Page 13: Fueling
2. Stop engines one at a time, by lifting the engine cut-off plungers located between controls, and turning the switch off after each engine has stopped. This will disengage the alarm buzzers. 3. NOTE: DO NOT TURN THE IGNITION CIRCUIT BREAKERS OFF WHILE THE ENGINE IS RUNNING AS YOU WILL LIKELY BURN OUT THE DIODES WHICH ENABLE ALTERNATOR CHARGING CIRCIUTS. -
Page 14: Electrical System
2. DOUBLE-CHECK! 3. Use the DECK FITTING KEY which is kept under the step next to the entry door. 4. Ensure that you have the proper fill cap! Do not try to fill water and fuel at the same time. 5. -
Page 15: Electrical Efficiencies: Helpful Hints
2. Power cord stows in the starboard side seat stowage on the bridge. Adapters stow in the compartment under the entrance door. 3. Connect cord to boat first, then to shore power ensuring you use the correct adapter for 30 amp, 20 amp, or 15 amp service. Secure power cord at both ends to take strain off connections. -
Page 16: Electrical System (D.c. Panel)
“off” when charging by generator or main engines - cruising or idling. By taking these simple precautions, you can enjoy the amenities and comforts of Kaizen’s systems, while minimizing the need to charge of hook-up to shore power. - Page 17 of 600 amp hours. When the LINK 1000 shows a -200 amp hours it is time to charge the batteries. 2. Both engines have high output externally regulated alternators that charge the house/inverter batteries, the engine start batteries, and the windlass battery. 3.
-
Page 18: Link 1000
12. The engine and windlass batteries are all isolated from each other and the inverter/house battery. 13. There is a volt meter in the engine room forward bulkhead that can monitor the start batteries and the windlass battery. • Starboard start battery is #1 •... -
Page 19: A.c. Panel And Inverter
1. The charge light over the pressure switch should be on and indicating green for the charge system to be energized when shore power is available. If it is off and power is available, press the CHARGE pressure switch and the green light should come on. 2. -
Page 20: Electronics
• The A.C. circuit breakers are for the A.C. outlets, the inverter input, the hot water heater and the microwave. • To supply power to the inverter for the charging, the inverter circuit breaker must be • The last three circuit breakers are for the shore power outlets and only have power when A.C. - Page 21 Lower Helm: Raymarine E-Series High Performance Multifunction Navigation Display with a 12.1" Ultra Bright Sunlight Viewable Color Display at lower helm, 800 x600 pixels. Fully waterproof. Fly Bridge: Raymarine E-Series 8.4” Ultra Bright Sunlight Viewable Color Display with Ultra Bright Sunlight Viewable high resolution display. 640 x480 pixels. Fully waterproof. Displays are networked and feature SeaTalk hs high speed networking for instantly transferring chartplotter, fishfinder and radar functions between E-Series displays.
- Page 22 Plug and Play compatibility with Raymarine C and E-Series multifunction navigation • displays. (Overlays on Chart plotter) New and improved dome housing. • Improved radiation pattern and bearing resolution using Propagation Enhancing • Geometry. Advanced microprocessor controlled transmitter receiver features 8 Pulse width/PRF •...
- Page 23 Over and above the DSC, your own and other ships’ position data can be exchanged with the position request or position report functions. The received position information can be transferred to external navigation equipment. In addition, the polling (request/ reply) function checks whether a specific ship is within the communications range.
-
Page 24: Water System
IMMEDIATELY IF WATER TAKNK BECOMES EMPTY OR WATER PUMP WILL OVERHEAT. 2. Kaizen carries 240 gallons of fresh water in four tanks. One forward, three aft. There is a gage mounted on the sink cabinet, aft head that reflects the current tank levels. -
Page 25: Sanitation & Waste
Deck fills are: One at the stern to starboard, and two at the stern to port. The forward tank is not in service, so do not fill. 3. The 6-gallon hot water heater tank heats from one of two sources: 1) Engine operation (while underway);... -
Page 26: Shower And Drain
2. The 45 gallon holding tank is normally pumped out at a shore pump out facility. The deck plate on the starboard side is opened and the waste is vacuumed out. Remember, it is illegal to pump out directly overboard. 3. -
Page 27: Crabbing And Fishing
5. Release igniter button but continue to hold down knob for 10 seconds. Otherwise, the gas will be cut off (a safety feature that stops gas flow if the burner flame goes out- irritating but better than having raw propane flow into the cabin). 6. -
Page 28: Crab Cooking
3. Measure the crabs using the CRAB MEASURING GAUGE normally located under the step below the starboard door leading to the deck. 4. Keep the male crabs of proper size (usually 6 ¼ inches across the carapace). CRAB COOKING This process can make a big difference in your meal, cleanup and overall satisfaction. Rule one: Dungeness crabs are different than east coast blue crabs, so don’t try to boil them live or whole. -
Page 29: Cabin Heat
4. Turn them upside down and when calm and under control whack smartly on their sternum and they will expire quickly. 5. When clearly dead, remove the entire half shell forcibly and dispose of it. Break the crab in half at the centerline. 6. -
Page 30: Stereo Speakers
3. The Red Dot Auxiliary Heater (forward under the stairs)- works off the engine heat exchanger when running the engines. The two speed fan switch is mounted above the 12 Volt panel. (Note the “Horn” breaker switch must be turned on for the fan to function). -
Page 31: Canvas And Bimini
5. Remove lighter. (The Magna BBQ heats up very quickly, and you should also feel heat radiating immediately after igniting.) 6. Allow to burn on the high setting for one minute before adjusting to your desired cooking temperature. 7. When done with the BBQ let the flame burn off the grill and cut gas supply on the regulator. -
Page 32: Anchor And Windlass
ANCHOR AND WINDLASS 1. The primary anchor is a 33# Bruce anchor with 250’ of 5/16 chain. The windlass is electric and is controlled p and down by a remote switch plugged into the windlass base. Remote is stored on the top of the lower helm. 2. -
Page 33: Raising The Anchor
6. Lower the anchor using the down switch on the windless controller, then control the chain payout rate with THE BOAT MOVING BACK. Do not let the chain free wheel unrestrained. 7. The chain is marked every 50’ in red. 8. -
Page 34: Mooring Cans
6. Once broken loose, stop and raise the anchor with the windlass and slow the rate of ascent as the anchor shaft approached the roller. Bring the anchor onto the bow pulpit by hand and secure. 7. Seat the anchor, engage the locking pin, and remove and stow the windless controller. 8. -
Page 35: Dingys
3. As you are coming slowly up to the can, have the crew holding the boat hook point at the can with the hook so the skipper always knows where it is. 4. Hook the can and bring the ring up to the boat to allow the second crew to thread the ring with the line. - Page 36 3. Attach the dingy line to harness to dinghy (it should be attached when the dinghy is in the cradle. The attachment points are the boy, and stern. (Port and Starboard). 4. Raise the boom using the mast line to a position that centers the line slightly aft of center of the dinghy.
-
Page 37: Through-Hull Locations
6. Attach dinghy lift harness to line. Raise and lower: 1. Raise dinghy with crew stationed fore and aft (if possible) to guide its movement. 2. Swing dinghy aboard clear of boat’s starboard rail with crew steading her position. 3. Lower the dinghy slowly onto the deck cradle with crew pushing dinghy forward as lower it. -
Page 38: Where Is It
WHERE IS IT?? Bucket Aft Lazerette Crab Gear Aft Lazerette CRAB MEASURING GAUGE Under the step below the starboard door Deck Key Under the Entry Door Steps Engine Spars Box In plastic box, near Port Engine... -
Page 39: How Do I
Flashlight Under the Entry Door Steps Freshwater Hose Aft Lazerette Manuals Beneath the starboard seat, main salon Oil, Engine Engine Room, Starboard Side Radio Mic, Upper Helm In Basket on Top of the Lower Helm Tool Box Owners Stateroom Closet HOW DO I?? Turn on the speakers? The speaker selection switch is mounted... -
Page 40: Nautical Library
Get a fix on the GPS? If you turned on the system and selected the lower helm as the master you will not get a fix. Turn system off, restart, nd select the upper helm as the master. Get hot water? BOTH Breakers on the 110 Panel need to be Turn on the Electronics? Master Toggle Switch is on Lower Helm... - Page 41 • Twin Engine Powerboat Handling (Video) QUICK REFERENCES • Tide and Current Tables • Northwest Marine Atlas (Charts) • The Marine Yellow Pages WILDLIFE & FISHING Mac’s Field Guides: • Water Birds Of The Northwest Coast • Northwest Coastal Fish Davis Quick Sightings at Sea: •...
Need help?
Do you have a question about the GB-36-127 and is the answer not in the manual?
Questions and answers