Table of Contents
Advertisement
Contents
Federal Communications Commission Regulations ......................... 5
Compliance with RF Exposure Standards ........................................ 5
Industry Canada Compliance ........................................................... 5
FCC Requirements ...................................................................... 6
RF Exposure Compliance and Control Guidelines ........................... 8
Radio Controls ........................................................................... 10
LCD Display ............................................................................... 11
Status Indicators ..............................................................................11
Alphanumeric Label Options............................................................11
Buttons and Labels ..........................................................................12
Battery Installation and Removal ............................................. 13
Installing the Battery ........................................................................13
Removing the Battery ......................................................................13
Battery Care and Maintenance ................................................ 14
Antenna Installation and Removal ........................................... 14
Programmable Switch and Button Functions ......................... 15
Switch Options .................................................................................15
Buttons Options ...............................................................................15
Menu Options...................................................................................15
Preset Menu Items ...........................................................................15
Keypad Menu Operation ..................................................................16
Preset Menu Items ...........................................................................16
Basic Radio Operation .............................................................. 17
Receive ............................................................................................17
Transmit ...........................................................................................17
Channel Zone Selection ............................................................ 18
Code Guard Operation .............................................................. 19
Analog Squelch Control ...................................................................19
APCO Project 25 Squelch Control ...................................................19
Code Guard Receive ...................................................................... 20
Code Guard Transmit ...................................................................... 20
Advertisement
Table of Contents

Subscribe to Our Youtube Channel
Related Manuals for BK Radio KNG


Summary of Contents for BK Radio KNG
-
Page 1: Table Of Contents
Contents Federal Communications Commission Regulations ......5 Compliance with RF Exposure Standards ........5 Industry Canada Compliance ............5 FCC Requirements ..............6 RF Exposure Compliance and Control Guidelines ......8 Radio Controls ................10 LCD Display ................11 Status Indicators ................11 Alphanumeric Label Options............11 Buttons and Labels ................12 Battery Installation and Removal .......... - Page 2 Mixed Mode Operation .............. 21 Mixed Mode Talkback ..............21 DTMF/ANI Operation ..............22 ANI Only..................22 DTMF Only ..................22 Both ....................22 Encryption Operation ............... 22 Required Setup ................22 Operation ..................23 Transmit Encryption Key Selection ..........23 Zeroization ..................
- Page 3 Emergency Signalling Options ..........40 Placing an Emergency Call ............40 Receiving an Emergency Signal ............. 40 Unit-to-Unit Call Options ............41 Individual Call (U2U) ................41 Unit-to Unit Callback ............... 42 Call List Programming ..............42 Encryption Options ..............43 Tx Secure (TXS) ................
- Page 4 KNG User’s Manual...
-
Page 5: Federal Communications Commission Regulations
RF exposure and to satisfy compliance requirements. COMPLIANCE WITh RF ExPOSURE STANDARDS Your BK Radio 2-way radio is designed and tested to comply with a number of national and international standards and guidelines (listed below) for human exposure to radio frequency electromagnetic energy. -
Page 6: Fcc Requirements
This manual contains information concerning the operation procedures for the BK Radio KNG Portable radio. The KNG has been designed to meet the tough requirements of today’s communications environment. Please take a moment to read the information in this manual so you can get optimum performance from your new radio. - Page 7 Please refer to the following websites for more information on what RF energy exposure is and how to control your exposure to assure compliance with established RF exposure limits. http://www.fcc.gov/oet/rfsafety/rf-faqs.html http://www.osha.gov/SLTC/radiofrequencyradiation/index.html RELM/BK Radio...
-
Page 8: Rf Exposure Compliance And Control Guidelines
Antenna should be kept away from eyes. • When worn on the body, always place the radio in a BK Radio approved clip, holder, holster, case, or body harness for this product. Using approved body-worn accessories is important because the use of BK Radio or other manufacturer’s non-... - Page 9 This software is licensed solely for use within this product. US Patent Nos. #6,912,495 B2, #5,870,405, #5,826,222, #5,754,974, #5,715,365, #5,701,390, #5,649,050, #5,630,011, #5,581,656, #5,517,511, #5,491,772, #5,247,579, #5,226,084, and #5,195,166. CONTACT INFORMATION For additional information on exposure requirements or other information, visit website http://www.relm.com. RELM/BK Radio...
-
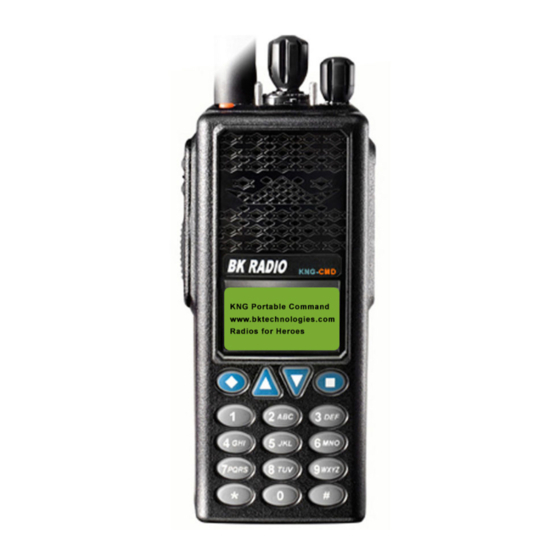
Page 10: Radio Controls
Push-to-Talk C h 1 K N G - P 2 5 171. 5 8 5 0 0 M H z Alphanumeric Diamond Display Button LIGT MENU Up Arrow Button Keypad Down Arrow Button WXYZ PQRS Square Button KNG User’s Manual... -
Page 11: Lcd Display
LCD Display The KNG display can be Status Indicators programmed for a variety of C h 1 options and functionality. Programmable K N G - P 2 5 Alphanumeric Check with your RELM/BK 171. 5 8 5 0 0 M H z... -
Page 12: Buttons And Labels
(Digital or Mixed Mode Operation) User Selectable Talk Group (Digital or Mixed Mode Operation) User Selectable TX CTCSS/CDCSS Code Guard (Analog or Mixed Mode Operation) Zeroize Encryption Keys and Password (Encrypted Models) Channel Zone Select ZSCN Zone Scan KNG User’s Manual... -
Page 13: Battery Installation And Removal
2. Pull the top of the battery out. (Approximately 30 3. Pull up to remove the battery pack. NOTE: All information programmed into the radio is maintained even when the battery pack is removed. RELM/BK Radio... -
Page 14: Battery Care And Maintenance
Battery Care and Maintenance BK Radio battery packs are available in a variety of capacities and types for special applications. Rechargeable battery packs can be charged separately or while attached to a radio. Periodically check the contacts on the battery pack for dirt that could prevent a good electrical contact with the charging base. -
Page 15: Programmable Switch And Button Functions
Programmable Switch and Button Functions The KNG portable radio is equipped with seven programmable control buttons and three programmable switches. Switch and button functions are assigned via PC programming. Collar Switch Right Toggle Switch Options Channel Scan Priority Scan Zone Scan... -
Page 16: Keypad Menu Operation
Currently active functions will be indicated by R a d i o S t a t u s a "+" icon next to the function. P25 ID 1 2 3 4 5 + P r i S c a n ▲ ▼ KNG User’s Manual... -
Page 17: Basic Radio Operation
TXD or TXA appears in the display. 2. Talk in a normal voice with the microphone one to two inches from your mouth. BK RADIO 3. Release the PTT switch to stop transmitting. If the length of your message exceeds the... -
Page 18: Channel Zone Selection
(See Mixed Mode Operation.) Channel Zone Selection The KNG P-150 can be programmed with up to 512 individual channels. These 512 channels can be divided into up to 32 zones of one or more channels. Zone selection can be assigned to any of the programmable buttons or as a menu item. -
Page 19: Code Guard Operation
Unit Calls. TGIDs are assigned on a per-channel basis. Users can be separated into Talk Groups with each group having its own TGID. Then, on channels programmed for Selective squelch, the incoming signal’s NAC and TGID must match the channels programmed RELM/BK Radio... -
Page 20: Code Guard Receive
2 Talk in a normal voice with the microphone one C h 1 K N G - P 2 5 to two inches from your mouth. 171. 5 8 5 0 0 M H z 3. Release the PTT switch to stop transmitting. LIGT MENU KNG User’s Manual... -
Page 21: Mixed Mode Operation
171. 5 8 5 0 0 M H z of the TX Digital switch. As in Talkback LIGT MENU Scan, the RTX channel and receive Press the PTT while the annunciators will be displayed for the RX indicator is shown duration of the timer. RELM/BK Radio... -
Page 22: Dtmf/Ani Operation
Radios that have the DES/AES factory option for encryption must have encryption keys loaded with an APCO Project 25 compatible key fill device such as the Motorola KVL 3000 Plus, using a BK Radio keyloader cable. The radio can hold up to 32 AES and/or DES keys. -
Page 23: Operation
Key Management Facility (KMF). In addition, the radio must have key encryption keys (used only to encrypt other keys) loaded with an APCO Project 25 compatible key fill device such as the Motorola KVL 3000 Plus, using a BK Radio keyloader cable. Operation The receiver can be programmed to automatically detect both clear and secure signals. -
Page 24: Zeroization
P R I S c a n ▲ ▼ 3. Press the 'ENT' to open the menu. Z e r o i z e K e y s Z e r o i z e N o w ? KNG User’s Manual... -
Page 25: Over-The-Air-Rekeying (Otar)
Press the 'YES' button to request a key or press 'ESC' to abort the operation. 5. Hold the 'ESC' button to return to normal R e k e y operation. R e k e y N o w ? RELM/BK Radio... -
Page 26: Keyset Viewing And Selecting
K e y s e t s 5. Press the 'ENT' button to select the → K e y s e t 1 K e y s e t 2 keyset. ▲ ▼ 6. Hold the 'ESC' button to return to normal operation. KNG User’s Manual... -
Page 27: Tactical Otar Option (Kza0584)
Tier III KNG portables may be equipped with Tactical Over-the-Air Rekeying option KZA0584. The tactical OTAR option allows a key source KNG radio to send individual encryption keys to OTAR equipped target radios without the need for a full Key Management Facility (KMF). - Page 28 “Key Received Received”. The key received message remains displayed until radio power is cycled. The radio will operate normally even while the message is displayed. If the key transfer is unsuccessful no message will be displayed. KNG User’s Manual...
-
Page 29: General Options
Press the 'ENT' button to set the selection. Hold the 'ESC' button to return to normal operation. Monitor (MON) When MON is on, the radio will unmute. The LCD display will show the receive indicator along with the signal strength indicator. If the RELM/BK Radio... -
Page 30: Repeater Talkaround (Ta)
Use the up/down buttons to select 'Talk Around'. Press the 'ENT' button. Use the up/down buttons to select 'Repeater' or 'Direct'. Press the 'ENT' button to set the selection. Hold the 'ESC' button to return to normal operation. KNG User’s Manual... -
Page 31: Surveillance Mode (Surv)
Hold the 'ESC' button to return to T x P o w e r normal operation. S q u e l c h S e t ▲ ▼ S q u e l c h A d j u s t ▲ ▼ RELM/BK Radio... -
Page 32: Tx Digital (Txd)
Low - Slide the switch up toward the channel select switch. Button Operation High - Press the programmed button. Low - Press the button again. Menu Operation Press the assigned Menu button. Use the up/down buttons to select 'TX Power'. Press the 'ENT' button. KNG User’s Manual... -
Page 33: Zone Select (Zon)
Hold the 'ESC' button to return to normal operation. Zone Select (ZON) The 512 channels available in the KNG can be divided into multiple operating zones. Switching between zones is accomplished via a programmed button or menu item. Optionally, zone labels or numbers can be displayed on the LCD. -
Page 34: Scanning Code Guarded Channels
The radio transmits on the channel selected by the Channel Selector knob unless Talkback Scan is enabled or “Transmit on Priority 1” is enabled (see Priority Scan). When the PTT switch is released, the radio continues to monitor the KNG User’s Manual... -
Page 35: Talkback Scan
171. 5 8 5 0 0 M H z even if a different transmission is being LIGT MENU monitored. Activity on PR2 preempts activity on any of the non-priority channels. Receptions on PR1 have priority over any other channel, including PR2. RELM/BK Radio... - Page 36 6e. Use the up/down buttons to select C h a n n e l 2 the channel. ▲ ▼ 6f. Press 'ENT' to set. Z o n e 0 1 P r 1 → O f f M a i n ▲ ▼ KNG User’s Manual...
-
Page 37: Menu Operation
→ C h a n n e l 1 C h a n n e l 2 ▲ ▼ Z o n e 0 1 P r 1 → O f f M a i n ▲ ▼ RELM/BK Radio... -
Page 38: Scan List Add/Delete
Use the up/down buttons to select 'Zone Scan'. Press the 'ENT' button. Use the up/down buttons to select On or Off. Press the 'ENT' button to set the selection. Hold the 'ESC' button to return to normal operation. KNG User’s Manual... -
Page 39: Zone Scan List Add/Delete
If enabled vote scanning takes place whenever the channel scan switch in on. NOTE: Channel voting occurs only with Channel Scan and is disabled when Zone Scanning. Channels programmed as Vote channels are treated as normal scan list channels during Zone Scan operation. RELM/BK Radio... -
Page 40: Emergency Signalling Options
Emergency Signalling Options The KNG portable radio supports P25 Emergency Operation. When Emergency Operation is engaged the radio will transmit the P25 ID of the radio along with the required P25 Emergency bit. Emergency operation applies only to channels programmed for Digital or Mixed Mode transmissions. -
Page 41: Unit-To-Unit Call Options
Enter ID = Enter a numeric P25 ID. LIGT MENU 'ENT' brings up 'Enter ID' menu. Use the keypad to enter the desired ID. Press 'ENT' to initiate the call. 4. Press the 'PTT' button to send the unit-to- unit call. RELM/BK Radio... -
Page 42: Unit-To Unit Callback
If enabled, pressing PTT during the hold time results in a Unit-to-Unit call to the received unit ID. Call List Programming If enabled with the PC radio editor, the P25 Call List can edited via the radio's keypad programming function. (See Keypad Programming) KNG User’s Manual... -
Page 43: Encryption Options
▼ normal operation. Zeroize Keys (ZER) The radio provides a method for the user to zeroize all encryption keys. The Zeroize Keys function can be assigned to a button or the radio menu. To initiate the Zeroize Function: RELM/BK Radio... -
Page 44: Rekey Request (Rky) (Otar Equipped Radios)
If the button is pressed while on a channel that has not been marked as an OTAR channel, the radio will boop and ‘NON-OTAR’ will appear on the display. If manual rekeying request is enabled, the rekey service is invoked as follows: KNG User’s Manual... -
Page 45: Keyset Viewing And Selecting
The radio will receive messages encrypted with any of the keys in any of the keysets, but transmit keys can only be selected from the active keyset. Follow the steps below to view/select the Keyset. RELM/BK Radio... -
Page 46: Tactical Otar Option (Kza0584)
Tier III KNG portables may be equipped with Tactical Over-the-Air Rekeying option KZA0584. The tactical OTAR option allows a key source KNG radio to send individual encryption keys to OTAR equipped target radios without the need for a full Key Management Facility (KMF). - Page 47 S u c c e s s f u l display will read “Non-Tact., OTAR Channel”. CANCEL Should the key transfer fail for any other reason a failure message with a two digit error code will be displayed. (See table) RELM/BK Radio...
- Page 48 R e c e i v e d Received”. The key received message remains displayed until radio power is cycled. The radio will operate normally even while the message is displayed. If the key transfer is unsuccessful no message will be displayed. KNG User’s Manual...
-
Page 49: Pick List Options
Pick List Options The KNG provides users the ability to select and assign Pick List functions to specific channels. Pick List options include: Transmit Code Guards, Transmit NACs, Talk Group IDs and Encryption Keys. Pick List Options can be assigned to a programmed button or a radio menu item. -
Page 50: Programming P25 Id Unit Call/Receive List
Programming of Channel, Zone and Global radio parameters. Programming P25 ID Unit Call/Receive List The KNG can be pre-programmed with up to 100 Project 25 IDs and labels. If 'RX'd Unit ID' is designated as a display line, the P25 ID of the radio sending the call will be shown when receiving a digital signal. - Page 51 3. Use the keypad to select the desired ID ▼ number. (Up to seven digits.) C a l l 1 4. Press the ENT button to save the ID. C a l l 1 L a b e l 12 3 4 5 6 7 RELM/BK Radio...
-
Page 52: Programming User Selectable Transmit Tones
Programming User Selectable Transmit Tones The KNG can be pre-programmed with up to 32, user selectable, CTCSS or CDCSS subaudible transmit tones. Tones are selected with the programmed buttons. If enabled, the tones can be programmed via the radio's keypad. -
Page 53: Programming User Selectable Network Access Codes
Programming User Selectable Network Access Codes The KNG can be pre-programmed with up to 32, user selectable NACs. NACS are selected with the programmed buttons. If enabled, the NACs can be programmed via the radio's keypad. To enter NAC List programming: 1. -
Page 54: Programming User Selectable Talkgroup Ids
Programming User Selectable Talkgroup IDs The KNG can be pre-programmed with up to 32, user selectable TGIDs. TDIDs are selected with the programmed buttons. If enabled, the TGIDs can be programmed via the radio's keypad. To enter TGID List programming: 1. -
Page 55: Keypad Programming
If enabled, channel, zone and global parameters can be programmed using the radio's keypad. Individual parameters may be blocked from programming access. Check with your RELM/BK Radio dealer or communications officer for information on the programmed functions of your radio. -
Page 56: Receive Mode
R X M o d e 3. Press the 'ENT' button to set the mode. → D i g i t a l 4. Press the 'ESC' button to return to the M i x e d ▲ ▼ Channel Programming menu. KNG User’s Manual... -
Page 57: Squelch Mode
3. Press the 'ENT' button to set the selection. → N o r m a l S e l e c t i v e 4. Press the 'ESC' button to return to the ▲ ▼ Channel Programming menu. RELM/BK Radio... -
Page 58: Transmit Frequency
T X M o d e → 12 . 5 k H z 3. Press the 'ENT' button to set the selection. 2 5 k H z 4. Press the 'ESC' button to return to the ▲ ▼ Channel Programming menu. KNG User’s Manual... - Page 59 NACs are programmed as three T X N A C digit hexadecimal numbers. (000 - FFF) 5. Press the 'ENT' button to set the NAC. 6. Press the 'ESC' button to return to the Channel Programming menu. RELM/BK Radio...
- Page 60 Selectable = encryption selected via S e c u r e programmed switch or button ▲ ▼ 3. Press the 'ENT' button to set the mode. 4. Press the 'ESC' button to return to the Channel Programming menu. KNG User’s Manual...
- Page 61 → O f f desired setting. Off = Selectable Power, On = Low Power Only. ▲ ▼ 3. Press the 'ENT' button to set the selection. 4. Press the 'ESC' button to return to the Channel Programming menu. RELM/BK Radio...
-
Page 62: Programming Zone Parameters
Channel, Priority 2 Channel, Automatic-Number- Identification (ANI) settings and Allow/Disallow Z o n e L a b e l P r i 1 C h a n Cloning. T x o n P r i 1 ▲ ▼ KNG User’s Manual... -
Page 63: Zone Label
▲ ▼ 3. Press the 'ENT' button to set the selection. T x o n P r i 1 → O f f 4. Press the 'ESC' button to return to the Zone Programming menu. ▲ ▼ RELM/BK Radio... - Page 64 A N I I D 4. Press the 'ENT' button to save the ID. 12 3 4 5 6 7 5. Press the 'ESC' button to return to the Zone Programming menu. A N I I D KNG User’s Manual...
-
Page 65: Programming Global Parameters
P r i 1 C h a n Scan Hold Time, Busy Channel Mode, Transmit P r i 1 Z o n e Time-out-Timer, Backlight Mode, Backlight T x o n P r i 1 Duration, Battery Saver, and Radio Password. ▲ ▼ RELM/BK Radio... - Page 66 ▲ ▼ 3. Press the 'ENT' button to set the selection. T x o n P r i 1 → O f f 4. Press the 'ESC' button to return to the Global Programming menu. ▲ ▼ KNG User’s Manual...
-
Page 67: Scan Hold Time
3. Press the 'ENT' button to set the selection. S e t H o l d Ti m e 4. Press the 'ESC' button to return to the 0 . 0 S e c o n d s Global Programming menu ▲ ▼ RELM/BK Radio... - Page 68 Keypress = Display and keypad light whenever O f f the keypad is used. → K e y p r e s s Display Chan = Display and keypad light ▲ ▼ whenever displayed information changes Both = Display and keypad light whenever KNG User’s Manual...
-
Page 69: Battery Saver
P a s s w o r d numeric Password. 12 3 4 5 6 4. Press the 'ENT' button to set the new Password. P a s s w o r d 5. Press the 'ESC' button to return to the Global Programming menu. RELM/BK Radio... - Page 70 W, X, Y, Z, w, x, y, z, 9 WXYZ 0, Blank Space *, ., ,, ;, :, ", ', !, ?, %, &, ', ~, @, _ #, $, +, -, =, ^, /, \, |, <, >, {, }, [, ] KNG User’s Manual...
-
Page 71: Radio Cloning
Radio Cloning If "Cloning" is programmed a menu item, any “Source” radio (a KNG with the desired radio frequencies and settings) is capable of transferring its program to another KNG of the same frequency range. The radio receiving the program is referred to as the “target” The KAA0700 cloning cable will be required in the following procedure. - Page 72 NOTE: Radios programmed with any zones blocked from receiving cloning information will not accept an 'Entire Radio' clone. Entire Radio cloning transfers all radio information except the following: Radio Serial Number P25 Identification Number Encryption Keys Passwords KNG User’s Manual...
-
Page 73: Warranty
RELM/BK Radio at (800) 648-0947. Email; sales@relm.com Service If you need service, contact your BK Radio dealer. If you find it impractical to have service provided by your dealer, contact the RLM/BK Radio Technical Service Department at (800) 422-6281. -
Page 74: Definitions And Acronyms
Channel Ready to Transmit Channel Receive Scan Squelch Squelch A control that eliminates background noise. Talkback Programmed response to a call. TGID Talk Group ID Time-Out Timer Time-Out Timer Limits the duration of calls. Talk Group ID P25 Talk Group Identification KNG User’s Manual... - Page 75 RELM/BK Radio...
-
Page 76: Your Radio Settings
Bottom Side ___________ Diamond _____________ BK RADIO Up Arrow ______________ Down Arrow ____________ Square _______________ WXYZ PQRS Menu Settings _____________ _____________ _____________ _____________ _____________ _____________ _____________ _____________ _____________ _____________ _____________ _____________ _____________ _____________ _____________ _____________ _____________ _____________ KNG User’s Manual...
Need help?
Do you have a question about the KNG and is the answer not in the manual?
Questions and answers