Table of Contents
Advertisement
Advertisement
Table of Contents

Related Manuals for Asoni CAM419


Summary of Contents for Asoni CAM419
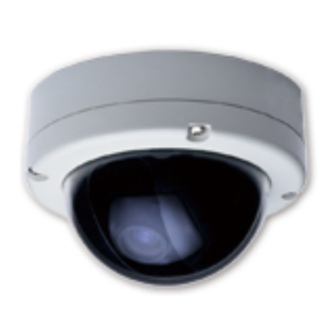
- Page 1 Mega-Pixel Network Vandal Dome CAM419 User’s Manual Version: 3.1 Date: 5/22/2008...
-
Page 2: Table Of Contents
Content Preface ..........................2 Product Specifications......................2 Product Installation ....................... 4 Hardware Installation......................4 Monitor Setting ........................6 C. IP Assignment ........................7 D. Install ActiveX Control ....................... 9 Live Video ........................... 11 Configuration ........................14 System ..........................14 Video/Audio Settings .......................20 C. -
Page 3: Preface
1. Preface CAM419 Network Vandal Dome is a CMOS Network Vandal Dome. It builds in web server. User views real-time video via IE browser. CAM419 supports MPEG-4 & M-JPEG video compression which provides smooth and high quality video. The video can be stored in the SD card, and can be playback remotely. - Page 4 Hardware ARM 9 ,32 bit RISC 64MB Image Sensor 1/4” CMOS, 1.3 Mega pixel Digital I/O 1 In/ 1 Relay out (COM. & N.O.) Audio In / Out 1 In / 1 Out Power Consumption DC12V, 700mA PoE model: Built-In PoE (IEEE 802.3af) Network Ethernet 10/ 100 Base-T...
-
Page 5: Product Installation
3. Product Installation A. Hardware Installation Power Jack (DC 12V) Digital I/O (Pink) Audio Input (Green) Audio Output Network Connector To connect the included power adapter. Power Jack: Digital In and Digital Out. Digital I/O: The RCA connector allows connect to a microphone or audio Audio Input (Pink): source, the connected audio will be heard at the remote site. - Page 6 5. Set up the network configurations according to the network environment. For further explanation, please refer to chapter 6.
-
Page 7: Monitor Setting
B. Monitor Setting 1. Right-Click on the desktop. Select [Properties] 2. Change color quality to “Highest (32bit)”. -
Page 8: Ip Assignment
C. IP Assignment Always consult your network administrator before assigning an IP address to your camera in order to avoid using a previously assigned IP address. MAC Address: Each network camera has a unique Ethernet address (MAC address) shown on the sticker of the camera. One final note, although the IP Search is able to find and configure any network camera on the LAN except those that are behind a router, it is a good idea to set the host PC to the same subnet. - Page 9 2. IP Search searches all the network devices which connect to the intranet and lists on the window. Click [Search] button to search again. 3. From the list, select the device with the MAC Address that corresponds to the device that is to be configured. 4.
-
Page 10: Install Activex Control
D. Install ActiveX Control For the first time to view the camera video via IE, it will ask you to install the ActiveX component. If the installation failed, please check the security setting for the IE browser. 1. In IE, click on [Tools] [Internet Options…] 2. - Page 11 When popup the following dialogue box, click [Yes].
-
Page 12: Live Video
It will show a dialogue box. Key-in the user name and password. The default user name and password are “admin” and “admin”. When connect to the CAM419, the following GUI shows. ④ ① ② ③... - Page 13 Streaming : If the streaming 2 is enabled, select the streaming from the pull-down list to display. Configuration : Go into the configuration page to set the parameters if necessary. Shows system date/time, video resolution and video refresh rate (FPS). Online Visitor : Shows how many users connect to this network camera.
- Page 14 Relay Out (ON/OFF Switch) : Click the button to manually turn on / off the Relay via the built-in Digital Out. Relay Out (Time Switch) : Click the button to manually turn on the Relay via the built-in Digital Out, after the interval time is passed, the Relay will be turned off automatically.
-
Page 15: Configuration
5. Configuration Click [Configuration] button to get into the configuration page. Click [Live View] button to back to the live video page. A. System System Information Set up the camera name, select language, and set up the camera time. Information Server Name This is the Camera name. - Page 16 Time Setting Date Format: Select the format to display the date. Time Zone: Select the GMT to match your time zone. Synchronize with NTP Server: Select this option will synchronize the camera time with the NTP server via network. Synchronize with PC’s time: Select this option will synchronize the camera time with the PC’s time.
-
Page 17: User Management
User Management You can add, remove and manage the users in this page. User Add User To add a new user, type the user name and password, then click [Add/Set] to save the user. User List Edit: To change the username and password, click [Edit] and modify the user in the pop-up window. -
Page 18: System Update
System Update This page allows user to upgrade firmware, restart camera and manage the settings. System Update Firmware Upgrade The firmware can be upgraded online. Note, after upgrade firmware, all settings including Network, A/V and Event settings will be restored to the factory defaults. We strongly recommend you save the current settings before upgrade the firmware, and then reload the settings after upgrade. - Page 19 New Setting File: To load the backup settings into the camera, click [Browse…] to select the file (filename is “Settings.CFG”), and then click [Upgrade].
-
Page 20: Log List
Log List Log List System Logs Click the [Logs] button on the right side to list the logs of system status. Motion Detection Logs Click the [Logs] button on the right side to list the logs of motion detection. I/O Logs Click the [Logs] button on the right side to list the logs of digital input and output. -
Page 21: Video/Audio Settings
B. Video/Audio Settings Image Setting Image In this page, adjust “Brightness”, “Contrast”, “Exposure”, “Sharpness” and “Automatic Gain Control” to get clear video. Night Mode: This function can be set at different Frame rate to increase night illumination. Lower the Frame rate set, slower the frame refresh rate, but better the night illumination. Night mode will be activated automatically depending on lux illumination, if set at 15 frame rate, when night mode activated at night, the frame rate will not be more than 15FPS. -
Page 22: Video Setting
Video Setting CAM419 supports MPEG4/MJPEG Dual Mode and Dual Streaming, set the video parameters in this page. Streaming 1 Setting Video Basic / Advanced Mode: Select the mode to configure the parameters. Advanced mode provides more detail parameters for setting. - Page 23 better video quality. JPEG: The video stream will be compressed in MJPEG format. Quality: 5 levels for select. The higher quality will get bigger file size. Video System: Change the orientation to display the video. Please select “60Hz” (NTSC) if you are in America, Taiwan… Please select “50Hz”...
- Page 24 3GPP Mode: Enable the streaming 2 as 3GPP mode, it allows a 3G mobile phone to view the video. Close: Disable the streaming 2. Resolution: Select the resolution from the pull-down list. VGA – 640X480 QVGA – 320X240 QQVGA – 160X120 Video Frame Rate: The video refreshing rate per second.
- Page 25 Audio CAM419 supports 2-way audio. Audio from Camera to Local PC For network camera to local PC, select [Enabled] and then click [Apply] to start this function. Audio Audio from Local PC to Camera For local PC to network camera, click “Chatting” button in the Live View page.
-
Page 26: Network
C. Network Network Information Network IP Assignment DHCP: If the camera behinds a router and the router provides DHCP service, using DHCP, the camera will get all network parameters from the router automatically. Static: Assign IP address, subnet mask, gateway, and DNS manually. Port Assignment Set the ports if necessary. - Page 27 UPnP Enable or disable the UPnP protocol. After set up, click [Apply] to save the settings.
- Page 28 PPPoE If the camera connects to an ADSL modem directly and want to use PPPoE connection, set the parameters in this page. PPPoE PPPoE Setting Select [Enabled] to use PPPoE. Type in username and password for the ADSL connection. Send Mail After Dialed If select [Enable], when connect to the Internet via PPPoE, the camera will send a mail with the Subject to a specific mail account.
- Page 29 DDNS CAM419 supports DDNS, set the parameters in this page. DDNS DDNS Setting There are several DDNS providers can be selected. Select the provider from the pull-down list, input Hostname, Username, Password and the Schedule Update time, and then click [Apply] to connect to the DDNS provider.
-
Page 30: Event Handling
D. Event Handling Event Setting CAM419 supports multiple event settings. Event... - Page 31 Motion Detection CAM419 allows 3 areas for detecting motion. When motion is triggered, it can send the video to specific mail address, transmit the video to remote FTP server, trigger the relay, and save video to local SD card. Set the Area: To set up or clear the motion area, click [Draw/Clear Area] button of [Area Setting:] line.
- Page 32 Network IP Check For the use of recording software, CAM419 supports the detection of the connection of camera and PC. Whenever the connection is down, it records the video to local SD card to make sure the video recording is continuous.
- Page 33 Mail & FTP To send out the video via mail or FTP, please set up the configuration first. Mail & FTP Mail Setting Login Method: The camera provides 2 kinds of mail settings. “Anonymous” for the mail server which doesn’t need login with username and password. “Account” for the mail server which needs login with username and password.
- Page 34 FTP Setting FTP Server: The IP address or URL of the FTP server. Username / Password: The username and password to log in the FTP server. Port: The port of the FTP service. Default is 21. Path: The path to save the sent video. After set up, click [Apply] to save the settings.
- Page 35 Install SD Card Make sure the direction and pushing SD card into the slot completely. Note, the use of the SD Card will affect the operation of the CAM419 slightly, such as affecting the frame rate of the video. Record Enable “Save to SD Card”...
- Page 36 Click the date, it will show the list of the video. The video format is AVI. Click the video to start Microsoft Media Player to play it. Note, the video format is AVI with MPEG4 compression, the PC must install the MPEG4 decoder such as FFdshow or Xvid to play the file.
- Page 37 I/O Setting CAM419 supports digital input and digital output. When the digital input is triggered, it can send the video to specific mail address, transmit the video to remote FTP server, trigger the digital out, and save video to local SD card.
-
Page 38: Network Configuration
Internet Access: ADSL or Cable Modem IP address: One real IP or one dynamic IP Only CAM419 connects to the Internet For fixed real IP, set up the IP into CAM419. For dynamic IP, start PPPoE. Configuration 2 Internet Access: ADSL or Cable Modem... - Page 39 Device needed: Switch Hub For fixed real IP, set up the IP into CAM419. For dynamic IP, start PPPoE. Configuration 3 Internet Access: ADSL or Cable Modem IP address: one real IP or one dynamic IP CAM419 and PC connect to the Internet...
-
Page 40: Appendix
Appendix The compatible list of SD Card Vendor Test Result Status SanDisk 128M Recommend SanDisk 256M Recommend SanDisk 512M Recommend SanDisk 1G Recommend SanDisk 2G Recommend Transcend 128M 80X Recommend Transcend 256M 80X Recommend Transcend 512M 80X Recommend Transcend 1G 80X Recommend Transcend 2G 150X Recommend... - Page 41 Vendor Test Result Status READY 128M SiliconPower 128M SiliconPower 256M TEKQ 128M TEKQ 256M TwinMOS 128M TwinMOS 256M UMAX 128M Blast 128M U-TEK 128M GiGATEK 128M Kingston 128M The speed is slower Kingmax 256M The speed is slower Kingston 512M The speed is slower Kingston 1G The speed is slower...
Need help?
Do you have a question about the CAM419 and is the answer not in the manual?
Questions and answers