
Related Manuals for Thermal Arc ULTIMA 150


Summary of Contents for Thermal Arc ULTIMA 150
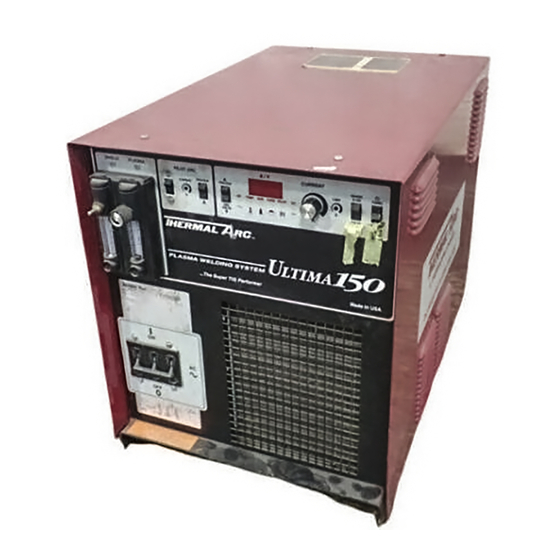
- Page 1 Plasma Welding Power Supply LTIMA Service Manual February 9, 2005 Manual No. 0-2503...
- Page 3 WARNINGS Read and understand this entire Operating Manual and your employer’s safety practices before install- ing, operating, or servicing the equipment. While the information contained in this operators manual represents our best judgement, Thermal Dynamics Corporation assumes no liability for its use. ULTIMA-150 Plasma Welding Power Supply Service Manual Number 0-2503 Published by:...
-
Page 4: Table Of Contents
TABLE OF CONTENTS SECTION 1: GENERAL INFORMATION ..................1 1.01 Notes, Cautions and Warnings ..............1 1.02 Important Safety Precautions ................ 1 1.03 Publications ....................2 1.04 Note, Attention et Avertissement ..............3 1.05 Precautions De Securite Importantes ............3 1.06 Documents De Reference ................ - Page 5 TABLE OF CONTENTS (continued) SECTION 4: REPAIRS & REPLACEMENT ................25 4.01 Introduction ....................25 4.02 General Anti-Static Handling Procedures ............ 25 4.03 Parts Replacement - General Information ........... 25 4.04 Opening The ULTIMA-150 Plasma Welding Power Supply ......26 4.05 PC Board Replacement Procedures ............
-
Page 7: Section 1: General Information
SECTION 1: GASES AND FUMES GENERAL INFORMATION Gases and fumes produced during the plasma cutting process can be dangerous and hazardous to your health. 1.01 Notes, Cautions and Warnings • Keep all fumes and gases from the breathing area. Throughout this manual, notes, cautions, and warnings Keep your head out of the welding fume plume. -
Page 8: Publications
• Wear dry gloves and clothing. Insulate yourself from the work piece or other parts of the welding PLASMA ARC RAYS circuit. • Repair or replace all worn or damaged parts. Plasma Arc Rays can injure your eyes and burn your skin. •... -
Page 9: Note, Attention Et Avertissement
6. ANSI Standard Z49.2, FIRE PREVENTION IN THE USE ATTENTION OF CUTTING AND WELDING PROCESSES, obtain- able from American National Standards Institute, 1430 Broadway, New York, NY 10018 Toute procédure pouvant résulter l’endommagement du matériel en cas de non- 7. AWS Standard A6.0, WELDING AND CUTTING CON- respect de la procédure en question. - Page 10 • Eloignez toute fumée et gaz de votre zone de respira- • Ne touchez jamais une pièce “sous tension” ou “vive”; tion. Gardez votre tête hors de la plume de fumée portez des gants et des vêtements secs. Isolez-vous provenant du chalumeau. de la pièce de travail ou des autres parties du circuit de soudage.
-
Page 11: Documents De Reference
ultra-violets très forts. Ces rayons d’arc nuiront à vos 1.06 Documents De Reference yeux et brûleront votre peau si vous ne vous protégez pas correctement. Consultez les normes suivantes ou les révisions les plus récentes ayant été faites à celles-ci pour de plus amples •... - Page 12 9. Norme 70 de la NFPA, CODE ELECTRIQUE NA- TIONAL, disponible auprès de la National Fire Pro- tection Association, Batterymarch Park, Quincy, MA 02269 10. Norme 51B de la NFPA, LES PROCÉDÉS DE COUPE ET DE SOUDAGE, disponible auprès de la National Fire Protection Association, Batterymarch Park, Quincy, MA 02269 11.
-
Page 13: Declaration Of Conformity
1.07 Declaration of Conformity Manufacturer: Thermal Dynamics Corporation Address: 82 Benning Street West Lebanon, New Hampshire 03784 The equipment described in this manual conforms to all applicable aspects and regulations of the ‘Low Voltage Directive’ (European Council Directive 73/23/EEC as amended by Council Directive 93/68/EEC) and to the National legislation for the enforcement of this Directive. -
Page 14: Statement Of Warranty
1.08 Statement of Warranty LIMITED WARRANTY: Thermal Dynamics ® Corporation (hereinafter “Thermal”) warrants that its products will be free of defects in workmanship or material. Should any failure to conform to this warranty appear within the time period applicable to the Thermal products as stated below, Thermal shall, upon notification thereof and substantiation that the product has been stored, installed, operated, and maintained in accordance with Thermal’s specifications, instructions, recommendations and recognized standard industry practice, and not subject to misuse, repair, neglect, alteration, or accident, correct such defects by suitable repair or replacement, at Thermal’s sole... -
Page 15: Section 2: Introduction
C. Customer/Operator Responsibilities SECTION 2: It is the customer/operator's responsibility to main- INTRODUCTION tain the equipment and peripheral accessories pro- vided by Thermal Dynamics in good operating order in accordance with the procedures outlined in the 2.01 Scope of Manual Operating Manual, and to protect the equipment from accidental or malicious damage. -
Page 16: Ultima-150 Power Supply Specifications
F. Coolant Reservoir Capacity 200 VAC ±10%50/60hz, 1 or 3 phase 208 VAC ±10%50/60hz, 1 or 3 phase 2 gal. (7.6 liters) Coolant Reservoir (use Thermal Arc 230 VAC ±10%50/60hz, 1 or 3 phase Coolant only) 380 VAC ±10%50/60hz, 1 or 3 phase G. -
Page 17: Requirements To Complete System
For more information, refer to Section 5, Parts Replace- ment. • Quick Disconnect Adapter Kit - for use with older model Thermal Arc torches. The Adapter Kit retro- fits the torch for direct connection to the quick dis- connect receptacle on the Power Supply. - Page 18 SECTION 2: INTRODUCTION Manual 0-2503...
-
Page 19: Section 3: Service Troubleshooting
B. Advanced Troubleshooting SECTION 3: The ULTIMA-150 Plasma Welding Power Supply Service SERVICE Manual (No. 0-2503) provides advanced troubleshoot- TROUBLESHOOTING ing. This manual is helpful for solving many of the more complex problems that can arise with the Power Supply. Troubleshooting and repairing this unit is a process which should be undertaken only by those familiar with high 3.01 Introduction... -
Page 20: How To Troubleshoot The Ultima-150 Power Supply
3.04 How to Troubleshoot the 3.06 Checking Basic Functions Ultima-150 Power Supply The following routine checks the basic functions of the Ultima-150 Power Supply. Use this routine to verify that The Ultima-150 Plasma Welding Power Supply is rela- the system is working correctly. Should any light fail to tively simple to troubleshoot since it has a panel of indi- display as described, refer to the appropriate trouble- cator lights that continually provide feedback to the user. -
Page 21: Ac Indicator Light Status
Line Voltage DC (10) NOTE Load Voltage TB1-3 to TB1-4 must be closed to enable the weld- A-01097 ing arc. Refer to the Ultima 150 Operating Manual L2 Load for more information. Terminal Wire #2 Ground Figure 3-2 Input Connections... -
Page 22: Temperature Indicator Light Status
2. Incorrect Voltage Selection 5. Faulty Transformer a. Check that the High-Low Voltage Selection a. Check J7 connection at Transformer (located in Plug is in the proper receptacle for the appli- front of the Output PC Board) for proper con- cation and that it is properly connected. -
Page 23: Gas Indicator Light Status
2. Exceeded Duty Cycle e. Check continuity of FET Heatsink Assembly (B) Temperature Switch between J2B-10 to J2B- a. Exceeding duty cycle will cause the power sup- 9 (ground) at the Logic PC Board. Connection ply or coolant to overheat. Allow 5 minutes to should be open (no continuity). - Page 24 c. If gases are supplied to system via a pipeline, If there are no Flowmeter readings or flow rates check that all excess station drops are closed appear to be incorrect, check the torch for and there are no leaks in the pipeline. blockage.
-
Page 25: Coolant Indicator Light Status
Flush coolant from system and replace with d. Reconnect wires to Conductivity Sensor. Thermal Arc® Coolant. To flush system, re- e. Connect the primary power and place the Pri- move hose fitting at the filter end of the Cool-... - Page 26 B. COOLANT Light Red-Green (blinking). 1. Coolant Level Inadequate A-01109 a. Disconnect the primary power and place the Primary Power ON/OFF Switch to the OFF Acorn Nut position. Pump b. Check coolant level in Reservoir. Add coolant if necessary. Hex Head Plug 2.
-
Page 27: Pilot Indicator Light Status
If voltage is not correct, check voltage from 3.11 PILOT Indicator Light Status wire #2 on the Primary Power ON/OFF Switch to J1-8. Should be 120 VAC whenever Primary The pilot arc is initiated by turning the PILOT ARC ON Power ON/OFF Switch is in the ON position. -
Page 28: Dc Pilot Indicator Light Status
If the pilot light still does not come on, the prob- c. If all settings are OK, and pilot is still erratic, lem is in the Logic PC Board. Disconnect the disconnect primary power and place the Pri- primary power and place the Primary Power mary Power ON/OFF Switch to OFF position ON/OFF Switch in the OFF position. -
Page 29: A/V Display Status
Once the problem has been identified and corrected, dis- connect the primary power and place the Primary Power R S T ON/OFF Switch to the OFF position. Reconnect J3 to Logic PC Board to enable DC output circuit. Repeat steps in Section 3.06, Basic Functions to ensure the system is fully functional. - Page 30 B. FET and Capacitor Assembly C. Output PC Board/Diode Bridge Assembly The FET/Capacitor Assemblies can be checked by use of NOTE an ohmmeter set to a diode scale. The Ultima-150 has been manufactured using one 1. Disconnect power from the unit. of two (2) models of Diode Bridge Assemblies - ei- ther Model "A"...
-
Page 31: Section 4: Repairs & Replacement
B. Procedure SECTION 4: 1. Open the wrist strap and unwrap the first two REPAIRS & REPLACEMENT folds of the band. Wrap the adhesive side firmly around your wrist. 4.01 Introduction 2. Unroll the rest of the band and peel the liner from the copper foil at the opposite end. -
Page 32: Opening The Ultima-150 Plasma Welding Power Supply
4. Note the location of all the cable connections to 4.04 Opening The ULTIMA-150 the Input PC Board Assembly. Plasma Welding Power Supply 5. Carefully remove all the connections to the Input 1. Remove the four Phillips head screws on the top PC Board Assembly. - Page 33 4. Carefully remove all the cable connections to the D. Pilot PC Board Replacement Output PC Board Assembly. The Pilot PC Board Assembly consists of two PC Boards NOTE mounted to a vertical frame. Be extremely careful when removing the 2 trans- NOTE former leads from the Current Sense Toroids.
-
Page 34: Reservoir Parts Replacement Procedures
3. Remove the Enclosure Cover per Section 4.04. 4.06 Reservoir Parts Replacement Procedures 4. Remove the hose connected to the bottom of the In-Line Filter Assembly. A. Coolant Reservoir Replacement NOTE Some residual coolant will drain from the In-Line CAUTION Filter. - Page 35 NOTE 8. Refill the Coolant Reservoir with the coolant re- Use thread sealant on all fittings when reinstall- moved or add fresh Thermal Arc Torch Coolant. ing. 14. Refill the Coolant Reservoir with the coolant re- moved or fresh Thermal Arc Torch Coolant.
- Page 36 NOTE 9. Refill the Coolant Reservoir with the coolant re- Some residual coolant will drain from the In-Line moved or add fresh Thermal Arc Torch Coolant. Filter. It is recommended that a rag or towels be D. Conductivity Sensor Assembly placed below the hose prior to removing.
-
Page 37: Motor Assembly Parts Replacement
Pump Assembly 6. Refill the Coolant Reservoir with the coolant re- Pump Clamp moved or add fresh Thermal Arc Torch Coolant. 4.07 Motor Assembly Parts Replacement A. Pump Assembly Replacement 1. Remove the Enclosure Cover per Section 4.04. Motor Assembly 2. - Page 38 B. Fan Replacement C. Motor Replacement 1. Remove the Enclosure Cover per Section 4.04. 1. Remove the Enclosure Cover per Section 4.04. 2. Tilt the ULTIMA-150 Plasma Welder on its side 2. Remove the Pump Assembly per paragraph ‘A’ far enough to gain access to the four Motor Mount- above.
-
Page 39: Coolant Filter Assembly Replacement
D. Radiator Replacement 4.08 Coolant Filter Assembly Replacement 1. Remove the Enclosure Cover per Section 4.04. 2. Remove the Logic/Display PC Board per Section The Coolant Filter Assembly is located on a bracket on 4.05-B. the rear panel of the unit. 3. -
Page 40: Hose Assembly Replacements
B. Coolant Supply Hose (Coolant Filter to 4.09 Hose Assembly Replacements Pump) Assembly Replacement This subsection describes the replacement of the various The Coolant Supply Hose Assembly goes from the rear Hose Assemblies used in the ULTIMA-150 Plasma Welder. panel Coolant Filter Assembly to the Pump Assembly. Refer to Section 5, Replacement Parts for the part num- Replace the Hose Assembly using the following proce- ber and location of each part. -
Page 41: Internal Parts Replacement
D. Coolant Supply Hose (Pump to TORCH 4. Remove the two nut/washers securing the Con- tactor Assembly to the base. Connector) Assembly Replacement 5. Install the replacement Contactor Assembly by re- The Coolant Supply Hose Assembly goes from the Pres- versing the above steps. - Page 42 D. Output Diode Bridge Assembly Replacement OUTPUT PC BOARD NOTE The Ultima-150 has been manufactured using one of two (2) models of Diode Bridge Assemblies - ei- ther Model "A" or Model "B". Follow procedures as they apply to your unit. All units with unit serial number ending with a letter prior to "G"...
- Page 43 Socket Head Cap Screw screws securing & Lock Washer PC Board to frame Phillips Head Screw & Star Washer Socket Head Cap Screw & Lock Washer A-01319 A-01568 Figure 4-16 Model "B" Diode Bridge Assembly (top view) 7. Remove the Diode Bridge Assembly and Thermal Transformer Pad.
- Page 44 Plasma Gas Flow Meter Assembly Solenoid Assembly Fitting Collar Plasma Gas Output Hose Solenoid Assembly Shield Gas wires Flow Meter Assembly Fitting Collar T-Fitting Shield Gas Output Hose Shield Gas Pressure Switch Plasma Gas T-Fitting Input Hose Plasma Gas Pressure Switch Shield Gas A-00856 Input Hose...
- Page 45 F. Input Diode Replacement Capacitors 1. Remove the Enclosure Cover per Section 4.04. 2. Locate the Input PC Board Assembly at the front of the unit, below the Logic PC Board. NOTE To remove the Input Diode, both the Logic PC Board and Input PC Board must be removed first.
-
Page 46: Front Panel Parts Replacement
H. Coolant Pressure Gauge Replacement 3. Locate the Gas Hose and Solenoid. Pull the Hose from the Solenoid Fitting while pushing the fit- 1. Remove the Enclosure Cover per Section 4.04. ting collar towards the fitting. 2. Drain coolant. 4. Remove the Hose from the Gas Fitting on the rear of the TORCH Connector by while pushing the 3. - Page 47 9. Remove the Plasma and Shield Gas Solenoid Fit- F. Coolant Temperature Switch Replacement tings from the Solenoids. 1. Remove the Enclosure Cover per Section 4.04. 10. Remove the two bottom screws securing the Flow 2. Unclip the Coolant Temperature Switch from the Meters to the Front Panel.
-
Page 48: Rear Panel Assembly Parts Replacement
Plasma Gas Supply Fitting Closed End Pigtail Splice Shield Gas Supply Fitting Coolant Temperature Switch Assembly Coolant A-01107 Return Fitting Figure 4-22 Coolant Temperature Switch Installation Detail Coolant Supply Fitting 5. Connect the Coolant Temperature Switch clip to A-00858 the side of the Radiator. Quick 6. - Page 49 C. TORCH Connector Coolant Supply Fitting F. Standard Remote Wire Assembly Replacement Replacement 1. Remove the Enclosure Cover per Section 4.04. The ULTIMA-150 is supplied with a Remote Wire As- sembly installed. The Remote Wire Assemblies are 2. Remove the Coolant Supply Hose (green) from the replaced in the same manner.
- Page 50 SECTION 4: REPAIRS & REPLACEMENT Manual 0-2503...
-
Page 51: Section 5: Parts Lists
The parts list provides a breakdown of all replaceable components. Control modules are field serviceable, so a complete breakdown of parts is provided. Power mod- ules must be returned to an authorized Thermal Arc dis- tributor for service. The parts lists are arranged as fol- lows: Section 5.03: Front Panel Replacement Parts... -
Page 52: Front Panel Replacement Parts
5.03 Front Panel Replacement Parts Item # Description Cat # Shield Gas Flowmeter 9-5919 Plasma Gas Flowmeter 9-5918 On/Off Switch 9-5940 Current Control Knob 9-4146 Front Panel Assembly 9-5945 Cover (Not Shown) 9-5947 Hose (Radiator To Reservoir) 9-5929 Hose (Disconnect To Radiator) 9-5928 Radiator (Includes 6 Grommets) 9-5941... -
Page 53: Center Chassis Replacement Parts
5.04 Center Chassis Replacement Parts Item # Description Cat # Fuse (3 Amp, 500V) 8-1153 Logic/Display PC Board Assembly 9-5934 Pilot PCBoard Assembly 9-5933 Output PCB/Diode Bridge/Heatsink Assembly (Includes #4-6) 9-5973 Output PC Board Assembly 9-5936 Diode Bridge Assembly With Thermal Pad 9-5974 Heatsink FET PCB/Heatsink/Capacitor/PC Board Assembly (Includes #7-9) -
Page 54: Base Unit Replacement Parts
5.05 Base Unit Replacement Parts Item # Description Cat # Coolant Pressure Gauge (Optional) 9-6220 Pressure Gauge Plug 9-4583 Auxiliary Transformer 9-5921 Contactor 9-5920 Motor 9-5932a Pump 9-6164 Pump Clamp 9-5942 Hose (Pump To Disconnect) 9-5927 Hose (Filter To Pump) 9-5926 Vibration Isolation Mount 9-5943... - Page 55 5.05 Base Unit Replacement Parts To Quick Disconnect From Filter 1. Coolant Pressure Gauge (optional) A-00853 Manual 0-2503 SECTION 5: PARTS LISTS...
-
Page 56: Rear Panel Replacement Parts
5.06 Rear Panel Replacement Parts Item # Description Cat # Coolant Reservoir Assembly 9-5948 Coolant Reservoir Cap 8-5142 Deionizer Basket 8-4410 Deionizer Bag 8-3312 Coolant Filter 8-4276 Conductivity Sensor Assembly 8-6203 Flow Switch Assembly 9-5937 In-Line Filter 8-3460 Shield Supply Hose 9-5931 Plasma Supply Hose 9-5930... - Page 57 5.06 Rear Panel Replacement Parts A-00855 Cable Assembly with Ground Clamp (optional) Manual 0-2503 SECTION 5: PARTS LISTS...
- Page 58 SECTION 5: PARTS LISTS Manual 0-2503...
-
Page 59: Appendix I: Eye Protection Chart
APPENDIX I: EYE PROTECTION CHART Welding or Cutting Operation Electrode Size Filter Metal Thickness Shade or Welding Current Number Torch soldering Torch brazing 3 or 4 Oxygen Cutting Light Under 1 in (25 mm) 3 or 4 Medium 1-6 in (25-150 mm) 4 or 5 Heavy Over 6 in (150 mm) -
Page 60: Appendix Ii: Quick Disconnect Leads Assignment
APPENDIX II: QUICK DISCONNECT LEADS ASSIGNMENT SHIELD GAS PLASMA GAS (YELLOW) (BLACK) COOLANT COOLANT SUPPLY (-) RETURN (+) (GREEN) (RED) A-00829 Rear Panel Mounted Quick Disconnect Leads Assignment Viewed Looking at Rear Panel APPENDIX Manual 0-2503... -
Page 61: Appendix Iii: Remote Wiring
APPENDIX III: REMOTE WIRING Notes: A-00831 1. Welding Arc/ON disabled without closing TB1-3 to TB1-4. This must be done by direct interface to TB1-3 & TB1-4 or via remote con- nection J20 Pin 3 to 4. 2. To disable the pilot arc when coolant conduc- tivity level is high, connect pin 12 to pin 24 and pin 13 to pin 23. -
Page 62: Appendix Iv: System Schematic
APPENDIX IV: SYSTEM SCHEMATIC A-00835 APPENDIX Manual 0-2503... - Page 63 A-00835 Manual 0-2503 APPENDIX...
- Page 64 Gas Regulators Pressure Shield Gas Switch Check Valve Symbol Pressure Plasma Gas Switch Direction Of Flow Shield Gas Plasma Gas TORCH QD Hose Assembly Hose Assembly (Rear Panel) Coolant Pressure Plasma Gas Solenoid Torch Coolant Supply Hose Assembly Gauge (optional) Coolant Filter To Pump Shield Gas Solenoid...
Need help?
Do you have a question about the ULTIMA 150 and is the answer not in the manual?
Questions and answers