Table of Contents
Advertisement
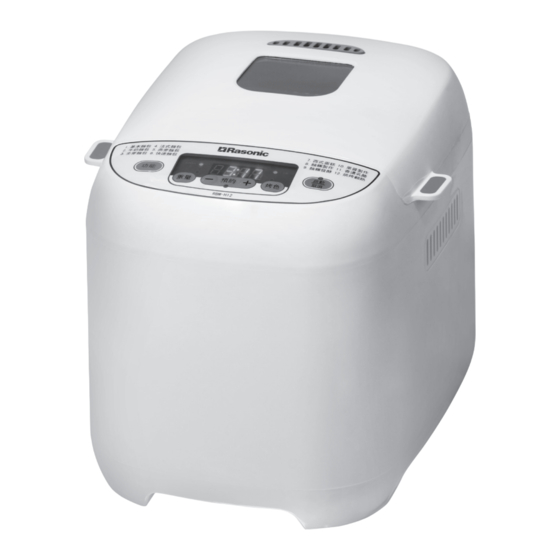
RBM-H12
麵包機 Bread Maker
使用說明書
OPERATION MANUAL
•
Please read the operation manual carefully before using. Keep it in a safe place for future reference.
•
The images in the operation manual may not match with the real object and are for reference only.
Shun Hing - Bread Maker.indd 3
僅供家庭使用
For household use only
13年7月26日 下午5:45
Advertisement
Table of Contents

Summary of Contents for Rasonic RBM-H12
- Page 1 RBM-H12 麵包機 Bread Maker 僅供家庭使用 For household use only 使用說明書 OPERATION MANUAL • Please read the operation manual carefully before using. Keep it in a safe place for future reference. • The images in the operation manual may not match with the real object and are for reference only.
- Page 2 目錄 • • • • • – 1 – Shun Hing - Bread Maker.indd 1 13年7月26日 下午5:45...
- Page 3 1. 安全注意事項 警告: 注意: 220-240V – 2 – Shun Hing - Bread Maker.indd 2 13年7月26日 下午5:45...
- Page 4 2. 產品規格 RBM-H12 220-240 ~ 50 600-720 500/750 1/1.5 282 x 354 x 285 – 3 – Shun Hing - Bread Maker.indd 3 13年7月26日 下午5:45...
- Page 5 3. 產品說明 面板操作 – 4 – Shun Hing - Bread Maker.indd 4 13年7月26日 下午5:45...
- Page 6 4. 製作時間及代碼 C-5 啓 C-6 啓 C-10 C-11 6 - 10 C-12 5. 使用方法 5.1 基本麵包 基本麵包 • 牛奶麵包 • 全麥麵包 • 法式麵包 • 燕麥麵包 • 快速麵包 REMOVE – 5 – Shun Hing - Bread Maker.indd 5 13年7月26日 下午5:45...
- Page 7 LOCK - - - - • • • • - - - - REMOVE – 6 – Shun Hing - Bread Maker.indd 6 13年7月26日 下午5:45...
- Page 8 ~參考食譜~ – 7 – Shun Hing - Bread Maker.indd 7 13年7月26日 下午5:45...
- Page 9 5.2 西式蛋糕 38 ) 38 ) – 8 – Shun Hing - Bread Maker.indd 8 13年7月26日 下午5:45...
- Page 10 1:10 ~參考食譜~ 5.3 麵糰製作 0:25 ~參考食譜~ – 9 – Shun Hing - Bread Maker.indd 9 13年7月26日 下午5:45...
- Page 11 35x20 40-50 5.4 麵糰發酵 1:25 – 10 – Shun Hing - Bread Maker.indd 10 13年7月26日 下午5:45...
- Page 12 ~參考食譜~ 5-10 30-40 10-12 5.5 果醬製作 C-10 1:20 ~參考食譜~ – 11 – Shun Hing - Bread Maker.indd 11 13年7月26日 下午5:45...
- Page 13 5.6 乳酪製作 C-11 8:00 6 - 10 ~參考食譜~ 5.7 烘烤翻熱 C-12 0:10 – 12 – Shun Hing - Bread Maker.indd 12 13年7月26日 下午5:45...
- Page 14 6. 其他功能 6.1 預約功能 5.1基本麵包 5:00 6.2 保溫功能 • • • • • 0:00 0:00 6.3 斷電記憶功能 6.4 暫停及取消功能 – 13 – Shun Hing - Bread Maker.indd 13 13年7月26日 下午5:45...
- Page 15 6.5 查看功能代碼 6.6 溫度保護功能 9.故障排除 7. 清潔及保養 • • • • • 8. 儲存 – 14 – Shun Hing - Bread Maker.indd 14 13年7月26日 下午5:45...
- Page 16 9. 故障排除 • • • • • • • • • • • • • • • • • • • • • • • • • • • • • • • • • • C:HH • • C:LL •...
- Page 17 10. 特別聲明 11. 售後服務 2406 5666 – 16 – Shun Hing - Bread Maker.indd 16 13年7月26日 下午5:45...
- Page 18 Thank you for choosing Rasonic Bread Maker. Please read the operation manual carefully before using and well keep for your later reference. Contents Important Safeguards Product Specification Product Description Operation Time and Code Operation Instruction Basic Breads (Basic Bread • Milk Bread • Wheat Bread • French Bread • Oats Bread • Quick Bread) Cake Kneading 5.4...
-
Page 19: Important Safeguards
1. Important Safeguards When using the bread maker, please follow the below safety precautions: The following chart indicates the degree of damage caused by wrong operation. Warning: Indicates that may cause death or serious injury. Caution: Indicates hazards that may cause human injuries or property damages. The following symbols can distinguish the instruction types that need to be strictly followed. These symbols mean prohibition. - Page 20 If food or bread residue remains in the cavity, please remove them to avoid burning. 2. Product Specification Model RBM-H12 Rated Voltage 220-240V~ 50Hz Rated Power 600-720 W Bread Weight Approx. 500/750 g (Approx. 1/1.5 lb) Net Weight 5.6 kg...
- Page 21 3. Product Description (The product image is for reference only, please refer to the actual product.) Control Panel – 20 – Shun Hing - Bread Maker.indd 20 13年7月26日 下午5:46...
- Page 22 4. Operation Time and Code Process Bread Function Code Time (The bread making time is varied with different condition of Weight room temperature, crust color and preset time.) 500g 3 hr 17 min Basic Bread 750g 3 hr 22 min 500g 3 hr 27 min * Fermentation and baking time are different for different Milk Bread bread functions.
- Page 23 Install the bread pan into the bread maker and close the lid. (1) Put the bread pan into the main body and rotate clockwise towards the 【LOCK】 mark on the cavity until it is fixed securely. (2) Fold down the handle and close the lid. 4. Plug the bread maker into the socket. When it is connected to power, the display window will show 【– – – –】 which means the bread maker is in stand-by mode. Press 【Function】...
- Page 24 ~ Recipe for Reference ~ ˚ ˚ ˚ – 23 – Shun Hing - Bread Maker.indd 23 13年7月26日 下午5:46...
- Page 25 ˚ In the recipes, “tsp” represents tea spoon while “tbsp”represents table spoon of the measuring spoon. Except French bread, quick bread function can be used for all the bread recipes, however the instant dry yeast needs to be 1.5 times of the original quantity. Please follow the ratio and amount of ingredients of various recipes, be careful that the amount of flour and instant dry yeast cannot exceed the maximum amount in the recipes. Otherwise, the ingredients may fly out from the bread pan, become cooked by the heater and consequently give out odors or smokes. Bread has a relatively poor quality when the room temperature is above 30˚C. The above recipes are tailor-made for the bread maker.
- Page 26 Set the bread maker: Take out the bread pan and remove the blade. Spread a butter layer on the bread pan evenly. Then pour the cake batter into the bread pan. Use a rubber spatula to make the surface of cake batter smooth. Install the bread pan to the main body and close the lid.
- Page 27 Steps for making cold soba: Divide the dough into 2 equal potions and shape each piece into a ball. Each piece of dough can make soba for one person. Cover the dough with a plastic wrap to avoid becoming dry. 2. Sprinkle some buckwheat flour on the rolling board, then use a rolling pole roll the dough to a 2mm-thick and 35 x 20mm large rectangle shape. 3. Spread some buckwheat flour on the dough, then cut into 2mm-wide noodle.
- Page 28 ~ Recipe for Reference ~ Steps for making bun: 1. Slightly flour the dough and the rolling board, knead the dough to release the trapped air by rolling pole, then roll it to a 3mm-thick rectangle shape. Sprinkle water on the dough surface and fold up the dough starting from the length side to become a roll. Then cut the roll into 8 portions and lay on individual pieces of wax paper. Preheat the steamer for about 10 minutes then turn off.
- Page 29 5.6 Yogurt Making Set the bread maker: 1. Take out the bread pan, remove the blade. Sterilize the bread pan with 100˚C hot water. Put the ingredients into the bread pan. Install the bread pan into the main body and close the lid. Press the 【Function】 key to select 【Yogurt】 function, the display window will show 【C-11】 and the default making time 【8:00】 . Adjust the cooking time by pressing 【+】 or 【-】 key (the time can be adjusted from 6 to 10 hours). Each press will increase or decrease the cooking time by 10 minutes.
-
Page 30: Keep Warm Function
6. Other Functions 6.1 Preset Function User can use this function to set the cooking completion time of the bread maker. The preset function can only apply on six bread functions, kneading and fermentation function. Set the bread maker: Set the bread maker according to the steps 1-6 in 5.1 Basic bread. Press 【Preset】 key, the preset indication light will flash, the default setting is 15 hours (the maximum preset time). Adjust the preset time if needed by pressing 【+】... -
Page 31: Cleaning And Maintenance
6.5 Check Function Code To check the function applied during operation, user can press 【function】 key, the display window will show the function code for 5 seconds. 6.6 Temperature Protection Device The bread maker is equipped with a temperature protection device, it is to ensure the process of making bread, dough and yogurt can be conducted under a suitable temperature. When the protection is triggered, please refer to 9. Trouble Shooting for the solutions. 7. -
Page 32: Trouble Shooting
9. Trouble Shooting Problem Cause Solution Bread expands • Bread shape and expansion • When room temperature exceeds 25˚C, not enough is varied with different room please use cold water at about 5˚C. temperature, humidity, • Reduce the amount of additional ingredients and preset time. ingredients or salt. • Too much additional • Increase the instant dry yeast or sugar to ingredients or salt is added. - Page 33 10. Special Avowal The contents in the operation manual has been checked. Our company reserves the hermeneutic power to any printing errors or misunderstanding on the content. 2. If there are technical improvements on the appliance, the operation manual will be updated in new version without prior notice. The product appearance and specification are subject to the information from the manufacturer.
- Page 34 Shun Hing - Bread Maker.indd 2 13年7月26日 下午5:45...
- Page 35 RBM-H12 麵包機 ~附加食譜 1: 意式薄餅~ 薄餅麵糰 設定麵包機: 水 140毫升 安裝揉刀後,將材料按表內順序倒入麵包容器內。 糖 7克(1/2大匙) 按 功能 鍵選擇 麵糰發酵 功能,再按 【 】 【 】 鹽 3克(2/5小匙) 啟動/取消 鍵開始。 【 】 牛油 15克 烹調完成後,麵包機會發出 嗶嗶聲”提示完成, 高筋麵粉 " 250克 快速乾酵母 5克(1小匙) 然後取出麵糰加工。 製作方法: 準備基本材料及可按個人喜好準備自選配料。 基本材料...
- Page 36 RBM-H12 Bread Maker ~Additional Recipe 1: Italian Pizza~ Pizza dough Set the bread maker: Water 140ml Install the blade, then put the ingredients into the Sugar 7g (1/2 tbsp) bread pan following the orders in the recipe. Salt 3g (2/5 tsp)
Need help?
Do you have a question about the RBM-H12 and is the answer not in the manual?
Questions and answers