Table of Contents
Advertisement
Advertisement
Table of Contents

Related Manuals for Emerson GM527


Summary of Contents for Emerson GM527
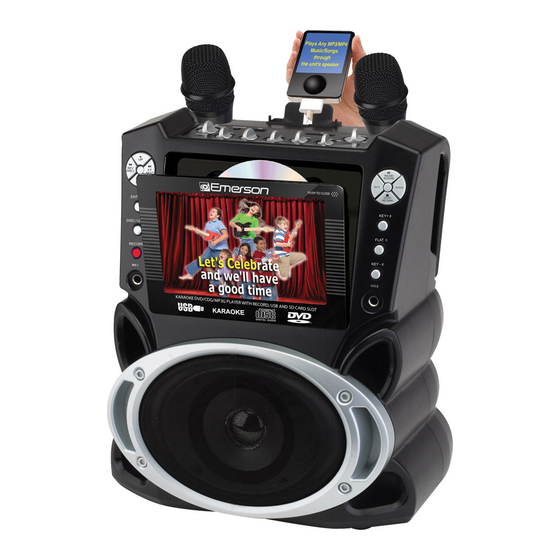
- Page 1 PORTABLE DVD/CDG/MP3G KARAOKE PLAYER GM527...
-
Page 2: Warnings And Precautions
Warnings and Precautions This device complies with Part 15 of the FCC Rules. Operation is subject to the following two conditions:(1)This device may not cause harmful interference. This device must accept any interference received, including interference that may cause undesired operation. CERTIFICATION: THIS PRODUCT COMPLIES WITH DHHS RULES 21 CFR CHAPTER 1 SUBCHAPTER J AT DATE OF MANUFACTURE. -
Page 3: Important Safety Instructions
Important Safety Instructions 1. Read these instructions. All safety 11. Accessories. Only use accessories 18. Replacement Parts and Safety and operating instructions should be specified and approved by the Check. When replacement parts are read before the product is operated. manufacture. - Page 4 Caution • Please use the original box and packing materials for safe transportation of this product. • It is normal for the cover and rear panel to become warm after the player has been operating for an extended period of time. •...
- Page 5 Features PAUSE/ RESUME MUTE REPEAT PREV NEXT DOWN STOP/ RETURN PLAY / ENTER KEY+ ♯ FLAT DISC / USB / SD RECORD KEY -♭ KARAOKE DVD/CDG/MP3G PLAYER WITH RECORD, USB AND SD CARD SLOT • DVD, CD, CDG, MP3, MP3G, •...
-
Page 6: Front And Rear Panel Illustration
Front and Rear Panel Illustration PAUSE/ RESUME MUTE REPEAT PREV NEXT DOWN STOP/ RETURN PLAY / ENTER KEY+ ♯ DISC / USB / SD FLAT RECORD KEY -♭ KARAOKE DVD/CDG/MP3G PLAYER WITH RECORD, USB AND SD CARD SLOT 1. UP: Navigate up in the menu 9. - Page 7 Front and Rear Panel Illustration DISC / USB / SD HEADPHONE MASTER VOL AUX IN MP3/IPOD DATA USB SD CARD / MMC MIC 1 VOL TONE ECHO BALANCE MIC 2 VOL FUNCTION OPEN POWER ON BASS TREBLE MUSIC MUSIC CD DOOR VOCAL 13 12 1.
-
Page 8: Remote Control
Remote Control 1.MENU DISC / SD / USB 19.SETUP 2.NUMBER KEYS 20.NEXT MENU 3.LANGUAGE 21.STOP RECORD DISC/SD/USB 4.EQUALIZER 22.PAUSE PROGRAM 5.UP 23.PREVIOUS DISPLAY 6.PREVIOUS 24.NEXT 7.DOWN MUTE 25.KEY+ 8.PLAY 26.MENU/PBC 9.FORWARD SETUP SUBTITLE EQULIZER LANGUAGE 3D SOUND SPECTRUM 10.REV 11.FLAT 12.KEY- 13.RECORD ENTER... -
Page 9: Connecting To A Tv Set
Connecting to a TV Set Connect to TV or TV and Stereo Notes: There are three ways of connecting the player’s AV output to the TV set: 1. S-video cable and left/right audio cable [set the (Video Type) to (S-Video)]. 2. -
Page 10: Remote Control Operation
Remote Control Operation During playback, press A-B button to select point A. Press it again to select point B. The player will repeat the section from A to B automatically. Press A-B a third time to cancel A-B repeat and clear point A and B. Note: During CD playback, points A and B must be within the same track. - Page 11 Remote Control Operation PLAY/PAUSE Press PLAY/PAUSE from stop mode to start play. Press PLAY/PAUSE during playback to pause playback. Press PLAY/PAUSE to resume normal playback. MENU During DVD, playback, press MENU to return to the program menu. Note: This function is subject to the disc. During DVD, playback, press TITLE to display the DVD title menu or TITLE play the first title.
- Page 12 Remote Control Operation AUDIO During DVD playback Press AUDIO repeatedly to select from up to 8 Audio language/formats. Note: This function is for disc. REPEAT While [PROGRAM] is on, press ENTER to display the [Program submenu]: Input the track numbers in the order you would like them to play.
-
Page 13: Remote Control Preparation
Remote Control Preparation Using the remote Battery installation 1. Open the cover 2. Install batteries MENU DISC/SD/USB RECORD PROGRAM DISPLAY MUTE SETUP SUBTITLE EQULIZER LANGUAGE ENTER 2. Close the cover PLAY PAUSE STOP PREV NEXT KEY- FLAT KEY+ MENU/PBC Notes: Point the remote control directly at the ●... -
Page 14: The Setup Menu System
The Setup Menu System 1. General Steps of setup menu A) Press the setup buttom, the main setup menu appears. SYSTEM SETUP TV SYSTEM SCREEN SAVER TV TYPE PASSWORD RATING DEFAULT B) Press the Left and Right arrow buttons to highlight the icon of the desired page, then press the Down or Right arrow button to activate that page. -
Page 15: Screen Saver
The Setup Menu System 2.1.2 SCREEN SAVER The SCREEN SAVER is automatic. A few minutes after the player is stopped, a screen saver with a DVD logo in motion will appear. SYSTEM SETUP TV SYSTEM SCREEN SAVER TV TYPE PASSWORD RATING DEFAULT 2.1.4 TV TYPE... - Page 16 The Setup Menu System 2.1.5 PASSWORD By default, the password function is disabled. To enable, select password, press enter and key-in the default password: 0000. To change password, you must key-in the old password, then enter a 4 digit password of your choice.
-
Page 17: Language Setup
The Setup Menu System 2.1.7 DEFAULT The DEFAULT setup options are RESTORE factory setup. SYSTEM SETUP TV SYSTEM SCREEN SAVER VIDEO TV TYPE PASSWORD RATING RESTORE DEFAULT If your unit is not working properly or as expected, reset player to its default condition. -
Page 18: Subtitle Lang
The Setup Menu System 2.2.2 SUBTITLE LANG Highlight the SUBTITLE LANG option, and press the Arrow buttons to choose the subtitle language you prefer, Press Enter to confirm. If the disc you are playing has that language, it will display subtitles in that language. - Page 19 Remote Control Operation DISPLAY During playback, press DISPLAY to show the current time counter position. Disc type Play time of the current title Current title Total Chapter Total title Current Chapter Press DISPLAY to show the Audio and Subtitle message menu. Language Angle Audio type...
- Page 20 USB/CARD/KARAOKE SCORE Press SOURCE to connect to USB or SD/MMC card reader. Your menu options will be DISC, USB or CARD READER per the screen below: DISC CARD CDG/DVD KARAOKE DISC PLAYBACK When a CDG/DVD KARAOKE Disc is loaded, the screen will display as follows: A A B B C C AAB B DD EE FF...
- Page 21 MP3G Playback When an MP3G Disc, SD Card or USB device is connected, the screen will display as follows: Current MP3G file [ 0 1 M P 3 ] 0 6 . M P 3 G name. Current 01.01MP3 01.01 directory 02.01MP3 02.01...
-
Page 22: Record Operation Procedures
Record Operation Procedures: 1. Load Disc or SD or USB, select Song Title from the Song List and press PLAY (This Unit Supports the MP3,MP3+G, CD,CD+G format’s Song) 2. If User wants to sing the song and record his Vocal with the Music then press the Red RECORD button ... -
Page 23: Mpeg4/Mp3 Playback
MPEG4/MP3 Playback When an MP3 Disc, MPEG Disc, SD Card or USB device is connected, the screen will display as follows: Current MP3/JPEG file [ 0 1 M P 3 ] 0 6 . M P 3 name. If a JPEG file is playing, the name should Current 01.01MP3... -
Page 24: Troubleshooting
Troubleshooting If you have any questions, please consult the trobleshooting guide below. Enter the power button is on. Enter the disc is not warped, damaged or deformed. Ensure the power outlet is operational. Ensure the disc is not badly stained or damaged. Ensure the power cord is not damaged. -
Page 25: Specifications
Specifications Power requirements: DC12V Power Consumption: 25W Video standard: NTSC/PAL/AUTO Unit Weight: 1.8kg Video output Video Output: 1.0V(p-p)/ 75Ω, sync, negative polaritly, RCA pin jack x 1 Audio output 2.0 channel output: RCA pin jack(L,R) x 2 Coaxial output: 0.5V(p-p)75Ω, RCA pin jack x 1 Frequency response: 20Hz to 20kHz S/N ratio: >90dB Total harmonic distortion: <0.0025%...
Need help?
Do you have a question about the GM527 and is the answer not in the manual?
Questions and answers