
Related Manuals for BlueChip BCT-ETX-CN700

Summary of Contents for BlueChip BCT-ETX-CN700
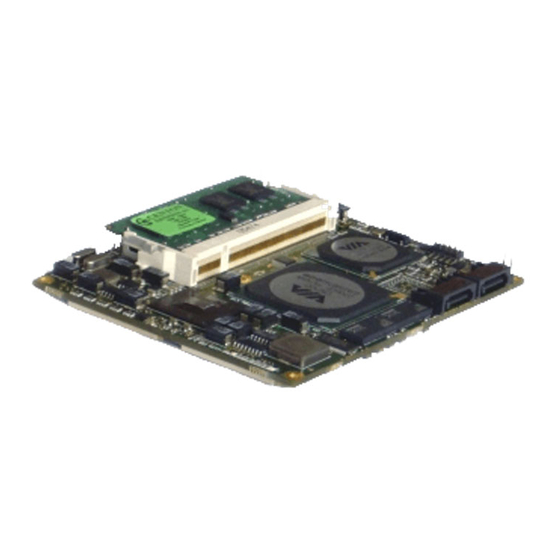
- Page 1 BCT-ETX-CN700 ETX Format Single Board Computer User Guide Document Reference: Product User Guide Document Issue: 1.4 Page | 1...
-
Page 2: Table Of Contents
ETX-CN700 Table Of Contents Contents Copyright ................................3 Limitations of Liability ............................3 Trademarks ................................. 3 Regulatory Statements ............................4 Safety Warning for North America ........................4 Manual Organisation .............................. 5 Introduction ................................6 Specification ............................... 7 General Precautions ..............................9 PS/2 Devices ............................... -
Page 3: Copyright
ETX-CN700 Introduction Copyright All rights reserved. No part of this publication may be reproduced, stored in any retrieval system, or transmitted, in any form or by any means, electronic, mechanical, photocopied, recorded or otherwise, without the prior permission, in writing, from the publisher. For permission in the UK please contact Blue Chip Technology. Information offered in this manual is believed to be correct at the time of printing. -
Page 4: Regulatory Statements
ETX-CN700 Introduction Regulatory Statements This product meets the essential protection requirements of the European EMC Directive (2004/108/EC) and the Low Voltage Directive (2006/95/EC), and is eligible to bear the CE mark. Warning This is a Class A product. In a domestic environment this product may cause radio interference in which case the user may be required to take adequate measures. -
Page 5: Manual Organisation
ETX-CN700 User Guide Organisation Manual Organisation This manual describes in detail the ETX CN700 range of Single Board Computers. We have tried to include as much information as possible but we have not duplicated information that is provided in the standard IBM Technical References, unless it proved to be necessary to aid in the understanding of the product. -
Page 6: Introduction
ETX-CN700 Product Summary Introduction The Blue Chip Technology ETX CN700 complies with the embedded ETX standard Version 3.02 set of Bus interface signals and peripheral IO devices interfaces on a single card. The concept of ETX is to provide the user with a standard connector interface with fixed connector locations and predefined IO functions. -
Page 7: Specification
ETX-CN700 Specification Specification VIA ULV Eden 500MHz VIA C7 nanobga2 1GHz/1.5GHz VIA Nano-E nanobag2 800MHz/1.3GHz Chipset: VIA CN700 Northbridge VIA VT8237R Plus Southbridge BIOS: Phoenix BIOS, with Ethernet Boot ROM option Memory: 512MB to 1GB PC2-4200/5300 DDR2 400/533 SDRAM using Horizontal 200 pin SODIMM, 1.8V operation. - Page 8 ETX-CN700 Specification Expansion Bus: As per ETX Specification, 4 connectors X1-X4 Connector X1 provides PCI Bus, USB and Audio Connector X2 provides the ISA Bus Connector X3 provides the VGA, LCD, COM1/2, LPT1, FDD, Keyboard and Mouse Connector X4 provides the Ethernet (non-isolated), 2 x EIDE (4 drives) Utilities signals, power management and control Supports four standard 5V 32bit 33MHz PCI Slots, V2.2 compliant Supports three standard 16-bit ISA slots...
-
Page 9: General Precautions
ETX-CN700 Precautions General Precautions Your Single Board Computer is susceptible to damage by electrostatic discharges. In order to avoid damage, you should work at an anti-static bench and observe normal anti-static precautions. Wear an anti-static wrist strap connected to an earth point before opening any packaging. Where a wrist strap is not available, discharge any static charge you may have built-up by touching an earth point. -
Page 10: Bios & Cmos Memory
ETX-CN700 Precautions BIOS & CMOS Memory Please be aware that with personal computer products, it is possible to create configurations within the BIOS make booting impossible. Unlike most personal computer products, the ETX-CN700 stores the BIOS settings in Flash memory rather than CMOS which allows these settings to be remembered even if there is no battery present. -
Page 11: Quick Start
The following sections explain how to install the ETX-CN700 Single Board Computer onto your host board. As this single board computer can be installed onto a variety of host boards, the BlueChip Technology MagnumX product has been used as an example host board. -
Page 12: Assembly
ETX-CN700 Installation Assembly Connector locations Figure 1: Connector Locations With an ETX Single Board Computer, the main connections for Keyboard, Mouse, Video, IDE, USB etc are made via the Host Board. On the ETX CN700 there are only two direct connections, both of which are SATA connectors. - Page 13 ETX-CN700 Installation Figure 2: ensure mounting pillars are fitted to host board The next action is to carefully align the connectors of the ETX CN700 with those on the host board and carefully press together. Note: The Hirose connectors are offset from each other, so the ETX CN700 will only fit on one orientation. Trying to force the ETX CN700 in the wrong orientation may damage the connectors Figure 3: Align ETX CN700 connectors with the host board If the memory module is not already fitted, then carefully fit the memory module onto the memory socket.
-
Page 14: Cooling
ETX-CN700 Installation Cooling Efficient cooling is essential for long and reliable operation of any electronic equipment. The VIA Eden/C7/Nano CPU, the VIA CN700 Northbridge and VIA VT8237 Southbridge do get hot in normal operation, and in an elevated ambient temperature will require additional cooling. Cooling requirements will vary with application, desired operating temperature, CPU load, and memory size and board orientation. - Page 15 ETX-CN700 Installation The Active solution has thermal pads attached to the bosses on the base of the finned heatsink which make direct contact with the surface of Northbridge, Southbridge and two voltage regulators to help dissipate heat into the heatsink. Figure 5: Heatsink bosses and thermal pads Before fitting the active solution, it is necessary to spread some thermal grease to the surface of the boss which will contact the CPU.
-
Page 16: Stack Heights And Clearances
ETX-CN700 Installation Stack Heights and Clearances The MagnumX stack heights for the above example are shown below. Figure 7: MagnumX with Active Cooling Stack dimensions Stack heights will depend on the length of the Hirose connectors on the host board. For example, the MagnumX uses longer connectors on the base board to allow for high components on the host board, so there is a board to board gap of 10mm. -
Page 17: System Software
ETX-CN700 Software Configuration System Software Operating System Install A DVD-ROM is supplied with each board, containing most common operating system drivers. Bear in mind that suppliers continually update their drivers, so it is always a good idea to check on the Internet for later ones. The following websites are good starting points: www.viaarena.com www.viatech.com... -
Page 18: System Bios
ETX-CN700 BIOS Setup System BIOS The ETX-CN700 Single board computer uses the Phoenix BIOS, which has a built-in Setup program that allows users to modify the basic system configuration. This type of information is stored in on-board flash for retention when the power is turned off. -
Page 19: Main Menu
ETX-CN700 BIOS Setup Main Menu Picture B1 The Main menu allows the setting of Date and Time, as well as providing details of IDE devices fitted to the unit. Note: In the Boot menu shown later, SATA Channel 0 and 1 are equivalent to IDE 4 and IDE 5 respectively System Configuration Feature Sub Menu Picture B2 Page | 19... -
Page 20: Advanced Menu
ETX-CN700 BIOS Setup In this sub menu, the important features are Legacy USB – Enabled for USB Keyboards, Mice and FDD to be recognised during Boot Quick Boot Mode – Enabled for faster boot process Boot time Diagnostic Screen – Enabled for a summary of devices and their resources to eb shown after POST and prior to OS load Advanced Menu Picture B3... -
Page 21: Bios Setup
ETX-CN700 BIOS Setup PnP Configuration Sub Menu Picture B4 This sub menu allows the reservation of system resources for use with legacy ISA devices. Chipset Devices Sub Menu Picture B5 The Chipset sub menu allows for PATA, SATA, USB, Audio and LAN functionality to be enabled or disabled Page | 21... -
Page 22: Hardware Monitor
ETX-CN700 BIOS Setup Internal VGA Control Sub Menu Picture B6 This sub menu allows the size of the frame buffer to be changes as well as selection of display type I/O Device Configuration Picture B7 This sub menu allows for controlling the Serial, Parallel and Floppy interfaces Hardware Monitor Picture B8 This sub menu shows on board voltages and temperatures for CPU and motherboard. -
Page 23: Power Menu
ETX-CN700 BIOS Setup Advanced Chipset Control Picture B9 Key settings in this submenu are the Allow ISA Bridge, which needs to be enabled if the host board supports ISA cards, and the Onboard Watchdog Timeout. Power Menu Picture B10 The Power Menu allows the user to set the state for power failure. Options are Off, Last State, and on. When set to on, then as soon as AC power is applied the ETX CN700 will power on Page | 23... -
Page 24: Security Menu
ETX-CN700 BIOS Setup Security Menu Picture B11 The Security menu allows for BIOS and Boot passwords to be set Page | 24... -
Page 25: Boot Menu
ETX-CN700 BIOS Setup Boot Menu Picture B12 The boot menu allows for a number of boot devices to be set In total 8 boot devices can be selected. If there are 8 devices already listed and another device is required, then one of the 8 needs to be removed from the Boot Order List by first selecting it, and then typing the “X”... -
Page 26: Exit Menu
ETX-CN700 BIOS Setup Exit Menu Picture B13 As well as offering the means to exit with and without saving settings, this menu also allows for the System BIOS Default Settings to be restored Page | 26... -
Page 27: Etx Connector Details
ETX-CN700 Appendix 1 ETX Connector Details Connector X1 Pin Number Signal Signal Level Pin Number Signal Signal Level PCICLK3 3.3 v PCICLK4 3.3 v PCICLK1 3.3 v PCICLK2 3.3 v REQ3# 3.3 v GNT3# 3.3 v GNT2# 3.3 v 3.3 v REQ2# 3.3 v GNT1#... - Page 28 ETX-CN700 Appendix 1 Connector X2 Pin Number Signal Signal Level Pin Number Signal Signal Level SD14 SD15 SD13 MASTER# SD12 DREQ7 SD11 DACK7# SD10 DREQ6 DACK6# DREQ5 MEMW# DACK5# MEMR# DREQ0 LA17 DACK0# LA18 IRQ14 LA19 IRQ15 LA20 IRQ12 LA21 IRQ11 LA22 IRQ10...
- Page 29 ETX-CN700 Appendix 1 Connector X3 Pin Number Signal Signal Level Pin Number Signal Signal Level Video BLUE Video HSYNC 3.3 v GREEN Video VSYNC 3.3 v DDCK 3.3 v DETECT# DDDA 3.3 v LVDS3#/ SHFCLK LVDSCLK#/B4 2.5 v / 3.3 v 2.5 v / 3.3 v LVDSCLK/B5 2.5 v / 3.3 v...
- Page 30 ETX-CN700 Appendix 1 Connector X4 Pin Number Signal Signal Level Pin Number Signal Signal Level 5VSB PWRGDIN 3.3 v or 5 v PSON SPEAKER PWRBTN# 3.3 v BATT Battery KBINH 3. 3 v / 5 v ACTLED/LILED 3.3 v RSMRST# LILED/3V3VSUS 3.3 v RSVD...
- Page 31 ETX-CN700 Appendix 1 Signal Descriptions Connector X1 (PCI-Bus, USB, Sound) Ground. All the GND pins on the ETX CN700 module should be connected to the baseboard ground plane. +5V ±5% power supply. All VCC pins on the ETX CN700 module should be connected to the baseboard +5V plane.
- Page 32 ETX-CN700 Appendix 1 FRAME# Cycle Frame of PCI Buses. This indicates the beginning and duration of a PCI access. The access will be either an output driven by the Northbridge on behalf of the CPU, or an input during PCI master access. PCIRST# PCI Bus Reset.
- Page 33 ETX-CN700 Appendix 1 Connector X2 ISA Signals All required signal pull-ups are integrated into the ETX CN700 module. In some applications it may be desirable to add additional signal termination components to the baseboard. SD[0..15] These signals provide data bus bits 0 to 15 for any peripheral devices. All 8-bit devices use SD0[0..7] for data transfers.
- Page 34 ETX-CN700 Appendix 1 IOCS16# The IOCS16# signal determines when a 16-bit to 8-bit conversion is needed for I/O bus cycles. A conversion is done any time the CPU module requests a 16-bit I/O cycle while the IOCS16# line is high. If IOCS16# is high, 16-bit CPU cycles are automatically converted on the bus into two 8-bit cycles.
- Page 35 ETX-CN700 Appendix 1 Connector X3 VGA Signals HSYNC Horizontal Sync: This output supplies the horizontal synchronization pulse to the CRT monitor. VSYNC Vertical Sync: This output supplies the vertical synchronization pulse to the CRT monitor. Red, Green, Blue Red, green and blue analog video output signals for CRT monitors. These lines should be terminated with 75 ohms to ground at the video connector.
- Page 36 ETX-CN700 Appendix 1 LVDS2# Txout2 second LVDS3# Txout3# second LVDS3# Txout3 second LVDSCLK# Txclock# second LVDSCLK Txclock second BIASON Controls panel contrast voltage. DIGON Controls panel digital power. BLON# Controls back-light power. LTGIO0 General purpose I/O pin. I2CLK, I2DAT I2C interface for panel parameter EEPROM. This EEPROM is mounted on the LVDS receiver. The data in the EEPROM allows the ETX module to automatically set the proper timing parameters for a specific LCD panel.
- Page 37 ETX-CN700 Appendix 1 DSR1#, DSR2# This active-low input is for serial port. Handshake signals are use to notify the UART that the modem is ready to establish the communication link. PS/2 Keyboard, PS/2 Mouse Signals KBDAT Bi-directional keyboard data signal. KBCLK Keyboard clock signal.
- Page 38 ETX-CN700 Appendix 1 INDEX# This active-low Schmitt Trigger input signal is asserted by the disk drive when the diskette index hole is sensed. TRK0# This active-low Schmitt Trigger input signal is asserted by the disk drive when the head is positioned over the outermost track.
- Page 39 ETX-CN700 Appendix 1 PIDE_IOW#/ SIDE_IOW# IDE IOW# Command. This is the IOW# command output pin used to notify the IDE device that the available Write Data is already asserted by the IDE Busmaster in PIO and DMA mode. In Ultra-33 mode, this pin has different functions.
- Page 40 ETX-CN700 Appendix 1 Ethernet Transformer Specification Turns ratio transmit: 1:1 +/- 5% Turns ratio receive: 1:1 +/- 5% Insertion Loss 1 to 60 MHz: max. 1 dB Return Loss 1 to 80 MHz: max. 10 dB Common Mode Rejection 30 to 100 MHz: max. 30 dB 100 to 500 MHz: max.
- Page 41 ETX-CN700 Appendix 1 3V backup cell input. BATT is typically connected to a 3V lithium backup cell for RTC operation and CMOS register non-volatility in the absence of system power. When RTC operation is not required by the application, some ETX modules can back up CMOS contents to EEPROM so a battery is not needed. I2CLK, I2DAT These clock and data lines implement an I2C-bus.which supports external slave devices only.
-
Page 42: Design Considerations
ETX-CN700 Appendix 2 Design Considerations If you are considering designing your own host board, to accept the ETX CN700, then the first place to start is the ETX Specifications, which the latest level can be found at http://www.etx-ig.org/ As well as designing and manufacturing the ETX CN700, Blue Chip Technology can also provide assistance in the design of a custom host board. -
Page 43: System Resources
ETX-CN700 Appendix 3 System Resources Direct Memory Access Interrupt Request Memory Page | 43... -
Page 44: Input/Output
ETX-CN700 Appendix 3 Input/Output Page | 44... -
Page 45: Maintenance
ETX-CN700 Maintenance Maintenance The ETX CN700 Single Board Computer should not require any regular maintenance. After a period of several years, it may be necessary to replace the battery, if present on the host carrier board, if it cannot maintain the CMOS clock whilst the AC power is disconnected. -
Page 46: Amendment History
ETX-CN700 History Amendment History Issue Level Issue Date Author Amendment Details 23-10-08 TMCK First release 26-05-09 TMCK Removed reference to 2Ghz CPU 28-08-09 TMCK Added I/O,DMA, IRQ and Memory Maps TMCK Added Nano CPU, Signal Level definition on connectors 06-09-10 TMCK Corrected LVDS3 pin definition on connector X3 Contact Details...
Need help?
Do you have a question about the BCT-ETX-CN700 and is the answer not in the manual?
Questions and answers