Table of Contents

Summary of Contents for Stone XN650R, XN650ROI, XT728R,XT728ROI
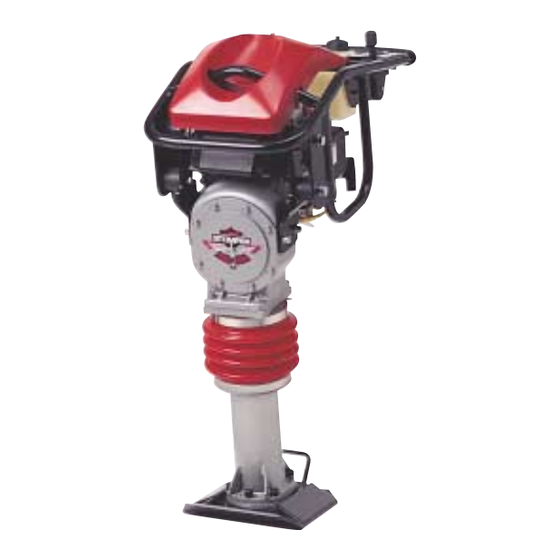
- Page 1 OPERATOR/SERVICE MANUAL MODEL: XN650R, XN650ROI, XT728R, XT728ROI, XM832R, XM832ROI, XJ834HG, XD836Y ® STOMPER - 2 Cycle Oil Injected and Pre-Mix, 4 Cycle and Diesel A 100% employee-owned American manufacturer REVISION: F 5/02 P/N 56318...
-
Page 3: Table Of Contents
TABLE OF CONTENTS OPERATOR/SERVICE MANUAL STOMPER FOREWORD ............................6 LIMITED WARRANTY ............................. 7 SECTION 1 - TECHNICAL DATA ........................9 - 10 Machine Sound Level Test ......................10 Vibration Tests ..........................10 SECTION 2 - HEALTH & SAFETY ........................11 - 14 SECTION 3 - OPERATIONS/ROUTINE MAINTENANCE - 2-CYCLE OIL INJECTED STOMPER .... - Page 4 To Stop Machine ........................... 27 Operation of Machine ........................27 Lifting and Transporting ....................... 27 Engine Idle ............................ 28 4.8.1 Fuel System ........................28 Disassembly and Reassembly - Fuel Injection Pump ..............29 4.10 Fuel Injection Valve ........................29 - 30 4.11 Disassembly and Reassembly - Case Nut ..................
- Page 5 6.3.4 Fuel Mixture ........................45 6.3.5 Lubrication ........................45 - 46 6.3.6 Air Cleaner ........................46 To Start Machine ........................... 46 To Stop Machine ........................... 46 Operation of Machine ........................47 Idle Speed Adjustment ........................48 Air Vent Tube Inspection ......................48 Throttle Control Cable Adjustment ....................
-
Page 6: Foreword
Fax #: ______________________________ Stone Construction Equipment, Inc. is not liable for the function of the machine when used in an improper manner and for other Location of above information: than the intended purpose. -
Page 7: Limited Warranty
No claim will be allowed for products lost or damaged in transit. Such claims should be filed with the carrier within fifteen days. Effective September 2001. Stone Construction Equipment, Inc. Phone: 1-800-888-9926 • 1-585-229-5141 Bred Tough, Technology Born To Work. -
Page 9: Section 1 - Technical Data
1. TECHNICAL DATA - 9 -... -
Page 10: Machine Sound Level Test
SOUND AND VIBRATION DATA 1.1 MACHINE SOUND LEVEL TEST Machine Type: Stomper Compactor Sound Level Meter Calibration Date: December 9, 1994 Meter Type: Simpson Model 886-2 Type 2 Test Date: December 9, 1994 Test Conditions: Temperature: 5 degrees Fahrenheit/-5 degrees Celsius Ambient Sound: 55 dba fast mode Soil Condition:... -
Page 11: Section 2 - Health & Safety
2. HEALTH & SAFETY - 11 -... - Page 12 SAFETY USE These machines are designed to carry out the func- tion of compacting material of the non-cohesive, bitu- minous and granular varieties. If used correctly they will provide an effective and safe means of compaction and meet the appropriate per- formance standards.
-
Page 13: Safety Precautions
SAFETY PRECAUTIONS Before using this equipment, study this entire decals are destroyed or missing, contact Owner’s Manual to become familiar with its factory immediately for replacement. For the proper operation. Do not allow untrained or safety of yourself and others, it is imperative unauthorized personnel, especially children, that the following rules are observed. - Page 14 • Never operate any gas powered equipment in a poorly ventilated or enclosed area. • Avoid prolonged breathing of exhaust gases. • Never perform any work on this equipment while it is running. • Always stop the engine and disconnect the spark plug wire to prevent accidental starting.
-
Page 15: Section 3 - Operations/Routine Maintenance - 2-Cycle Oil Injected Stomper
3. OPERATIONS 2-CYCLE OIL INJECTED - 15 -... -
Page 16: Specifications
3.1 Specifications Oil-Injected Stomper ® STONE STONE STONE MODEL XN650ROI XT728ROI XM832ROI Dimensions Weight 125 lbs. 130 lbs. 158 lbs. Dimensions (L x W x H) 30.3" x 13.5" x 36.5" 28.5" x 15" x 38" 28.5" x 15" x 38"... -
Page 17: Operating Principle
OPERATING INSTRUCTIONS 3.2 OPERATING PRINCIPLE A tamping shoe is mounted at the lower end of a cylindrical spring housing. A piston, installed between massive opposing springs inside the spring housing, is actuated by a connecting rod and crank system which is driven by a high speed, 2 cycle gasoline engine through a gear train and centrifugal clutch. The piston alternately loads and unloads the springs. -
Page 18: Oil Pipe Replacement
NOTE: Special ratio for initial break-in period. See chart below FUEL 50:1 EC12 20:1 All Units Break-In Gasoline Two Cycle Oil Two Cycle Oil Mix (first 10 hours) 5 Gallons .80 pints (12.8 oz) (.38 L) 2.00 pints (32 oz) (.94 L) .16 pints (2.56 oz) (..08 L) .40 pints (6.4 oz) (.19 L) 1 Gallons... -
Page 19: Air Cleaner
3.3.7 Air Cleaner Engine life will be extended by maintaining clean engine air filters. Remove and clean the air filter elements daily, or more frequently under dustier job conditions. Wash the pre-filter element clean in a non-oily cleaning solvent such a "Solvesol". Let the filter dry before reinstalling it in the air cleaner. Replace air cleaner element every 100 hours. -
Page 20: Throttle Control Cable Adjustment
ROUTINE MAINTENANCE 3.7 THROTTLE CONTROL CABLE ADJUSTMENT 1. Loosen throttle cable clamp screw. 2. Push throttle handle all the way to the right. 3. Push down on high RPM throttle paddle until it rests on the high RPM adjustment screw and tighten throttle cable clamp screw. -
Page 21: Storing Stompers
3.11 STORING STOMPERS The following steps should be taken to prepare your Stomper for storage: 1. Disconnect fuel line and allow all fuel to drain from the gasoline tank only. Replace fuel line. 2. Start engine and allow to run until it stops from lack of fuel. This will use up all the fuel in the carburetor and prevent the formation of deposits due to evaporation of fuel. -
Page 23: Section 4 - Operations/Routine Maintenance - Diesel Stomper
4. OPERATIONS DIESEL - 23 -... -
Page 24: Specifications
4.1 Specifications Stomper ® Diesel STONE MODEL XD836Y Dimensions 215 lbs. Weight Dimensions (L x W x H) 31.5" x 15" x 38" Shoe Size 13" x 13" Operating System Power 4 hp. Yanmar Engine Specs L40AE-D Engine RPM 3000 - 3600... -
Page 25: Operating Principle
OPERATING INSTRUCTIONS 4.2 OPERATING PRINCIPLE A tamping shoe is mounted at the lower end of a cylindrical spring housing. A piston, installed between massive opposing springs inside the spring housing, is actuated by a connecting rod and crank system which is driven by a powerful air-cooled 4 hp diesel engine through a gear train and centrifugal clutch. The piston alternately loads and unloads the springs. -
Page 26: Starter Screen
4.3.2 Starter Screen This screen keeps dirt, etc., from entering the fan housing and clogging the air cooling passages. Be- cause this engine is air-cooled, it is necessary to keep this screen clean at all times to permit the unre- stricted passage of air into the fan housing. -
Page 27: To Stop Machine
4. Pull starting handle slowly until you feel resistance. 5. Return starting handle slowly. 6. Push decompression lever down and release. Lever should stay in down position. 7. Pull starting handle hard and fast. 8. If engine fails to start, try again from step 4. 4.5 TO STOP MACHINE 1. -
Page 28: Engine Idle
ROUTINE MAINTENANCE WARNING DIESEL FUEL IS BOTH TOXIC AND FLAMMABLE. DO NOT SMOKE WHILE WORKING WITH FUEL. DO NOT USE NEAR OPEN FLAME. AVOID PROLONGED BREATHING OF VAPORS AND SKIN CONTACT. FLASH POINT OF FUEL NO. 2- D IS 125°F (52°C). SERIOUS ILLNESS OR LOSS OF LIFE COULD RESULT. 4.8 ENGINE IDLE To adjust engine idle, it is necessary to use a strobe light with a digital readout for RPM's. -
Page 29: Disassembly And Reassembly - Fuel Injection Pump
WARNI 4.9 Disassembly and Reassembly - Fuel Injection Pump This is a standard fuel injection pump body. Disassemble and reassemble the fuel pump in the direction order of “UP”, “DOWN” and “SIDE” from the center of the fuel injection pump body (marked “C”) as illustrated. -
Page 30: Disassembly And Reassembly - Case Nut
Check 1. Carbon deposits (Flowering)—carbon deposits build up on the nozzle in the form of flowers. Flowering lowers combustion performance significantly. Make sure the nozzle is free from contamination. 2. Shape of injection spray—move the lever of the nozzle tester at a speed of approximately 1.2 time/sec. -
Page 31: Fuel Filter
Adjustment by 0.1mm results in a change in the injection starting pressure of about 20 kg/cm Adjusting shims come in the following thicknesses: 0.1, 0.15, 0.4, 0.5, 0.6, 0.7, and 0.8mm. 4.12 Fuel Filter The fuel filter uses an element of nominal filterable particle diameter of 5 microns. -
Page 32: Throttle Control Cable Adjustment
4.14 THROTTLE CONTROL CABLE ADJUSTMENT 1. Loosen throttle cable clamp screw. 2. Push throttle handle all the way to the right. 3. Push up on high RPM throttle paddle until it rests on the high RPM adjustment screw and tighten throttle cable clamp screw. - Page 33 3. Push decompression lever down and hold it while you pull recoil 2 or 3 times. (Do not start engine). Pull decompression lever up and pull recoil slowly until you feel resistance. This will close intake and exhaust valves in compression position and help prevent rust from forming. 5.
-
Page 35: Section 5 - Operations/Routine Maintenance - 2-Cycle Pre-Mix Stomper
5. OPERATIONS 2-CYCLE PRE-MIX - 35 -... -
Page 36: Specifications
5.1 Specifications Stomper ® Pre-Mix STONE STONE STONE MODEL XN650 XT728R XM832 Dimensions 125 lbs. 130 lbs. 158 lbs. Weight Dimensions (L x W x H) 30.3" x 13.5" x 36.5" 28.5" x 15" x 38" 28.5" x 15" x 38"... -
Page 37: Operating Principle
OPERATING INSTRUCTIONS 5.2 OPERATING PRINCIPLE A tamping shoe is mounted at the lower end of a cylindrical spring housing. A piston, installed between massive opposing springs inside the spring housing, is actuated by a connecting rod and crank system which is driven by a high speed, 2 cycle gasoline engine through a gear train and centrifugal clutch. The piston alternately loads and unloads the springs. -
Page 38: Oil Pipe Replacement
NOTE: Special ratio for initial break-in period. See chart below FUEL 50:1 EC12 20:1 All Units Break-In Gasoline Two Cycle Oil Two Cycle Oil Mix (first 10 hours) .80 pints (12.8 oz) (.38 L) 2.00 pints (32 oz) (.94 L) 5 Gallons 1 Gallons .16 pints (2.56 oz) (..08 L) -
Page 39: To Start Machine
5.4 TO START MACHINE 1. Check fuel tank, air cleaner, and Stomper lubrication as previously instructed. 2. Open the fuel valve under the tank and the air vent thumbscrew in the tank fill cap. 3. Raise throttle lever halfway and apply the choke. NOTE: A warm engine may not require choking. -
Page 40: Throttle Control Cable Adjustment
ROUTINE MAINTENANCE 5.7 THROTTLE CONTROL CABLE ADJUSTMENT 1. Loosen throttle cable clamp screw. 2. Push throttle handle all the way to the right. 3. Push down on high RPM throttle paddle until it rests on the high RPM adjustment screw and tighten throttle cable clamp screw. -
Page 41: Storing Stompers
5.11 STORING STOMPERS The following steps should be taken to prepare your Stomper for storage: 1. Close fuel shut-off valve. 2. Start engine and allow to run until it stops from lack of fuel. This will use up all the fuel in the carburetor and prevent the formation of deposits due to evaporation of fuel. -
Page 43: Section 6 - Operations/Routine Maintenance - 4-Cycle Gas Stomper
6. OPERATIONS 4-CYCLE GASOLINE - 43 -... -
Page 44: Specifications
6.1 Specifications Stomper ® Honda Gas STONE MODEL XJ834 HG Dimensions Weight 200 lbs. Dimensions 33.5" x 16.5" x 38.5" (L x W x H) Shoe Size 13" x 13" Operating System Power 4 hp. Honda GX120 Engine Specs 3050 -3250... -
Page 45: Operating Principle
OPERATING INSTRUCTIONS 6.2 OPERATING PRINCIPLE A tamping shoe is mounted at the lower end of a cylindrical spring housing. A piston, installed between massive opposing springs inside the spring housing, is actuated by a connecting rod and crank system which is driven by a high speed, 4 cycle gasoline engine through a gear train and centrifugal clutch. The piston alternately loads and unloads the springs. -
Page 46: Air Cleaner
FOR XJ MODEL 1. With unit standing upright (in vertical position--not operating) so that the oil drains freely into the spring housing, check OIL FILL PLUG & SIGHT GAUGE that the oil is at fill sight plug level. 2. Whenever the level is low, remove the fill sight plug and refill to level of fill sight plug with any good quality SAE-30. -
Page 47: Operation Of Machine
6.6 OPERATION OF MACHINE WARNING WHEN OPERATING THE STOMPER, KEEP FEET CLEAR FROM THE RAMMING SHOE. SERIOUS PERSONAL INJURY MAY OCCUR. WHEN OPERATING THE STOMPER, HEARING PROTECTION SHOULD BE WORN. HEARING LOSS MAY RESULT FROM PROLONGED EXPOSURE TO NOISE. CAUTION: Never operate on hard, unyielding surfaces. Unwarranteed damage may result. CAUTION: Always use both hands when operating this machine. -
Page 48: Idle Speed Adjustment
ROUTINE MAINTENANCE Standard idle speed: 1,500 + 50 rpm 6.7 IDLE SPEED ADJUSTMENT 1. Start the engine and allow it to warm up to normal operating temperature. 2. With the engine idling, turn the throttle stop screw to obtain the standard idle speed. -
Page 49: Setting High Rpm
6.10 SETTING HIGH RPM (Operating Speed) 1. Loosen throttle control cable clamp screw. 2. Turn high RPM adjustment screw clockwise to increase RPM or counterclockwise to decrease RPM. 3. Push throttle handle all the way to the right. 4. Push the high RPM throttle paddle to the left until is rests on the high RPM adjustment screw and tighten the throttle cable clamp screw. -
Page 51: Section 7 - Maintenance
7. MAINTENANCE - 51 -... -
Page 52: Important - Maintenance Tasks
F F F F F 7.1 IMPORTANT The person attempting any of the following maintenance tasks must be authorized to do so and have read and understood all sections within this manual. - 52 -... -
Page 53: Instruction For Base Plate Removal
7.2 INSTRUCTIONS FOR BASE PLATE REMOVAL The spring retaining Base Plate retains heavy springs under compression. Follow the instructions carefully or severe personal injury may occur. Detach shoe by removing six (6) shoe bolts and washers. Assemble two (2) threaded bolts, two (2) washers from bottom two corner bolt holes, fully thread two (2) nuts with two (2) washers from opposite side. -
Page 54: Instruction For Service Lower Unit Xn Oil Injected And Pre-Mix Stomper Model Xn650
7.3 INSTRUCTIONS FOR SERVICE LOWER UNIT XN OIL INJECTED AND PRE-MIX STOMPER MODEL XN650 The spring retaining Base Plate retains heavy springs under compression. Follow the instructions carefully or severe personal injury may occur. Detach the shoe from the stomper by removing (6) shoe bolts and washers. Thread M8 nuts onto (2) full thread M8 x 5.50”... -
Page 55: Section 8 - Exploded Views With Parts
8. EXPLODED VIEWS WITH PARTS - 55 -... -
Page 57: Hardware Key
Hardware Key ..........................57 Torque Charts ..........................58 - 59 Gearcase for XN Oil Injected and Pre-Mix ..................60 - 61 Gearcase for XT Oil Injected and Pre-Mix ..................62 - 63 Gearcase for XM Oil Injected and Pre-Mix ..................64 - 65 Gearcase - XD Diesel ........................ -
Page 58: Torque Charts
8.2 Torque Charts SAE GRADE 5 SAE GRADE 8 Coarse Thread, Zinc-Plated Coarse Thread, Zinc-Plated SIZE TORQUE SIZE TORQUE ft. lbs. ft. lbs. 1/4 - 20 (.250) 1/4 - 20 (.250) 5/16 - 18 (.3125) 5/16 - 18 (.3125) 3/8 - 16 (.375) 3/8 - 16 (.375) 7/16 - 14 (.4375) 7/16 - 14 (.4375) - Page 59 8.2 Torque Charts Property Class 8.8 ZINC-PLATED Coarse Thread Fine Thread SIZE ft. lbs. ft. lbs. Property Class 10.9 ZINC-PLATED Coarse Thread Fine Thread SIZE ft. lbs. ft. lbs. 1000 Property Class 12.9 ZINC-PLATED Coarse Thread Fine Thread SIZE ft. lbs. ft.
-
Page 60: Gearcase For Xn Oil Injected And Pre-Mix
8.3 Gearcase for XN Oil Injected and Pre-Mix - 60 -... - Page 61 8.3 Gearcase for XN Oil Injected and Pre-Mix Item Part No. Description Qty. Item Part No. Description Qty. 39373 Gear Case, Machined 80872 SHCS M10 - 1.5 x 30 8.8 ZN Cover Front, Machined 39376 80804 WSHRL M10 Split ZN 127B 39379 Gear Helical Crank...
-
Page 62: Gearcase For Xt Oil Injected And Pre-Mix
8.4 Gearcase for XT Oil Injected and Pre-Mix - 62 -... -
Page 63: Gearcase For Xt Oil Injected And Pre-Mix
8.4 Gearcase for XT Oil Injected and Pre-Mix Item Part No. Description Qty. Item Part No. Description Qty. 21112 Case Cover with Bearings 80802 HWHST M8 -1.25 x 25mm ZN 7500 32254 O-Ring 80801 SHCS M10 1.5 x 35mm 12.9 BLK Bearing 32022 80804... -
Page 64: Gearcase For Xm Oil Injected And Pre-Mix
8.5 Gearcase - XM Oil Injected and Pre-Mix - 64 -... - Page 65 8.5 Gearcase - XM Oil Injected Pre-Mix Item Part No. Description Qty. Item Part No. Description Qty. 65029-2 Cap Speed Cover 80821 SHCS M5 .8 x 16mm 8.8 ZN 30189 Gasket 80804 WSHRL M10 Split ZN XM 127B 22991 Gearcase Cover Assy 80810 SHCS M8 1.25 x 20mm 8.8 ZN 32216...
-
Page 66: Gearcase- Xd Diesel
8.6 Gearcase- XD Diesel - 66 -... -
Page 67: Gearcase - Xd Diesel
8.6 Gearcase-XD Diesel Item Part No. Description Qty. Item Part No. Description Qty. 65072-2 Gearcase Machined Diesel 80002 PINDL 1/4 x 5/8 PLN 39224 Shaft Seal 80810 SHCS M8 -1.25 x 20 8.8 ZN 43176 Clutch Shaft Weld 14T 80812 WSHRL M8 Split ZN 65025 Shock Mount Metric... -
Page 68: Gearcase - Xj 4-Cycle
8.7 Gearcase - XJ 4 Cycle - 68 -... - Page 69 8.7 Gearcase - XJ 4 Cycle Item Part No. Description Qty. Item Part No. Description Qty. 65072-2 Gearcase Machined Diesel 80002 PINDL 1/4 x 5/8 PLN 39224 Shaft Seal 80810 SHCS M8 - 1.25 x 20 8.8 ZN 39472 Clutch Shaft Weld 14T 80812 WSHRL M8 Split ZN 39484-2...
-
Page 70: Lower Unit For Xn Oil Injected And Pre-Mix
8.8 Lower Unit - XN Oil Injected and Pre-Mix - 70 -... - Page 71 8.8 Lower Unit - XN Oil Injected and Pre-Mix Item Part No. Description Qty. Item Part No. Description Qty. 39438 O-Ring 2.5mm x 85mm 80804 WSHRL M10 Split ZN 127B 39374 Guide Tube Machined 80872 SHCS M10 - 1.5 x 30 8.8 ZN Boot 39372 80943...
-
Page 72: Lower Unit For Xt Oil Injected And Pre-Mix
8.9 Lower Unit - XT Oil Injected and Pre-Mix - 72 -... - Page 73 8.9 Lower Unit - XT Oil Injected and Pre-Mix Item Part No. Description Qty. Item Part No. Description Qty. 65050-2 Guide Tube 80803 SHCS M10 1.5 x 25mm 8.8 ZN Boot Clamp 80804 WSHRL M10 Split ZN 44106 127B 47361 Boot 80819 SHCS M12 1.75 x 35mm 8.8 ZN...
-
Page 74: Lower Unit For Xm Oil Injected And Pre-Mix
8.10 Lower Unit for XM Oil Injected and Pre-Mix - 74 -... - Page 75 8.10 Lower Unit for XM Oil Injected and Pre-Mix Item Part No. Description Qty. Item Part No. Description Qty. 65032-2 Guide Tube 80824 SHCS M12 - 1.75 x 80 8.8 ZN Boot Clamp 44106 80822 SHCS M12 - 1.75 x 50mm 8.8 ZN 47361 Boot 80519...
-
Page 76: Lower Unit For Xd Diesel And Xj 4-Cycle
8.11 Lower Unit- XD Diesel & XJ 4 Cycle - 76 -... - Page 77 8.11 Lower Unit- XD Diesel & XJ 4 Cycle Item Part No. Description Qty. Item Part No. Description Qty. 65032-2 Guide Tube Weld 80720 SHCS M8 -1.25 x 25 8.8 ZN 44106 Clamp Boot 80812 WSHRL M8 Split ZN 127B 47361 Boot Urethane 80822...
-
Page 78: Engine - Xn/Xt And Xm Oil Injected And Pre-Mix
8.12 Engine - XN, XT & XM Oil Injected and Pre-Mix - 78 -... -
Page 79: Engine - Xn/Xt And Xm Oil Injected And Pre-Mix
8.12 Engine - XN, XT & XM Oil Injected and Pre-Mix Item Part No. Description Qty. Item Part No. Description Qty. 23208 Kit EC12 O/I Engine XN 80406 HHCS M8 - 1.25 x 20mm 8.8 ZN 23209 Kit EC12 O/I Engine XT 80812 WSHRL M8 Split ZN 127B... -
Page 80: Engine - Xd Diesel
8.13 Engine - XD Diesel - 80 -... -
Page 81: Engine - Xd Diesel
8.13 Engine - XD Diesel Item Part No. Description Qty. Item Part No. Description Qty. 31244 Engine Yanmar L40A 4HP 80902 STUD M10 - 1.5 x 60 8.8 ZN 31245 Muffler Special Yanmar 80833 NUTNY M10 - 1.5 ZN 39236 Gasket Exhaust 80806 WSHR M10 Flat 200D ZN... -
Page 82: Engine - Xj 4-Cycle
8.14 Engine - XJ 4 Cycle - 82 -... - Page 83 8.14 Engine - XJ 4 Cycle Item Part No. Description Qty. Item Part No. Description Qty. 30567 Engine 4 Cycle Honda 80803 SHCS M10 - 1.5 x 25 8.8 ZN 30356 Clutch Assembly 80833 NUTNY M10 - 1.5 ZN 39453-2 Engine Support Weldment 80806 WSHR M10 Flat ZN...
-
Page 84: Handle And Fuel Tank - Xn Oil Injected And Pre-Mix
8.15 Handle and Fuel Tank - XN Oil Injected and Pre-Mix - 84 -... -
Page 85: Handle And Fuel Tank - Xn Oil Injected And Pre-Mix
8.15 Handle and Fuel Tank - XN Oil Injected and Pre-Mix Item Part No. Description Qty. Item Part No. Description Qty. 80894 39419-2 Handle Weldment SHCS M8 - 1.25 x 16 8.8 ZN (Pre-Mix) 80894 SHCS M8 - 1.25 x 16 8.8 ZN (Oil Inj.) 39421 Cover 80812... -
Page 86: Handle And Fuel Tank - Xt/Xm Oil Injected And Pre-Mix
8.16 Handle and Fuel Tank - XT/XM Oil Injected and Pre-Mix - 86 -... - Page 87 8.16 Handle and Fuel Tank - XT/XM Oil Injected and Pre-Mix Item Part No. Description Qty. Item Part No. Description Qty. 44215-2 Handle Weld Assembly 80894 SHCS M8 - 1.25 x 16mm 8.8 ZN (Oil Inj.) 10 39483 Handle Grip Cushion 80894 SHCS M8 - 1.25 x 16mm 8.8 ZN (Pre-Mix) 6 39387...
-
Page 88: Handle And Fuel Tank - Xd Diesel
8.17 Handle and Fuel Tank - XD Diesel - 88 -... - Page 89 8.17 Handle and Fuel Tank - XD Diesel Item Part No. Description Qty. Item Part No. Description Qty. 39482-2 Handle Assembly Weld Diesel 80810 SHCS M8 - 1.25 x 20 8.8 ZN1 65007-2 Guard Side 80812 WSHRL M8 Split ZN 127B 39483 Handle Grip Cushion...
-
Page 90: Handle And Fuel Tank - Xj 4-Cycle
8.18 Handle and Fuel Tank - XJ 4 Cycle - 90 -... -
Page 91: Handle And Fuel Tank - Xj 4-Cycle
8.18 Handle and Fuel Tank - XJ 4 Cycle Item Part No. Description Qty. Item Part No. Description Qty. 39661-2 Handle Assembly Weld 80947 HHCS M6 - 1.0 x 40 8.8 NZ 39386 Throttle HSG 80812 WSHRL M8 Split ZN 127B 39470 Handle Grip Black Vinyl... -
Page 92: Shoes Xt/Xn Oil Injected And Pre-Mix
8.19 Shoes for XT/XN Oil Injected and Pre-Mix - 92 -... -
Page 93: Shoes Xt/Xn Oil Injected And Pre-Mix
8.19 Shoes for XT/XN Oil Injected and Pre-Mix Item Part No. Description Qty. Item Part No. Description Qty. 22983 Kit Shoe 11" Wide XT 22984 Kit Shoe Optional Shoe 15" Wide XT 22985 Kit Shoe Optional 5" Wide XT 23145 Kit Shoe 5"... -
Page 94: Decal Identification
8.20 Decal Identification 55379 Robin 55378 Diesel 55322 - 94 -... -
Page 95: Decal Identification
8.20 Decal Identification 55156 PN 55325 - Diesel PN55324 - Diesel PN 55053 55377 - 95 -... -
Page 97: California Proposition 65 Warning
CALIFORNIA PROPOSITION 65 WARNING: Operation of this equipment and/or engine exhaust from this product contains chemicals known to the State of California to cause cancer, birth defects, or other reproductive harm. - 99 -... - Page 98 The Way It Ought To Be. Stone Construction Equipment, Inc. P .O. Box 150, Honeoye, New York 14471 Phone: (800) 888-9926 Fax: 585-229-2363 e-mail: sceny@mcimail.com www: stone-equip.com A 100% employee-owned American manufacturer © 1996 Stone Construction Equipment, Inc. Printed in U.S.A. GP1M...
Need help?
Do you have a question about the XN650R, XN650ROI, XT728R,XT728ROI and is the answer not in the manual?
Questions and answers