Table of Contents
Advertisement
Quick Links
Advertisement
Table of Contents

Subscribe to Our Youtube Channel
Related Manuals for Binatone Smart 66


Summary of Contents for Binatone Smart 66
-
Page 1: User Guide
USER GUIDE Smart 66 Android Smart Home Phone On the web: www.binatoneglobal.com For product-related questions, please call US and Canada: (1) 866-779-1632 Images not to scale. Warning: Before operating this unit, please read these instructions carefully. -
Page 2: Table Of Contents
Table of Contents Table of ConTenTs WELCOME ................... IMPORTANT AND SAfETy ............CARE AND MAINTENANCE ............GETTING TO KNOW yOUR PHONE ........... SETTING UP................KEybOARD ................WI-fI® SETTINGS ..............DATE, TIME, & DISPLAy ............PERSONALISING yOUR HANDSET......... 10 DECT SETTINGS ............... 11 USING THE PHONE fUNCTIONS .......... -
Page 3: Welcome
Welcome WelCoMe Congratulations on purchasing your new smart 66 android smart Home Phone. This User Guide provides you with all the information you need to get the most from this device. Before making your first call or using the Internet, follow the simple instructions in ‘Getting to Know Your Phone’... -
Page 4: Important And Safety
Important and Safety, Care and Maintenance IMPoRTanT and safeTy This equipment is not designed to make emergency telephone calls in the event of power failure. Alternative arrangements should be made to access emergency services under these conditions. You are advised to keep a basic phone that does not require mains power for normal operation. -
Page 5: Getting To Know Your Phone
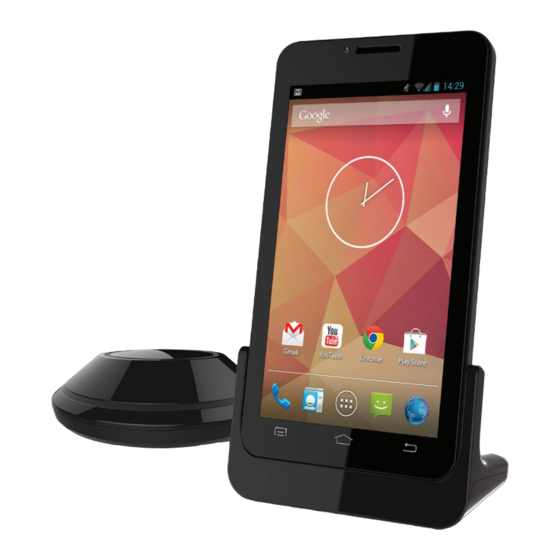
Getting to Know your Phone GeTTInG To KnoW youR PHone Overview of the Handset 1 Earpiece 7 volume Place your ear against this when Adjust the volume up + / down - . making normal phone calls. 8 Remove back Cover 2 Camera Use this slot to help take the back Front facing camera lens. -
Page 6: Handset Lcd Display
Getting to Know your Phone Handset LCD Display The status bar at the top of the screen displays the time, handset status, and notifications. Icon Status Battery is low. Battery is charging. Wi-Fi® connection on / signal strength. DECT signal strength. Alarm clock set. -
Page 7: Using The Touchscreen
Getting to Know your Phone 4.4 Handset Notifications Panel When the status bar at the top of the screen displays a status icon, tap and hold the status bar and slide downward to open the notifications panel. Using the Touchscreen Action function Operation Select on-screen items such as Gently tap an item on the screen... -
Page 8: Handset Range
Getting to Know your Phone Handset Range The Smart 66 Android Smart Home Phone achieves optimum reception for telephone calls when there is clear line of sight between the base and handset. Any obstruction between the base and handset will reduce the range significantly. - Page 9 Getting to Know your Phone 4.10 Handset Extended Home Screens Extended Home screens let you organise apps (applications) and widgets on your handset. You can conveniently access them from the Home screen. 1. Slide horizontally across the screen (left or right). 2.
-
Page 10: Overview Of The Base
Getting to Know your Phone 4.14 Overview of the base 1 Paging / Register button Press this to page all handsets registered to the base. Press and hold to register a new handset to the base (see Section 5.3 or 10.1). 2 Power Line In Connect to the Micro-USB plug base power adaptor 3 Phone Line In... -
Page 11: Setting Up
Setting Up seTTInG uP Insert the Handset battery To access the battery compartment, carefully remove the cover by lifting from the small cut-out in the bottom corner, as shown, and running your fingernail along the edge, then carefully insert the battery into position and replace the cover. Connecting the Power Cable and Telephone Line Cord IMPoRTanT... -
Page 12: Charge The Handset Battery
Charge the Handset battery When using your Smart 66 Android Smart Home Phone for the first time, connect the supplied power cord to the handset or stand the handset in a charger pod (if sup- plied), and charge for at least 6 hours. -
Page 13: Low Battery Warning
Setting Up Low battery Warning If the " Connect charger" message appears on the display, you should charge the handset. Tip: Tap > Settings > battery to see how your battery power is being used. battery Performance When the battery is used for the first time, it will not reach full capacity until it has been fully discharged and recharged during normal use over several days. -
Page 14: Removing The Memory Card
Setting Up Removing the Memory Card To remove the memory card: 1. Turn your phone off. 2. To access the memory card slot, open the back case see "Inserting the handset battery". 3. Remove the battery. 4. Remove the memory card by sliding the card out of the memory card slot. 5. - Page 15 Setting Up 5.11 bundled Applications Your Smart 66 Android Smart Home Phone comes bundled with some applications. Icon Application Description Browser Browse the internet over Wi-Fi. Calculator Perform arithmetic operations on numbers. Create events, manage meetings, and Calendar appointments. Camera Capture images and shoot video.
- Page 16 Setting Up Icon Application Description Google A Google search application. Google To set Google options. Settings Hangouts A Google application. Local A Google maps application. Maps To open Google maps. Music Play music. Phone Make and receive telephone calls. Play Store To access the Google Play Store.
-
Page 17: Keyboard
Keyboard KeyboaRd Your handset features an on-screen Qwerty keyboard, which has the same key arrangement as that of a standard computer keyboard. The on-screen keyboard lets you enter text such as contact information and email messages. The keyboard appears automatically when you launch certain applications or when you tap on a text or number field. -
Page 18: Accept Or Reject Dictionary Suggestions
Keyboard Add Words to User Dictionary 1. From the Home screen, tap 2. Tap Settings > Language & input > Personal Dictionary. 3. Tap + . 4. Enter word in the edit box and tap Add to dictionary. 5. Tap to return to the previous menu. -
Page 19: Wi-Fi® Settings
Wi-fi Settings WI-fI® seTTInGs The handset Wi-Fi can be accessed at any time using the settings menu. To use Wi-Fi, you must first make sure it is turned on. > Settings. 1. From the Home screen, tap 2. Slide the bar next to Wi-fi to the ON position. 3. -
Page 20: Date, Time, & Display
Date, Time, & Display daTe, TIMe, & dIsPlay When using the phone for the first time, or if the battery has been left uncharged, you may need to set the time and date. Set Date 1. From the Home screen, tap 2. -
Page 21: Personalising Your Handset
Personalising your Handset PeRsonalIsInG youR HandseT Display Settings 9.1.2 Set Wallpaper The wallpaper is the background image you see on your home screen. 1. From the Home screen, tap 2. Tap Wallpaper. 3. Tap to select Gallery, Live Wallpapers, or Wallpapers. If you select Live Wallpapers or Wallpapers, simply tap to select a wallpaper from the list and tap Set wallpaper. -
Page 22: Sound Settings
Personalising your Handset Sound Settings 9.2.1 Set Silent Mode This option enables you to mute all sounds except media and alarms. 1. From the Home screen, tap 2. Tap Settings > Audio profiles > Silent. A lit circle appears next to the option to indicate that silent mode is on. To change from silent mode tap and select a different mode. -
Page 23: Dect Settings
Your handset needs to be registered to the base station before it can be used. Note: Your Smart 66 Handset is pre-registered to the Base and should not need to be registered again. Handset registration is only necessary if you buy extra handsets or if a handset becomes faulty. -
Page 24: Using The Phone Functions
OK to confirm 11 usInG THe PHone funCTIons 11.1 Make an External Call Placing an external call using the Smart 66 Android Smart Home Phone handset is similar to dialling with a mobile phone. 1. From the Home screen tap to access the phone tab and dial pad. -
Page 25: Clear Call Log
Using the Phone functions 11.1.2 In-call Options During a call, you can access the following options: Dial pad Shows the dialer pad for Touch tone dial and Recall (R) function. Ends the current call. Mute Mutes the handset microphone. Speaker Switches between earpiece and speakerphone modes. -
Page 26: End A Call
Using the Phone functions Note If the supplied earphones are plugged in when a call is answered, the received speech will be heard in the earphones, and you will still need to keep the earphone's microphone close to your mouth to be heard. 11.6 Answer Call in Speakerphone Mode 1. -
Page 27: Contacts (Address Book)
Contacts (Address book) 12 ConTaCTs (addRess booK) This application stores contact information such as names, telephone numbers, and addresses. 12.1 Open Contacts You can access your contacts from two different applications: 1. From the Home screen, tap > > • If the phone shortcut is already on your Home screen, tap >... -
Page 28: Add A New Contact
Bluetooth device to the Smart 66 handset, which will show as SMART66 in the list of devices. 2. When the file is received by the Smart 66 handset, a notification is shown at the top of the screen. -
Page 29: Edit A Contact
Contacts (Address book) 12.6 Assign a Ringtone to a Contact 1. From the Home screen, tap > Contacts. 2. Tap to select a contact > > Set ringtone. 3. Tap to select a ringtone. • The ringtone is played. 4. Tap OK to confirm. Note •... -
Page 30: Deleting A Contact
Contacts (Address book) 12.10 Deleting a Contact > Contacts. 1. From the Home screen, tap 2. Tap to select the contact from the contacts list. 3. Tap > Delete. 4. Tap OK to confirm. 12.11 Link Picture to a Contact You can link a picture to your contact so you see a picture of the contact when you search through the Contacts list or when a contact calls you. -
Page 31: Internet Function
Contacts (Address book) / Internet function 12.11.3 Change Picture of a Contact Simply repeat the steps above, but instead of seeing a grey image box, you will see the image you chose for that contact. 12.11.4 Remove a Picture of a Contact 1. - Page 32 Internet function If successful, “Connected” will show below your selected Wi-Fi network. You can now use the Internet, provided the Wi-Fi router is connected to the internet. Note • Your handset will automatically connect to the network when it is in range. •...
-
Page 33: Bluetooth Setup
bluetooth Setup / Using the Web browser 14 blueTooTH seTuP On this device, bluetooth connectivity is used for data transfer only, no Bluetooth voice communication is supported. 1. From the Home screen, tap > Settings > Slide the bar next to bluetooth to the ON position. - Page 34 Using the Web browser If you cannot see the address bar, try scrolling to the top of the screen. Note • As you enter the address, matching web page addresses will appear on the screen. • Tap to select an address and go directly to the web page, or continue to enter the complete web page address and tap Go 15.5 Automatic Screen Rotation The handset can change the screen orientation depending on how you are holding it.
-
Page 35: Manage Bookmarks
Using the Web browser 15.6.4 finding Text On a Webpage > find on page. 1. When viewing a webpage, tap 2. Enter the text in the input box using the on-screen keyboard and tap Done. • Matching text will be highlighted on the screen. 3. -
Page 36: Email
Email 16 eMaIl The email application lets you send and receive email. You will need an existing email account to send and receive email. If you already have an account, you can simply enter your login details, otherwise you will need to create a new one. NOTE YOU MUST JOIN A WI-FI NETWORK THAT IS CONNECTED TO THE INTERNET BEFORE YOU CAN SETUP, SEND AND RECEIVE EMAIL. - Page 37 Email 16.3 Adding Another Email Account You can connect to more than one email account. > Settings > ADD ACCOUNT. To add another, tap Note When setting up more than one account, you will be prompted to chose which account you want to set as your default account. 16.4 Combined view You can combine all your email accounts into just one inbox.
-
Page 38: Open An Attached File
Email 16.6 view an Email Message > Email. 1. From the Home screen, tap 2. From the Inbox scroll down / up to find a message you want to read. 3. Tap the message to read it. 4. The following message options will be available by tapping on them: Icon Action Deletes the email. -
Page 39: Check For New Messages
Email 16.8 Check for New Messages From the Home screen, tap > Email > select an account (if necessary) > tap 16.9 Reply / forward an Email Message 1. Select a message you want to reply to, then select one of the following options: •... -
Page 40: Photos & Video
Photos & video 17 PHoTos & vIdeo There is a front-facing camera for taking photos or recording videos. 17.1 Open Camera > Camera. From the Home screen, tap 17.2 Switch between Camera and video Mode (camera) or (video) to take a picture with the camera or start recording a video, respectively. -
Page 41: Record Video
Photos & video 17.6 Record video You can zoom in and out by double-tapping on the screen, or by using two fingers on the screen and pinch together to zoom out or spread apart to zoom in. 1. Tap > Camera 2. -
Page 42: Sound Recorder
Sound Recorder / fM Radio 18 sound ReCoRdeR Use the sound recorder to record voice memos and other sounds. > Sound Recorder. 1. From the Home screen, tap 2. Tap to start recording > to stop recording. 3. Select Discard or Save. 4. -
Page 43: Music
Music 20 MusIC The Music application lets you play digital audio files stored in your internal Phone storage or on your memory card. You must copy audio files to the card and insert it into the handset before launching the music application. See section 5.7 Inserting a Memory Card. -
Page 44: Create Playlists
Music 20.4 Party Shuffle All Songs and tap Party shuffle. 20.5 Turn Party Shuffle Off and tap Party shuffle off. 20.6 Create Playlists You can use playlists to organise your music files. You can create multiple playlists on your handset. 1. In the playback window, tap 2. Tap Add to playlist > New. 3. - Page 45 Music 20.10 Remove a Song from Playlist 1. From the main music library, tap Playlists. 2. Tap to select the playlist from which you wish to remove a song. 3. Tap and hold the song you wish to remove. • A pop-up options menu appears.
-
Page 46: Play Store
Music / Play Store 20.15 Delete Current Song and then tap Delete. 1. In the Playback window, tap 2. Tap OK to confirm. WARNING The song will be permanently deleted from the SD card. 20.16 Set Current Song as Ringtone In the Playback window, tap and then tap Use as ringtone. -
Page 47: Gallery
Gallery 22 GalleRy The Gallery application lets you view photos and videos on your handset from the internal memory or from an installed micro SD card. 22.1 Open Gallery > Gallery > select a folder. From the Home screen, tap Note •... -
Page 48: Clock
Clock 23 CloCK 23.1 Open Clock From the Home screen, tap > Clock. The screen will display the time, date and next alarm time if one is set. 23.2 Change Clock Style Switch between analog and digital clocks. From the Home screen, tap >... - Page 49 Clock 23.6 Activate an Alarm Setting 1. Tap > Clock > • A list of alarm settings is displayed. 2. Tap the ON / OFF switch to the right of the time to activate an alarm. • When activated the switch should be in the ON position. Note When the alarm rings, tap and slide to the left for Snooze to defer the alarm or tap and slide to the right to Dismiss the alarm until the next scheduled day.
-
Page 50: Stop Watch
Clock 23.10 Count Down Timer You can set a time period and start a countdown that produces an alarm tone when it reaches zero. 1. Tap > Clock > 2. Enter the duration required. • Tap START to start the countdown. •... -
Page 51: Calendar
Clock / Calendar 23.13 Adding clocks for other cities Additional clocks can be inserted on the screen to show the time in other cities. 1. Tap > Clock > 2. Tap a city name to select it. A tick will be shown when a city is selected. (Tap again to remove it.) 3. -
Page 52: Add New Event
Calendar • Hide declined events • Show week number • Week starts on • Use home time zone • Clear search history 24.5.2 Reminder Settings To turn a setting on or off, tap the box beside it. A will indicate that the setting has been activated. -
Page 53: Todo
Calendar / Todo / Calculator 24.8 Edit Events 1. Tap on the event in the calendar screen or open the Agenda screen. 2. Tap on the event you want to change. 3. Tap on at the top of the screen. 4. -
Page 54: File Manager
file Manager 27 fIle ManaGeR File Manager allows you to browse files and folders stored on your handset and memory card. You can also perform actions such as Paste, Delete, Copy, and Move. 27.1 Open file Manager 1. From the Home screen, tap >... -
Page 55: Install / Uninstall Apps
file Manager / Install 27.6 Delete a file 1. Tap and hold the file or folder you wish to delete until a pop-up menu appears. 2. Tap > OK. 27.7 Modify file Settings > file Manager > 1. From the Home screen, tap 2. -
Page 56: System Settings
System Settings 29 sysTeM seTTInGs From the Home screen, tap > Settings. From here you can modify the different settings of your handset. Setting Description This displays how much Internet data has been used. Data usage More... Extended wireless and network settings such as VPN. Dect Register and Reset the handset or set Call Divert. -
Page 57: Firmware Upgrade
System Settings Setting Description Select Large text and set Auto-Rotate screen, and other op- Accessibility tions. About phone Display technical information such as Android version, Build number, System version etc., and check for updates or the Sta- tus of the handset. WaRnInG •... -
Page 58: Troubleshooting
Troubleshooting 30 TRoublesHooTInG Handset does not turn on. • Make sure the handset battery is correctly installed (see section 5.1) and has been fully charged (see section 5.4). • Make sure the power adapter is securely connected to the handset during charging. - Page 59 Troubleshooting No handset dial tone. • Your handset may not be registered to a base station (see section 10.1). • Your handset may be out of range of the base. Move closer to the base unit and check the handset number is shown on the Status bar. No handset ring tone.
-
Page 60: General Information
General Information 31 GeneRal InfoRMaTIon If your product is not working properly: • Read this User’s Guide and check the troubleshooting section. • Contact Customer Service at: US and Canada: (1) 866-779-1632 Important Safety Instructions Follow these safety precautions when using your phone to reduce the risk of fire, electric shock, and injury to persons or property: 1. -
Page 61: Installation Guidelines
General Information Installation Guidelines 1. Read all instructions and save them for future reference. 2. Follow all warnings and instructions marked on the product. 3. Do not install this product near a bath tub, sink, or shower. 4. Operate this phone using only the power source that is indicated on the marking label. -
Page 62: Fcc, Acta And Ic Regulations
fCC, ACTA and IC Regulations 32 fCC, aCTa and IC ReGulaTIons fCC Part 15 This equipment has been tested and found to comply with the requirements for a Class B digital device under Part 15 of the Federal Communications Commission (FCC) rules. - Page 63 fCC, ACTA and IC Regulations with this product. It is designed to be connected to a compatible modular jack that is also compliant. An RJ11 jack should normally be used for connecting to a single line and an RJ14 jack for two lines.See Installation Instructions in the User’s Guide.The Ringer Equivalence Number (REN) is used to determine how many devices you may connect to your telephone line and still have them ring when you are called.
-
Page 64: Industry Canada
Industry Canada 33 IndusTRy Canada Operation is subject to the following two conditions: (1) this device may not cause harmful interference, and (2) this device must accept any interference, including interference that may cause undesired operation. The term “IC: “ before the certification/registration number only signifies that the Industry Canada technical specifications were met. -
Page 65: Technical Specifications
Technical Specifications 34 TeCHnICal sPeCIfICaTIons General Operating System Android OS 4.2.2 (Jelly Bean) battery Information DLG Power Battery Co. Ltd. battery Model BM25GM725 battery Type 3.7V Li-Polymer, 2500mAh Only use the provided battery Screen Size 6" TFT LCD, WVGA , 800 x 480 pixel Panel Capacitive Multi Touch (5 Fingers) Connectivity...
Need help?
Do you have a question about the Smart 66 and is the answer not in the manual?
Questions and answers