
Related Manuals for JBL GT4.0c


Summary of Contents for JBL GT4.0c
- Page 1 GRAND TOURING SERIES Automotive Component Systems GT 4.0 c , GT 5.0 c , GT 6.0 c O w n e r ’ s M a n u a l G E N U I N E J B L...
-
Page 2: Autosound At Its Best
If, after having read it, you decide that you would rather leave installa- tion to a professional, consult your JBL Grand Touring Dealer. Autosound at Its Best Similarly, the woofer cones are manufactured with a proprietary Your JBL Component System is... -
Page 3: Tweeter Installation
Component System. Important Paperwork Before proceeding, be sure to put the sales receipt from your JBL Component System purchase in a safe place. It is necessary to vali- date your Limited Warranty. Having access to the receipt is... - Page 4 FLUSH MOUNT 1 Line up tab with slot on bracket Push tweeter into bracket and turn clockwise Figure 2 Typical installation of the GT4.0c and GT5.0c woofers with grilles as shown in Figure 2a. GTC04 WIRING HARNESS CONNECT AMPLIFIER Lead from GTC04 tweeter Small 0.11"...
- Page 5 Tweeter Output Level high-pass filter as well as a pro- tection device that keeps the The GTC04 is a very efficient tweeter from being over-exerted tweeter. If there is a need to by low frequencies that it was not lower the tweeter output level, designed to reproduce.
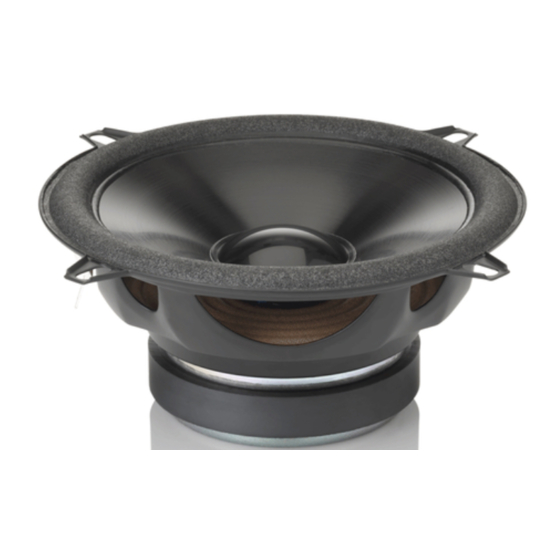
- Page 6 Installation of the GT4.0c woofer as shown in Figures 4a and 4b. Removable Mounting Ears on GT4.0c Bend up and down repeatedly to break off or use tin snips. • Some Toyota installations may require mounting ears to be removed from opposite sides.
- Page 7 Installation of the GT6.0c woofer Figure 5a with the Intermount II (pat. pend.) mounting system is shown in Figures 5a, b, c. Mounting Ring Mounting Hooks Rotate Lock Slots for Mounting Foam Hooks Gasket Rotate Mounting to Lock Slots Mounting Hooks Front View Mounting for US 6-1/2"...
- Page 8 Figure 5d Hole Cutout Front Mounting Mounting the GT6.0c woofer in 165/170mm DIN (European) installations using the Intermount II Clips clips shown in Figures 5d and 5e. Mounting Surface Figure 5e Rear Mounting...
-
Page 9: Component Placement
Component Placement 2. The best center image will be Because of the JBL Component achieved when the distance from System’s small size and ex- the left speaker and the right tremely versatile mounting speakers are as equal as possi- options, there are an almost infi- ble from your listening position. -
Page 10: System Design
System Design There are a variety of system options available with the Component System. The simplest configuration is to use them full range with their built-in passive crossovers by connecting them to the output of a head unit or an amplifier (Figures 7 and 8). -
Page 11: Installation Warnings And Tips
Electronic Lo-Pass Hi-Pass Crossover Amp for Woofers f < 5khz Left Midwoofers – GTC04 Tweeters Left GTC04 and GTC Midwoofer Connected Channel Directly to Amplifier Figure 9 Installation Warnings and Tips • Be careful not to cut or drill Amp for into fuel tanks, fuel lines, brake Tweeters or hydraulic lines, vacuum lines... - Page 12 Clear,” we suggest that you step where you hear distortion in the up to a JBL power amplifier form of either signal distortion which has an RMS power rating from an overdriven amplifier or...
- Page 13 Frequency Response 50Hz – 21kHz Sensitivity 91dB Mounting Depth Drop In: 2-3/16" Bottom Mount: 2-9/16" GT5.0c GT4.0c Grand Touring Automotive Grand Touring Automotive 5-1/4" 2-way Component 4" 2-way Component System System 1" Titanium Composite 1" Titanium Composite Balanced-Drive Neodymium Balanced-Drive Neodymium Magnet Tweeter with 1/2"...
-
Page 14: Warranty Terms
JBL’s liability is limited to the repair or replace- ment, at our option, of any defective product and shall not Do Not Return Products to the JBL Factory without Authorization. They will be Returned Unopened. You are responsible for transport- ing your product for repair or replacement. - Page 16 Declaration of Conformity We, JBL Europe A/S Kongevejen 194B DK-3460 Birkerød DENMARK declare in own responsibility, that the products described in this owner’s manual are in compliance with technical standards: EN 50 081-1/1992 EN 50 082-1/3.1995 Steen Michaelsen JBL Europe A/S Birkerød.
Need help?
Do you have a question about the GT4.0c and is the answer not in the manual?
Questions and answers