
Related Manuals for AUVIO 16-913

Summary of Contents for AUVIO 16-913
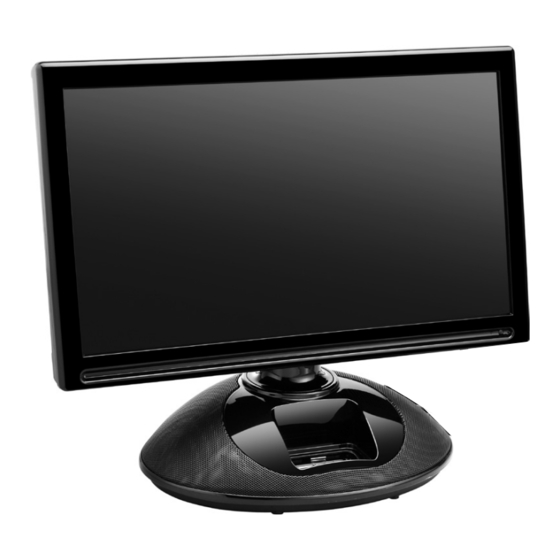
- Page 1 T H E PE RFORMAN C E Y O U N E ED 19” LCD HDTV with Dock for iPod ® User’s Guide 16-913 Please read this user’s guide before using your new TV.
-
Page 2: Table Of Contents
Contents Important Safety Instructions .....................4 Overview ..........................7 Features ..........................7 Package Contents ......................7 Setup ........................... 11 Install Remote Control Batteries ................. 11 Connect the Power Cord ....................11 Connecting an Antenna ....................12 Indoor Antenna .......................12 Outdoor Antenna ....................12 Connecting an HDMI Device ..................12 Connecting a Component Video Device ..............13 Connecting an S-Video Device ..................13 Connecting a Composite Video Device ..............13... - Page 3 Search for Channels Manually ................21 View the Channel List.....................21 Add or Delete Favorites ..................21 Edit a Channel Label ....................21 General Settings ......................22 Parental Control Options ..................22 Set the Time and Date ....................23 Set Closed Captions ....................24 Change Menu Settings ...................24 Change Input Labels ....................25 Reset to Factory Defaults ..................25 Change PC Settings .....................25...
-
Page 4: Important Safety Instructions
Important Safety Instructions Read these instructions. All the safety and operating instructions should be read before this product is operated. Keep these instructions. The safety and operating instructions should be retained for future reference. Heed all warnings. All warnings on the appliance and in the operating instructions should be adhered to. - Page 5 WARNING: To reduce the risk of fire or shock hazard, do not expose this product to rain or moisture. CAUTION RISK OF ELECTRIC SHOCK. DO NOT OPEN. CAUTION: TO REDUCE THE RISK OF ELECTRIC SHOCK, DO NOT REMOVE COVER OR BACK. NO USER-SERVICEABLE PARTS INSIDE.
- Page 6 Child Safety Tips Severe injuries can occur if children climb, grab, or jostle an improperly secured TV. To significantly reduce the risk of injury, proper steps should be taken. Displaying on a TV Stand/Entertainment Center: Make sure your TV is situated on an appropriately-sized TV stand, generally one that is larger than the TV.
-
Page 7: Overview
Overview Features Widescreen display provides 16:9 aspect ratio and has a native resolution of 1366×768 „ (720p) HDMI, component, composite, antenna, and VGA inputs for a variety of connection „ options Compatible with High Definition broadcasts „ Allows iPod video playback „... -
Page 8: Power Indicator
CHANNEL +/– VOL +/VOL – Browse through channels. Press + to increase volume, or – to decrease it. On the main menu and source screens, press On the main menu and source screens, press to to go go and . MENU Access and navigate the TV menu. -
Page 9: Component Video
PC-RGB (VGA) S-VIDEO HDMI TUNER Connect to a Connect S-Video Connect to HDMI Connect an antenna computer signal from a devices via HDMI or cable for TV camcorder or VCR. cables to transmit reception. audio and video. AV-IN (Composite) Component Video PC AUDIO SERVICE Connect A/V composite video... - Page 10 S.MODE MTS – Select alternate audio if Select an audio preset. available. POWER – Turn the TV on or to standby. P .MODE – Select a video preset. LED Indicator – Blinks red while remote is in use. SLEEP – Set the sleep timer. Number Buttons (0-9, –) Set the channel or enter f –...
-
Page 11: Setup
Setup Install Remote Control Batteries Press the tab to remove the battery cover. Insert the two supplied AAA batteries as indicated by the polarity symbols (+ and –) marked on the remote control. Replace the battery cover. Battery Notes: Dispose of batteries promptly and properly. Do not burn or bury ... -
Page 12: Connecting An Antenna
Connecting an Antenna Indoor Antenna Plug one end of a 75-ohm coaxial cable with an F connector (not supplied) to the TUNER jack on back of the TV, and its other end to the antenna (not supplied). Outdoor Antenna For best reception, use a high-quality outdoor antenna (not supplied). Plug one end of a 75-ohm coaxial cable with an F connector (not supplied) to the TUNER „... -
Page 13: Connecting A Component Video Device
Connecting a Component Video Device Connect the device’s component outputs (Y/Pb/Pr) to the COMPONENT jacks on the back of the TV. Match the colors on the connection cables with the colors on the jacks. For component cables and jacks, Green = Y, blue = Pb, and red = Pr. Use an audio cable (not supplied) to connect a device’s audio output jacks to the AV-IN audio jacks on the back of the TV. -
Page 14: Connecting A Pc
Connecting a PC Your TV automatically adjusts the screen resolution and saves it when receiving a VGA signal from a PC. If the receiving signal is not the standard mode signal, refer to the table to set your PC’s resolution. Resolution Vertical Frequency Horizontal Frequency... -
Page 15: Connecting To A Home Theater
Connecting to a Home Theater Connect Audio and Video through your A/V receiver/amplifier Connect audio and video cables from your DVD player or other device to your A/V receiver/amplifier, then connect the receiver/amplifier to the TV. Refer to the instructions from your A/V receiver/amplifier or speaker system to make speaker connections. -
Page 16: Basic Operation
Basic Operation Initial Setup Menu Initial Setup Menu Before watching any programs, you must configure your TV. 1. Plug the TV’s power cord into a standard AC outlet, then press POWER. The Initial Setup Menu appears. 2. Press or to select a language: English, French, or Spanish and press ... -
Page 17: Ipod Operation
iPod Operation Connect your iPod or iPhone. Wait 3 to 5 seconds until the iPod menu appears. Note: The iPod charges automatically while connected to the TV. When it is finished charging, appears. Press IPOD MODE to switch from Normal mode to Manual mode (switch controls from the ... -
Page 18: Advanced Settings
Advanced Settings Picture Settings Use Preset Picture Settings Change picture settings based on preselected criteria. Press MENU on the TV or remote control. The main menu displays. Press or on the TV or remote control to select Picture, then press OK or . Press ... -
Page 19: Audio Settings
Note: You can also use the ASPECT button on the remote control to cycle through the aspect ratio options. Color Temperature Normal – Does not enhance colors for warmth or coolness. „ Cool – Provides more blue/green tones. „ Warm – Provides more yellow/orange/red tones. „... -
Page 20: Advanced Audio Settings
Balance Use to move the sound to the right speaker and to move sound to the left speaker. Defaults to 0. Audio Channel Mono „ Stereo (default) „ SAP (second audio program) „ Audio Language 1 and 2 Set up to two different languages for alternate language broadcasts: English, Spanish, or French. -
Page 21: Search For Channels Manually
Search for Channels Manually Follow steps 1 and 2 under “Set the Tuning Band. ” Press or to select Manual Add Channel, then press OK or . Press to highlight Channel Type, then press to select Analog or Digital channel type. Press ... -
Page 22: General Settings
General Settings Parental Control Options To prevent children from viewing adult programs, you can block specific shows or age ratings. Press MENU on the TV or remote control. The main menu displays. Press or to select Settings, then press OK or . -
Page 23: Set The Time And Date
Set Advanced Parental Lock Ratings Follow Steps 1 through 4 under “Parental Control Options.” Press or to select Advanced Rating, then press OK or to select ON. Press or to select Advanced Parental Lock, then press OK or . -
Page 24: Set Closed Captions
Set Closed Captions Closed Captions (CC) are subtitles that display the dialogue, narration, and sound effects of a TV program. You can select whether or not to display them and whether or not to mute the sound while they’re displayed. Closed Captions are not available for all channels. -
Page 25: Change Input Labels
Change Input Labels To specify which type of input goes to which device: Press MENU. The main menu displays. Press or to select Settings, then press OK or . iPod Press or to highlight Input Labels, then press . Use ... -
Page 26: Additional Information
Additional Information Troubleshooting Problem Possible Solution No picture/sound Make sure the power cord is plugged in. The batteries in the remote may be dead. Replace the batteries and try again. The power outlet may be faulty. Plug in another device. If it does not work, have an electrician inspect the outlet. -
Page 27: Specifications
(1) This device may not cause harmful interference, and (2) this device must accept any interference received, including interference that may cause undesired operation. Product 19” LCD HDTV with Dock for iPod Model 16-913 Responsible Ignition L.P ., Party 3102 Maple Ave Suite 450... -
Page 28: Limited Warranty
Limited Warranty This product is warranted against defects in materials and workmanship under normal use by the original purchaser for one (1) year after the date of purchase from an authorized retailer. THERE ARE NO OTHER WARRANTIES. This warranty does not cover: (a) damage or failure caused by or attributable to abuse, misuse, failure to follow instructions, improper installation or maintenance, alteration, accident, or excess voltage or current;... - Page 30 RoHS environmental restrictions. © 2009. Ignition L.P . All rights reserved. Auvio is a trademark used by Ignition L.P . Package and user’s guide are recyclable. User’s guide contains recycled material. Printed 09A09 iPod is a trademark of Apple Inc., registered in the U.S.
Need help?
Do you have a question about the 16-913 and is the answer not in the manual?
Questions and answers