Table of Contents
Advertisement
Advertisement
Table of Contents

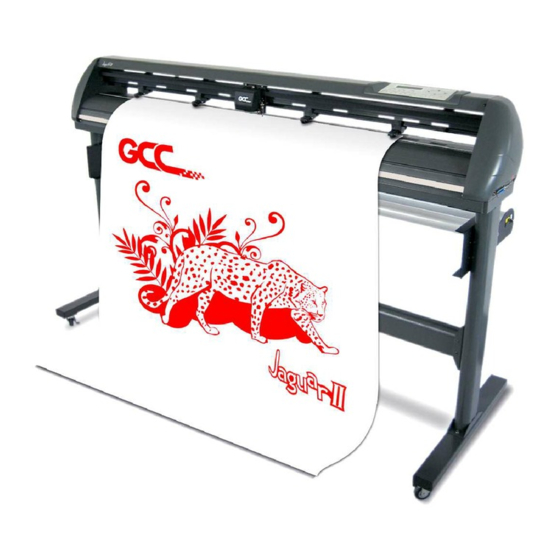
Summary of Contents for Great Computer JII-61
- Page 1 User Manual Great Computer Corporation © V2 2003/7/3...
-
Page 2: Important Information
Jaguar II User Manual Important Information Thank you for purchasing the SignPal Series – Jaguar Ⅱ Ⅱ Ⅱ Ⅱ . Before you use the cutting plotter, please make sure that you have read the safety precautions and Instructions below. Caution SAFETY PRECAUTIONS! For safety concern, please always hold the cutter firmly from the bottom when moving it. - Page 3 Jaguar II User Manual HOW TO CUT 3mm LETTERS ? To obtain good quality output, narrow width media is suggested. However, if wide media is used, you should: Position two pinch rollers as close as possible to both edges of the cutting area. Make sure the loaded media is held flat with equal tension across the platen.
- Page 4 Jaguar II User Manual Then turn the roll downward to make an equal tension across the media (See Figure 0-2 ♪ Make sure that the media tension is equally distributed from left to right. If the media were not tighten enough against the platen, it would cause tracking problems.
- Page 5 Jaguar II User Manual Warning Never press the top release grip and pull the bottom release grip at the same time as the pictures shown below: ○ ○ ○ ○ (CORRECT) ╳ ╳ ╳ ╳ (INCORRECT) Press down Press down Stop DISABLE Note:...
-
Page 6: Quick Menu
Jaguar II User Manual Quick Menu 1. Power ON. (LED lights on) 2. Place the media and lower down the pinch rollers (must position above the grid drums). 3. Sizing - Press the related Arrow Keys for roll (cut from the current position), edge (cut from the edge) or single. -
Page 7: The Specification For Gcc Blade
Jaguar II User Manual The Specification for GCC Blade For cutting general signage vinyl. Blade with largest angle. BK07026A BK07026A BK07026A BK07026A GCB- - - - 145S 145S 145S 145S The blade is 45°with Yellow Cap Yellow Cap Yellow Cap Yellow Cap, 0.25 mm blade offset and 5 miles life. -
Page 8: About The Tool
Jaguar II User Manual About the Tool A generic term referring to the blade that cuts the sheet, the pen that does plotting, and the LED bombsight (option) used for pointing to the reference point. OFFSET is the distance that the blade tip is displaced from the centerline of the blade. Blade Central line Blade tip... -
Page 9: Table Of Contents
User Manual Jaguar II Important Information Quick Menu The Specification for GCC Blade About the Tool 1. – Setting Up Your Sign Cutting Plotter Checking supplied items Front View of SignPal Jaguar II Back View of SignPal Jaguar II Whole View of SignPal Jaguar II Left Hand Side of Jaguar II Right Hand Side of Jaguar II Control Panel... - Page 10 User Manual Jaguar II Cutting Plotter Computer Communication Problems Software Problem Cutting Quality Problem Appendix – Specification Table of Contents...
-
Page 11: Setting Up Your Sign Cutting Plotter
Jaguar II User Manual 1. Setting Up Your Sign Cutting Plotter Checking supplied items Please check carefully whether you have received all the items listed below. If you found any item missing, please consult your local dealer. Cutting Plotter Stand Set (Only for Jaguar JII-132S/101S/76S) 1 piece of H-shape stand 2 pieces of stands 1 piece of stand beam... - Page 12 Jaguar II User Manual Front View of Jaguar (Figure 1-1) Grid Drums move the media back and forth during operation. Tool Carriage performs the – cutting with the installed blade and pen. Control panel – consists of 14 control keys and 1 LED and 1 LCM showing messages and menus.
- Page 13 Jaguar II User Manual Back View of Jaguar Figure 1-2 Lever - raises or lowers pinch rollers. Pinch Rollers - hold the media during cutting. Figure 1-2 1.4 Whole View of Jaguar Figure 1-3 Roll Holder - Holds and Roll Holder Guide roll media supplies the Bushes...
-
Page 14: Left Hand Side Of Jaguar
Jaguar II User Manual 1.5 Left Hand Side of Jaguar ( Figure 1-4 Power Switch – On when switches to [I]; Off to [O] Fuse – 3 Amp. AC Power Connector – used to insert the AC power cord. Figure 1-4 Right Hand Side of Jaguar ( Figure 1-5 Serial Interface Connector (RS232C) –... -
Page 15: Control Panel
Jaguar II User Manual Control Panel (Figure 1-6) Please refer to the Chapter3 – the description of operation for detailed explanation. Figure 1-6 LCD Display Screen: various functional and error message are displayed here. Power LED: it lights up when the power is on. 4 Arrow Keys: used to move the carriage or sheet or changing setting. -
Page 16: Installation And Operation Procedure
Jaguar II User Manual 2. Installation and Operation Procedures Installation Caution 1 Make sure the power switch is off before installing the cutting plotter. Carefully handle the cutter to prevent any injuries. Caution 2 Choosing a proper place before setting up the cutting plotter Before installing your cutting plotter, select a suitable location, which meets the following conditions. -
Page 17: Stand & Flexible Media Support System Installation
Jaguar II User Manual Stand & Flexible Media Support System Installation Step 1 Please examine supplied items in the accessory box of stand carton: 1 piece of M6 L-shape hexagon screw driver 1 piece of M5 L-shape hexagon screw driver 24 pieces of M6 screws 4 pieces of hold plugs Step 2... - Page 18 Jaguar II User Manual Step 4 Position the stand beam perpendicularly to part and put the screws into the holes and tighten them as Figure 2-3. Then the complete picture of stand will be like Figure 2-4 stand tand beam H-stand screw Figure 2-3...
- Page 19 Jaguar II User Manual Step 7 Place two roll holders into the holes in the roll holder support ( Figure 2-7 Roll holder support Roll holders Figure Step 8 Lastly, the complete picture will be shown like below. (see Figure 2-8 Figure 2-8 Installation and Operation of Sign Cutting Plotter...
- Page 20 Jaguar II User Manual 2.2 Desktop Flexible Media Support System Installation (Jaguar61) Step 1 Please examine the following items in stand carton’s accessory box: 1 set of Roll Media Flange (2 pieces) 1 set of Roll Holder (2 pieces) 1 set of Roll Holder Guide Bushes (4 pieces) 1 set of Roll Holder Support (2 pieces) 1 set of Desktop Support Bracket (2 pieces) 4 pieces of Plastic Foot...
- Page 21 Jaguar II User Manual Step 4 Roll Holder Assembly Put the bottom of machine in lateral, and position the Roll Holder Assembly beside the bottom of the machine. Then, insert the M6 screws into the holes of Roll Holder support assembly and tighten them with M5 L-shape screwdriver.
-
Page 22: Blade Installation
Jaguar II User Manual 2.3 Blade Installation is the illustrator of the blade holder. Insert a blade into the bottom of the blade Figure 2-10 holder and remove the blade by pushing the pin. Make sure that your fingers are away from the blade tip. - Page 23 Jaguar II User Manual Step 3 Adjust the blade tip to suitable length by screwing “Blade tip adjustment screw” clockwise or count-clockwise. (Figure 2-13 Tips: “The proper length” means the blade’s length is adjusted 0.1mm more than film’s thickness. That is, if the thickness of film is 0.5mm, then blade’s length is properly adjusted 0.6mm and it can completely cut...
-
Page 24: Media Loading
Jaguar II User Manual 2.4 Media Loading 2.5.1 Loading the Sheet Media To load the media properly, please follow the procedures listed below: Lever Step 1 Use the lever on the upper right side of the cutting plotter to raise or lower down pinch rollers. -
Page 25: Loading The Roll Media
Jaguar II User Manual Step 5 Turn on the power, the tool carriage will measure the size of the media automatically. And the plotting cutter begins to work. Note: Always adjust the position with the pinch roller raised. Move the pinch roller by applying force at the rear portion of the pinch roller support. Do not move it by holding its front rubber roller ( Figure 2-20 Incorrect... - Page 26 Jaguar II User Manual Option A (Recommended) Insert the two roll holders into the roll media support set then place the roll media directly between the two roll holders ( Figure 2-22 Figure 2-22 Option B (Use the media flanges) Insert a roll media flange at the end of each roll media and tighten the thumbscrew until the roll media is firmly gripped (see Figure...
- Page 27 Jaguar II User Manual 4. Then turn the roll downward to make an equal tension across the media ( Figure 2-26 Note : Make sure that the media tension is equally distributed from left to right. If the media were not tighten enough against the platen, it would cause tracking problems! Figure 2-26...
-
Page 28: Tracking Performance
Jaguar II User Manual 2.6 Tracking Performance In order to achieve the best tracking performance for a long plot, we recommend some significant media loading procedures described as follows: 1. If the media length is less than 4 m, leave the margin of 0.5mm—25mm in the left and right edges of the media (see Figure 2-27 0.5mm - 25mm... -
Page 29: Adjusting The Cutting Force And Offset
Jaguar II User Manual 2.7 Adjusting the Cutting Force and Offset Before sending your designs for cutting, you may perform a “cut test” to generate satisfactory cutting results. “Cut Test” should be repeated until the appropriate cutting conditions for the media are discovered. -
Page 30: Description Of Features
Jaguar II User Manual 3. Descriptions of Features This chapter describes the button operation with the LCM menu flowcharts of Jaguar II. When the cutting plotter is ready for use as described in Chapter 1 & 2, all functions are under default parameters. -
Page 31: Setting Up Menu—Jaguar Ii In Off-Line Mode
Jaguar II User Manual 3.2 Setting up Menu—Jaguar II in off line mode Press[ON/O FF LINE] switch to offline m ode O ffline For System Setup 0-600gram with an increm ent of 5 gf [Force Key] Force: 80 gf OK: Enter 0.000-1.000m m with an increm ent of 0.025m m [OFFSET KEY] Offset 0.275 m m... -
Page 32: Description Of Menu Items
Jaguar II User Manual 3.3 Description of Menu Items This describes the items and functions available when you press Menu or Key Function Setting Default Roll: Sizing media width. Tracking Media sizing 25 meters Edge Sizing media width and pull the media back until Tracking the front paper sensor open 25 meters... - Page 33 Jaguar II User Manual Press [MISC. KEY] will enable fine-tune movement while moving tool carriage. Press [MISC KEY] again can disable fine-tune movement. [PAUSE/RESUME] is to temporarily terminate [Pause/Resume] operation machine. Press [Pause/Resume] again will resume the cutting job. [ONLINE/OFFLINE] [ONLINE/OFF LINE KEY] is to stop the cutting job or aborts the change of the setting.
- Page 34 Jaguar II User Manual These setting are used to connect the Communication communication between host computer and cutter. Baud Rate is to determine the speed of data transmission. Data Bits refers to the size of one block of data and Parity is used to check if data was revived correctly or not.
- Page 35 Jaguar II User Manual Scale Length & This “Scaling” feature is used to adjust the error Width on the length and width, which may cause by the thickness of the media. The Denominator is the actual length, and the Numerator is the ideal length measured from the resultant.
- Page 36 Jaguar II User Manual Set Panel Setup Setting to “Accept setup command”, the cutter receives changes of set up commands from the software when the machine is disabled. Setting to “Control panel only”, the cutter will not accept any set up command from the software, the Force, Speed, Cutting Quality, and Offset must directly changed from the Control Panel of the cutter.
-
Page 37: Connecting Cutting Plotters
Jaguar II User Manual 4. Making Connections The cutting plotter communicates with a computer through a USB (Universal Serial Bus), Parallel port (Centronics) or a Serial port (RS-232C). This chapter shows you how to connect the cutting plotter to a host computer and how to set up the computer/cutting plotter interconnection. -
Page 38: Parallel Transmission
Jaguar II User Manual 4.2 PARALLEL TRANSMISSION 4.2.1 Connecting to the Parallel Port (Centronics) 1. Connect a parallel cable to the cutting plotter and the host computer (Figure 4-1) 2. Set up the output port LPT1 or LPT2 from your software package 3. - Page 39 Jaguar II User Manual MODE COM2: 9600, N, 8, 1, P Then, use TYPE command to output via COM2 if COM2 is the assigned output port. TYPE filename > COM2 Tip: Add the MODE command line to your system’s AUTOEXEC.BAT to automatically execute MODE command every time you want to output your data at the DOS prompt via serial connection.
-
Page 40: Maintenance
Jaguar II User Manual 5. Maintenance This chapter explains the basic maintenance (i.e. cleaning the cutting plotter) required for the cutting plotter. Except for the below mentioned, all other maintenance must be performed by a qualified service technician. Cleaning the Cutting Plotter In order to keep the cutting plotter under good condition and best performance, you need to clean the machine properly and regularly. -
Page 41: Cleaning The Grid Drum
Jaguar II User Manual Cleaning the Grid Drum 1. Turn off the cutting plotter, and move the tool carriage away from the area needed to be cleaned. 2. Raise the pinch rollers and move them away from the grid drum for cleaning. 3. -
Page 42: Software Problem
Jaguar II User Manual 6. Trouble Shooting This chapter helps you to correct some common problem you may come across. Prior to getting into the details of this chapter, please be sure that your application environment is compatible with the cutting plotter. Note: Before having your cutting plotter serviced, please make certain that the malfunction is in your cutting plotter, not... -
Page 43: Operational Problems
Jaguar II User Manual 6.2 Operational Problems Some mechanical problems or failure during operation will cause some problems. The error messages shown on the LCM present the problem first, and followed by recommended actions. If the problem still exists after the recommended actions have been done, have your cutting plotter serviced. - Page 44 Jaguar II User Manual Cutting Plotter/Computer Communication Problems The messages showed below present problems in relation to cutting plotter/computer communication. Is the connection cable connected Communication Error to the cutting plotter and computer Setup: MISC. key properly? Has the interface setting been Refer to Chapter 4 - done correctly? Connecting your cutting...
-
Page 45: Software Problems
Jaguar II User Manual Software Problems Check the following first: Does your software package indicate that it will work with your computer and cutting plotter? Does your software support HP-GL and HP-GL/2 drivers? (* check the configuration settings of your software.) Does the cutting plotter interface Most well known cutting softwares in match the requirements of your... -
Page 46: Cutting Quality Problem
Jaguar II User Manual Cutting Quality Problems Is the blade installed correctly and the blade holder fastened securely? Refer to Chapter 2.3 Is the blade dull or “ Blade Installation”. chipped? Replace Is tool force set up with a new properly? (The default blade for tool force is 80 gf) - Page 47 AC 100~240V (auto switch) Power Consumption Max. 110watts Environment Humidity 30% ~ 70% relative humidity (operating) 0°C~55°C / 32°F~131°F(operating) Environment Temperature -40°C~75°C / -40°F~167°F(storage) The above specification is subject to change without prior notice. Stand for Jaguar JII-61 is optional. Specifications...
Need help?
Do you have a question about the JII-61 and is the answer not in the manual?
Questions and answers
I have an old cutter that no longer communicates with new computer and wondering if they are still enough the same that I could just replace mother board so it would work. Everything about the cutter is still fantastic.