Table of Contents
Advertisement
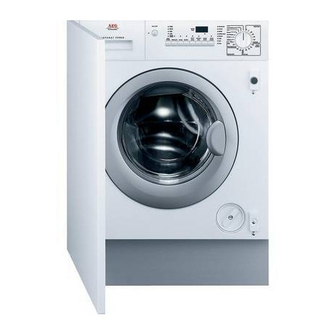
LAVAMAT TURBO 12710 VIT
LAVAMAT TURBO 14710 VIT
Instruction Booklet
5 mm
PERFEKT IN FORM UND FUNKTION
Washer-Dryer
ON/
1200
OFF
WASH
900
TIME
700
500
RINSE
HOLD
SPIN
PRE-
STAIN
QUICK
EASY
DRYING
SPEED
WASH
IRON
TIME
L 12710 VIT
RESET
PREWASH
COTTON
MINIPROGRAMM
WASH
95
SPIN
60 E
RINSE
DRAIN
60
DRAIN
SOFT-
50
ENER
SPIN
40
RINSES
DRY
DELAY
START
START
PAUSE
SOAK
30
CLEAN
FILTER
DRYING
COLD
END
EASY-
60
30
CARE
50
WOOL
40
30
40
40
30
DELICATES
DRYING
Advertisement
Table of Contents

Related Manuals for AEG LAVAMAT TURBO 12710 VIT


Summary of Contents for AEG LAVAMAT TURBO 12710 VIT
- Page 1 LAVAMAT TURBO 12710 VIT LAVAMAT TURBO 14710 VIT Washer-Dryer Instruction Booklet L 12710 VIT RESET 1200 PREWASH COTTON MINIPROGRAMM WASH WASH TIME SPIN 60 E RINSE DRAIN DRAIN SOFT- RINSE ENER SPIN HOLD RINSES SPIN PRE- STAIN QUICK EASY DRYING...
- Page 2 If you require assistance or advice on your appliance, please contact our cus- tomer care department by letter or telephone: Customer Care Department AEG/ELECTROLUX Major Appliances Addington Way Luton Bedfordshire LU4 9QQ Tel: 08705 350 350* * calls to this number may be recorded for training purposes.
-
Page 3: Table Of Contents
Contents Safety instructions ............6 Disposal . - Page 4 Contents And in which form?............23 TRADITIONAL POWDERS.
- Page 5 Contents Something not working? ..........38 Troubleshooting .
-
Page 6: Safety Instructions
• Repairs to the machine must be carried out only by qualified personnel. Repairs carried out by inexperienced persons could cause injury or serious malfunctioning. Contact your local AEG/ELECTROLUX Service Force Centre. • Never start the machine if the mains cable is damaged or the control pan- el or worktop are damaged allowing inner components to be accessible. -
Page 7: Child Safety
Safety instructions Child safety • This appliance is designed to be operated by adults. Children should not be allowed to tamper with the controls or play with the appliance. • Pets and children have been known to climb into washing machines. Please check the drum before use. -
Page 8: Disposal
Disposal Packaging materials The materials marked with the symbol are recyclable. >PE<=polyethylene >PS<=polystyrene >PP<=polypropylene This means that they can be recycled by disposing of them properly in appro- priate collection containers. Machine Use authorised disposal sites for your old appliance. Help to keep your coun- try tidy! The symbol on the product or on its packaging indicates that this prod-... -
Page 9: Tips For Environmental Protection
Tips for environmental protection To save water, energy and to help protect the environment, we recommend that you follow these tips: • Normally soiled laundry may be washed without prewashing in order to save detergent, water and time (the environment is protected too!). •... -
Page 10: Main Features Of Your Washer-Dryer
Main features of your washer-dryer • Programme and temperature setting using the programme selector. • Stain option for effectively treating stained washing. • Energy saving programme for normally soiled cotton items. • SOAK programme for heavy soiled items. The machine performs a soak at 30°C. -
Page 11: Description Of The Appliance
Description of the appliance Front view Detergent drawer Control panel L 12710 VIT RESET 1200 PREWASH COTTON MINIPROGRAMM WASH WASH TIME SPIN 60 E RINSE DRAIN DRAIN SOFT- RINSE ENER SPIN HOLD RINSES SPIN PRE- STAIN QUICK EASY DRYING DELAY START 5 mm SOAK... -
Page 12: Control Panel
Description of the appliance Control panel L 12710 VIT RESET 1200 PREWASH COTTON MINIPROGRAMM WASH WASH TIME SPIN 60 E RINSE DRAIN DRAIN SOFT- RINSE ENER SPIN HOLD RINSES SPIN PRE- STAIN QUICK EASY DRYING DELAY START SOAK SPEED WASH IRON TIME START... -
Page 13: On/Off Button
Description of the appliance Position 60E corresponds to the ENERGY SAVING programme for nor- mally soiled laundry, extended washing time. The washing temperature will decrease (cannot be combined with QUICK). Position DRYING = drying phase; Position COLD = cold wash. ON/OFF button Press this button to switch the machine on. -
Page 14: Drying Time Button
Description of the appliance To annul the preset delay, press the START/PAUSE button, then press the DELAY START button until the symbol 0’ is displayed. Then press the START/PAUSE button again to restart the programme. DRYING TIME button If you wish to carry out a timed drying programme push the button until the drying time you want appears in the display according to the fabrics (cotton or easy cares) you have to dry. -
Page 15: Prewash
Description of the appliance To empty out water: • select the DRAIN programme to empty out the water without spin- ning. • select the SPIN programme for draining and spinning. • select the SPIN SPEED and depress the START/PAUSE button; Warning! The programme selector dial must be turned first to RESET and then to the DRAIN or SPIN programmes. -
Page 16: Display
Description of the appliance Display The display shows the following information: • Duration of the selected programme (in hours and minutes), calcu- lated automatically on the basis of the maximum recommended load for each type of fabric. • Selected drying time (max. 130 minutes for cotton and easy cares). After the programme has started, the time remaining is updated every minute. -
Page 17: Cancelling/Altering A Programme
Description of the appliance Altering an option/programme which is running To alter an option, first set the machine to PAUSE by pressing the START/PAUSE button. Any option can be modified before the machine starts it. After select- ing the new option press the START/PAUSE button again to re-start the selected programme. -
Page 18: Detergent Dispenser Drawer
Description of the appliance Detergent dispenser drawer Programme chart Compartment for prewash or soak detergent and stain remover. The prewash or soak detergent is added at the beginning of the wash programme. The stain remover is added during the STAIN-Action phase in the main wash. Compartment for powder or liquid detergent used for main wash. -
Page 19: Preparing The Wash Cycle
Preparing the wash cycle Sorting out and preparing the laundry • Sort out the laundry according to type of fabrics and care labels (see “Types of fabric and care labels”). • Empty pockets. • Remove any metal parts (safety pins, clips, etc.). •... -
Page 20: Weight Of Laundry
Preparing the wash cycle Weight of laundry Approximate Sort of laundry dry weights Bathrobes 1200 g Work shirts 300-600 g Quilt covers 700 g Sheets 500 g Blouses 100 g Hand towels 200 g Tea towels 100 g Shirts 200 g Pillowcases 200 g Night-gowns/Pyjamas... - Page 21 Preparing the wash cycle Delicates Microfibres, easy-cares or curtains marked with these symbols require a very gentle treatment. The DELICATES programme is suitable for this type of fabric. Woollens and particularly delicate items Fabrics such as wool, wool mix or silk marked with this symbol are particu- larly sensitive to machine washing.
-
Page 22: Detergents And Additives
Preparing the wash cycle Detergents and additives Which detergent?..To ensure you obtain the best wash results from your appliance, it is impor- tant to use the right detergent in your everyday wash, and only detergents recommended for use in automatic machines. To maintain the appearance of your clothes and household textiles and to make them last longer you should use different types of detergent for dif- ferent washes, whether for whites, colours or delicates. -
Page 23: And In Which Form
Preparing the wash cycle And in which form? Not only are there different types of detergent, but they are also available in different forms. Whether you chose a powder or liquid in traditional or com- pact form is your own personal choice. TRADITIONAL POWDERS Pour the powder directly into the dispenser drawer. -
Page 24: Preparing The Drying Cycle
Preparing the drying cycle As a dryer, the machine works on the condensation principle. Therefore, the water tap must be open and the drain hose must drain water into a sink or into the drain pipe, even during the drying cycle. Load max. -
Page 25: Drying Symbols On Garment Labels
Preparing the drying cycle Drying symbols on garment labels Always look at the garment label to check whether garments can be machine dried. The following symbols refer to drying: Machine drying is usually possible Normal drying (normal temperature) Gentle drying (reduced temperature) Do not machine dry Duration of the drying cycle The drying time can vary according to... -
Page 26: Additional Drying
Preparing the drying cycle Additional drying Should the laundry still be too wet at the end of the programme, set anoth- er short drying cycle. Warning! To prevent the formation of creases or shrinking of fabrics, avoid excessive drying. -
Page 27: How To Wash
How to wash Load the laundry Open the door. Place the laundry in the drum, one item at a time. Distribute laundry as even- ly as possible. Close the door. Add detergent and additive Pull the drawer out till it stops. Pour the main wash detergent into compartment... -
Page 28: Selection Of The Desired Wash Programme
How to wash Selection of the desired wash programme L 12710 VIT Turn the programme selector dial to the RESET PREWASH COTTON MINIPROGRAMM WASH desired position: the lights corresponding to SPIN 60 E RINSE DRAIN DRAIN SOFT- the different phases making up the selected ENER SPIN RINSES... -
Page 29: Selection Of The Delay Start Option
How to wash Starting the programme 1. Check that the water tap is open. 2. Press START/PAUSE to start the programme. If the Delay Start option has been selected the programme will start at the end of the countdown. At the start of the programme, if the “END” light blinks for few sec- onds and on the display appears E40, that indicates that the door is open. -
Page 30: At The End Of The Programme
How to wash At the end of the programme The machine stops automatically. A blinking zero appears on the display. The END light comes on in the programme progress display, the START/PAUSE light is off. Turn the selector dial to RESET. If the RINSE HOLD option has been selected the END and the RINSE HOLD lights remain lit, the door is blocked, to indicate that the water must be emptied out before opening the door either... -
Page 31: Automatic Washing And Drying (Non-Stop Programme)
Press the START/PAUSE button to start the programme. At the end of the cycle, turn the programme selector dial to RESET and press the ON/OFF button again to switch the appliance off. Remove the laundry. Automatic washing and drying (NON-STOP programme) Warning! For NON-STOP programmes, it is also essential not to exceed the maximum load sizes of 2.5 kg for cotton and 1.5 kg for easy-cares. -
Page 32: Programme Charts
Programme chart Wash programmes Consumption* Wash Additional Max. Temp. Fabrics Energy Water Duration programme functions load min. Cotton and linen, SPIN SPEED for example nor- RINSE HOLD White mally soiled work PREWASH 5 kg 1.90 STAIN Cottons garments, sheets, QUICK household linen, EASY IRON underwear, towels. -
Page 33: Programme Charts
Programme chart Special programmes Consumption* Descrip- Additional Max. Programme Programme phases Energy Water Duration tion functions load min. Soak at 30°C for about Heavy soiled 20 minutes. Soak fabrics 5 kg Stop with water in the except wool. tub (Rinse Hold). This pro- gramme can 3 rinses with liquid... -
Page 34: Programme Chart
Programme chart Drying Drying time Degree of drying Type of fabric Max. load Spin speed mins Cotton and 1400 105-115 2.5 kg Extra dry linen 1200 110-120 Ideal for towelling (bathrobes, 1400 50-60 materials bath towels, 1 kg 1200 55-65 etc.) 1400 95-105... -
Page 35: Cleaning And Maintenance
Cleaning and maintenance After each wash At the end of the wash programme, pull the dispenser drawer out a little to let it dry. Leave the door ajar to allow air to circulate. If the machine is not used for a prolonged period: Close the water tap and unplug the appliance. -
Page 36: Door Seal
Cleaning and maintenance To remove the drawer from the machine, press the button in the rear left- hand corner. To facilitate cleaning, the top part of the additive compartment can be removed. Detergent can also accumulate inside the draw- er recess: clean it with an old toothbrush. Refit the drawer after cleaning. -
Page 37: Emergency Emptying Out
Cleaning and maintenance Water inlet filter If you notice that the machine is taking longer to fill, check that the filter in the water inlet hose is not blocked. Turn off the water tap. Unscrew the hose from the tap. To do this, depress the small yellow button on the hose. -
Page 38: Something Not Working
At the same time the light END flashes. Once the problem has been eliminated, press the START/PAUSE button to restart the programme. If after all checks, the problem persists, contact your local AEG/ELECTROLUX Service Force Centre. Problem Possible cause Solution The ON/OFF button Depress the button. - Page 39 Something not working? Problem Possible cause Solution The water tap is closed (E10). Open the water tap. The water inlet hose is Check the whole length of the squashed or kinked (E10). hose and remove the kink. The machine does not fill The small filter of the water Clean the filter.
- Page 40 Something not working? Problem Possible cause Solution The transit bolts have Check that the machine not been removed. has been unpacked as described in the Installation section. The machine vibrates or is noisy The feet have not been Carefully level the machine. adjusted.
- Page 41 Something not working? Problem Possible cause Solution The unbalance detection If the laundry is not evenly device that prevents distributed inside the drum excessive vibration during at the beginning of the spinning has cut in. spin cycle, the machine detects this and tries to redistribute it more evenly by means of a few drum rotations.
-
Page 42: Unsatisfactory Washing Results
Something not working? Unsatisfactory washing results If the laundry looks grey and lime scale is found in the drum • Too little detergent has been used. • An unsuitable detergent has been used. • Stubborn stains have not been treated prior to washing. •... -
Page 43: Technical Data
Technical data Height x Width x Depth 82x60x54.5 cm Depth with door opened 95 cm Height adjustment ± 13 mm approx. Load (depending on programme) 5 kg max. domestic Drum speed during washing max. 55 rpm Drum speed during spinning 1200/900/700/500 rpm (L12710VIT) 1400/900/700/500 rpm (L14710VIT) Water pressure... -
Page 44: Service & Spare Parts
Service & Spare Parts If after carrying out the necessary checks there is still a fault with your appliance please contact your local AEG/ELECTROLUX Service Force Centre. In guarantee customers should ensure that the suggested checks in the “Troubleshooting” section have been made as the engineer will make a charge if the fault is not a mechanical or electrical breakdown. - Page 45 Service & Spare Parts Customer care For general enquiries regarding your AEG/ELECTROLUX appliance, or further information on AEG/ELECTROLUX products please contact our Customer Care Department at the address below or visit our website at www.aeg-electrolux.co.uk Customer Care Department AEG/ELECTROLUX Major Appliances Addington Way...
-
Page 46: Guarantee Conditions
Guarantee Conditions AEG/ELECTROLUX offer the following guarantee to the first purchaser of this appliance. 1.The guarantee is valid for 12 months commencing when the appliance is handed over to the first retail purchaser, which must be verified by pur- chase invoice or similar documentation. -
Page 47: Guarantee Conditions
Guarantee Conditions European Guarantee If you should move to another country within Europe then your guarantee moves with you to your new home subject to the following qualifications: The guarantee starts from the date you first purchased your product. The guarantee is for the same period and to the same extent for labour and parts as exist in the new country of use for this brand or range of products. -
Page 48: Instructions For Installation And Electrical Connection
Instructions for installation and electrical con- nection Safety instructions for the installer • This appliance is heavy, care should be taken when moving it. • When unpacking the appliance, check that it is not damaged. If in doubt, do not use it and contact the retailer. •... -
Page 49: Dimensions Of The Appliance
Dimensions of the appliance Front view and side view L 12710 VIT RESET 1200 PREWASH COTTON WASH MINIPROGRAMM WASH TIME SPIN 60 E RINSE DRAIN DRAIN SOFT- RINSE ENER SPIN HOLD RINSES SPIN PRE- STAIN QUICK EASY DRYING DELAY START 5 mm SPEED WASH... -
Page 50: Installation
Installation Unpacking All transit bolts and packing must be removed before using the appliance. Using the supplied spanner, unscrew and remove the rear right-hand bolt and lay the machine on its back, taking care not to squash the hoses. This can be avoided by plac- ing one of the corner packing pieces between the machine and the floor. -
Page 51: Positioning
Installation Set the machine upright and remove the two remaining bolts from the back. Pull out the three plastic spacers from the holes into which the bolts were fit- ted. Plug the open holes with the plugs which you will find in the plastic bag containing the instruction booklet. -
Page 52: Water Inlet (Cold Water Connection Only)
Installation Water inlet (cold water connection only) Connect the hose to a tap with a 3/4” thread. Installation should comply with local water authority and building regulations’ requirements. Set the hose correctly by loosening the ring nut. After positioning the inlet hose, be sure to tighten the ring nut again to prevent leaks. - Page 53 Installation When discharging into a stand- 3 pin pipe ensure that the top of the standpipe is no more than 90 cm (35.4'') and no less than 60 cm (23.6'') above floor level. The drain hose may be extend- ed to a maximum of 4 metres. An additional drain hose and joining piece is available from your local Service Force Centre.
-
Page 54: In The Interest Of The Environment
Installation In the interest of the environment Washing machines and dish- washers should be connected to the FOUL drainage system, the water will then be taken to a sewage works for treat- ment before being discharged safely into a river. SHOWER It is essential that these appli- SINK TOILET... -
Page 55: Permanent Connection
The plug must not be used if the fuse cover/carrier is lost. The cover/carrier is indicated by the coloured insert at the base of the plug. A replacement cover/carrier must be obtained from your local AEG/ELEC- TROLUX Service Centre. Permanent connection... -
Page 56: Building-In
Building-in Building-in 6 0 0 This appliance has been designed to be built into the kitchen furniture. The recess should have the dimen- sions shown in picture A. When installing the appli- ance into the kitchen furni- ture ensure, if possible, the hoses are placed in either of the two recesses on the back of the appliance. - Page 57 Building-in b) Hinges 35 Ø 12.5-14 depth To mount the hinges it is necessary to drill two holes (dia. 35 mm, depth 12.5-14 mm) on the inner side of the door. The distance between the holes hobs fixing centres must be 416 mm. The distance (B) from upper edge of the door to the centre of the hole depends on the adjacent furniture's...
- Page 58 Building-in Recommendations regarding the construction and fitting of a base when the installation requires an integrated appliance to be raised Where the appliance has been raised by mounting onto a wooden base pro- vided by the installer. The material used to construct the base should have a non slip surface, be water repellent and if possible be one solid piece.
- Page 59 With the appliance installed adjust all four feet ensuring the machine is stable, and a clearance of approximately 5 mm is left between the top of the machine and the underside of the worktop. A final check for stability should be carried out with the machine on spin with a load, this will identify the need for any further fine adjustment to the feet.
- Page 60 AEG Hausgeräte GmbH Postfach 1036 D-90327 Nürnberg http://www.aeg.hausgeraete.de © Copyright by AEG 132.984.531-01-0805 Subject to change without notice. From the Electrolux Group. The world’s No. 1 choice. The Electrolux Group is the world's largest producer of powered appliances for kitchen, cleaning and outdoor use.
Need help?
Do you have a question about the LAVAMAT TURBO 12710 VIT and is the answer not in the manual?
Questions and answers