Table of Contents
Advertisement
Quick Links
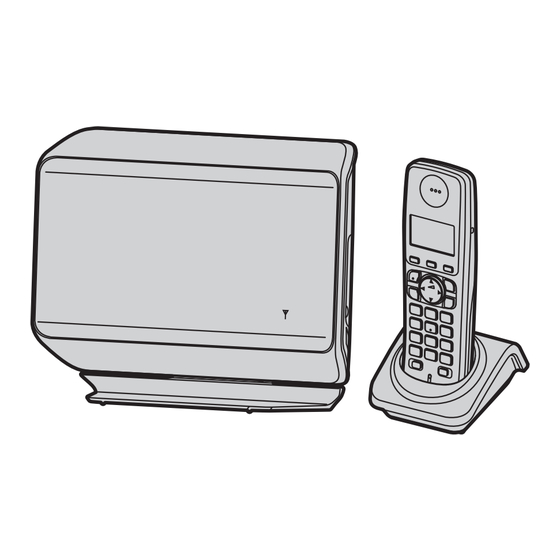
Operating Instructions
GSM Fixed Wireless Phone
KX-TW501NZ
Model No.
Thank you for purchasing a Panasonic product.
This phone is designed to operate on GSM network - GSM900 and
GSM1800.
Charge the batteries for about 7 hours before initial use.
Please read these operating instructions before using the unit and save
them for future reference.
Advertisement
Table of Contents

Related Manuals for Panasonic KX-TW501NZ


Summary of Contents for Panasonic KX-TW501NZ
-
Page 1: Operating Instructions
Operating Instructions GSM Fixed Wireless Phone KX-TW501NZ Model No. Thank you for purchasing a Panasonic product. This phone is designed to operate on GSM network - GSM900 and GSM1800. Charge the batteries for about 7 hours before initial use. Please read these operating instructions before using the unit and save... -
Page 2: Table Of Contents
Table of Contents Introduction Character entry....33 Error messages ....36 Accessory information . -
Page 3: Accessory Information
*2 See page 3 for replacement battery information. *3 The handset cover comes attached to the handset. *4 SIM card cover comes attached to the base unit. Replacement battery information Please contact your nearest Panasonic dealer for sales information. Accessory item Model number Rechargeable... -
Page 4: General Information
Introduction Expanding your phone system You can expand your phone system by Handset (optional): KX-TWA51NZ registering optional handsets (6 max.) to a single base unit. Important: L Any other handsets for conventional DECT cannot be used. General information L This equipment is designed for use in New Zealand. -
Page 5: Important Information
Important Information Operating safeguards For your safety L Unplug the product from power outlets before cleaning. Do not use liquid or To prevent severe injury and loss of life/ aerosol cleaners. property, read this section carefully before L Do not disassemble the product. using the product to ensure proper and safe L Do not allow liquids such as water, or operation of your product. -
Page 6: Important Safety Instructions
Do not tamper with the Base unit location/avoiding noise charger. Failure to follow these instructions The base unit and other compatible Panasonic may cause the batteries to swell or explode. units use radio waves to communicate with each other. -
Page 7: Other Information
Important Information L When you leave the product unused for a long period of time, unplug the product from the power outlet. L The product should be kept away from heat THIS MODEL MEETS INTERNATIONAL sources such as radiators, cookers, etc. It GUIDELINES FOR EXPOSURE TO RADIO should not be placed in rooms where the temperature is less than 5 °C or greater... -
Page 8: Specifications
Important Information Specifications <DECT Specifications> ■ Standard: DECT (Digital Enhanced Cordless Telecommunications) ■ Frequency range: 1,880 MHz to 1,900 MHz ■ RF transmission power: Approx. 10 mW (average power per channel) <GSM Specifications> ■ Standard: Dual-Band GSM 900/1800 MHz ■ Frequency band: GSM 900: 900 MHz E–GSM 900 GSM 1800: 1,800 MHz DCS 1800 ■... -
Page 9: Getting Started
Getting Started Important: L Ensure that the SIM card is fully Setting up inserted so that the SIM card cover can be properly closed. Inserting/removing the SIM Close the SIM card cover after you card finish. The SIM (Subscriber Identity Module) card must be inserted before using the unit. -
Page 10: Battery Installation
Getting Started Connections Battery installation L Use only the supplied Panasonic AC L Use only rechargeable Ni-MH AAA adaptor PQLV219AL. (R03) size. L Do NOT use Alkaline/Manganese/ ■ Base unit Ni-Cd batteries. DC IN Jack L Confirm correct polarities (S, T). -
Page 11: Note When Setting Up
For replacement, we not in use (standby). recommend using the Panasonic L Even after the handset is fully rechargeable batteries noted on page charged, the handset can be left on 3, 6. -
Page 12: Controls
Getting Started A Speaker B {j/OK} (Menu/OK) Controls C {k} (Phonebook) D {C} (Talk) Base unit E Navigator key ({^}/{V}/{<}/{>}) ? (Volume: {^}/{V}) F {s} (Speakerphone) G {R} (Recall/Flash) H Receiver I Display J {R/SEND} (Redial/Send) K {ih} (Off/Power) L {C/T} (Clear/Mute) M Dial keypad { 0}: International call “+”/ Space insert “... -
Page 13: Display/Indicator
(page GSM networks. When the base unit is 36), contact turned on, the GSM network indicator your nearest shows current signal strength using the Panasonic following colours. service centre for further details. -
Page 14: Turning The Power On/Off (Handset)
Getting Started {>} 2 times i {V}/{^}: Select your desired language. i {>} i Turning the power {ih} on/off (Handset) Date and time Power on {j/OK} Press {ih} for about 1 second. {V}/{^}: “Settings” i {>} Note: {V}/{^}: “Time Settings” i L When the PIN code request is {>} displayed, enter PIN code and press... -
Page 15: Making/Answering Calls
Making/Answering Calls {V}/{^}: Select the desired phone number. i {>} Making calls {V}/{^}: “Erase” i {>} Lift the handset and dial the phone {V}/{^}: “Yes” i {>} i {ih} number. L To correct a digit, press {C/T}. Making an international call The international prefix (+) and the When you finish talking, press destination country/region code should... -
Page 16: Answering Calls
Making/Answering Calls Pause Useful features during A pause is sometimes required when a call making calls using optional network services. To insert a pause, press and hold {*} Mute until “P” is displayed. While mute is turned on, you can hear Note: the other party, but the other party L A 3 second pause is inserted each... - Page 17 Making/Answering Calls For call waiting service users For conference call service (network service) users (network service) To use call waiting, you must first You can have a conversation with up to 5 subscribe to the call waiting service of parties at the same time using a network your service provider.
- Page 18 Making/Answering Calls For transferring call service users (network service) This feature allows you to transfer and connect 2 outside calls using network service. While talking, you can make or receive a call from a 3rd party. ■ When receiving another call: Press {R} to answer the 2nd call.
-
Page 19: Phonebook
Phonebook Searching by first character (using a Handset phonebook dial key) The phonebook allows you to make calls L To change the character entry without having to dial manually. You can mode: add 250 names and phone numbers. {R/SEND} i {V}/{^}: Select the character entry mode. -
Page 20: Copying Phonebook Entries
250 phonebook data entries from the phonebook of another compatible SIM card to a handset phonebook. Panasonic handset. You can also copy Important: the SIM card data to the handset L This unit is set to accept only certain phonebook. - Page 21 Phonebook {ih} Note: L If you transfer phonebook data from a blank SIM card, the transfer process is completed but with no affect whatsoever to the receiving handset’s phonebook data.
-
Page 22: Settings And Security
Settings and Security Changing the settings You can use the handset to customise the following features on the unit. Changing the settings by scrolling through the display menus {j/OK} Press {V} or {^} to select the desired top-menu. i {>} Press {V} or {^} to select the desired item in sub-menu 1. - Page 23 Settings and Security Top-menu Sub-menu 1 Sub-menu 2 Page Security PIN Code PIN Code Request Change PIN Code Call Barring Outgoing Calls Incoming Calls Barring Password *1 If you program these settings using one of the handsets, you do not need to program the same item using another handset.
-
Page 24: Special Instructions For Settings
Settings and Security L When the handset is in use, the alarm will not sound until the handset is in Special instructions standby mode. for settings L If you select “Once”, the setting changes to “Off” after the alarm sounds. Alarm You can set one of 2 different alarm Call divert (network service) -
Page 25: Special Instructions For Security
Settings and Security the 8-digit PUK code to unlock. PUK “If Unreachable” number is issued by your service Calls are diverted when the unit is out provider. of GSM network range. L If you enter the incorrect PUK code 10 Select the desired setting. - Page 26 Settings and Security will not reveal PIN code to you. If you L When you select “Activate” for forget your PIN code, contact your incoming calls, select the desired service provider. The default PIN code following option. i {>} is followed by SIM card setting. –...
-
Page 27: Registering A Unit
Settings and Security Re-enter the new 4-digit password Handset: for verifying. i {>} When the handset has been registered successfully, you hear a {ih} confirmation tone (long beep) and w stops flashing. Note: Registering a unit L When you purchase an additional handset, refer to the additional Operating additional units handset’s installation manual for... -
Page 28: Call Log
Call Log Viewing the received list and Call log calling back L The unit’s call log stores numbers in {j/OK} the following way: {V}/{^}: “Caller ID” i {>} – Recently dialled phone numbers Press {V} to search from the most (redial list, page 15). - Page 29 Call Log Storing caller information to the handset phonebook {j/OK} {V}/{^}: “Caller ID” i {>} {V}/{^}: Select the desired entry. i {j/OK} {V}/{^}: “Add Phonebook” i {>} To store the name, continue from step 3, “Adding entries”, page 19.
-
Page 30: Message
Message Listening to voice mail Voice mail service messages Voice mail is an automatic answering This unit lets you know that you have service offered by your service provider. new voice mail messages in the After you subscribe to this service, your following way depending on your service service provider’s voice mail system provider:... -
Page 31: Intercom/Locator
Intercom/Locator Note: L You can also have a conference call Intercom using network services. For details, Intercom calls can be made between see page 17. handsets if you have the additional During an outside call, press {INT} handset noted on page 4. to put the call on hold. -
Page 32: Useful Information
Useful Information To attach the base unit stand Wall mounting Place the base unit stand by fitting the tab into the slot on the base unit. Then slide the stand until it clicks. Base unit Remove the base unit stand by pushing (A) and sliding down (B). -
Page 33: Character Entry
Useful Information Character entry The dial keys are used to enter characters and numbers. Each dial key has multiple characters assigned to it. The characters that can be entered depend on the character entry mode (page 33). – Press {<} or {>} to move the cursor. –... - Page 34 Useful Information Greek character table (M) Extended 1 character table (N) L The following are used for both uppercase and lowercase: Extended 2 character table (O) L The following are used for both uppercase and lowercase:...
- Page 35 Useful Information Cyrillic character table (P)
-
Page 36: Error Messages
PIN (page 25). Enter the correct one. L The base unit does not work properly; contact Error:00x your nearest Panasonic service centre for further details. L Phonebook copy failed (page 20). Confirm the Failed other handset (the receiver) is in standby mode and try again. - Page 37 Useful Information Display message Cause/solution L You entered the incorrect PIN code 3 times, SIM Blocked therefore the SIM card is locked. Enter the 8- digit PUK code supplied by your service provider using the following method. Enter the 8-digit PUK code. i {>}/{#} Enter the new PIN code (4 to 8 digits).
-
Page 38: Troubleshooting
Useful Information Troubleshooting If you still have difficulties after following the instructions in this section, disconnect the base unit’s AC adaptor and turn off the handset, then reconnect the base unit’s AC adaptor and turn on the handset. General use Problem Cause/solution The handset does not... - Page 39 Useful Information Problem Cause/solution I cannot register a handset to a L The maximum number of handsets (6) is base unit. already registered to the base unit. Cancel unused handset registrations from the base unit (page 27). L Place the handset and the base unit away from other electrical appliances.
- Page 40 Useful Information Problem Cause/solution Noise is heard, sound cuts in L You are using the handset or base unit in an and out. area with high electrical interference. Re- position the base unit and use the handset away from sources of interference. L The GSM network signal is weak.
-
Page 41: Glossary Of Terms
AC adaptor. Insert the batteries and charge fully before use. If the unit does not work properly, contact your nearest Panasonic service centre. Caution: L To avoid permanent damage, do not use a microwave oven to speed up the drying process. -
Page 42: Warranty
6) Damage to the product caused by accident, misuse or Act of God. 7) Repairs when the product has been dismantled, repaired, modified or serviced by other than a Panasonic Authorised Dealer authorised to service that type of product. IF YOUR PANASONIC PRODUCT FAILS WITHIN THE... -
Page 43: Index
Index Received list: 28 Received list edit: 28 Index Redialling: 15 Ringer tone: 22 Additional handsets: 27 Security: 25 Alarm: 24 SIM: 9, 41 Answering calls: 16 Speakerphone: 15 Auto talk: 16 Transferring calls: 18, 31 Battery: 10, 11 Troubleshooting: 38 Call barring: 26 USSD: 23 Call divert: 24... - Page 44 (09) 272 0137 Copyright: This material is copyrighted by Panasonic Communications Co., Ltd., and may be reproduced for internal use only. All other reproduction, in whole or in part, is prohibited without the written consent of Panasonic Communications Co., Ltd.
Need help?
Do you have a question about the KX-TW501NZ and is the answer not in the manual?
Questions and answers