Table of Contents
Advertisement
Quick Links
Advertisement
Table of Contents

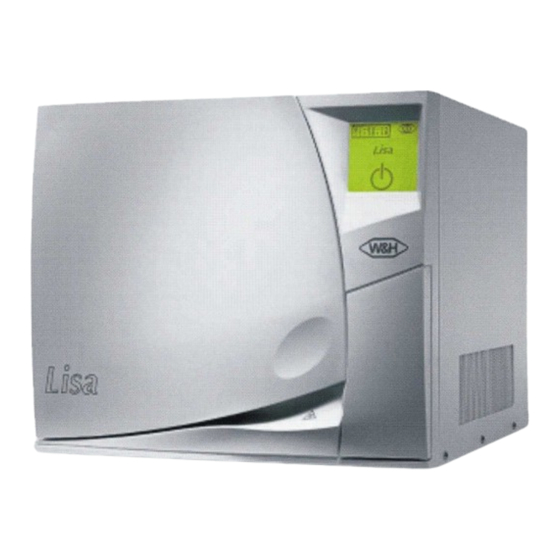
Summary of Contents for W & H Lisa MB 17
- Page 1 User Manual Water Steam Sterilizer LISA MB17/22 201 10 AEN REV. 9...
-
Page 3: Table Of Contents
SUMMARY UNPACKING 1.1. Unpacking the sterilizer 1.2. Unpacking the accessories SET-UP 2.1. Installation 2.2. Electricity supply 2.3. Printer connection (optional) DESCRIPTION 3.1. Front view of the sterilizer 3.2. Rear view of the sterilizer 4.1. Main menu 4.2. Description of the water tank 4.3. - Page 4 RECOMMENDATIONS – SAFETY The purpose of this user manual is to provide you with all the information you need in order to ensure: A proper installation and set-up. Optimal use. A safe and reliable operation. A regular and correct servicing requirements. DECLARATION OF CONFORMITY The Lisa sterilizer MB 17/22 is a Medical device class IIb, in accordance with rule 15 - Appendix IX of the European Directive 93/42/CEE.
- Page 5 GENERAL RECOMMENDATIONS – SAFETY The user is responsible for operating and servicing the sterilizer in accordance with the instructions listed in this manual. The sterilizer has not been designed for the sterilisation of liquids. The sterilizer has not been designed to operate in the presence of gas or explosive vapours. The chamber is automatically heated to 110°C as soon as the sterilizer is switched on.
-
Page 6: Unpacking
UNPACKING The sterilizer, the accessories, the user manual and the warranty card are supplied in a sturdy box. Check the condition of the packaging on receipt. Contact the carrier immediately and inform your supplier if the outer packaging is damaged. 1.1. -
Page 7: Unpacking The Accessories
1.2. UNPACKING THE ACCESSORIES Open the door and remove the accessories from the sterilization chamber. Check the contents: 5 anodised aluminium trays Reversible rack for 3/5 trays Tray holder Drain tube Mains cable Funnel User manual and warranty card Declaration of conformity Insert the rack into the sterilization chamber and click it into position. -
Page 8: Set-Up
SET-UP 2.1. INSTALLATION The sterilizer has been calibrated and tested in the factory. It does not require calibration during installation. Working temperature range: 10°C to 40°C / Humidity : 0 to 90%. Storage temperature range : -20°C to 60°C / Humidity : 0 to 90% (Water tanks empty). Install the sterilizer as outlined below: Install the sterilizer on a flat and level surface. -
Page 9: Electricity Supply
2.2. ELECTRICITY SUPPLY The electrical installation must comply with the current standards in the country. The electricity supply must be single phase 230 volts ±10%, 50/60Hz, 10A. Installation category / Mains overload category = II An earth connection is essential. The sterilizer must be connected to an electrically earthed plug. -
Page 10: Printer Connection (Optional)
2.3. PRINTER CONNECTION (OPTIONAL) Attention ! We recommend to use the following printer: - Custom DP40H. It has been tested and is perfectly compatible with the sterilizer and its software. The use of another printer is undertaken with the full responsability of the user, clearing the manufacturer, W&H l of responsability for warranty and any other claim. -
Page 11: Description
DESCRIPTION 3.1. FRONT VIEW OF THE STERILIZER Touch screen Door Service door Main switch / circuit breaker * Switch ON/OFF of the sterilizer. Use this switch to interrupt a cycle 9 pin serial port only in the case of a noted defect. For technical department only. -
Page 12: Rear View Of The Sterilizer
3.2. REAR VIEW OF THE STERILIZER Condenser ventilation 25 pin printer port Compliance plate Mains plug socket Connection for external used water drainage User manual... -
Page 13: Use
4.1. MAIN MENU Activate the mains switch, the selection screen appears. Manual stand-by Cycle selection Access to sub (§ 4.6.2.) menus (§ 4.5.) If the sterilizer is not used for a certain period of time, it will automatically go into stand-by mode. Stand-by mode time is programmable (§... -
Page 14: Description Of The Water Tank
4.2. DESCRIPTION OF THE WATER TANK The sterilizer is equipped with 2 independent water tanks of equal volume - 3.5 litres (MB17) or 4,5 litres (MB22). The left tank also called the "main tank" contains the distilled or demineralized water required for each cycle. It is fitted with 2 level sensors, minimum (0.5 l) and maximum (3.5 l on MB17 or 4.5 l on MB22). -
Page 15: Filling Of The Main Water Tank
4.3. FILLING OF THE MAIN WATER TANK Attention ! Use only high quality distilled or demineralized water (see Annex 7). sterilizer Remove the main water tank cap located on the top of the … …Fill the tank with approx. 3 litres on MB17 (or 4 litres on MB22) of water... …Once the tank is almost full, an audible tone will be heard. -
Page 16: Draining Of The Used Water Tank
4.4. DRAINING OF THE USED WATER TANK When the used water tank is full, it is impossible to run another cycle. The following message appears: D R A I N T H E U S E D W A T E R T A N K ♦... -
Page 17: Programming
4.5. PROGRAMMING Press the "M" key on the selection screen… …The program menu is displayed… To exit the program menu Cursor UP Consult: LANGUAGE § 4.5.1. U S E R N A M E § 4.5.2. D A T E / C L O C K §... -
Page 18: Selecting A Language
4.5.1. SELECTING THE LANGUAGE To exit the sub-menu Cursor UP Cursor DOWN Selection confirmation 4.5.2. PROGRAMMING THE NAME OF THE DOCTOR / SURGERY Confirmation, exit of the sub-menu Alphabet scrolling Alphabet scrolling Letter selection Letter selection cursor to the right cursor to the left User manual... -
Page 19: Programming The Date And Time
4.5.3. PROGRAMMING THE DATE AND TIME It is essential to adjust the date and time especially if the sterilizer is connected to a printer. These parameters are systematically printed at the beginning and at the end of the cycle report. Place the selection cursors under the data that is to be adjusted. -
Page 20: Programming The Stand-By Mode
4.5.5. PROGRAMMING THE BRIGHTNESS OF THE TOUCH SCREEN Darker Confirmation, exit Lighter from the sub-menu 4.5.6. PROGRAMMING THE STAND-BY MODE Exit from the sub-menu Cursor UP Cursor DOWN Confirmation of the selection User manual... -
Page 21: Maintenance Program
4.5.7. MAINTENANCE PROGRAM This screen shows the number of cycles remaining before replacement of the bacteriological filter (400), the door seal (1000) as well as when general servicing (4000) is required. The three counters are decreased in value after each cycle. When one of the counters reaches 0 a corresponding message appears at the bottom of the selection screen. -
Page 22: Cycle Selection
4.6. CYCLE SELECTION 4.6.1. CYCLE TABLE STERILIZATION CYCLES TEST CYCLES B CYCLE B CYCLE B CYCLE TYPE OF CYCLE B&D/ VACUUM B-STANDARD B-PRION B-STANDARD HELIX TEST TEST Temperature 135.5°C 135.5°C 122.5°C 135.5°C Pressure 2.16 bar 2.16 bar 1.16 bar 2.16 bar -0.85 bar Duration of the plateau 3'20... -
Page 23: Selection - Start Of The Cycle
4.6.2. SELECTION – START OF THE CYCLE Exit, if necessary, from the stand-by mode… …Enter cycle select menu… Exit and return to selection screen Cursor Cursor DOWN Confirmation of the selection Position the cursor in front of the required cycle. Start the selected cycle. -
Page 24: Cycle Procedure
4.6.3. CYCLE PROCEDURE The following information is displayed during the cycle: Date You can access the technical parameters at Time Access to technical any time by pressing the "Info" icon (see § data § 4.8 4.8.). Selected cycle If needed, the cycle can be interrupted by N°... -
Page 25: Manual Stop
4.7. MANUAL STOP If needed, the cycle can be interrupted at any moment by pressing the "STOP" key for 2 seconds. An audible tone will confirm the request… 2” M A N U A L S T O P P L E A S E W A I T L O A D N O T S T E R I L E... -
Page 26: Cycle Data Information
4.8. CYCLE DATA INFORMATION You can access the technical data at any time during the cycle by pressing the " nfo" icon. ..The following data will be displayed… Date Time Chamber pressure T° calculated/Pressure T° of the steam T° chamber heater T°... -
Page 27: Cycle Data Summary (End Of Cycle)
4.9. CYCLE DATA SUMMARY (end of cycle) At the end of the cycle, before opening the door, the " nfo" icon gives access to the technical data summary of the completed cycle. The first screen lists the pressure and duration of each phase until the process... -
Page 28: Messages
MESSAGES A certain number of messages can appear at the beginning or at the end of the cycle. This is merely information and not an alarm. The user can continue to operate the sterilizer with complete confidence. During a cycle, the micro-processor continuously analyses all the parameters. The cycle would be interrupted immediately and an alarm displayed, if there was a concern with the sterilization quality (see §... -
Page 29: Alarms
ALARMS The micro-processor continuously analyses all the cycle parameters. If there is any doubt regarding sterilization efficiency, the cycle is immediately interrupted and an alarm displayed. This is followed by a phase of approximately 2 minutes required to reinitialise the sterilization system and to return the chamber to atmospheric pressure. -
Page 30: Description Of The Alarms
6.1. DESCRIPTION OF THE ALARMS N° Description Action Mains The load cannot be considered sterile. Mains failure or significant fall in voltage occurred The cycle must be repeated. during the cycle. Sterilization chamber Clean the door seal, repeat the cycle. The time spent to reach the sterilization plateau is If the problem persists ℡... - Page 31 DESCRIPTION OF THE ALARMS (continue) N° Description Action Vacuum pump Clean and check the door seal (§ 7.2.), repeat the During a vacuum phase, the maximum achieved ℡ cycle. If the problem persists service. vacuum is not lower than – 0.20 bar. Clean and check the door seal (§...
-
Page 32: User Maintenance
USER MAINTENANCE A distinction must be made between two levels of maintenance, that performed regularly by the user and preventive maintenance carried out by an approved technician (§ 8). Remove the mains cable before examining the sterilizer. 7.1. MAINTENANCE PROGRAM Spare N°... -
Page 33: Cleaning The Door Seal
7.2. CLEANING THE DOOR SEAL Clean the door seal and the porthole with a lint free cloth saturated with alcohol. The porthole can also be cleaned with a non-abrasive detergent. 7.3. CLEANING THE CHAMBER, TRAYS AND TRAY HOLDER Remove the trays from the chamber. Disconnect and remove the rack. -
Page 34: Cleaning The Water Tanks
7.6. CLEANING THE WATER TANKS Completely drain both water tanks (main and used water tank). Open the service door. Insert the drain tube into the quick coupling drain connection of the used water tank (right). Allow the entire contents of the tank to empty and discard the used water. -
Page 35: Replacing The Door Seal
7.7. REPLACING THE DOOR SEAL Fully open the door of the sterilizer. Remove the door seal by hand. Carefully clean the seal seat with a cotton bud moistened with alcohol. Moisten the new seal. Insert the seal in the sequence illustrated in the following diagrams: Insert the seal starting as follows: Down Left and right. -
Page 36: Servicing Conducted By The Approved Technician
SERVICING CONDUCTED BY THE APPROVED TECHNICIAN Service is essential to continued effective sterilization. We recommend servicing by an approved technician every 3 years or 4000 cycles. Check list: Replacement of the 5 Solenoid valves. Replacement of the vacuum pump membrane kit. Replacement of the water filter. -
Page 37: Break-Down Guide
BREAK-DOWN GUIDE The list below of problems is limited because most defects and incidents are covered in messages (§5) and alarms (§6). PROBLEMS POTENTIAL CAUSES SOLUTIONS The main switch or network circuit Activate the main switch or network circuit The sterilizer breaker is open (OFF). -
Page 38: Annex 1 Technical Characteristics
Annex 1 TECHNICAL CHARACTERISTICS Single phase 230 VAC ±10% – 50/60Hz – 10A Electricity supply Sterilizer: Name plate situated on the back side: 10°- 40°C / 0-90%. Working temperature / Humidity Storage temperature / Humidity -20°- 60°C / 0-90% (empty) Min. -
Page 39: Annex 2 Preparation Of The Load
Annex 2. PREPARATION OF THE LOAD Cleaning of the instrument The instruments to be sterilized must be clean and free from all types of residue such as fragments, dentine and blood, etc. These substances can damage the objects placed in the trays and even the sterilizer itself. ♦... -
Page 40: Annex 3 Maintenance Of Dynamic Instrumentation
Annex 3 MAINTENANCE OF DYNAMIC INSTRUMENTATION External disinfecting This procedure prevents the risk of infection during cleaning and maintenance. ♦ Wear gloves. ♦ Dampen the instrument with a non-corrosive disinfectant (pH from 2.5 to 9) or with 70-80% ethyl alcohol. ♦... - Page 41 Annex 4: BOWIE & DICK TEST The Bowie & Dick Test, also called the Brown Test, is representative of the small porous type load. It comprises several sheets of paper and foam wrapped in a small packet in the middle of which there is a chemical heat-sensitive indicator strip (physic-chemical test).
-
Page 42: Annex 5
Annex 5 HELIX TEST The Helix Test is the most complex representation of a hollow instrument load ( type A ). Characteristics: Length: 150 cm Strip test Internal diameter: 2 mm Material : PTFE This test is used to validate the equipment performance in terms of hollow instruments sterilization, namely: Pre-vacuum efficiency, rapid and uniform steam penetration. -
Page 43: Annex 6
Annex 6 VACUUM TEST This test is used to validate the performance of the sterilizer in terms of leakage: The efficiency of the vacuum pump. The tightness of the pneumatic circuit. Pressure Duration -0.65 -0.85 The profile of the cycle, specific for this test includes: A vacuum phase up to P1 = - 0.85 bar. -
Page 44: Annex 7
Annex 7 WATER QUALITY The table below lists the quality of the water to be used for steam sterilization as taken from the new European standard (EN 13060, Annex C) Table C.1: Contaminants of feed water FEED WATER ≤ Evaporate residue 10 mg/l ≤... - Page 45 Annex 8 ACCESSORIES DESCRIPTION SPARE NUMBER Printer: Custom DP40H/cable A70010XX Anodised perforated aluminium trays T523200X (MB17) 18,5mm x 28,5mm T523202X (MB22) F523002X (MB17) Reversible rack F523006X (MB17) Cassette holder F523000X Tray holder F523001X Drain tubing with quick coupling S230900X Mains cable Funnel F540902X Bacteriological filter...
- Page 48 Manufacturer Importer W&H Sterilization S.r.l Italy, I-24060 Brusaporto (BG) Via Bolgara, 2 t +39/035/66 63 000 f +39/035/50 96 988 wh.com...