Pendo Pendopad 7" Quick Start Manual & User Manual
Internet tablet
Hide thumbs
Also See for Pendopad 7":
- Quick start manual & user manual (36 pages) ,
- Quick start manual & user manual (34 pages)

Related Manuals for Pendo Pendopad 7"


Summary of Contents for Pendo Pendopad 7"
- Page 1 QUICK START GUIDE & USER MANUAL > Please read carefully before use ANDROID 4.0 ICE CREAM SANDWICH...
-
Page 2: Table Of Contents
Table of Contents  Thank You .............3 Requirements ..............19 Connect to a Wi-Fi network ........20 Package Contents ............3 Features................4 browSinG The web ........22 GeTTinG To know The inTerneT TableT ..5 opTional ConneCTionS ......26 About the Touchscreen ..........8 Connecting to a Computer ........26 Protective Film ............8 Connecting Headphones .........27 Touchscreen Actions..........8... -
Page 3: Thank You
Thank You  Congratulations on your purchase of the Internet Tablet. This guide is provided to help you get started quickly with your tablet; please read it carefully and save it for future reference. To view PDF documents, download and install the free Adobe Acrobat reader from the Adobe website at www.adobe.com. -
Page 4: Features
features Built-in camera Convenient front-facing camera Browse the Web. Automatic orientation detection Visit your favorite websites Read any way you want; the display adjusts Check your e-mail automatically! Keep in touch with friends and family Reading books in the ePub format requires the included ... -
Page 5: Getting To Know The Internet Tablet
Getting to know the internet Tablet  unit at a Glance name description Camera Front-facing camera Page 5 Getting To Know The Internet Tablet... - Page 6 name description Headphone Audio output connection for headphones. jack Volume + Press to increase the volume level. Volume - key Press to decrease the volume level. MicroSD Load external microSD memory card slot cards here. Page 6 Getting To Know The Internet Tablet...
- Page 7 name description Power key Press to turn the unit on, or to turn the screen on and off. Press and hold to access the 1 1 1 8 1 1 1 9 Power Off menu. Power jack Charge and power the tablet (DC input) with the included power adapter.
-
Page 8: About The Touchscreen
about the Touchscreen buttons, menu items, the on-screen keyboard and other items displayed on the screen. Your tablet comes equipped with an easy-to-use You can perform the following actions on the touchscreen touchscreen which allows access to the tablet’s using your fingertip. functions. -
Page 9: About The Orientation Sensor
about the orientation Sensor Swipe: Swipe up/down on the screen to scroll through a list. On some screens, The tablet contains a sensor that will automatically you may be able to swipe left/right to change the orientation of most screens as you rotate the change the view. -
Page 10: Charging The Tablet
Charging the Tablet inserting a memory Card The current battery status will be always displayed in the The tablet accepts microSD memory cards. Insert a lower right of the screen in the system information bar. memory card into the microSD card slot to: The battery icon will change in accordance with the battery status. -
Page 11: Resetting The Tablet
To release and remove a memory card: 2. Push the card further into the slot until you hear a click. The card will spring out of the slot. 1. UNMOUNT the memory card. 3. Grasp the card by its edge to remove it. a. -
Page 12: Getting Started
Getting Started  Turning the Tablet on and off 2. Touch OK to turn off the tablet. To turn the tablet on: Press and hold the Power key until the LCD screen turns on. Wait until the Home screen appears; the tablet is now ready for use. -
Page 13: Turning The Screen On And Off (Standby)
Turning the Screen On and Off (Standby) Unlocking the Screen When the tablet is on, you can turn off the screen to When the screen turns off, you will have to unlock the conserve battery power. Simply press the Power key screen when you turn it back on. -
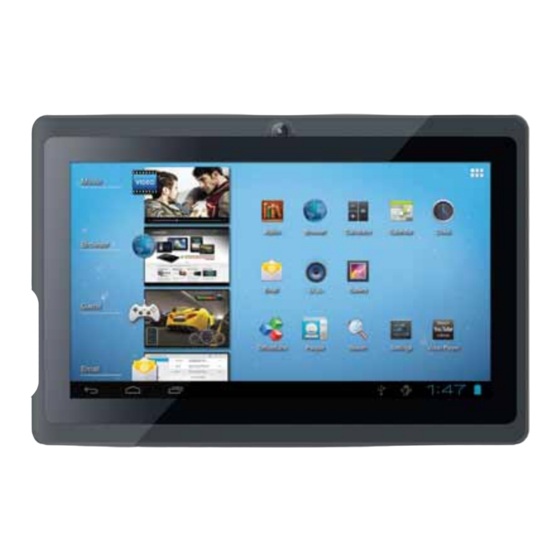
Page 14: Home Screen At A Glance
home Screen at a Glance If a password has been set, enter the password to finish unlocking the screen. The Screen Unlock password can be set in the Security settings menu. The home screen is the starting point for all of the features of your tablet. -
Page 15: About Applications
about applications name description R e c e n t Touch to display the list of thumbnail To open an application, touch the application icon on the Apps images of apps you have worked home screen or in the Launcher. recently. - Page 16 Browse the web. View and manage files stored on the tablet. Display the calendar or record events Play music. and appointments to manage your schedule. Perform simple mathematical Access the Settings menu to adjust operations. the tablet’s options. Take pictures or videos with the front- facing camera.
-
Page 17: Installing Applications
Installing Applications Removing Widgets You can also download an install additional applications Touch and hold the Widget until Remove icon appears from the device’s applications marketplace, the web at the top side of the screen, then drag the Widget to the browser, or other sources. -
Page 18: About Notifications
About Notifications Touch a notification in the list; the Notifications panel will close and the application associated with the notification The icons that appear in the Notification bar at the will launch. bottom right corner of the screen alerts you when new To close the Notifications panel: messages arrive or alarms or other application events occur. -
Page 19: Connecting To The Internet
Connecting to the internet  This tablet can utilize Wi-Fi data networks to connect to the Internet. — Wireless Wi-Fi technology can provide Internet access at distances of over 300 feet; however, this distance can be affected by your surrounding environment and Wi-Fi router. requirements Please refer to your wireless router’s documentation for help, or ask your network administrator for details. -
Page 20: Connect To A Wi-Fi Network
Connect to a wi-fi network The Notification bar displays icons that indicate your tablet’s Wi-Fi status. Connected to a Wi-Fi network (waves indicate connection strength). There are no Wi-Fi networks in range, or [no icon] the Wi-Fi radio is off. 1. - Page 21 If the network is open, the tablet will prompt you to confirm connection to the network. Touch Connect to confirm. If the network is secured (as indicated by a Lock icon), the tablet will prompt you to enter a password or other credentials.
-
Page 22: Browsing The Web
browsing the web  The Browser application lets you visit webpages and find information on the web. Keep up with the news, your friends, or enjoy video from YouTube™, the world’s most popular video-sharing community. To use Browser, the tablet must be connected to the name description Internet. - Page 23 To bookmark a webpage. Some common Browser actions are described below. Bookmark your favorite webpages in order to visit To go to a webpage. them quickly without entering a URL. 1. Go to the web- 1. Touch the Address bar at the top of the page that you Browser screen.
-
Page 24: Browser Menu
To go to a bookmarked webpage. 3. Touch “Delete bookmark“. 1. Touch the Goto Bookmark icon. 4. Touch “OK” to confirm. 2. Touch a bookmark browser menu tile to open it. While viewing a webpage, touch the icon show as right to open the Browser Menu, the icon is locate on the top right corner of the screen, the options are:... - Page 25 Request desktop site: Save for offline reading: Save this page onto the in- ternal memory, then you can read it when the internet connection is disable. Page info: View information about the current page, including the URL. ...
-
Page 26: Optional Connections
optional Connections  Connecting to a Computer Touch the Notification bar to open the notifications panel. Connect the tablet to a computer to transfer files. 1. Connect your tablet to the computer. With the included USB cable: Plug the small end of the cable into the USB 2.0 Hi- speed connector of the tablet. -
Page 27: Connecting Headphones
Connecting headphones 2. Mount the storage drive. Touch USB connected to mount the tablet’s built-in Connect a pair of headphones (or earphones) to the storage, then touch “Turn on USB storage” and “OK” tablet to enjoy media in private. when prompted to confirm. -
Page 28: Using The Usb Full-Size Adapter
using the uSb full-Size adapter The USB full-size adapter can be used to connect and You may also use this connection to add a use USB devices with the tablet. The adapter converts mouse to the tablet. the Micro USB port on the tablet into a USB On-the-Go The adapter supports one connection at a time. -
Page 29: Setting The System Options
Setting the System options  Open the system settings menu to adjust how the tablet looks and functions. Many applications will have their own settings; refer to the documentation provided by the application developer to learn more. To open the Settings menu: 1. -
Page 30: Specifications
Specifications  * Music was tested with a 128 kbps MP3 file; video was tested with a processor All winner A13 Cortex A8 1GHz 1920 x 1080 MPEG-4/AVC file; browsing was tested with the screen 512MB brightness set to default. Actual playback results may vary. Storage 4GB flash built-in microSD card slot (max.
Need help?
Do you have a question about the Pendopad 7" and is the answer not in the manual?
Questions and answers