Table of Contents
Advertisement
Quick Links
Advertisement
Table of Contents

Related Manuals for Spypen Luxo

Summary of Contents for Spypen Luxo
- Page 1 SPYPEN LUXO User’s Manual © 2002 plawa...
-
Page 2: Introduction
Windows® XP or Macintosh® running OS 8.6 - 9.2 via the USB (Universal Serial Bus) port. You can also use your SPYPEN LUXO to capture not only snaps of your family and friends, but also video clips of them in action. -
Page 3: Table Of Contents
7.4 Mode Button 7.5 Power Getting Started 8.1 Switching the SPYPEN LUXO On 8.2 Taking an Image 8.3 Continuous Mode 8.4 Self-Timer Mode 8.5 Clear the Stored Images 8.6 Changing the Image Resolution Connecting your SPYPEN LUXO to your Computer... - Page 4 10. Uploading Images to Your Computer For Windows® Users: 10.1 Running the Digital Camera Manager 10.2 Quick Reference 10.3 Uploading Images 10.4 Creating & Uploading Movie Clips 10.5 Creating Live Movie Clips For Macintosh® Users: 10.6 Uploading Images and Movie Clips 11.
-
Page 5: System Requirements
• CD-ROM Drive • Standard mouse and keyboard 4. Package Contents SPYPEN LUXO Warranty Card SPYPEN LUXO CD-ROM includes Digital Camera Manager (PC), Digital Camera Installer (Mac), PhotoStudio® 2000 (PC & Mac), ArcSoft PhotoFantasy™ 2000 (PC & Mac), ArcSoft PhotoPrinter® 2000 (PC & Mac), ArcSoft VideoImpression™... -
Page 6: Software Installation
5. Software Installation For Windows® Users: 5.1 How to Install Digital Camera Manager 5.1.1 How to Install Digital Camera Manager “Digital Camera Manager” should be installed rst. 1. Insert the CD-ROM disc into the CD-ROM drive and close the CD-ROM drawer. 2. -
Page 7: How To Install Arcsoft® Software
5.2 How to Install ArcSoft® Software Introduction to the Software PhotoStudio® 2000 PhotoStudio® 2000 is a full-featured, easy-to-use digital image-editing program that provides a complete set of photo editing and retouching tools, plus a wide selection of special effects and enhancements. Its powerful features include a wide variety of input and output options, layers, multiple undo and redo functions, image management tools, editable text, multiple le format support and a lot more. -
Page 8: How To Install Microsoft® Netmeeting
5.2.1 How to Install ArcSoft® Software 1. Re-insert the CD-ROM disc into the CD-ROM drive and close the CD-ROM drawer. 2. An installation wizard will automatically launch. 3. Click the “ArcSoft® Software” icon. 4. Select the language for the installation and click “OK”. 5. -
Page 9: How To Install Adobe® Acrobat® Reader
6. For further installation details, please visit the following website: http://www.microsoft.com/windows/netmeeting Note: • You need to enter your name, your e-mail address and country details during installation. • You need to adjust the playback volume and your record volume. 5.4 How to install Adobe® Acrobat® Reader Adobe®... -
Page 10: For Macintosh® Users: Mac
8. Click “Quit” to nish the installation. 9. A folder named “STV0680 Camera Snapshots” will appear in your Hard Disk after your SPYPEN LUXO is connected to your Mac via the USB cable for collecting images and movies. 5.6 How to Install ArcSoft® Software 5.6.1 How to Install PhotoStudio®... -
Page 11: How To Install Cu-Seeme
5.6.3 How to Install ArcSoft PhotoPrinter® 2000 1. Insert the CD-ROM disc into the CD-ROM drive and close the CD ROM drawer. 2. Double click the CD-ROM icon “Spypen Luxo”. 3. Double click the “PhotoPrinter® 2000” icon in English folder. -
Page 12: How To Install Adobe® Acrobat® Reader
2. Please make sure the rechargeable battery is charged for minimum of 3 hours before use for the rst time. Simply connect your SPYPEN LUXO to your computer with the USB cable supplied to recharge your battery. Build-in rechargeable battery... -
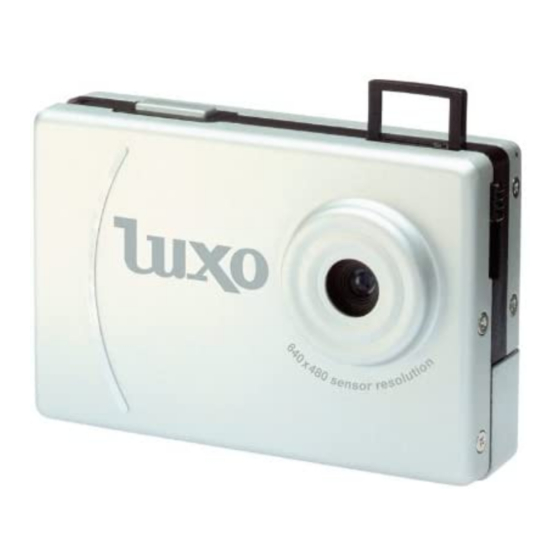
Page 13: Getting To Know Your Spypen Luxo
Important Note: Due to the very small size of the viewnder, ensure your SPYPEN LUXO is perfectly parallel to the subject you wish to take an images of. We recommended images are taken at a minimum distance of... -
Page 14: Lcd Display
SPYPEN LUXO’s memory. Important Note: It is important to note that any images stored in your SPYPEN LUXO’s memory will be lost if the battery is totally drained (and the USB cable is not connected to your SPYPEN LUXO to your powered on PC or Mac). -
Page 15: Getting Started
Your SPYPEN LUXO will automatically switch on when you connect your SPYPEN LUXO to your PC or Mac via USB port. Press the Mode Button to turn on your SPYPEN LUXO when your SPYPEN LUXO is in Stand-by Mode. The LCD will indicate the mode for high resolution and it will also display the number of images which may be taken. -
Page 16: Self-Timer Mode
The Self-Timer Mode cannot be selected when the SPYPEN LUXO is full. 8.5 Clearing the Stored Images When you wish to clear the memory of your SPYPEN LUXO, press the Mode Button until appears on the LCD. Pressing the Shutter Button once will cause the SPYPEN LUXO to beep and the start ashing. -
Page 17: Connecting Your Spypen Luxo To Your Computer
The USB cable allows you to upload images from the SPYPEN LUXO to your PC or Mac. One end of the cable connects to the USB port on the side of the SPYPEN LUXO and the other end connects to your PC’s or Mac’s USB port. When your SPYPEN LUXO is connected to your PC or Mac, it will draw power from the PC in order to preserve your battery life. -
Page 18: Uploading Images To Your Computer
You can use the Digital Camera Manager to upload images taken by your SPYPEN LUXO at any time whether or not the SPYPEN LUXO is full. Connect your SPYPEN LUXO to your PC via the USB cable. Plugging the USB connector into the SPYPEN LUXO will cause it to reset and issue a double beep but all stored images will remain. -
Page 19: Uploading Images
1. Switch the interface to DSC (Digital Still Camera) Mode by clicking the button. 2. Click to capture all images stored in your SPYPEN LUXO. A window will appear and ask if you want to convert all stored images to higher resolution. (for images only) Select “Yes” or “No”. -
Page 20: Creating & Uploading Movie Clips
Create your very own digital movies using Digital Camera Manager. Low resolution supports 99 frames of video. High Resolution supports 24 frames of video. • When the SPYPEN LUXO is full, attach it to your PC via USB and run the Digital Camera Manager. -
Page 21: Creating Live Movie Clips
10.5 Creating Live Movie Clips You can now create live digital movies using Digital Camera Manager. • Make sure your SPYPEN LUXO is connected to your PC via USB and run the Digital Camera Manager. • Warning! Live Video Mode will erase all images stored in your SPYPEN LUXO. - Page 22 3. If you have already created an album and you want to save image(s) in, double click the album. 4. Click the button to adjust the frame rate and the button to adjust the resolution (size) of the movie clip. 5.
-
Page 23: Uploading Images And Movie Clips
For Macintosh® Users: 10.6 Uploading Images and Video Clips 1. Connect your SPYPEN LUXO to your Mac via USB cable. 2. A window will pop up and ask you to name the pictures (images). File name format is default as <Date>... -
Page 24: How To Use Photostudio® 2000
1. Select the “PhotoStudio® 2000” icon from the “ArcSoft Camera Suite” program group on the Windows® Start Menu. You can now start to download your stored images from your SPYPEN LUXO by the following steps: 2. Go to “File” and select “Select Source”. Select “USB Dual-mode Camera” as source. - Page 25 You can play with the image by using the function icons. Using live images:- 6. You can also capture a live shot when your SPYPEN LUXO is connected to your PC by the following steps: 7. Click “Get Fantasy” to select the template in the existing library and then click “OK”...
-
Page 26: How To Use Arcsoft Photoprinter® 2000
Start Live View 11. For further help ArcSoft Capture Image Select Camera Source PhotoFantasy™ 2000, go to “Help” to access the Help Topics. Visit http://www.arcsoft.com for all your FAQ’s, tips and technical support. See Section 13 for more details. ® 11.3 How to use ArcSoft PhotoPrinter 2000 1. - Page 27 Double click on the video and it will appear just like other video templates in the storyboard. Now go to step 10. Alternatively you can produce a live video. Ensure your SPYPEN LUXO is connected to the computer via the USB cable. Click on the capture icon. Step 7 And press the record icon.
-
Page 28: How To Use Microsoft™ Netmeeting
2. Connect your USB cable to an available USB port on your PC on the other end. 3. Put your SPYPEN LUXO on top of your PC monitor or another at surface. 4. Connect your microphone (not included) to your audio card’s external microphone connector. -
Page 29: How To Use Photostudio® 2000
2. Click “Get Fantasy” to select the template in the existing library and then click “OK” to conrm. Important! Make sure the “Spypen Luxo” CD-ROM is in the CD-ROM Drive. 3. Double click on “Get Photo 1” and click “Add”. -
Page 30: How To Use Arcsoft Photoprinter® 2000
“Mask” 11.9 How to use ArcSoft PhotoPrinter® 2000 1. Double click the “PhotoPrinter” icon from the PhotoPrinter. Important! Make sure the “Spypen Luxo” CD-ROM is in the CD-ROM Drive. 2. Choose the “Page Layout”. The selected page layout will on shown on the right panel. -
Page 31: Mac
Double click on the video and it will appear just like other video templates in the storyboard. Now go to step 10. Alternatively you can produce a live video. Ensure your SPYPEN LUXO is connected to the computer via the USB cable. Click on the capture icon. Step 7 And press the record icon. -
Page 32: How To Use Cu-Seeme
11.11 How to use CU-SeeMe™ Warning! Using CU-SeeMe™ will erase all images stored in your SPYPEN LUXO. Make sure you upload all wanted images before using CU-SeeMe™. 1. Connect your SPYPEN LUXO to the USB cable on one end. 2. Connect your USB cable to an available USB port on your Mac on the other end. -
Page 33: Customer Support
12. Customer Support plawa-feinwerktechnik GmbH & Co. KG Bleichereistr. 18 73066 Uhingen - Germany Helpline: +49 (7161) 93872-0 (English, Deutsch) Website: www.spypen.com, www.plawa.de Email: support@plawa.de 13. ArcSoft WorldWide Customer Support For Japan For North America ArcSoft Japan Support Centre (Tokyo) -
Page 34: Troubleshooting
Install the software, restart your PC, and nally, not found in the Programs menu Manager requires the SPYPEN LUXO connect the SPYPEN LUXO to the PC via the USB after I have installed the driver. be connected to the PC (via the USB) - Page 35 Import” plug-in le and STV0680 Manager requires SPYPEN connect the SPYPEN LUXO to the Mac via the USB Camera Snapshots”/”Spypen Mac” LUXO be connected to the Mac (via port, then the plug-in le and folder will appear in folder is not found in the Programs the USB) after the software has been the Hard disk.
-
Page 36: Battery Guidance
15. Battery Guidance WARNINGS! • Batteries should be replaced by local customer service. • Only batteries of the same or equivalent type as recommended are to be used. • Batteries are to be inserted with the correct polarity. • The supply terminals are not to be short-circuited. •... -
Page 37: Technical SpeciCations
• 20% - 85% relative humidity, non-condensing Camera Cautions • Never immerse any part of the SPYPEN LUXO or its components into any uid or liquid. • Disconnect the SPYPEN LUXO from your PC or Mac before cleaning it. • Remove dust or stains with a soft cloth dampened with water or neutral detergent. -
Page 38: Fcc Notice
17. FCC Notice This device complies with Part 15 of FCC Rules. Operation is subject to the following two conditions: (1) This device may not cause harmful interference, and (2) This device must accept any interference received, including interference that may cause undesired operation.
Need help?
Do you have a question about the Luxo and is the answer not in the manual?
Questions and answers