Table of Contents
Advertisement
Quick Links
Advertisement
Table of Contents

Related Manuals for KD interactive Kurio 7

Summary of Contents for KD interactive Kurio 7
- Page 1 The Ultimate Android™ Tablet for Families™ INSTRUCTION MANUAL...
-
Page 2: Table Of Contents
CONTENT 1) FEATURES Included in the box..................................Overview......................................Charging......................................Automatic lock....................................Home screen....................................Portrait / Landscape orientation............................Multi-touch screen..................................Camera ......................................Connect Kurio to PC/Mac ® ................................ 1-10 External storage..................................1-11 Transfer file....................................1-12 Android interface ..................................1-13 Connect Kurio to TV screen.............................. - Page 3 2) STARTING WITH KURIO 7 Setup Kurio.................................... Step 1 Choose your language............................... Step 2 Set-Up date and time................................Step 3 Select and connecting to Wi-Fi............................Step 4 Serial number..................................Step 5 Create Parental account..............................Step 6 Create User account................................Step Internet security level................................
- Page 4 4) SUPPORT AND IMPORTANT INFORMATION Update Kurio system................................Warning......................................Tech support and warranty information........................... Restricted use of electronic devices..........................FAQ / Troubleshooting................................Exposure to radio frequency energy..........................Recycling ....................................Declaration of conformity............................... Copyrights ....................................
-
Page 5: Included In The Box
1- FEATURES Included in the box The following accessories are included in the box: Anti-shock USB to cover Mini-USB adapter Power Adapter Kurio tablet (DC 5V–2A) inch USB Cable... -
Page 6: Overview
Overview Power ON/OFF/STANDBY Volume - Exit the Volume + profile Rear camera Microphone Front camera Headphone 3.5mm jack Mini-HDMI Back Mini-USB Home DC Input Options Micro SD Card Slot Speaker Wi-Fi settings Help Screen... -
Page 7: Charging
Charging You can charge your Kurio by either using the supplied power adapter or USB cable. Your Kurio will charge more quickly by using the power adapter. Automatic lock After a time of inactivity, Kurio will lock automatically. This time can be modified in Display settings of the Parental Area. -
Page 8: Home Screen
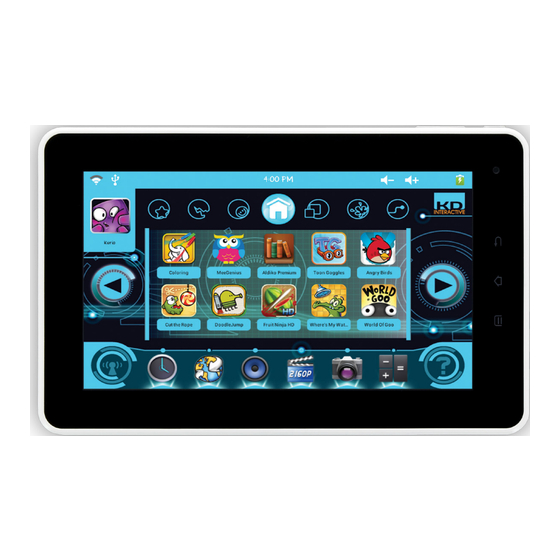
Home screen Here are the icons you can see on the Home screen of Kurio tablet: Volume + Micro SD card inserted Volume - Battery level indicator USB peripheral connected Power of Wi-Fi signal (if activated) Wi-Fi access On-screen help Web browser Gallery: Edit / Calculator... -
Page 9: Portrait / Landscape Orientation
Portrait / landscape orientation Depending on the application you are using, you might prefer having the tablet in Portrait or Landscape orientation. Kurio tablet has a built-in accelerometer (gravity sensor) which allows you to switch between the two modes simply by rotating the tablet in the orientation you like. -
Page 10: Multi-Touch Screen
1- 7 Multi-touch screen Kurio has a multi-touch capacitive screen. Just use your fingers to control Kurio. Touch the screen to open files. Press and hold on the main screen to add an application. press and hold the app icon to remove it. Note: The reactivity of the touch screen can vary from one person to another, this is linked to the nature of the capacitive screen. - Page 11 Slide up/down to scroll, and swipe left/right to Use 2 fingers to zoom-in or out while viewing photos, navigate in the menu. webpages or other applications.
-
Page 12: Camera
Camera Kurio comes with 2 cameras for photos and videos. Front 0.3Mpx VGA camera for self-portraits. And there is a 2Mpx camera at the back. Zoom IN Switch between Front and Rear Camera Take a photo or Start/Stop video recording Zoom OUT Settings Video mode... -
Page 13: Connect Kurio To Pc/Mac
Connect Kurio to PC/MAC ® It is possible to connect Kurio to your computer in order to transfer your photos, videos, music, eBooks from the computer to Kurio. USB to Mini USB cable (included in the Kurio box) is required. Once the cable is plugged, the icon “USB Peripheral connected”... -
Page 14: External Storage
Note: The data you have transferred will be visible on Kurio only once you have turned off the USB storage function. 1-10 External storage Kurio allows you to read some files (photos, videos, music and more) from external storage (USB key, hard drive or Micro SD card). -
Page 15: Transfer File
1-11 Transfer file It is possible to save on the tablet’s internal storage the data you have on your external storage by using File Manager. By default, please note that File Manager is not available on the Kurio interface. You can make it available in the Applications settings of the Parental area. - Page 16 You are now in the Android interface. All installed Apps Date / Time / Battery level / Wi-Fi / Settings Back Recently Home opened files To exit the Android interface and go back to Kurio interface, press IMPORTANT NOTE: ANDROID INTERFACE SHOULD ONLY BE USED BY PARENTS. ALL PARENTAL CONTROLS ARE DISABLED IN THIS.
-
Page 17: Connect Kurio To Tv Screen
1-13 Connect Kurio to TV screen (HDMI cable required) It is possible to connect Kurio to a TV screen in order to display your photos, videos, music on your tablet straight on your TV screen. Mini HDMI to HDMI cable (buy separately) is required. A mini HDMI port must be available on your TV. Note: If you have no sound or image on your TV screen, please try to unplug the HDMI cable, and then plug it in again. -
Page 18: Starting With Kurio
2 - STARTING WITH KURIO 7 Note: Kurio is powered by a Lithium-Polymer battery. To ensure battery life, it’s recommended to charge the tablet at least 3 hours before the first use. Please use the 5V power adapter provided with Kurio tablet. -
Page 19: Step 2 Set-Up Date And Time
Step 2: Set up Date and Time Before starting the setup of Kurio, you will be requested to adjust Date and Time. Please make sure to enter the correct time and date as an incorrect date may prevent the web filtering system from working correctly. - Page 20 Welcome to the Kurio Interface Setup > Go to START SETUP...
-
Page 21: Step
Step 3: Select and Connect to Wi-Fi access: • Select your hotspot and tap to ″Connect″ • Enter the Wi-Fi key of the hotspot selected • press on to confirm Upgrade check: When the Wi-Fi connection is done, the system will check whether an update is existing for the device. If it exists then it will be directly applied. -
Page 22: Step
Step 4: Then the user has to key in the serial number to ensure the device’s authenticity. The serial number is a 12 alphanumeric character chain of the form AAAA-BBBB-CCCC. You can find the serial number on the sticker at the back of the unit. Press on to confirm. -
Page 23: Step
Step 5: Create the Parent account The information entered in this part will be used to inform you about new software updates and for registration. • Only one email address is authorised. • This account shall be protected by a password. •... - Page 24 Press on to confirm. The parental account is now set, you can start creating the first user profile!
-
Page 25: Step 6 Create User Account
Step 6: Create user account In this part, you will enter the information about the user. If the tablet will be used by a child, do not hesitate to complete this part together with them! • Enter basic information about the child (name, birth date, gender). •... - Page 26 The password should be 1 to 16 characters long, with only letters and numbers. Select ″Gesture″ check box if you want to use a gesture pattern as password, then press “Define gesture”. You can now create your pattern with a sliding movement that links 5 dots. You can’t validate your password if it has more or less than 5 dots.
-
Page 27: Step 7 Internet Security Level
Step Internet security level This part will allow you to define which access to the Internet will be granted to the user of this profile. By default, no Internet access is selected. - Page 28 Full Internet access Give complete access to all the resources of Internet. It should only be used if the profile is to be used by the parents. Any profile using the Full Internet access should be protected by a password. Content filtering mode Allow the user to browse the Internet freely except on the websites that may contain inappropriate content.
-
Page 29: Step 8 Content Filtering Parameters
Step 8: Content filtering parameters There are several predefined profiles that contain the list of website categories that will be blocked. The content of each profile (except the custom filter) will be defined on the server side, not from the Kurio interface. The user selects the profile by pressing on the corresponding bullet. -
Page 30: Step 9 Time Management
Step 9: Time management This part allows to control how long and when the user can use the tablet. This Session control part controls the consecutive playtime and the imposed rest times. The Global control part controls the daily period when the tablet can be used. The Global control has priority over the session control, meaning that even if there is some remaining playtime in the current session, the profile will be blocked if the stop limit of the Global control is reached. - Page 31 The following screens will be shown if the time limit is reached during the use of the device.
-
Page 32: Step 10 App Management
Step 10: App management In this part, you can manage the applications authorised to use within this profile. Authorised Applications Unauthorised Applications The applications that are not checked won’t be accessible in the main children screen. This selection is done for each profile, so 2 profiles may use different authorised applications. - Page 33 • Screen layout On this screen you can build the interface that will be displayed on the user’s main screen. TABS Shortcut Bar In each tab, you can insert 10 different apps that will be visible in the user’s interface. To select the app, drag the app located in the list on the left side and drop it into the main interface.
- Page 34 The apps you can see at the left side in the list are the ones you have selected in the previous step ″App management″. If you want to remove an app from the user’s interface, just select it and press ″Delete″. Any newly installed application will have to be approved to be used in the user profile.
-
Page 35: Step 11 Initial Setup Completed
Step 11: Initial setup completed The initialization of Kurio is now finished and ready for use. Press ″Exit Setup″ to reach the Kurio user interface. -
Page 36: How To Get Access To The Parental Area
3 – PARENTAL AREA How to gain access to the parental area? This takes you to the login interface. In this area, you have 4 possibilities: Parental Area Select another profile Enter the profile Select and Help & More Info Connect to Wi-Fi access... - Page 37 Press on Parental area icon. You will have to enter the password you created within the parental account (STEP 5 – page 19). Welcome to the Kurio Parental area! From here you can create and manage the different profiles, download new applications and content, change the device settings, manage your account or exit the interface to come back to the Android system.
-
Page 38: Profile
Change the System settings of the tablet or reset the interface Kurio store Search, purchase, download, review any apps for Kurio Main account Change your email or password, and learn more about KD Interactive Android Go to Android interface Press the red arrow to go back to the login interface. -
Page 39: Tablet Setup
Tablet setup Load the Kurio system on startup: If this function isn’t checked, then the Android Interface will be loaded on startup. In this function, the parental controls will be deactivated. Keep currently used rules: the Internet security settings of the safe browser used in Kurio interface will be maintained in Android interface. - Page 40 Create New Account: To download any application, you will have to create an account for the Kurio Store. This account is different than the one you have created when you first installed the tablet. This means the email address can be different.
-
Page 41: Main Account
Note 1: Once it is downloaded, the App doesn’t appear automatically in the Kurio interface. Select it in the App Management/Authorised Application menu of the Parental Area. Note 2: You can find several Internet browsers on the Kurio Store. Please note that Internet Access mode is only available with Safe browser. Buy New Apps: If you want to buy a new app, you have to create an account and enter your credit card information. -
Page 42: Update Kurio System
4 - SUPPORT AND IMPORTANT INFORMATION Update Kurio system You can update the Kurio system by using Kurio Store. When a new update is available, you will be warned in Kurio Store. You will also automatically be informed by email. The email address you entered when installing the system will be used. -
Page 43: Warning
Warning • All packing materials such as internal bags, plastic collars, plastic films, carton inserts are not part of this product and should be discarded for your child’s safety. • Do not try to disassemble the unit. • To charge Kurio, only use the power adapter supplied with Kurio tablet. •... -
Page 44: Tech Support And Warranty Information
Please check with your airline company before traveling. • Kurio 7 has an Airplane Mode. Please go into the Settings of the Android Interface to switch the tablet into Airplane Mode. All wireless connections will be turned off. -
Page 45: Exposure To Radio Frequency Energy
Exposure to radio frequency energy This product emits and receives radio frequency electromagnetic energy. If not installed and used in accordance with the instructions, it may cause harmful interference to radio communications, electronic equipment and personal medical devices. If Kurio does cause harmful interference, try to co rrect it by reorienting or relocating the receiving antenna. -
Page 46: Declaration Of Conformity
Piso 6P4 P.O. Box 121 08191 RUBI - BARCELONA – SPAIN Product: Kurio 7 Model: CI1100 We declare that the product above complies with the basic requirements and the other relevant provisions required by R&TTE Directive (1999/5/CE), the Low Voltage Directive (2006/95/EC), EMC Directive (2004/108/EC) and is in conformity... -
Page 47: Copyrights
Copyrights © 2012 Copyrights. Kurio™, Kurio™ logo, KD Interactive™ and KD Interactive™ logo are trademarks or registered trademarks of CIDE Interactive Inc. All rights reserved. Angry Birds is a trademark of Rovio Entertainment Ltd. © 2009-2012 Rovio Entertainment Ltd. All rights reserved. Doodle Jump® © 2011 RealNetworks, Inc and Lima Sky, LLC. All rights reserved. - Page 48 The Ultimate Android™ Tablet for Families™...
Need help?
Do you have a question about the Kurio 7 and is the answer not in the manual?
Questions and answers