Table of Contents
Advertisement
Quick Links
Advertisement
Table of Contents

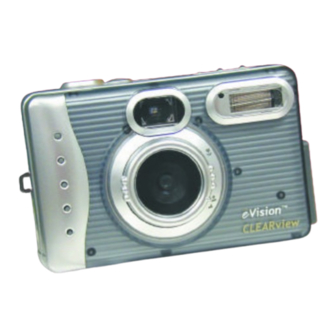
Summary of Contents for eVision Clearview
-
Page 2: Table Of Contents
Internet, Fun Thi n gs To Do wi t h PhotoSui t e the picture. CLEARview gives you all the tools Usi n g the Camera as a Web Cam that you will need. Using MyCamera Flash –... - Page 3 Back of Camera Option settings include: Self-Timer - Use the Self-Timer Normal quality photos will be button when you need to take compressed, so more photos can LCD Display – The LCD Display Press to view the camera photos of yourself. After you be stored in the camera.
-
Page 4: Let's Get Started
Battery power level LCD Display - Press to turn Full battery power the LCD display On/Off. CLEARview as a PC camera. Medium battery power Note: As a power-saving feature, the LCD Low battery power These ports will enable you to... - Page 5 Step 2 Open the memory Formatting the Memory Card Step 6 Press the OK button on the controller. compartment cover located at the It is recommended that you format bottom of your camera and insert your Compact Flash memory card the Compact Flash memory card.
-
Page 6: Taking Photos
positive value to have brighter Taking Photos Reminder : Wait for the green indicator light to stop blinking before you take your next photos, or a negative value to picture. This may take several seconds and have darker photos. Taking photos with your digital varies depending on the camera settings camera is a snap. -
Page 7: Deleting Photos
Note: Erase and OK share the same button forward through the pictures. to your computer. Refer to page 20 on the controller. for details on how to download Step 1 Place the CLEARview Deleting Photos photos. CD-ROM into the appropriate Step 5 A menu will appear, with drive. - Page 8 TWAIN driver setup complete Step 14 Click Next on the Step 23 Click Next on the setup Quit – which exits the CLEARview screen. choose destination location type screen. The default setup CD-ROM and returns you to your screen.
-
Page 9: Get Connected
Step 28 Click Next on the This will restart your computer so the USB cable cable (the yellow ArcSoft VideoImpression that all of the CLEARview software to the USB port plug) to the components can take effect. welcome screen. located on the... -
Page 10: Accessing Clearview
• Edit or enhance your photos. that the camera is ready. Microsoft NetMeeting – This software Step 3 Click on the CLEARview • E-mail photos to friends and allows you to join videoconferencing icon. - Page 11 Step 7 Double-click on a picture Step 2 Press the Power button to download from the thumbnails to turn on the CLEARview. or click on the Select All icon to download all of the photos.
- Page 12 Reminder : This example uses the AOL The Resize this image? screen any unwanted areas by dragging service and you must be signed on to the downloaded from the CLEARview. appears. the resize handles to adjust the service to continue.
- Page 13 shows the new area to be Step 1 Click Touchup on the bitmap (BMP). JPEG images give Step 2 Click on the Albums cropped. activity panel. a good balance between image button on the activty panel. quality and file size and are ideal Step 2 Click on the Enhance for online use.
- Page 14 Notice how the album Step 13 Click on Return when The Create Slide Show activity Reminder : The photos were downloaded to C:\My Files\My Documents\My Pictures. panel appears. name appears in the you have finished adding photos activity panel on the to the album.
- Page 15 Step 5 Click and drag a photo Step 9 Change the font, style from the library to the shape. and color. Step 10 Notice how the text has Step 6 Click on Add/Edit Text. a blinking box around it, click and drag the text to the desired The add/edit text activity panel location on the photo.
- Page 16 AOL service to continue with this part of the Recording Video exercise. You can use the CLEARview as a Step 1 Click on the “You’ve Got digital camcorder to record video Pictures” logo from the AOL wherever you go. This camera will Welcome screen.
-
Page 17: Using Mycamera
Record mode, press Step 2 Double-click on the For example, “ Hi kids, check out to switch modes. CLEARview icon located on the The next section will explain how to your dad. “ desktop. The software menu edit your clips in ArcSoft Step 8 Press and hold down the VideoImpression. - Page 18 Step 6 Click on the Play button Step 11 Click on the Album Step 20 Click on a transition Hint: Click on the video in the template and then click on the Add to Storyboard icon. to preview your video. icon.
-
Page 19: Using Windows Netmeeting
Step 4 Click on the Open icon. Step 1 Make sure the CLEARview For additional information on • 1.8” Color LCD for instant viewing software is closed, then click on Microsoft NetMeeting, please refer of photos Step 5 Double-click on an image the Start button. -
Page 20: Next Steps
Groups@AOL - to create your own digital cameras and other high personal area where you can post The CLEARview supports up to The CLEARview's flash is best energy drain electronics. These photo collections, private mes-... -
Page 21: Need Help
1-888-935-0353 Monday through Friday from 9:00AM - 5:00PM Pacific Time. © 2001 America Online. All rights reserved. eVision and the eVision logo are trademarks of America Online. All other product names are trademarks or registered trademarks of their respective trademark holders. - Page 22 Notes Notes • 42 43 •...
Need help?
Do you have a question about the Clearview and is the answer not in the manual?
Questions and answers