
Related Manuals for Ice-O-Matic GEMU090 Series


Summary of Contents for Ice-O-Matic GEMU090 Series
- Page 1 Installation Manual GEMU090 Series Ice-O-Matic 11100 East 45th Ave Denver, Colorado 80239 P t N Part Number 9081430-01 / 17-3371-01 9081430 01 / 17 3371 01 D t 9/11 Date 9/11...
- Page 2 Customer, that part of any such machine that becomes defective. In the event that the Warranty Registration Card indicating the installation date has not been returned to Ice-O-Matic, the warranty period will begin on the date of shipment from the Company. Irrespective of the actual installation date, the product will be warranted for a maximum of seventy-two (72) months from date of shipment from the Company.
-
Page 3: Table Of Contents
GEMU090 residential ice machine. The GEMU090 was developed to offer fans of Ice-O-Matic’s Pearl Ice form the ability to have that ice in their homes. Previously pearl Ice was only available in commercial establishments, where it developed a strong following because of the chewable nature of the ice. -
Page 4: Product Description
GEMU090 Installation and Use Product Description: This ice machine is designed to be used indoors, in Water Quality a controlled environment or outdoors within certain limits. The water to the machine must be potable, or fit for human consumption. Beyond that, water supplies The GEMU090 is made up of two major systems: vary in the degree of mineral content. -
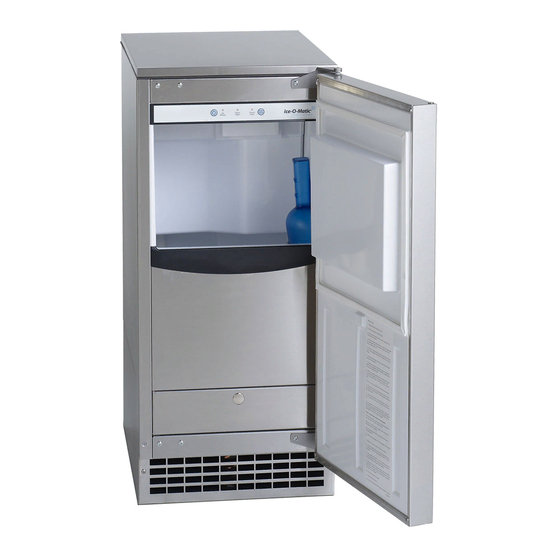
Page 5: Cabinet Dimensions
3/8" I.D. PUMP MODEL (INCLUDED) 5/8" I.D. GRAVITY MODEL (NOT INCLUDED) Ice-O-Matic Ice Systems are designed and manufactured with the highest regard for safety and performance. They meet or exceed the standards of agencies like ETL. Ice-O-Matic assumes no liability or responsibility of any kind for products manufactured by Ice-O-Matic that have been altered in any way, including the use of any parts and/or other components not specifically approved by Ice-O-Matic. -
Page 6: Location Recommendations
GEMU090 Installation and Use Location Recommendations: The machine can be built into a cabinet. It is an air Drain Conversion: A gravity drain model can be cooled refrigeration system and so air flows in and converted to a drain pump model by installing a out of it through the grill at the bottom front. -
Page 7: Familiarization
GEMU090 Installation and Use Familiarization The control panel is visible when the door is opened. It has three indicator lights and two switches. Clean Check Time to Reset Making Water Clean Control Panel The model and serial number plate is located on the bottom of the control panel box. -
Page 8: Door Swing
GEMU090 Installation and Use Door Swing The door can be attached to open with hinges on 6. Remove original bottom hinge. the left or right. Retain all screws for re-use. To change: 1. Remove top hinge pin from hinge. 7. Remove two plugs or screws from upper cabinet bracket. -
Page 9: Plumbing - Pump Model
GEMU090 Installation and Use Plumbing - Pump Model Drains Water Supply There are two types of ice machine models, one The recommended water supply tubing is ¼ inch that drains by gravity and one that has an internal OD copper. Stainless steel flex or reinforced PCV drain pump. -
Page 10: Plumbing: Gravity Drain Model
GEMU090 Installation and Use Plumbing: Gravity Drain Model Caution: Restrictions in the drain system to the clamp. Leave the other end of the tube lying on the machine will cause water to back up into the ice floor of the base pan until the unit is positioned storage bin and melt the ice. -
Page 11: Electrical And Start Up
GEMU090 Installation and Use Electrical and Start Up The ice machine is supplied with a power cord. Do Installation check list: not remove the grounding pin from the cord’s plug. Do not use extension cords. Follow all codes. 1. Has the unit been connected to the proper water supply? Connect the machine to its own 115 volt, 15 amp circuit. -
Page 12: Use
GEMU090 Installation and Use No special instructions are needed for use. Just Noise: take as much ice as you need, the machine will replace it. A scoop is provided, and it can be stored The ice machine is designed for quiet operation, in the machine using the loop of tubing on the right but will make some noise during the ice making side as a holder. -
Page 13: Maintenance
GEMU090 Installation and Use Maintenance Ice-O-Matic strongly recommends regular 4. Return the kickplate and front service panel to their original positions. Fasten them to the cabinet maintenance of this ice machine. During normal using the original screws. operation mineral scale that is in the water supply will gradually build up on the ice making surfaces. -
Page 14: How To Remove Scale From The Ice Making System
GEMU090 Installation and Use How to remove scale from the ice making system. Cleaning this machine involves adding a solution of scale remover and water to the ice machine and continuing to add it as it makes ice. The scale remover must be diluted to the correct ratio. - Page 15 GEMU090 Installation and Use 6. Locate blue float valve on/off lever. Move lever 8. Obtain pre-mixed Ice-O-Matic Clear 1 Scale up about half way to shut water off. remover solution (with squirt bottle) or mix a solution of Clear 1 with water: 2.5 ounces of Clear 1 with 1 quart (32 oz) of warm water.
- Page 16 GEMU090 Installation and Use 11. Press and HOLD both the Clean-Reset and 13a: Optional - move float lever up to Off, add On/Off buttons for 5 seconds. The Time to Clean locally approved sanitizer* to water system, then light will blink on and off. repeat step 13.
Need help?
Do you have a question about the GEMU090 Series and is the answer not in the manual?
Questions and answers